MyKitchenInHalfCups

Once Upon a time: Cooking … Baking … Traveling … Laughing …


9 Comments

Eight Years ~ BBB Caramelized Onion Bread

Can you believe EIGHT years?  I can not.  Eight years times twelve months equals ninety-six breads!  Even missing a couple, it has been an incredible journey.

I think I felt pretty good about baking bread back then.  I wasn’t a total novice; yeast didn’t bother me any more.  But I realized in the big picture, I’d hardly baked much bread.

Eight years and about ninety breads later plus more than that in-between Babe breads how is it with me?  I still find the mystery in yeast, water and flour ever fascinating and the challenge of bread enthralling.  Shape may always be a fascinating challenge.  I love new techniques but I don’t always push myself to them; I should try harder in that area.  Reading … I love reading with my 8 year old grand son.  I see how we read words without needing to know anything like an exact definition.  I see how we can read and skip big parts of a sentence and how it can then be nonsense and still we push right on.  Read, yes, I see that is often how I read recipes and miss key elements.

When I presented this recipe to the Babes I copied it exactly as it had been written.  I’ve rewritten all but two parts of it below.  I’ve tried to put in “alerts” where one of us missed seeing something.  I’m not saying I wrote it better, I’m saying I tried to change somethings that would allow me to read the recipe better and follow the direction more completely the next time.

Next time: yes this bread is good enough and interesting enough to bake again.  I want to aim for that scoring pattern on the book cover one day.  I hope you like it and want to bake along with us in our journey finding good breads.


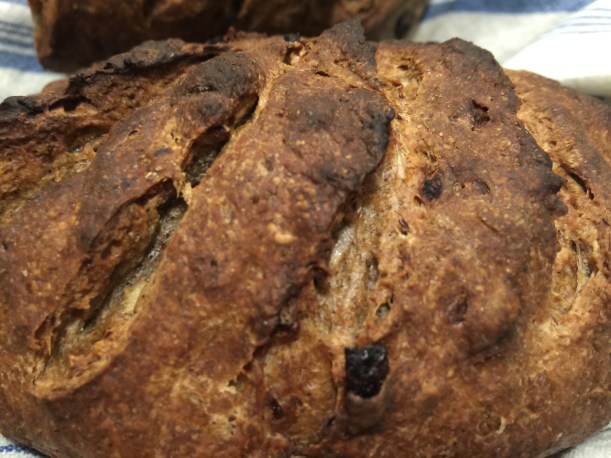
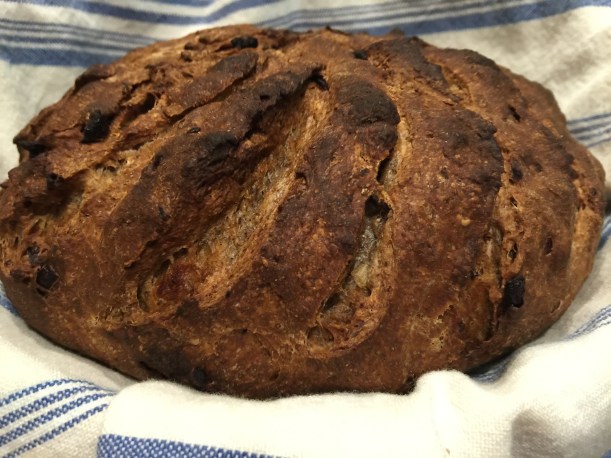
CARAMELIZED ONION BREAD

Recipe By: Bien Cuit by Zachary Golper, Peter Kaminsky & Thomas Schauer
Yield: 2 medium loaves
Total Time: about 3 days (but most of that is dough resting)

IMG_0358

STARTER
125 grams (3/4 c + 21/2 tbsp) white rye flour (I only had dark rye)
0.3 gram (generous pinch) instant yeast
125 grams (1/2 c + 1 tsp) water at about 60°F (15°C)

DOUGH
425 grams (3 c + 21/2 tsp) white flour, plus additional as needed for working with the dough
75 grams (1/2 c + 11/2 tsp) buckwheat flour

35 grams ground flax seed
15 grams (21/2 tsp) fine sea salt
1 gram (generous 1/4 tsp) instant yeast
350 grams (11/4 c + 31/2 tbsp) water at about 60°F (15°C)
50 grams (21/2 tbsp) honey
25 grams (13/4 tbsp) unsalted butter, at room temperature
50 grams (1/4 c) Caramelized Onions (you know how to caramelize onions, yes?)
DUSTING MIXTURE for the linen liner and shaped loaves
1 part fine semolina flour
5 parts white flour

1.   STARTER: ROOM TEMPERATURE 10 TO 12 HOURS

Whisk flour and yeast together.  Pour water over.  Using wooden spoon or your hand mix carefully to insure all the flour is wet.  Cover the container and allow to sit on the counter at room temperature for 10 to 14 hours.  The starter will peak around 12 hours.

2. THE DOUGH
Whisk together white and buckwheat flours, salt and yeast.
Use approximately a third of the water to pour around the starter edges to release it from the sides of the bowel.
Mix remaining water and honey in large bowl and add the starter; mix starter into water with wooden spoon.
Because you may not need all of the flour, reserve a small amount (arbitary, maybe 1/2 cup).  Mix the dry ingredients into the starter to combine then switch to a plastic bowl scraper.
The dough will now be sticky to the touch.
Note: At no point in this process of resting did my dough double in size.
3.  ROLL AND TUCK
Some Babes, like some Buddies, are sticklers for following directions and amounts.  Perhaps, over the years I’ve become jaded by too many crazy mis-reads and just down right mistakes and breads that are just good.  When I read this recipe roll and tuck just morphed into stretch and fold for me which is what I did.  You’ll find several Babes who were very particular and followed the technique.
*** TUCK in my experience has always been cupping hands around a dough and tucking/pulling the dough under.  The result you’re looking for is a strong smooth finish.

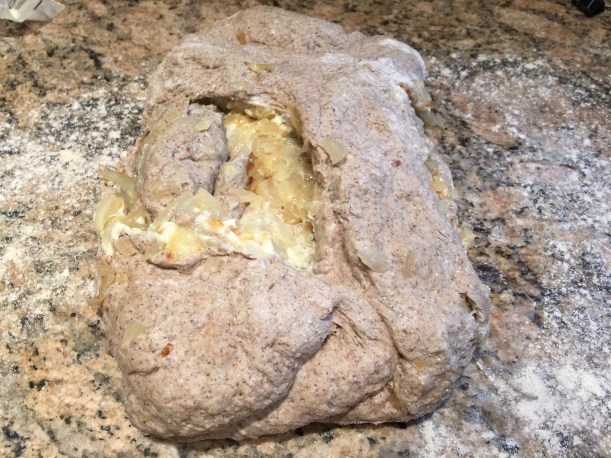
“Push the dough to one side of the bowl. Roll and tuck the dough (see Rolling and Tucking), adding the reserved flour mixture and a small amount of additional flour to the bowl and your hands as needed. Continue rolling and tucking until the dough feels stronger and begins to resist any further rolling, about 10 times. Then, with cupped hands, tuck the sides under toward the center. Place the dough, seam-side down, in a clean bowl, cover the top of the bowl with a clean kitchen towel, and let rest at room temperature for 45 minutes.”

IMG_0363
4.  FIRST STRETCH AND FOLD ~ TOTAL OF 4 times

Dust the counter and your hands lightly with flour.  Release the dough from the bowl and place it seam-side down on the counter.  Stretch into a rough rectangular shape then, as you would fold a letter to place into an envelope, fold the rectangular into thirds.  Using cupped hands again tuck the sides under toward the center of the dough ball.  Give the ball a slight turn with each tuck and work your way around the ball at least once.  Return the dough ball seam-side down back to the bowl and cover again with the towel.
Allow to rest again for another 45 minutes.
5.  SECOND STRETCH AND FOLD
Repeat the step 4 and return the dough to the bowl, cover with the towel, and let rest for 45 minutes.

IMG_0366
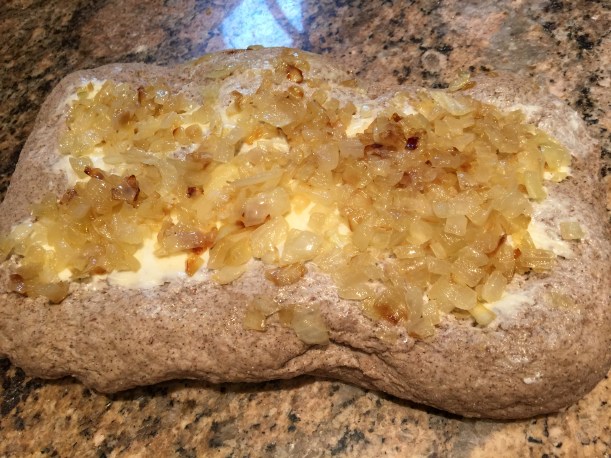
6.  THIRD STRETCH AND FOLD ~ ADDING ONIONS AND BUTTER

Third stretch and fold encorporates butter and onions.  Stretch the dough into a rectangle.  Drop small pieces of butter across the top the rectangle.  Spread the butter across the top then top the smeared butter with the onions.
Roll the dough tightly and press to flatten slightly.  Turn seam side down.  Fold into thirds and roll again; roll and fold until the butter and onions are completly incorporated into the dough.  Mine took about 7 times.
Turn the dough seam side down and tuck around the ball.
Cover with the towel and let rest another 45 minutes.
IMG_0369
7.  FINAL STRETCH
Fourth and final stretch, repeat step 4, then return the dough to the bowl, cover with the towel, and let rest for about 20 minutes.

8.  SHAPING  ~  12 TO 18 HOURS REFRIGERATED

Lightly dust the work area and hands with the dusting mix.
Divide the dough in half.  I divided mine unequally as I wanted one loaf larger than the other.   Roll into two loose tubes.
Let rest 5 minutes.  Press each again and shape how you choose.
Quote from Bien Cuit:  “Transfer to the lined pan, seam-side up, positioning the loaves lengthwise. Dust the top and sides of the loaves with flour. Fold the linen to create support walls on both sides of each loaf, then fold any extra length of the linen liner over the top or cover with a kitchen towel.
Transfer the pan to the refrigerator and chill for 12 to 18 hours.”
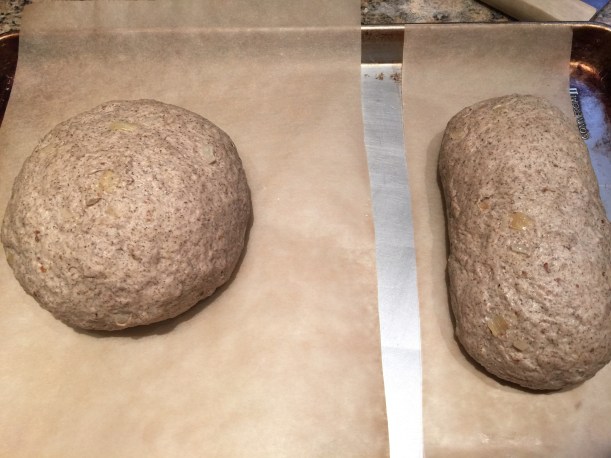
I placed my shaped loaves (seam side down – oh dear … ) onto parchment paper and covered.  Let them rest for 15 hours in the refrigerator.
IMG_0378
9.   PRE-HEAT OVEN WITH BAKING STONE
Pre-heat oven with baking stone and cast-iron inside to 500°F (260°C).
Cast-iron skillet is for creating steam with ice cubes; it really works well.

IMG_0398
10.  SCORING  ~  OVEN

Because my loaves were on parchment I simply lifted the parchment onto the baking peel. If you followed Bien Cuit directions above you’ll need to turn the loaves seam side down at this point.
Score the top of each loaf.  The cover of this book pictures a gloriously scored loaf that I hope to one day truely capture, until then this is a good try.
Transfer the loaves to the baking stone.
Add 3 cups ice cubes to the hot cast iron skillet.
Immediately lower the oven temperature to 460°F (240°C).
Bake, rotate the loaves 3/4 way through the baking time, until the surface is a deep, rich brown, with some spots along the scores being very dark (bien cuit), about 25 minutes.  My loaves registered 205° at that time.
IMG_0383

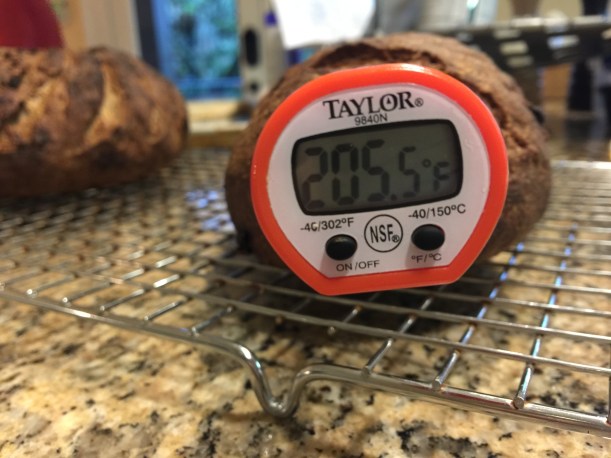
11. Using the baking peel, transfer the loaves to a cooling rack. When the bottoms of the loaves are tapped, they should sound hollow. If not, return to the stone and bake for 5 minutes longer.
IMG_0394
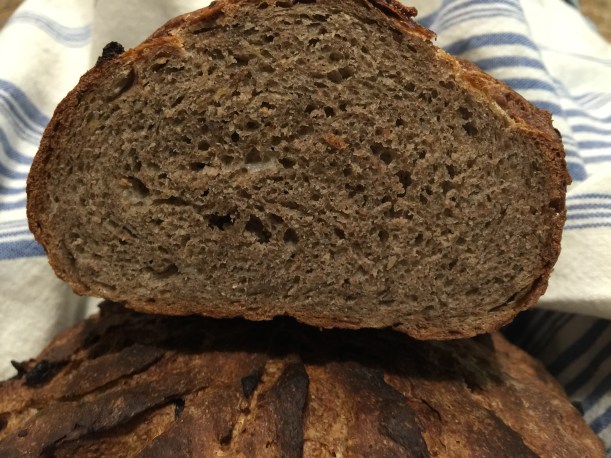
Let the bread cool completely before slicing and eating, at least 4 hours but preferably 8 to 24 hours.

About this book:  I understand this book has a very unusual binding and the pages are printed on black paper.  Since I am currently on the road, I ordered the iBook.  I’m very happy with it.  There are many fabulous looking recipes I look forward to trying.  This recipe turned out excellent.

I hope you’ll want to be a Buddy with us.  This bread won’t disappoint.  If you want to be a Buddy, we’d be overjoyed to have you join us.  Bake the bread, post it to your blog (no blog: send we a photo of your bread (my e-mail is comments my kitchen at mac dot com) and what your experience was) before the 29th of this month, I’ll send you a Buddy badge and put you in the round up on as close to the 2nd of March as I can manage.
IMG_0399
You will find Kelly is now a Babe.  I think you’ll find her to be a very enthusiastic Babe.  She’s baked a beautiful loaf this month as have many of our other Babes listed in the right column.  We’re without our link tool this month but I’m going to try and get that back into operation as soon as possible.
Happy Bread Baking to all!