
I don’t know about you but every once in a while I get smug and think “I’ve really baked a lot of breads. No ALL breads but maybe I’m getting where I’m really comfortable I’ve got really good exposure to most things bread … but then there’s always another month and another Babe coming up with something just a little different. This month it’sKelly (Hobby Baker) from A Messy Kitchen.
Always bake the original recipe before changing any thing … right? And when have I ever done that …
So, I created an over nite soaker.
I considered the pros and cons of replacing bean liquid for water. In the end I tasted the bean water and rejected adding it because it had too strong a bean flavor. Nothing wrong with bean flavor but it seemed wrong for bread.
Always I added flax.
I used all of the yeast because I only used whole grains.
My major failing was knowing this was whole grain and not having a thermometer. In my Dad’s old house, I’m working with an oven that is over 45 years old, badly mistreated and scheduled for replacement on our next visit. Between the oven and no thermometer, I way underbred these two small loaves. The rye flavor was awesome but we could only enjoy a slice toasted so that it finished cooking.
If you can forgive my excuses, this is a treat of a bread with the rye flour. While the taste of this bread does not make one think “health food mediocre”, I have to think this is a super nutritious bread using the beans!
Kelly (Hobby Baker) from A Messy Kitchen found this recipe in Home Baking: The Artful Mix of Flour and Tradition around the World
Yield: 2 small loaves
OVER NITE SOAKER
330 grams water (1.5 cup)
120 grams sprouted spelt flour
DOUGH
all of the soaker
2 cups drained cooked navy beans, room temp.
30 grams flax meal
120 grams sprouted rye flour
1 tablespoon olive oil
2 teaspoons salt
2 tablespoons caraway
130 grams white whole wheat flour
130 grams bread flour
1. Mix water and flour in soaker and cover several hours or overnight.
2. Process beans until smooth, transfer to a large bowl or stand mixer.
Add the sprouted flour and yeast and stir for one minute, in one direction, to develop the dough.
Add the oil, salt, and seasoning herb or spice, if using and stir them in.
Add 1 cup of the white whole wheat flour and stir in.
Add the remaining flour and knead in with a dough hook, or work in and knead by hand for about 5 minutes, until smooth.
3. Place dough in a bowl, cover, and let rise for 3 hours, until almost doubled in volume. (There should be about 2.5 pounds of dough.)
4. Turn out dough and divide in half. Butter two 8×4″ pans.
Form each portion of dough into a loaf and place seam side down in the pans.
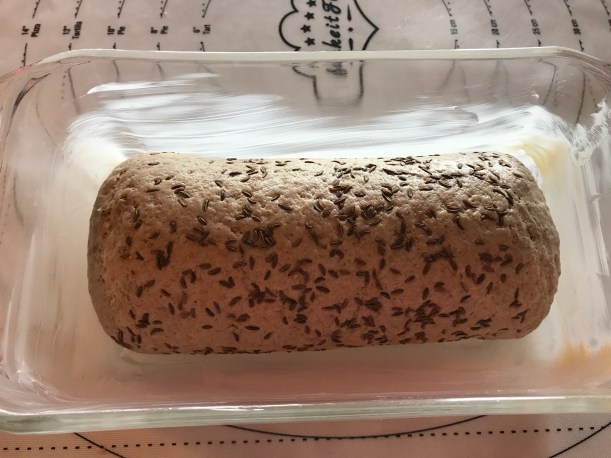
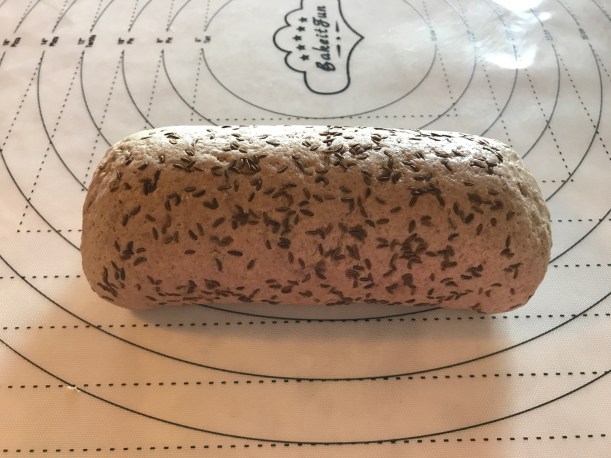
Rolled each loaf in caraway seeds.
The directions say to let rise for 2½ hours. That was too long for my kitchen. The above loaf was baked after 1 hour 45 minutes. You’ll have to watch the dough for proper rise. Check at 1 hour and continue to proof if needed.
5. Preheat oven to 400ºF, have a spray bottle or small cup of water ready for steam. Slash each loaf lengthwise , place in oven and bake for 5 minutes, adding steam every couple minutes with the sprayer or cup.
Bake for 15 minutes, then reduce heat to 375ºF and bake for 25 minutes until rich brown with a matte finish.
Turn the loaves out and check for doneness. Finish cooling on a wire rack before slicing.
Here’s a great little article on the different white beans:
4 Types of White Beans: What’s the Difference?
The side note on this experience, very generic as it is and will be true of all dough I mix/knead in future: I bought a pastry non-stick mat. If you want to save money or spend nothing more on kitchen/baking, skip this nest two paragraphs. What you may ask is a non-stick pastry mat and why would I lay out any $$ for that. Even though it’s very recently something prompted me to look these up, now I don’t remember what it was. The first couple I found were super $$$ and I was losing interest rapidly. Then I found one I think for under $30 and read the reviews. It was the reviews that really sold me.
Now my review might sell you so you get a 2nd chance to stop reading here if you don’t want to get interested. Always when I knead, mix or roll out anything on my counter, I clean it … and then I have to clean it again when finished. Sometimes dough really leaves a funky residue to clean off and it can get tedious. NOTHING sticks to the pastry mat AND it doesn’t slide. Clean up is super simple. When I roll it out, I know I left it clean! The mat comes marked clearly with all sorts of measurements all over – along the edges and all those circles for rolling pie crust in the center. Dream come true. Yep, you want one now.

I won’t say you have to or that you knead to run out and get a pastry non-stick mat but I would encourage you to bake the Velvety Bean Bread and make it with rye … assuming you enjoy rye. I’m sure you have a better oven than I and you’re in your own kitchen with a thermometer.
Join the Bread Baking Babes and bake up a unique little loaf that is high in protein but a little lower in gluten than normal. This is a lovely little bread and we would love for you to bake along with us! Just bake your version of this bread by July 30th and send Kelly a note with your results and a picture or link to your post at eleyana(AT)aol(DOT)com with Buddy Bread in the subject line and she will include you in our buddy round up at the beginning of next month and send you a Buddy badge graphic to keep and/or add to your post. You don’t have to have a blog to participate, a picture is fine!
