MyKitchenInHalfCups

Once Upon a time: Cooking … Baking … Traveling … Laughing …


9 Comments

BBB ~ Sfincione Bagharese

Aparna, our kitchen of the month, you may have thought it was hard to find a bread we haven’t baked but honestly even though this little group has been baking for these many years and it does seem like we’ve baked just a huge number of breads, every month I marvel that wow it’s just water yeast flour, the same ingredients as last month BUT it’s just never the same and it NEVER gets boring. Thank you so very much for this introduction to this our 14th anniversary bread.

Check out Aparna’s post on this bread at My Diverse Kitchen.com.https://www.mydiversekitchen.com/sfincione-bagharese

From Aparna’s site you can travel to all the other Babes who baked this bread.

SFINCIONE BAGHARESE

(Partly adapted from here)

POOLISH:

150 g white whole wheat

150 ml water

1 tsp dry active yeast

DOUGH :

All the Poolish from above

150 gm AP flour

250 gm semolina flour

300 ml water (more or less)

30 ml olive oil

15 gm salt

ONION LAYER :

5 medium sized onions (one a red onion)

30 ml olive oil

Salt to taste

CHEESE LAYER :

300 gm mozzarella sliced (thinner slices will work best)

400 gm Ricotta

BREADCRUMB LAYER :

Some chopped scallions 

4 to 6 slices of BEEKEEPER’S PAIN DE MIE

100 gm grated Parmesan cheese

50 grams walnuts

Salt to taste

Red chilli flakes or crushed pepper to taste

1 tsp dried oregano

Also two very well oiled round 23cm trays

HOW TO MAKE IT :

Make the Poolish by mixing together in a medium sized bowl the flour, dry yeast, and water until a sticky dough is obtained. Add more water if necessary to achieve this. Cover loosely with a plastic film and leave to rise for about 2 hours. The polish should be somewhat bubbly and have doubled in size.

I mixed the dough by hand. Mix together the flours, water (more or less as required), oil and the poolish. The dough will be sticky. Add the salt and knead till it is soft, very pliable and smooth. Shape it into a round and place it in a bowl greased with olive oil. Cover the bowl loosely and leave it to rise till double in volume. Mine took about 2 and a half hours.

Cook the onions. While the dough is rising, get the toppings ready. Heat the oil in a pan and add the sliced onions. Sprinkle a little salt and cook the onions on low to medium heat until they turn translucent and soft. Do not brown or caramelized them. Take the pan off heat and let them cool to room temperature.

Prepare the breadcrumb mixture. Run the bread slices (with or without crusts) in a food processor to make the crumbs. Put the breadcrumbs in a bowl. Mix together with the oil, salt, red chilli flakes (or crushed pepper) chopped scallions/ spring onions, oregano and grated cheese. The texture should be of loose but moist crumbs.

Once the dough has risen, gently knead to deflate it. Divide it into two equal portions. Press out each portion into a roughly 9-inch circle (or oval) using your fingers. ****Since Aparna and I both seem to think the topping is the show of this bread, next time I will bake mine in a 10 inch or larger pan and make more topping to cover the larger surface area.  If the dough feels sticky, oil your fingers lightly. Place in the oiled trays. I used a pie dish. Let the dough rise again, for about an hour till almost double in thickness and quite puffy.

Top with anchovy (maybe one day I’ll try anchovy but not this time), then the cooked onions. Next comes the Ricotta and a hard cheese (I used Parmesan ). Make sure to cover the surface of the dough evenly. Finish layering by spreading the breadcrumb mixture on the top.

Bake the Sfincione at 250C (480F) on the bottom shelf of the oven for about 10 to 12 minutes. The underneath of the bread should become golden and crisp. Then move the pan to the middle shelf of the oven and bake for another 10 minutes or so, until it is crisp and golden brown on the top as well. Remove from the oven and let it cool.  

Next time I will use parchment on the bottom so there will be no issue of sticking AND if the bottom seems too moist, I can take it out of the pan and return it to the oven rack for 2 to 5 minutes for crisper texture.

Cut and serve. Leftovers can be refrigerated for up to 2 days.  Hahaha. I did give one loaf away but the other loaf we very quickly took care of. 

HAPPY ANNIVERSARY TO ALL BABES, PAST, PRESENT AND FUTURE.

We know you’ll want to make Sfincione Bagherese too! 

To receive a Bread Baking Buddy Badge to display on your site: make the topped flatbread in the next couple of weeks and post about them (we love to see how your bread turns out AND hear what you think about it – what you didn’t like and/or what you liked) before the 28 February 2022. If you do not have a blog, no problem; you can also post your picture(s) to Flickr (or any other photo sharing site) and record your thoughts about the bread there. Please remember to contact the Kitchen of the Month to say that your post is up.

For complete details about this month’s recipe, the BBB and how to become a BBBuddy, please read:


8 Comments

Cruffins ~ BBB ~ July 2021

What you may ask is a Cruffin? Since the Babes are Baking Cruffins this month, that would be a fair question. In simplest terms a cruffin might be a cross between a croissant and a muffin but it is neither a croissant nor a muffin. Mostly what you need to know about a Cruffin is: they are insanely beautiful and taste marvelous! That’s really what a Cruffin is BUT if you want to know more details check out Aparna’s post at My Diverse Kitchen.

I think these should be named oatmeal mushrooms.

There is an art to writing a recipe BUT there is an art to reading a recipe as well and clearly I am woefully lacking in reading skills. Perhaps my math is just as lacking. The recipe Aparna gave us clearly stated “this recipe makes 8 cruffins” … I ended up with 17. Can’t read, can’t count.

My cruffins are dark – I used half white whole wheat with half regular AP flour and brown sugar – and I’m ok with that. I will admit the BBB’s who bake with white flour got a gorgeous gourmet picture perfect golden cruffins. I’ll settle for the subtle caramel flavor I get with the brown sugar.

Cruffins

Recipe by Aparna from My Diverse Kitchen

This recipe makes 8 Cruffins (see it said it right there)

For the Dough :

25 grams brown sugar (this was just sweet enough for us)

1 1/4 tsp dry yeast

100 grams white whole wheat flour

101 grams white AP flour

50 gm unsalted butter, chilled

1/4 tsp salt

183 oat milk (did not use any water but used all oat milk)

For Lamination :

120 gm unsalted butter, at room temperature

To Decorate/ Serve :

Speculaas spice/Cinnamon sugar

DIRECTIONS :

I add the dry yeast directly to the flour with other ingredients.

 In a medium bowl mix together the flour, yeast, sugar, salt and chilled butter cut into small pieces. Add milk and knead into a soft and elastic dough that comes away from the side of the bowl. The dough should not be sticky. Add a little more milk or flour, as required to achieve this consistency of dough. I found I needed at least half cup more of regular AP flour to obtain a soft supple dough that was not sticky.

Shape the dough into a ball and transfer it to an oiled bowl, turning the dough to coat it well. Cover and let the dough rise till double in volume. This should take between an hour to two depending on ambient temperature. Mine took about an hour and 45 minutes.

In the meanwhile prepare your baking pan and keep aside. Butter and very lightly flour the cavities of your muffin or popover tray.

Dust your working surface lightly with flour and turn the dough out. Lightly knead to deflate the dough. Divide into four equal pieces. Roll out each piece to a 60x20cm (24X7 inches) sized piece. The dough sheet will be very thin. If you have a pasta machine you can use that as it is easier to roll out thin sheets with it. I cut the dough into two pieces (60cm x 40cm each) and cut into 4 pieces after buttering each.

Spread about 30 to 38 gm butter (I started with 150 grams of butter and had 50 left) of soft butter over each rolled out piece of dough. I sprinkled half with cinnamon sugar and the other half with speculaas spice. Cut each piece into half, lengthwise, creating two thin strips.

Roll one thin strip into a tight roll. Place this at the edge of the second strip and continue rolling till you have one thick roll. This will give your cruffins more layers.

Cut roll in half lengthwise. Roll each half, like a circle (cinnamon roll style)with the cut layers side showing the outside. Make sure to tuck both ends under so it doesn’t open up on baking. Place the roll in the prepared muffin or popover pan.

Repeat with all the dough pieces. Cover the pan with a kitchen towel and allow to rise for about 45 minutes. The rolls should look puffy and have risen to almost the edge of the cavities.

Bake the cruffins at 190C (375F) for about 30 minutes or till golden brown and done. My smaller size baked in about 24 minutes. Turn them out onto a rack and let them cool. I skipped toppings and thought they were just perfectly delicate and sweet enough. Serve warm with coffee or tea.

My Cruffin were small (17 instead of 8) and more brown than golden but still insanely beautiful and marvelous tasting with coffee in the morning, hot tea in the late afternoon, coffee in the morning, hot tea in the late afternoon … oh gosh, it’s time to bake again as I know you will want to do. I want these again with my morning coffee … and my late afternoon tea!

Coffee or tea?

And I do thank you just very much for cruffins Aparna!


13 Comments

BBB ~ Non, Naan

BBB ~ Non, Naan, Tashkent Obi Non

Recipe From: Samarkand: recipes & stories from Central Asia & the Caucasus by Caroline Eden & Eleanor Ford

Yes.  This is our Baker’s Dozen Anniversary!

Amazing that this little group of Bread Baking Babes has been around on the internet for the incredible Baker’s Dozen years!  I’ve missed very few of the breads the group has baked. There’s not been one bread in all those years that I haven’t learned from and enjoyed.  Most of the breads I’d enjoy baking again.  There have been simple breads.  There have been scary breads. When I started baking bread sometime in the 70’s, there was nothing easy about it and failure seemed to always be a possibility.   Baking all these breads over all these years has brought me to the startling conclusion that really dough just wants to be bread. Some dough will be more successful bread than others but generally, it will be better than anything that would come in a plastic bag and plenty of loaves will be as good as or better than the gourmet bakeries.  More than ever during this pandemic baking bread brings me sanity.

Traditionally this bread is never cut – a knife is an instrument of war. Docking the rim with an onion cutting tine makes it easy to break off sections.

How did I come to this bread? A long time ago I came across this thing called a bread stamp on Amazon. I’d never seen one, never seen a bread that used one, had no ideas why I should have one but I ordered two of them. They were beautiful but I had no idea what I should do with them. I took them to a baking class and ask if anyone had seen them used. Nope. …  Maybe a year ago, I saw a picture of bread stamps in a book I had and then I found the recipe for the bread.  SEVERAL MONTHS AGO, Elizabeth ask about doing this recipe and improvising or using the bread stamp. The idea seemed to take hold and I was way past due to try my bread stamps.  

Sealing wax! My bread stamp came in brown paper with sealing wax!


I think I baked my first loaf on 19 September 2020 and the second loaf on 20 September 2020; at this point I truly would only be able to count if I had taken photos of each loaf and I am pretty sure I didn’t take every bake.  
This truly is an everyday loaf. Easy to put together in the evening to rest overnight in the fridge and bake first thing in the AM. Easy to mix first thing in the AM and have coming out of the oven for lunch.  Easy to mix after lunch and serve with appetizers and/or dinner. I have not baked this three times in one day. No, I have not.

I really played with many combinations of flours but always totaling 200 grams.

When I put this up for the Babes I was really thinking it would be a great try to make it into a sourdough.  We were able to do that and it was nice bread.  In the end, for me at any rate, I felt the allure of this bread was the ease and everydayness of it and I went with the straight yeast version.  I know it will come to my rescue many times in the future. 

I also recognize that this bread has been made for centuries (many centuries), after all it is mentioned in the ‘Epic of Gilgamesh’.  
For the best article I found on this bread try http://www.aramcoworld.com/articles/July-2015/The-Fabled-Flatbreads-of-Uzbekistan .  There are multiple uTube videos. Two of the best we’ve found are:
this one shows you how to use scissors and a fondue fork in place of a bread stamp
and
this one shows using a glass
Just search for bread stamp or Easy Uzbek Bread or How to make Tashkent Obi Non 
You’ll be overwhelmed. but in a fun way.

You can do this without a bread stamp. You already have multiple implements in your kitchen that you can use. 

Items that might be used to emboss the dough. A fondue fork was used in the uTube video, I don’t have one.

I know the world is crazy right now and goodness knows I am way past ready to be done with the virus.  At the same time mixing and kneading bread is something of a saving grace for me.  This makes beautiful and tasty bread.  You can do it.  

BBB ~ Non, Naan, Tashkent Obi Non:

ORIGINAL

1 1/2 cups   AP flour
1 1/2 teaspoons yeast
3/4 teaspoons salt
oil
150 grams water
METRIC
200 grams flours
15-20 grams ground flax seed
7 grams yeast
6 grams salt
150 – 180 grams water, to make a sticky dough
oil, to knead dough on counter
VARIATIONS
60 grams whole grain spelt, total flours will =200 grams
60 grams bread
80 grams white whole wheat flour
15-20 grams ground flax seed
7 grams yeast
6 grams salt
150-180 grams water, to make a sticky dough
oil, to knead dough on counter
SOURDOUGH
STARTER Late the night before baking
100 grams rye starter
50 grams whole grain spelt flour
50 grams bread flour
70 grams white whole wheat flour
130 grams water
NEXT MORNING
3/4 teaspoon salt
oil of your choice

 STRAIGHT DOUGH Whisk together the flour(s), yeast, ground flax if using and salt.
Add water to make a sticky dough. This should not be a stiff dough.
Pour a little oil on the counter surface and knead the dough until the dough loses it’s tackiness and is silky smooth and soft. 
Cover and let rise till doubled in size.  Anywhere from 90 minutes to 2 hours.

2. Knock some of the air out of the dough and form it into a dome ball.  Set the dome on parchment paper and cover. The mixing bowl usually works well to cover it with. Let proof again until doubled in size.  This may only take 45 minutes to an hour.

3. Preheat the oven with baking stone.  I first baked this at 475°F. I have since baked it at 500°F.  I baked it under a stainless steel bowl but found misting the oven twice in the first 4 minutes worked best for me.  

4. Make an indentation in the middle of the bread by pressing with the heel of your hand.  I found starting the indentation with my largest ladle worked well and then I was able to enlarge it with my fingers. The indentation should be larger than the bread stamp pattern you plan to use.
Dip the bread stamp tines in flour. Pierce the middle of the dough with the floured bread stamp.  Press firmly to get a good imprint. 
Brush to top of the bread with oil, butter, egg with a pinch of salt.  Sprinkle with onion seeds or sesame seeds OR get carried away and make it your own.

5. Bake for 15 to 18 minutes.  The top should be golden and the loaf should sound hollow when tapped on the bottom. The center will be somewhat cracker like and the outside rim light and puffy.

SOURDOUGH: The night before I mixed starter, flours and water together.  It was a very wet dough. I did not knead it.

The next morning I dusted the counter with bread flour, flattened the dough on the dusted counter, pour the salt on the dough and kneaded it adding flour until it was smooth and no longer sticky.  The salt did not break the dough as I kneaded. I can not guess how much flour I added. 

Finally I flattened the dough on a parchment round and covered it with a large bowl.  At five hours later it had risen nicely.  I oiled the top and used my hand to flattened it in the middle then used the bread stamp to stamp it.  I didn’t get a clear stamp imprint; I needed a larger flattened center.  Sprinkled sesame seeds on the oiled top.

I baked the loaf on the parchment on a baking stone covered with a stainless bowl at 500°F for 15 minutes. Removed the bowl, turned the oven down to 450° and continued baking for 4 more minutes. Internal loaf temperature was 208°. 

We would love for you to try this bread. We would love to hear about your experience.

I really think you want to give this a go! To receive a Baking Buddy Badge to display on your site, post about your Naan adventure in the next couple of weeks (we love to see how your bread turns out AND hear what you think about it – what you didn’t like and/or what you liked) before … usually its the end of the month but this time I’m extending that a week so the date will be 7 March 2021. 

Don’t miss this awesome video referred to us by Aparna!

Here’s how to let us know:

  • comments my kitchen at mac dot com
    » Remember to include your name and a link to your post
    » Please type “BBB February 2021 bread” in the subject heading

And check out what the other Babes had to say about this one.

Happy Baking!


10 Comments

Toasted Oats Bread ~ BBB

Celebrate!

Toast!

Raise your glasses to increasing vaccine availability and toasted oats!  

YES! Thank You Elizabeth ( blogfromourkitchen) out Kitchen of the Month! (You should know that every month, Elizabeth is the Babe who does the graphic magic to create our unique logo for each bread.) This is certainly a winner in our virus snow bound abode. 

Toast these oats in a skillet not the oven! YES!!  Oh and I do appreciate you have to stand totally at attention at the stove to avoid catastrophe but you have to keep an eye on the oven as well and the stove top for me took all of 5 minutes 30 seconds.

Toasted Oats Bread ~ BBB

Leavener

  • 60 grams whole wheat flour
  • 60 grams water
  • 40 grams starter from the fridge (about 30 grams)

Oats

  • 100 grams rolled oats, toasted
  • 110 grams boiling water

Actual Dough

  • 100 grams 100% organic whole wheat flour
  • 400 grams unbleached all-purpose flour
  • 5 grams wheat germ
  • 5 grams rye chops
  • 8 grams diastatic malt
  • 325 grams water
  • all of the leavener from above,
  • 10 grams salt + 25 grams water
  • all of the rolled oats mixture from above

Topping (optional)

A rough looking dough.
  • Rolled oats
    • Leavener: In the evening of the day before making the bread: Put the starter, flour and water into a smallish bowl. Mix with a wooden spoon until the flour is stirred in well. I used a bread whisk. Cover the bowl with a plate (I use a shower cap) and set aside overnight in the oven with only the light turned on. Unless it is ridiculously hot in the kitchen. In that case, leave the oven light turned off.
  • Prepare the Oats: Pour rolled oats into a dry cast iron frying pan and place it over medium high heat, stirring with a wooden spoon from time to time. It takes about about 7 minutes to toast the oats. (They smell wonderful!) (Previously when I’ve toasted oats I’ve done it in the oven.  Toasting them in a skillet, gives you much more control and resulted in a uniform darkening color and much better flavor enhancement. Henceforth, I will be toasting in a skillet.) Transfer the toasted oats into a medium-sized bowl and pour boiling water over top. Cover with a plate and leave overnight in the oven with the leavener.
  • Mix the dough In the morning of the day you will be making the bread: When a small forkful of the leavener floats in a small bowl of room temperature water (I have never tried this), you can go ahead and mix the dough: Sift the whole wheat flour into a large mixing bowl, reserving the bran for after shaping. I did not do the sifting Add all-purpose flour, wheat germ, malted wheat chops (I thought I didn’t have malted wheat chops, turns out I did, used rye chops and some diastatic malt), and 325 water to the sifted whole wheat flour. Stir with a wooden spoon. (Again I used my bread whisk)  Set aside for a moment.
  • Weigh the salt and 25 grams water, whisking it together in a small bowl. Set this bowl aside in the oven with only the light turned on.
  • Add the leavener to the large bowl. Use a dough whisk or wooden spoon to mix these ingredients together to make a rough dough. Cover the bowl with a plate (or shower cap) and leave on the counter for about 30 minutes.
  • Adding the salt: Pour the salt mixture over the dough.
  • Kneading: Use one of your hands to squish the salt and water into the dough; use the other hand to steady the bowl – this way you always have a clean hand. At first the dough might be a bit messy and seem like it’s coming apart. Persevere. Suddenly, it will seem more like dough than a horrible separated glop. Keep folding it over onto itself until it is relatively smooth. Cover with a plate and leave to rest for about 30 minutes.
  • Adding the oats and first stretching and folding: Add the oats overtop. (First time I baked this, I had already added the oats. Since the first time I toasted oats in the oven, the color was altogether different. Ultimately, I don’t think the timing of adding the oats made much difference.) Turn the bowl as you fold and re-fold the dough into the center, to distribute the oats. Cover the bowl with a plate and leave on the counter (or if the kitchen is cool like ours in winter and spring, into the oven with only the light turned on).
  • Continuing to stretch and fold: Repeat the folding step about 3 times in all at 30 minute intervals. After the final time of folding, leave the covered bowl in a draft free area until the dough has almost doubled.
  • Pre-shaping: Scatter a dusting of all-purpose flour on the board and gently place the dough on the flour. Fold the dough over in half, gently patting off any extra flour that might be there. Turn the dough a quarter turn and fold in half again. Continue turning and folding in half until the dough is shaped in a ball. Leave it seam side down on the board and cover with a large overturned mixing bowl (or a tea towel) and let rest for about 30 minutes.
  • Prepare the brotform: Liberally coat the insides of a brot-form with rice flour.
  • Shaping and adding optional topping: Scatter a very light dusting of flour on top of the round. Gently press down with the palms of your hands to create a disc that is about 4 centimeters deep. Carefully turn the disc over. Without breaking the skin on the bottom, use the dough scraper to fold the dough in half. Turn the dough a quarter turn and continue folding until a ball is created. Leave it seam side down and use the sides of the dough scraper to tighten the dough ball further. Once it has been tightened, wet your hands and rub them gently over the top. Scatter quick oats overtop. Now carefully put the shaped loaf seam-side UP into the brotform. Scatter the reserved bran evenly onto the seam area. Cover with the tea towel or an overturned mixing bowl and let sit for an hour or so to allow the loaf to almost double. “Almost” is the key here….
  • Preheating the oven: To know when it’s time to bake, run your index finger under water and gently but firmly press it on the side of the bread. If the dough springs back immediately, recover the bread and leave it on the counter for another 15 minutes of so. If the dough gradually returns back after being pressed, leave the bread on the counter. Put a baking stone on a lower shelf of the oven. Place a cast-iron combo cooker (or lidded casserole dish) on the middle shelf and preheat the oven to hot (we set ours to 450°F).  (I opted for an oval brotform, without a cast iron oval large enough to bake it in, I baked the loaf on parchment paper, pushed it onto the hot baking stone in the oven and covered it with a very large stainless bowl.)
  • Scoring: When the oven is thoroughly preheated about fifteen minutes later, transfer the round into the hot shallow pan of the combo-cooker.   I adapted scoring to the oval shape I had. Using a lame, sharp knife, or scissors, score the bread in the pattern you like.
  • Baking: Bake for 30 minutes with the lid on. After 30 minutes, remove the lid and, without stopping to stare in amazement at the amazing oven spring actually I could not help but at least momentarily stare in amazement at the oven spring, close the oven door to continue baking for another 30 minutes, until the crust is a lovely dark golden brown and the bread sounds hollow when knuckle-rapped on the bottom. (Internal temperature probe showed 204°F.)
  • Cooling: When the bread has finished baking, remove it from the oven and allow it to cool on a footed rack before slicing and eating; the bread is still cooking internally when first removed from the oven! If you wish to serve warm bread (of course you do), reheat it after it has cooled completely: To reheat any uncut bread, turn the oven to 400°F for 5 minutes or so. Turn the oven OFF. Put the bread into the hot oven for about ten minutes. This will rejuvenate the crust and warm the crumb perfectly.

Yes, this does look like an involved recipe. Yes, there are a number of steps. Yes, because it looks long, it looks difficult.  The actuality is the single steps are spread out over time but are simple to execute with long stretches where you do whatever you like and a single step takes only a short bit time.

Do those short steps get you to a worthwhile goal … what a very foolish question,  My answer is an emphatic YES!!!  We would love to hear your answer:

I believe you should and will want to make toasted oats bread too! To receive a Baking Buddy Badge to display on your site, post about your toasted oats adventure in the next couple of weeks (we love to see how your bread turns out AND hear what you think about it – what you didn’t like and/or what you liked) before the 29 January 2021.

Here’s how to let us know:

  • email Elizabeth
  • » Remember to include your name and a link to your post
  • » Please type “BBB January 2021 bread” in the subject heading

Now about next month…This little group started in February 2008 that means that next month we’ve been around … It’s our Anniversary! And for the first time ever I’m giving you a hint for next month’s bread. We’ll be playing around with…


9 Comments

Le Tordu ~ BBB February 2020 ~ 12th Anniversary

Recipe: French Regional Breads by Mouette Barboff as brought to us by Elle: Feeding My Enthusiasams
Yield: 1 or 2 loaves

Kitchen of the Month Elle from Feeding My Enthusiasms, raised an incredible amount of comment this month, interest, confusion and for me my first ever real experience into making a real effort to understand baker’s percentage.  Why was that you might ask?  Because this is a book written by and I believe a professional baker for professional and commercial bakeries.  When I read 10 kg of strong white bread flour I was stopped dead. There is no container in my kitchen that is going to hold 22 pounds of flour. I didn’t even bother to try to add the water into that container that didn’t exist. Elizabeth thought she could put it in her bath tub but there would be protest from her mate. We have a shower, no tub yet. Hence, baker’s percentages to make this a reasonable recipe for Babes.  The enthralling aspect of this recipe is the shape. In the book, it looks like to lovers wrapped around each other. What could be more romantic for Valentines, the month of February and the Babe’s 12th anniversary!  None of my three loaves ever came out looking anything like two lovers BUT all three bakes were magnificent loaves!  This is great bread.
I never did get around to baking this with just white flour. I try to bake with whole grains and we were both really captivated when I used the sprouted wheat and then the rye.

The Recipe as written:
10 kg strong white bread flour
6 litres (approximately) water
60 g yeast (6 g per kg of flour)
2.5 kg levain (sourdough starter) – 25% of the amount of flour
The Recipe as written with rye flour:
1 kg strong white bread flour (Type 55)
100 g medium rye flour (Type 130)
20 g table salt (2% per kg)
15 g yeast (1.5% per kg)
3/4 l water at 12 degrees C
5 g malt (0.5% per kg)
30% fermented dough
Baking: 20 minutes
My First Bake

IMG_0656
550 g bread flour
50 g rye flour
10 g salt
7 g salt
315 g water
3 g diastatic malt
165 starter
My Second Bake:

IMG_0785
Flour total = 700 g
450 g Bread flour
100 g spelt flour
150 g rye
5 g diastatic malt powder
420 g water
14 g salt
Smidgen yeast
175 g starter
My Third Bake:

IMG_0961
550 g bread flour
150 g rye flour
10 g salt
400 g water
6 g diastatic malt
4 g yeast
175 starter

Directions:

1. Mix flour(s), yeast, water, and diastatic malt powder (if using) in a large bowl. 
When well mixed, allow 10 to 20 minutes for the flour(s) to absorb the water.

2. When well mixed and after resting those 10 to 20 minutes, add in the fermented/starter dough. The dough should be rather firm in order to hold its shape when shaped.
Knead for several minutes until the two doughs are well blended.
Pour salt on the counter and knead into the dough.

3. Allow the dough to rest several hours. Stretch and fold several times.

4. Depending upon how much flour used, you may have dough for only one loaf.
My first bake produced dough weighing 1050 grams which I divided into two loaves about 10 inches long.  I felt they were too fat and not long enough. But they were delicious and both of us loved the sprouted wheat used, really lends a lovely aroma.
My second and third bakes I made one loaf each bake.

5. Shaping Fold the dough twice across its wides part and then flatten gently with the flat of the hands into a rectangle about the length expected to be.
Lightly flour the dough.
I used my thinnest rolling pin the first two times but purchased a 3/4 inch dowel for the third (which is what I recommend).
Place the rolling pin/dowel in the middle of the dough and flatten the center creating two rolls.
Flour lightly and flip over. Flour 2nd side lightly and flatten again.
Lift one roll on top of the other so that the rolls are now side by side.
Roll/twist twice holding the dough tight.

6. Place the twisted loaf on a couch, between two rolling pins in a plastic bag or in a clay baker with lid.
Cover and allow to rise/prove for an hour to hour 15 minutes.
Preheat the oven to 450° F(230° C)

7. Oven HOT Bake with steam.
The book says an 800 gram loaf bakes for 25 minutes and a 4 pound loaf for 40 minutes.
All three of my bakes were with whole grains therefore I bake them to an internal temperature of 205°F.

Notes:

For my first bake I carefully I calculated the baker’s percentages … and then in a fleeting instant of inattention – allowed the scale to shut off – I only had 485 g bread flour and tried to figure what else I was going to use to get to 550 g that I had calculated … I crazily added 115 g sprouted wheat.  I obviously can not add under pressure. And only now realize my mistake as I see I added more flour than my calculation had called for.  I also ended up with 2 extra grams of diastatic malt powder in the flour and couldn’t really reasonably pull it out.

I am not really smart enough to tell you what my starter is. I suppose I should be embarrassed to tell you I used some left over dough from another bread using commercial yeast and started feeding it rye and whole wheat for about 5 days and felt like it got happy and that’s what I used. Hydration level … ha ha, no idea. So I’m no help knowing what Barboff means by fermented dough. The only clue I’ve seen is the fermented dough is from the previous days batch and the previous days batch might have been pain de campagne dough.  Practically speaking, “previous days batch” in my kitchen could have been any number of things, none of which would have proved useful.

I did use the 10 g salt and it seemed good. I think the malt got be really nice color and I will use the 5 g that got in by mistake on purpose next time. I’m going to use the diastatic malt powder more often as it does brown the crust so nicely.

For the first bake the dough weight was 1050 g and my 2 loaves weighted amazingly 525 each. Each loaf measured 10 inches long.

Second Bake: The loaf was 20 inches long and fit corner to corner on a sheet pan. Final rise was an hour 45 minutes.

Third Bake: When the dough was set to rise/prove for an hour … we ended up going into town … the dough went into the fridge for 3 hours and then sat out for two hours to come back to room temperature before I shaped it.  Shaped it went into a covered clay baker. I baked it at 450° covered for 15 minutes.
When I uncovered the loaf, I put the oven thermometer into the loaf and set it to alarm when the internal temperature reached 205°. I think that was another 20 minutes but I didn’t really watch.

You’ll surely want to be a Buddy this month, these long, twisty breads are so delicious! Just make the  loaves (see Feeding My Enthusiasms), then email your link ( or email your photo and bit about your experience if you don’t have a blog) to plachman *at*sonic*dot*net and please add as your subject ‘BBBuddy’. I will send you a Buddy badge. Deadline? March 1.


12 Comments

10 Years Bread Baking Babes

The Bread Baking Babes have a cloudy past. You have your choice as to where and who all the histrionics originated with. There could be some case made that it started with Karen of BakeMyDay. There could be some case made that it started with Ilva. And there could be some case made that Ilva put a name to it while we were baking a Daring Baker challenge over what was then Skype. Out of those clouds the Babes emerged. We’re Beautiful, Boisterous, Brilliant, Bold, Buxom, Busy, Bewitching, Brash, Bourbon Basted, Bread Baking Babes, that’s 12 B’s. And, as you know, B-12 is one of the essential nutrients that’s found in….bread! (I believe Lynn put those altogether for us.) We’ve rallied at the opportunity to be called Babes. I mean, when you get to be my age, you never pass up an opportunity to be called Babe!

fullsizeoutput_8095

That’s how my first post for this bread started 10 years ago.   And since then?  We have been baking, oh Babe have we been baking! This month’s recipe was chosen by Karen from BakeMyDay 10 year ago.  I believe Lien is the only Babe to have managed every bread we’ve bake, one every month.  Yes, even I think I can do the simple math on that one 10 years times 12 months gives you 120 loaves of bread.  I’ve missed several but I’ve tried not to count.  Even so, it’s a lot of bread but the fun has been so much more than the bread.  I’ve loved every minute AND I’ve loved ever Babe.

IMG_0124

Over those 10 years, we’ve all baked a LOT of bread. A number of Babes have retired for many and varied reasons. But, once a Babe always a Babe.

Dark

Karen, golly wow 10 years, so many breads, so many good times. This bread was a stunner to me 10 years ago and it’s still a thrill to take it out of the oven.  Many folds, LONG rises but so glorious.  Thank You so many times for so Much.  Check out Karen’s BakeMyDay for the recipe write up because I’m not going to put it up here just right yet.

Lien, gracious what can I say. You are a wonder. 120 breads and all our badges for Babes and Buddies. Never forget.  You can retire, take a break BUT: Once a Babe, Always a Babe.  Thank you for everything.

I am so happy you baked again with us Sara.  I understand entirely that the flour on the top matters not because this is just wonderful bread.  It was a joy and stunning the first time around 10 years ago and is again every time I’ve baked.  Yes, I loved that Dan’s Garlic as well!

Cathy. Awe struck I am. Yeast water and grows her own grains.

Karen yes we have two. Karen talks about being a newbie and this being a surprise. I agree this is always a glorious surprise when I take it out of the oven but you know by the holes in the crumb Karen is not a newbie, she’s a Babe.

Judy this bread wants/tries to be lazy but the oven seems to give it that oven spring go and you get those lovely holes! Babe Success.

Elizabeth Truly for the Babes this has proven to be an iconic bread. I thought is thrilling the first time and then every time since taking it from my oven. Pinto Bean soup and this bread buttered, glorious breakfast! Really Elizabeth you were a Babe from the start and only became more so after the invite ;-). Glorious bread, lovely color. Wonderful times, glorious bread.

Pat Oh, Pat I love the anniversary photo with the dough streaking down. Your bread is glorious. Now I need another loaf to make avocado toast with! Super to have you with us Babe.

Kelly Only with us 2 years! Ha, from the looks of your bread it’s been forever and you did it without bread flour? Oh, only part Spelt and Kamut, more challenging flours. That’s definitely a Babe.

Aparna Great crown for our 10th! Difficult to know how different flours will behave until we try them all. I appreciate that only two to eat the breads is tricky, I found it much easier when there were more friends and family around to share.

The hardest part about this bread is to know where to start telling you about it. You see I baked it three times in the last three weeks (10 years ago). In the last ten years I’ve baked this bread I would guess at least once a year and some years more. This time around I’ve only baked it once …  But the year is young.

I will follow tomorrow with the recipe here but you can know I used sprouted whole wheat for 30% of my flour and of course I added some flax 30 grams.

fullsizeoutput_8097

If you would like to become a Bread Baking Buddy, here’s how it works:

  • The Kitchen of the Month (Tanna this time!).
  • Email me with BBB 10th anniversary in the subject line, with your name and the link to the post.
  • Post your “baking the bread” experience on your blog mentioning Bread Baking Babes with a link to the MyKitchenInHalfCups.com.
  • The Kitchen of the Month will put up a list of our Bread Baking Buddies at her site and send you a neat BBB award for this bread that you can then add to your post on your blog.

YMkzuTQbRue3I0DKa37DGA

I need to bake again so I can dip it in olive oil and pepper.


13 Comments

Jachnun ~ BBB ~ Questions of BREAD ~ 12 hours baking

fullsizeoutput_762f

What makes it bread?  Is it one or more ingredient? Is it how we use/eat it?  Is there any one thing about bread that makes it bread?  The Babes have danced around this question in various ways from time to time.  Coffee cake? Does it qualify as bread because it uses yeast … because we eat it like bread … or because we eat it drinking coffee for breakfast?  Does a quick bread using no yeast but baking soda qualify because it’s named bread?  What qualifies bread to be bread?

Lien  brought us to the kitchen table with this introduction and question and her answer to the question:  This recipe was stuck in my head for a while. I guess the 12 hour baking time did that. Then I wondered is this a bread? No yeast, but baking powder?! No yeast can still make real bread, think flatbread, wraps and so on. But baking powder is linked to pastry in my brain. Things like banana bread (with baking powder/soda) is called a bread in English, but for me that’s a loaf cake and absolutely not a bread. So I let it sink in for a while to decide if it was bread worthy or not. It is not sweet, not eaten with sweet things, even if it is a breakfast item. And it’s function is a bread… I can see it like that, and so it is, and that’s what we’re baking. … It feels like an adventure…

What makes bread BREAD?  Not sure I have the answer but this is bread by any qualifying test I can come up with.  What do you think?

fullsizeoutput_762b

Jachnun ~ BBB

Serving: 9-12

500 g bread flour, 100 grams of the 500 white whole wheat
45 g date syrup, recipe called for 20 of honey
pinch of baking powder, generous
12 g fine salt
300 ml water to make spongy dough
60 grams butter, melted

*Zhug
1 teaspoon chili flakes, or 1 red fresh chili pepper (or 1 tsp chili flakes)
1 teaspoon black pepper, ground
1 teaspoon cumin seeds
½ teaspoon coriander, ground
4 medium garlic cloves
Pinch of cardamom, ground
Pinch of cloves, ground
½ teaspoon salt
30 g coriander leaves (or parsley if you dislike coriander)
Olive oil, enough to make a sauce-like consistency

Place all ingredients in a bowl and crush it to a sauce in a blender or with a stick blender.
Place the Zhug in a clean jar and refrigerate.
(Fridge shelf life about 2 weeks)
Serve with:
8 eggs, poached
1 large tomato (or 2 smaller ones)

img_1755

1. DOUGH
Mix the flour, date syrup, baking powder, salt and water together to form a sticky wet  dough and knead for a few minutes. Let it rest for 10 minutes to let the gluten relax.  Next time: use at least half white whole wheat flour.  I think using the bread flour probably gave this the gluten needed to give this dough needed stretch so I’ll stick with bread flour for at least 50%.

To develop gluten you now start to knead the dough for 5 minutes. Place it in a lightly greased bowl and give it a stretch and fold like this: Lift up the side of the dough and fold it over, turn the bowl and repeat this for about 7 or 8 times.
Cover with plastic and leave to rest at room temperature for 1 hour. Or leave your dough until evening.

2. PAN & OVEN
You can use a (ovenproof) cooking pan or springform (about 20 cm in diameter). Given an ill equipped kitchen, I used a skillet with lid.

Fold a long piece of parchment paper lengthwise and place it in the pan, so the ends hang over the rim of the pot.
Preheat the oven to 105ºC/225ºF and place a rack in the lowest position in your oven.  I might try one notch up from the lowest position to see if it would reduce toughness on the bottom of the rolls OR I wonder if lining the bottom of the pan with bread would influence that.

I mixed my dough early in the morning and didn’t shape it until 6 in the evening.

3. SHAPING

img_1759
Divide the dough in 6 more or less equal pieces, shape them into a ball and leave to rest 10 minutes before the stretching begins. I divided the dough into 6 pieces and rolled three that size. But the last 3 pieces I divided in half which gave me 6 smaller jachnun.  I liked the smaller size best.  Next time I will divide the dough to make 12 rolls.
To shape these rolls you have to stretch them using butter, oil or margarine.  Butter, flavor … I used butter.
Grease your work surface, place one piece of dough on it, grease the top and start working to make it the thinnest possible, while greasing it constantly. It is best to do this by hand, other methods (rolling pin) do not give the thinness.
When the dough is very thin (preferably like fillo or strudel dough) fold 1/3 of one side over onto the dough, repeat with the other side (like a business letter). You now have a long strip, keep buttering/greasing the top, while you roll – starting at the narrow edge- the dough in a tight cylinder.

This video will show you how: https://www.youtube.com/watch?v=Oygxy4i3u30

img_1773

When I shaped the first roll, the video rolled in my head and I found myself patting the dough flat and lifting around the edges, stretching it out.  I didn’t get the nearly perfect rectangle that she did in the video but the defects pretty much didn’t bother the final outcome.

4. Prepare for the oven
I placed my rolls in a single layer which allowed them all to color evenly and dark golden brown.  NOTE: Would a layer of bread on the bottom of the pan prevent the hardness on the bottom of the rolls?  Would just moving the oven rack from the very bottom rack up one would solve that issue?
Traditionally eggs are cooked in the pan with the rolls, I skipped that part but I did have one of the rolls warmed with a poached egg the second morning.  It’s perfect breakfast.
Take a double layer of aluminum foil, cover the pot, securing the edges of the pan. Use a lid or a sheet pan to place on top of the foil. (or use a lid if available to keep it tight).
Place it on the rack in the oven and bake for 12 hours.

fullsizeoutput_7634

5. You should understand you have to plan the timing of this… or get up in the middle of the night.
Mixing the dough in the early morning, leaving it out on the counter during the day, shaping the rolls and putting them into the oven at about the same hour in the evening that you want to take them out in the morning worked beautifully for me.  A twelve hour bake at 225 F worked perfectly.

The next morning you take out the pan, place the jachnuns on a plate and serve it with eggs around them. Serve with grated tomato and Zhug (a spicy and hot dipping sauce) for breakfast.  Reheat well.

I’ve marked this a laminated bread because of all the butter plastered on the dough and stretching it thin and folding and rolling AND because the aroma when I took this warm from the oven reminded me of croissants.

The book “Breaking breads” has a slightly different recipe for Jachnun.  It calls for all purpose flour.  My feeling is you’ll get better gluten development and crumb using bread flour but I did not try all purpose.  Experience/intuition tells we this would traditionally have been bake using whole wheat flour and butter.   I might try this with all white whole wheat just to see what it does, it would be better for me health wise but I wouldn’t want to lose the gluten the bread flour seems to add.

Cafe Liz has  interesting points on Jachnun and is worth checking out as well.

And Zhug … don’t miss it. WOW glorious. Too strong for you, reduce the hot stuff and/or miss in a little goat cheese.
Lien I will forever be grateful for this “bread”.

fullsizeoutput_7632

You can see the crumb here is very bread like … no yeast can be bread?  Now go dip that in a poached egg will you?  Well, it’s my idea of a little roll of heaven and it’s bread.  So, yeast does not define BREAD.  What defines bread as BREAD?  I’ll keep baking…

Bake with us … help define BREAD … be a Bread Baking Buddy.   It is an adventure bake. Wanna give it a go, be Brave and become our Bread Baking Buddy. Shape, bake, sleep, taste, take a picture, tell us about it and sent it to the Kitchen of the month (that’s me this time: notitievanlien(at)gmail(dot)com) subject: BBBread february. And I’ll send you the Bread Baking Buddy Badge in return, to add to your post if you like ánd I’ll add you to the BBB Round-up, which will be on around March first. Deadline 29th of this month. Have fun baking!

By the way, this is Gorn’s latest love.


9 Comments

Eight Years ~ BBB Caramelized Onion Bread

Can you believe EIGHT years?  I can not.  Eight years times twelve months equals ninety-six breads!  Even missing a couple, it has been an incredible journey.

I think I felt pretty good about baking bread back then.  I wasn’t a total novice; yeast didn’t bother me any more.  But I realized in the big picture, I’d hardly baked much bread.

Eight years and about ninety breads later plus more than that in-between Babe breads how is it with me?  I still find the mystery in yeast, water and flour ever fascinating and the challenge of bread enthralling.  Shape may always be a fascinating challenge.  I love new techniques but I don’t always push myself to them; I should try harder in that area.  Reading … I love reading with my 8 year old grand son.  I see how we read words without needing to know anything like an exact definition.  I see how we can read and skip big parts of a sentence and how it can then be nonsense and still we push right on.  Read, yes, I see that is often how I read recipes and miss key elements.

When I presented this recipe to the Babes I copied it exactly as it had been written.  I’ve rewritten all but two parts of it below.  I’ve tried to put in “alerts” where one of us missed seeing something.  I’m not saying I wrote it better, I’m saying I tried to change somethings that would allow me to read the recipe better and follow the direction more completely the next time.

Next time: yes this bread is good enough and interesting enough to bake again.  I want to aim for that scoring pattern on the book cover one day.  I hope you like it and want to bake along with us in our journey finding good breads.


CARAMELIZED ONION BREAD

Recipe By: Bien Cuit by Zachary Golper, Peter Kaminsky & Thomas Schauer
Yield: 2 medium loaves
Total Time: about 3 days (but most of that is dough resting)

IMG_0358

STARTER
125 grams (3/4 c + 21/2 tbsp) white rye flour (I only had dark rye)
0.3 gram (generous pinch) instant yeast
125 grams (1/2 c + 1 tsp) water at about 60°F (15°C)

DOUGH
425 grams (3 c + 21/2 tsp) white flour, plus additional as needed for working with the dough
75 grams (1/2 c + 11/2 tsp) buckwheat flour

35 grams ground flax seed
15 grams (21/2 tsp) fine sea salt
1 gram (generous 1/4 tsp) instant yeast
350 grams (11/4 c + 31/2 tbsp) water at about 60°F (15°C)
50 grams (21/2 tbsp) honey
25 grams (13/4 tbsp) unsalted butter, at room temperature
50 grams (1/4 c) Caramelized Onions (you know how to caramelize onions, yes?)
DUSTING MIXTURE for the linen liner and shaped loaves
1 part fine semolina flour
5 parts white flour

1.   STARTER: ROOM TEMPERATURE 10 TO 12 HOURS

Whisk flour and yeast together.  Pour water over.  Using wooden spoon or your hand mix carefully to insure all the flour is wet.  Cover the container and allow to sit on the counter at room temperature for 10 to 14 hours.  The starter will peak around 12 hours.

2. THE DOUGH
Whisk together white and buckwheat flours, salt and yeast.
Use approximately a third of the water to pour around the starter edges to release it from the sides of the bowel.
Mix remaining water and honey in large bowl and add the starter; mix starter into water with wooden spoon.
Because you may not need all of the flour, reserve a small amount (arbitary, maybe 1/2 cup).  Mix the dry ingredients into the starter to combine then switch to a plastic bowl scraper.
The dough will now be sticky to the touch.
Note: At no point in this process of resting did my dough double in size.
3.  ROLL AND TUCK
Some Babes, like some Buddies, are sticklers for following directions and amounts.  Perhaps, over the years I’ve become jaded by too many crazy mis-reads and just down right mistakes and breads that are just good.  When I read this recipe roll and tuck just morphed into stretch and fold for me which is what I did.  You’ll find several Babes who were very particular and followed the technique.
*** TUCK in my experience has always been cupping hands around a dough and tucking/pulling the dough under.  The result you’re looking for is a strong smooth finish.

“Push the dough to one side of the bowl. Roll and tuck the dough (see Rolling and Tucking), adding the reserved flour mixture and a small amount of additional flour to the bowl and your hands as needed. Continue rolling and tucking until the dough feels stronger and begins to resist any further rolling, about 10 times. Then, with cupped hands, tuck the sides under toward the center. Place the dough, seam-side down, in a clean bowl, cover the top of the bowl with a clean kitchen towel, and let rest at room temperature for 45 minutes.”

IMG_0363
4.  FIRST STRETCH AND FOLD ~ TOTAL OF 4 times

Dust the counter and your hands lightly with flour.  Release the dough from the bowl and place it seam-side down on the counter.  Stretch into a rough rectangular shape then, as you would fold a letter to place into an envelope, fold the rectangular into thirds.  Using cupped hands again tuck the sides under toward the center of the dough ball.  Give the ball a slight turn with each tuck and work your way around the ball at least once.  Return the dough ball seam-side down back to the bowl and cover again with the towel.
Allow to rest again for another 45 minutes.
5.  SECOND STRETCH AND FOLD
Repeat the step 4 and return the dough to the bowl, cover with the towel, and let rest for 45 minutes.

IMG_0366
6.  THIRD STRETCH AND FOLD ~ ADDING ONIONS AND BUTTER

Third stretch and fold encorporates butter and onions.  Stretch the dough into a rectangle.  Drop small pieces of butter across the top the rectangle.  Spread the butter across the top then top the smeared butter with the onions.
Roll the dough tightly and press to flatten slightly.  Turn seam side down.  Fold into thirds and roll again; roll and fold until the butter and onions are completly incorporated into the dough.  Mine took about 7 times.
Turn the dough seam side down and tuck around the ball.
Cover with the towel and let rest another 45 minutes.
IMG_0369
7.  FINAL STRETCH
Fourth and final stretch, repeat step 4, then return the dough to the bowl, cover with the towel, and let rest for about 20 minutes.

8.  SHAPING  ~  12 TO 18 HOURS REFRIGERATED

Lightly dust the work area and hands with the dusting mix.
Divide the dough in half.  I divided mine unequally as I wanted one loaf larger than the other.   Roll into two loose tubes.
Let rest 5 minutes.  Press each again and shape how you choose.
Quote from Bien Cuit:  “Transfer to the lined pan, seam-side up, positioning the loaves lengthwise. Dust the top and sides of the loaves with flour. Fold the linen to create support walls on both sides of each loaf, then fold any extra length of the linen liner over the top or cover with a kitchen towel.
Transfer the pan to the refrigerator and chill for 12 to 18 hours.”
I placed my shaped loaves (seam side down – oh dear … ) onto parchment paper and covered.  Let them rest for 15 hours in the refrigerator.
IMG_0378
9.   PRE-HEAT OVEN WITH BAKING STONE
Pre-heat oven with baking stone and cast-iron inside to 500°F (260°C).
Cast-iron skillet is for creating steam with ice cubes; it really works well.

IMG_0398
10.  SCORING  ~  OVEN

Because my loaves were on parchment I simply lifted the parchment onto the baking peel. If you followed Bien Cuit directions above you’ll need to turn the loaves seam side down at this point.
Score the top of each loaf.  The cover of this book pictures a gloriously scored loaf that I hope to one day truely capture, until then this is a good try.
Transfer the loaves to the baking stone.
Add 3 cups ice cubes to the hot cast iron skillet.
Immediately lower the oven temperature to 460°F (240°C).
Bake, rotate the loaves 3/4 way through the baking time, until the surface is a deep, rich brown, with some spots along the scores being very dark (bien cuit), about 25 minutes.  My loaves registered 205° at that time.
IMG_0383

11. Using the baking peel, transfer the loaves to a cooling rack. When the bottoms of the loaves are tapped, they should sound hollow. If not, return to the stone and bake for 5 minutes longer.
IMG_0394
Let the bread cool completely before slicing and eating, at least 4 hours but preferably 8 to 24 hours.

About this book:  I understand this book has a very unusual binding and the pages are printed on black paper.  Since I am currently on the road, I ordered the iBook.  I’m very happy with it.  There are many fabulous looking recipes I look forward to trying.  This recipe turned out excellent.

I hope you’ll want to be a Buddy with us.  This bread won’t disappoint.  If you want to be a Buddy, we’d be overjoyed to have you join us.  Bake the bread, post it to your blog (no blog: send we a photo of your bread (my e-mail is comments my kitchen at mac dot com) and what your experience was) before the 29th of this month, I’ll send you a Buddy badge and put you in the round up on as close to the 2nd of March as I can manage.
IMG_0399
You will find Kelly is now a Babe.  I think you’ll find her to be a very enthusiastic Babe.  She’s baked a beautiful loaf this month as have many of our other Babes listed in the right column.  We’re without our link tool this month but I’m going to try and get that back into operation as soon as possible.
Happy Bread Baking to all!


9 Comments

BBB ~ Kouign Amann

BBB logo February 2015

… and the crowd goes wild to celebrate our 7th Anniversary.
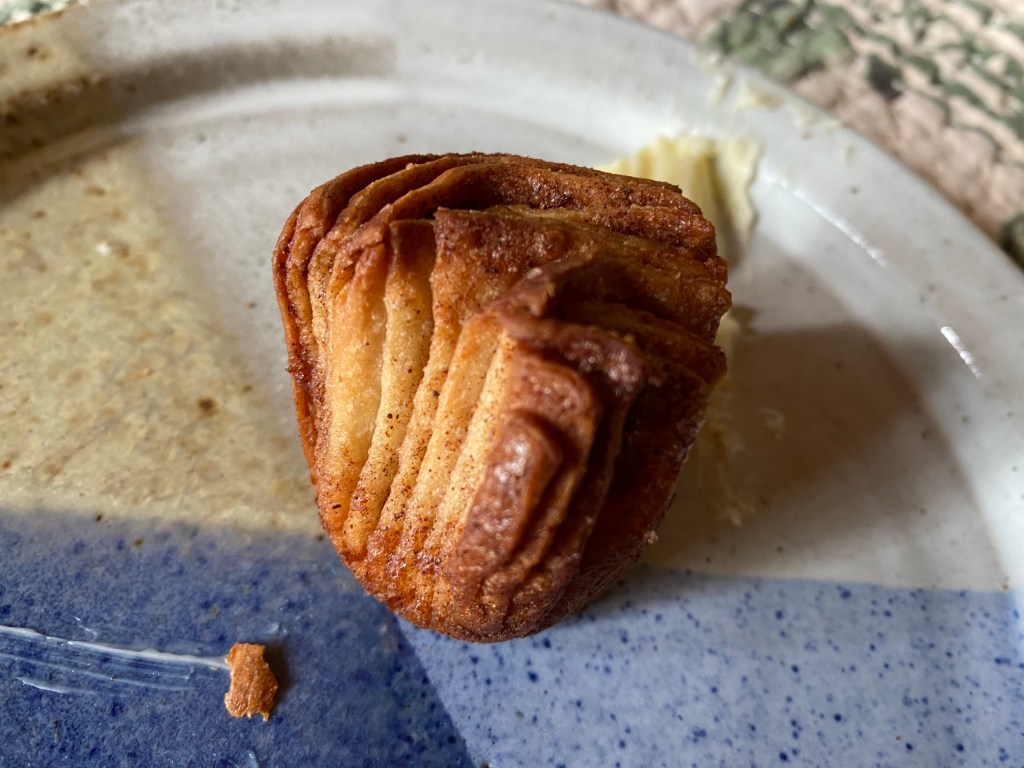
Kouign Amann

IMG_7973

So wild, I’ve been threatened with being chained to the oven until I bake them again.  Chained to the oven … no wilder than 7 years of Bread Baking Babes!  Beautiful bread baking Babes, thank you all.

Lien is once again our KOM (Kitchen of the Month).  I am once again blown away by a bread I would never have picked: it looks intimidating (that wow factor is very high with this one) and it’s sweet, something I just almost never volunteer for.  But, I am totally won over by this one and will probably be making it again…like on Tuesday or Wednesday.

Kouign Amann
from Lien by Paul Hollywood – BBC “The Great British Bake Off
Yield: 12 – 16 pastries
300 grams strong plain flour: I used half bread flour & half white whole wheat , plus extra for dusting
5 grams fast-action yeast: I used reg instant
1 teaspoon salt
200 ml warm water
25 grams unsalted butter, melted
250 grams cold unsalted butter, in a block
100 grams caster sugar, plus extra for sprinkling
1.  Put the flour into the bowl of a freestanding mixer fitted with a dough hook. Add the yeast to one side of the bowl and the salt to the other. Add the water and melted butter and mix on a slow speed for two minutes, then on a medium speed for six minutes.
***Not sure why, but I actually used the kitchen aid for this one.
I’ll probably do it by hand next time. This is a really lovely satiny like dough, easy to knead.  I see no reason this would be difficult without a stand mixer.
2. Tip the dough onto a lightly floured work surface and shape into a ball. Put into a lightly oiled bowl. Cover with cling film and leave to rise for one hour.
***I figured this is all about butter so took a small pat of butter and rubbed it into my palms and then onto dough ball.
Here I go again. I wanted to get this started but knew I’d have a long wait time before starting the laminating process SO it went into the fridge at this point. Slowly rising about 3 hours before I got back to it.
Next time I will be using salted butter.
3. Sandwich the butter between two sheets of grease proof paper and bash with a rolling pin, then roll out to a 14 cm square. Place in the fridge to keep chilled.***I just used parchment paper.
     IMG_7967
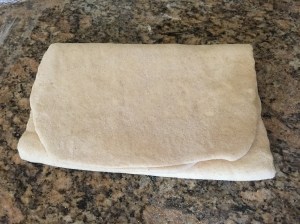
4. On a lightly floured surface, roll out the dough to a 20 cm square. Place the butter in the centre of the dough diagonally, so that each side of butter faces a corner of the dough. Fold the corners of the dough over the butter to enclose like an envelope.
IMG_7969
5. Roll the dough into a 45×15 cm rectangle. Fold the bottom third of dough up over the middle, then fold the top third of the dough over. You will now have a sandwich of three layers of butter and three layers of dough. Wrap in cling film and place in the fridge for 30 minutes. This completes one turn.
***Do not feel you need to be exact at 30 minutes. It’s chilling in the fridge, up to another 30 minutes (an hour total) it’s going to be fine.  If the dough resists rolling, extra time will allow it to relax and making the rolling out easier anyway.
6. Repeat this process twice more, so you have completed a total of three turns, chilling the dough for 30 minutes between turns.
***Do allow a full 30 minutes between turns.
I’ll be very tempted to do an extra sprinkling on this third turn, lighter than the next. The limiting factor might be it will cause the butter to break through.  I did not have any difficulty with the butter popping through the dough.  I’m thinking regular brown sugar would be lovely here and may give that a go next bake.IMG_7970

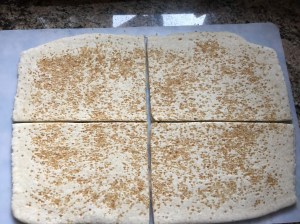
7. Roll the dough into a rectangle as before. Sprinkle the dough with the caster sugar and  fold into thirds again. Working quickly, roll the dough into a large 40×30 cm rectangle. Sprinkle the dough with caster sugar and cut the dough into 12 squares.

***My math/division skills can be limited some days more than others.  Twelve evaded me. I cut it into 16 pieces. Actually, that was probably idea for how many people were putting these into their mouths. As it turned out, I only got one because I snuck off with it first thing. I’ll do 16 again. I will however try for more square shape than the rectangle I ended up with on most.

I don’t believe I used the measured amount of sugar. I just tried to cover the rectangle and rolled the sugar in so that it stuck in the dough.

IMG_7971

8. Grease a 12-cup muffin tin well with oil. Gather the dough squares up by their four corners and place in the muffin tins, pulling the four corners towards the centre of the muffin tin, so that it gathers up like a four-leaf clover. Sprinkle with caster sugar and leave to rise, covered with a clean tea towel, for 30 minutes until slightly puffed up.

***I used butter in the pan.

IMG_7975

9. Preheat oven to 220ºC.
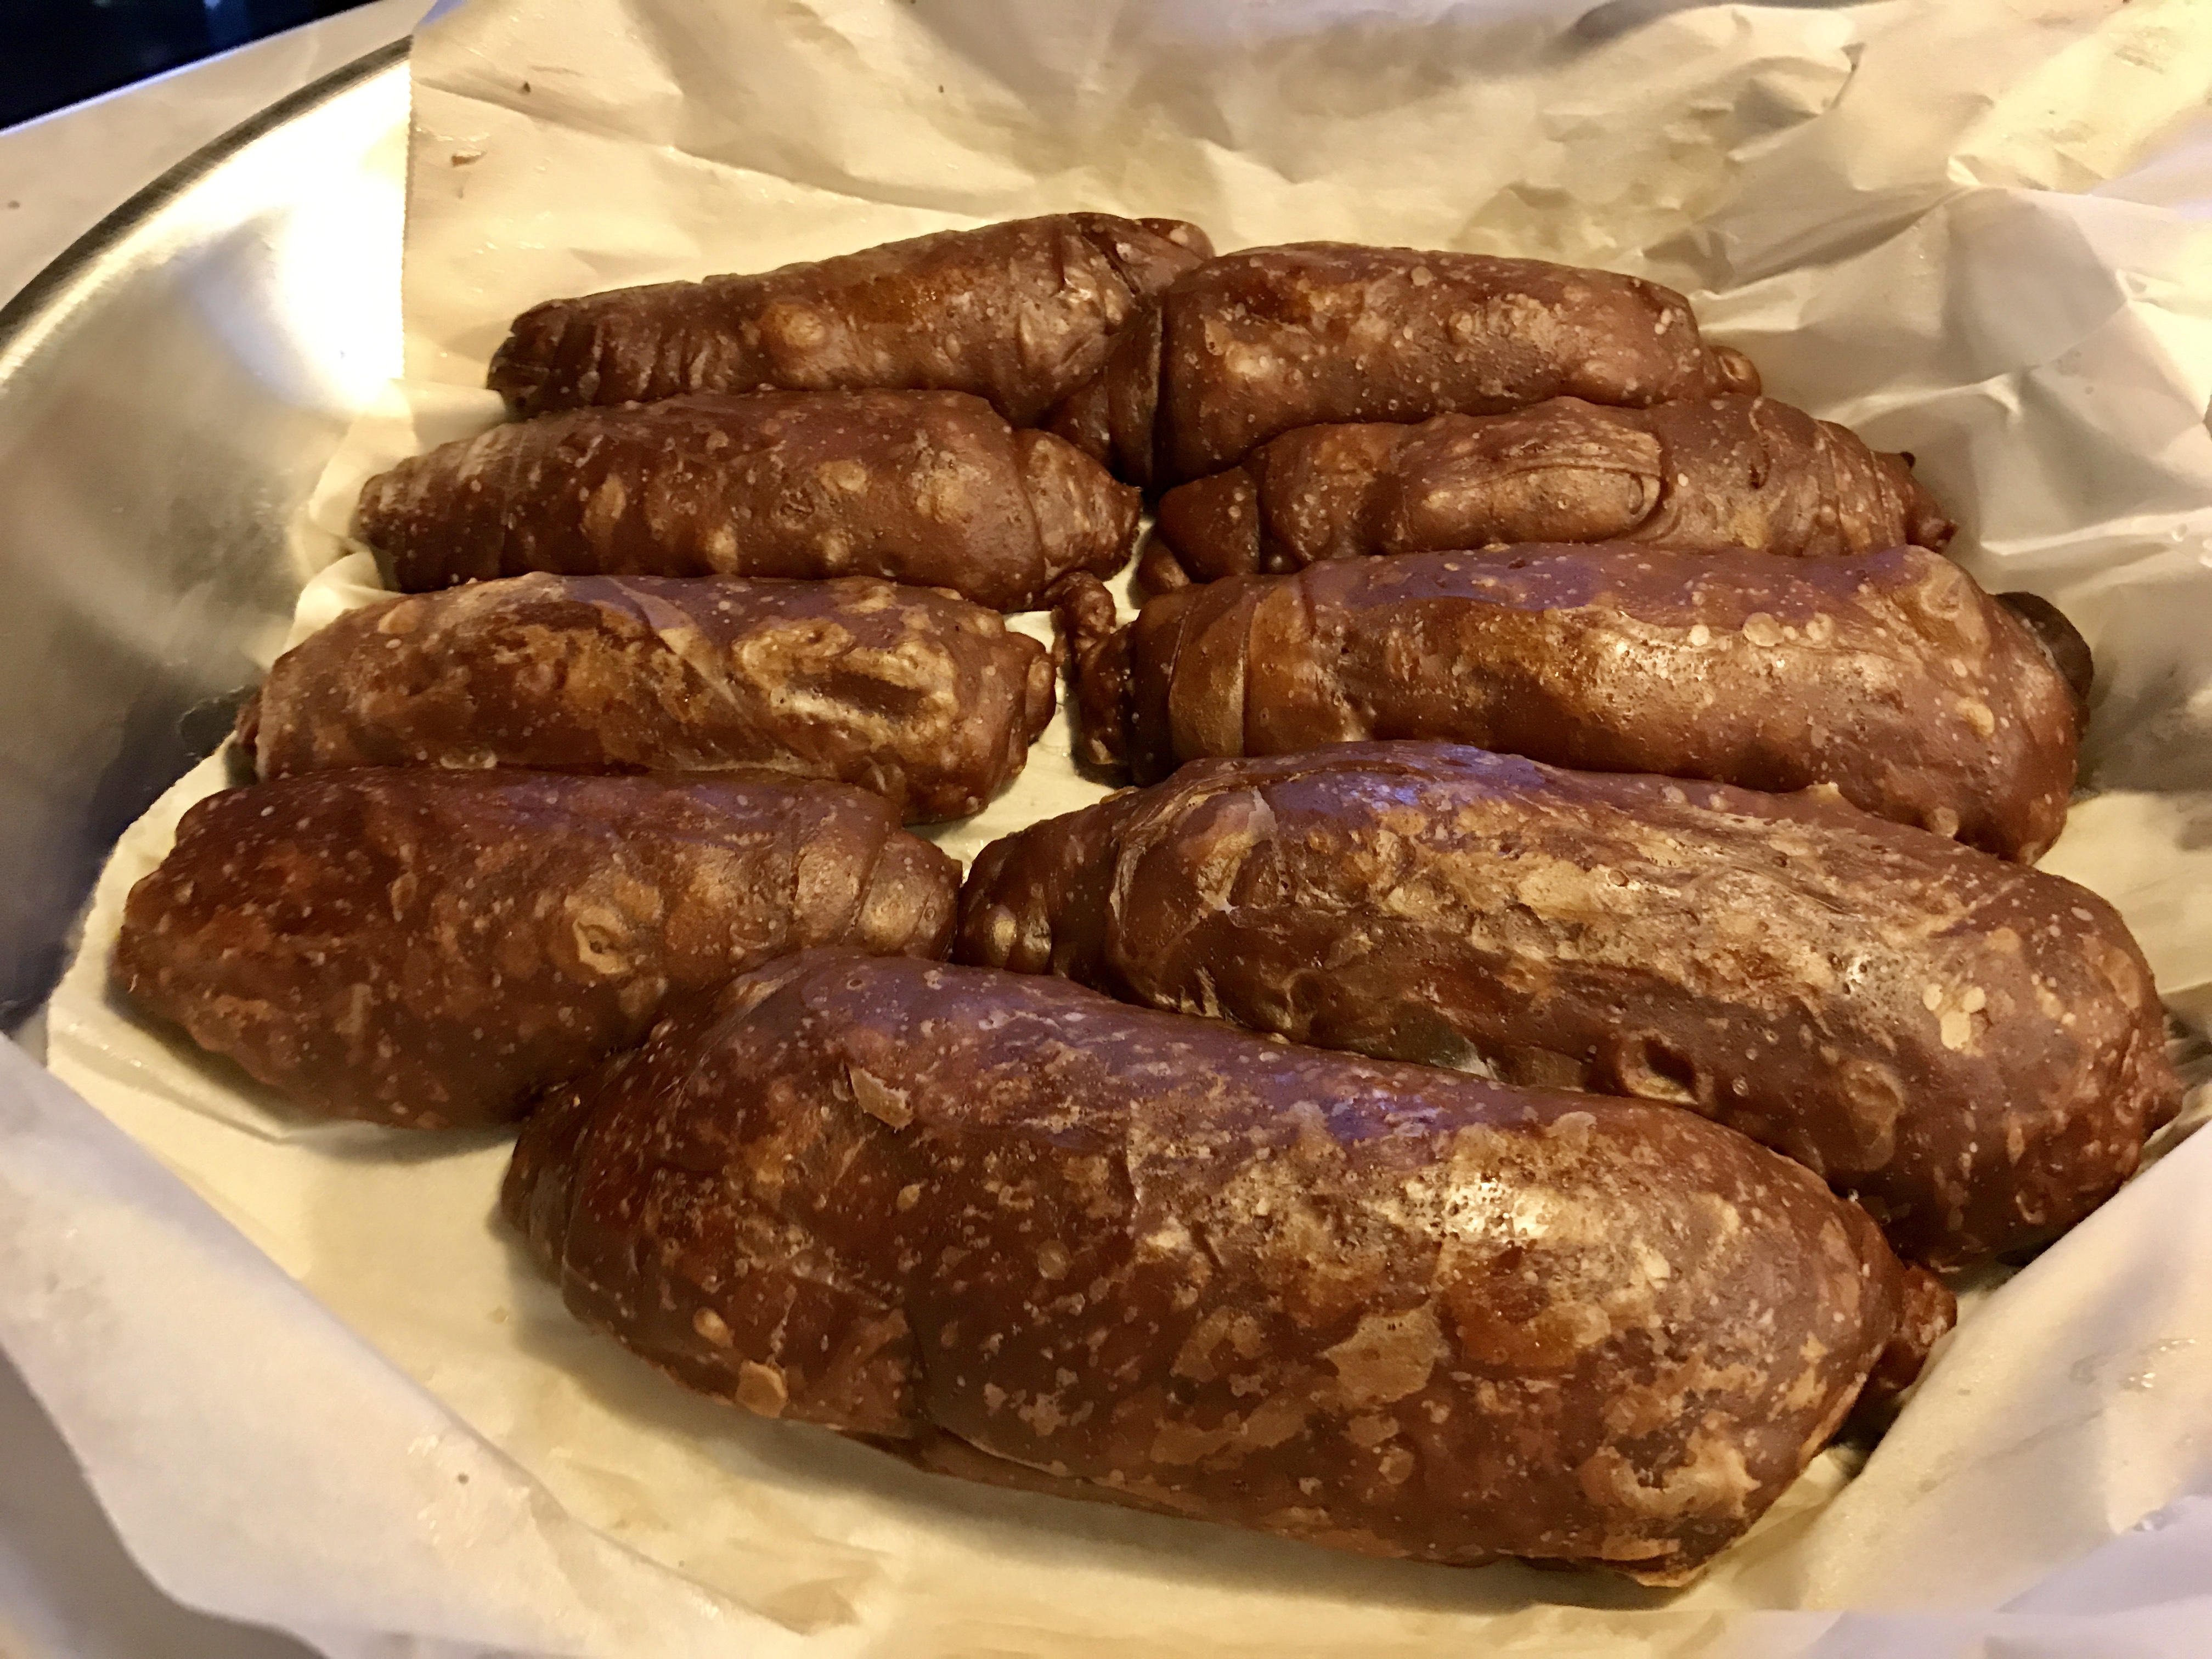
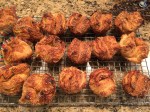
Bake the pastries for 30-40 minutes, or until golden-brown.
Cover with foil halfway through if beginning to brown too much.
Remove from the oven and leave to cool for a couple of minutes before turning out onto a wire rack.
Be careful not to burn yourself on the caramelised sugar, but don’t leave them to cool for too long, or the caramelised sugar will harden and they will be stuck in the tin. Serve warm or cold

Mine took 32 minute in regular bake (no convection) oven at 405°F .
Watch these. Almost exactly at the 15 minute mark I covered these with foil or they would have been black. As it was the color came out gorgeous.
I had absolutely no difficulty removing these from the pan.

IMG_7977

10. Serve warm or cold. Warm is best!
***Warm, you really want them warm. You really want that flaky crunch!

11. If you don’t want to eat them all in want go (of just if you want to, but shouldn’t), bag and freeze them. Before you eat them: Defrost them and place them in a warm oven (180ºC) for about 4-6 minutes or until warm, they will crisp up again.
***I didn’t see this the first time I baked them.  Believe me I will be trying this.

IMG_7979

Notes:

2 1/2  hours preparation time (mostly resting in the fridge time)
30 mins to 1 hour cooking time

We have France to thank for these caramelised buttery, sugary parcels. Lien’s been an internet sleuth and has more on how these came about.  The are perfect with a café au lait. Equipment and preparation: for this recipe you will need a 12-cup muffin tin and a freestanding mixer fitted with a dough hook.  (Personally I don’t think that dough hook is necessary but haven’t done it without yet.)

If you don’t want to eat them all in one go (or just if you want to, but shouldn’t), bag and freeze them. Before you eat them: Defrost them and place them in a warm oven (180ºC) for about 4-6 minutes or until warm, they will crisp up again.
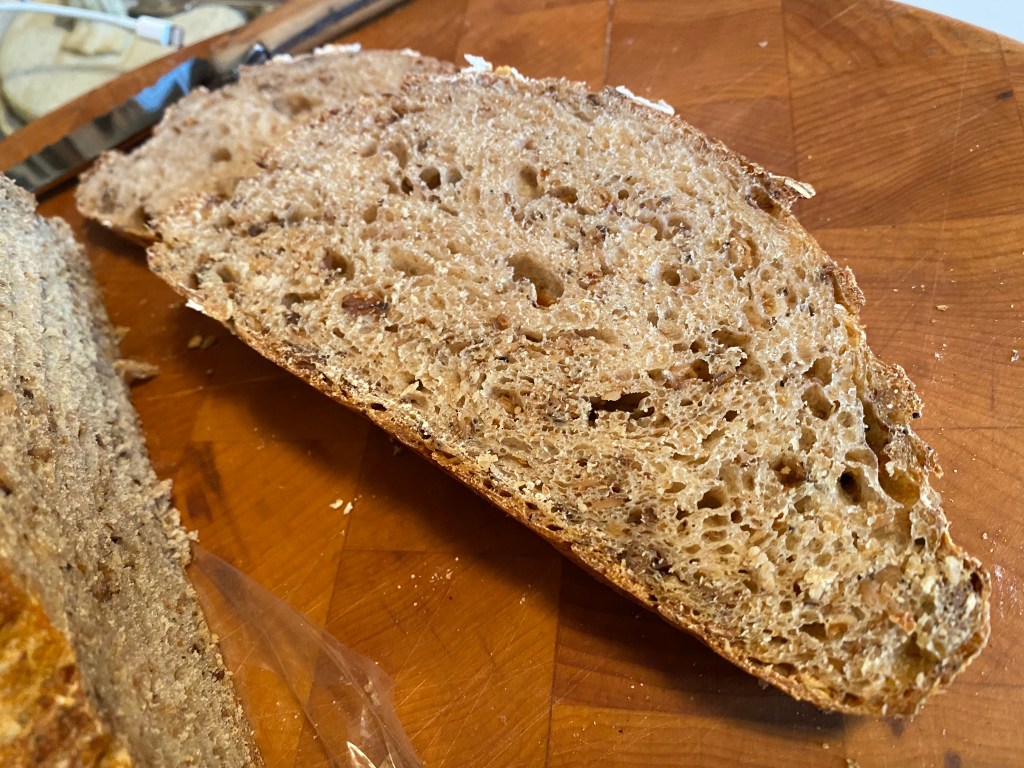
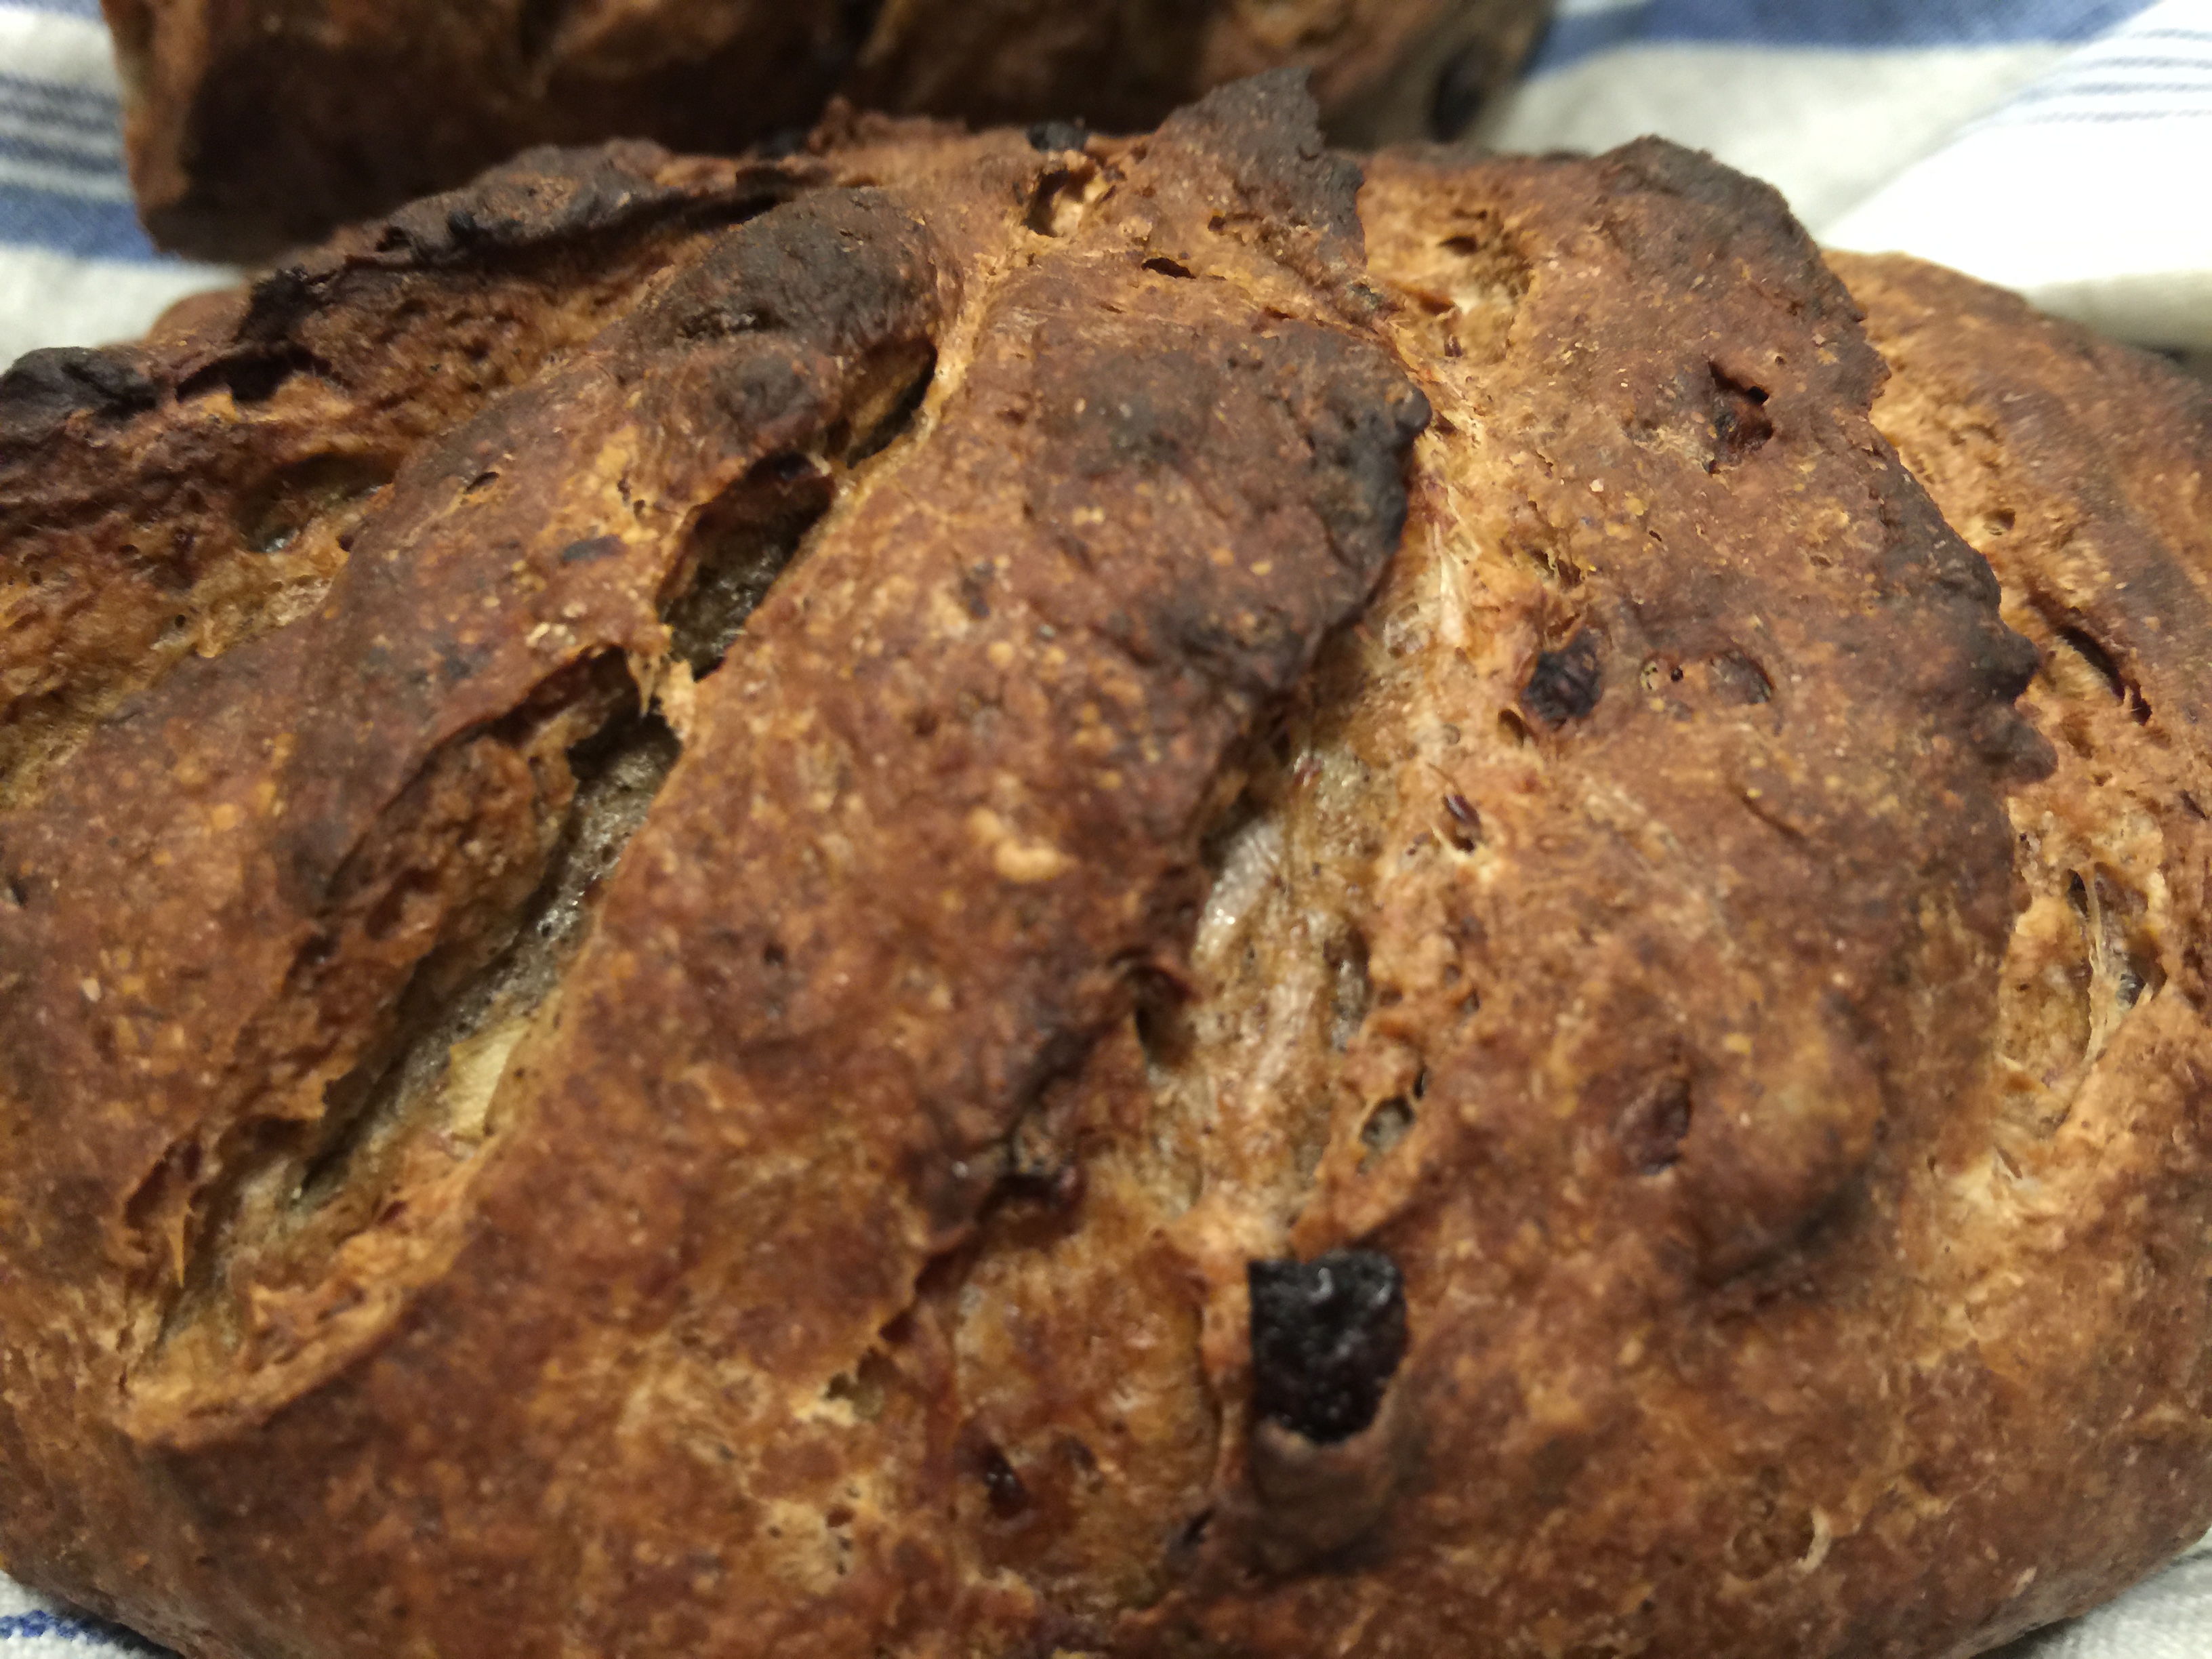
I know the crumb shot is woefully lacking but I was lucky to get even that considering how fast these went.  Lien does have the perfect crumb shot!
You simply must bake these. Chain yourself to the oven door until you do. Bake, write, post and let us know how it worked out. Send your info + picture to the Kitchen of the month (that’s Lein this time, so send it to: notitievanlien(at)gmail(dot)com, add subject BBBuddy). Deadline 1 March.
Become our Bread Baking Buddy, you’ll get a BBBuddy Badge for your entry (you can add that too your post if you want) and will be added to the Buddy round up later.  Mine may look good but Lien’s are gorgeous!   I mean BAKE these. You’ll be hooked for life!