Do you love the crisp fall air, leaf raking, fresh apples, pumpkin and spices? I’m ready for the air to be cooler and cinnamon is always welcome in my kitchen! Pumpkin has never been my very favorite but in this bread it is perfect. This is the bread of fall. Totally my new favorite with fresh home made apple butter. How can you beat that? OK, well maybe put peanut butter AND apple butter on a slice of this. Yes, maybe that would be even better.
Cathy, I can’t say thank you for my very favorite way to bake with pumpkin and gorgeous spices! Cathy, Bread Experiencehttps://www.breadexperience.com/rustic-sourdough-pumpkin-shaped-bread/, is hosting the kitchen table. Be sure to check out the other Babes baking the pumpkins!

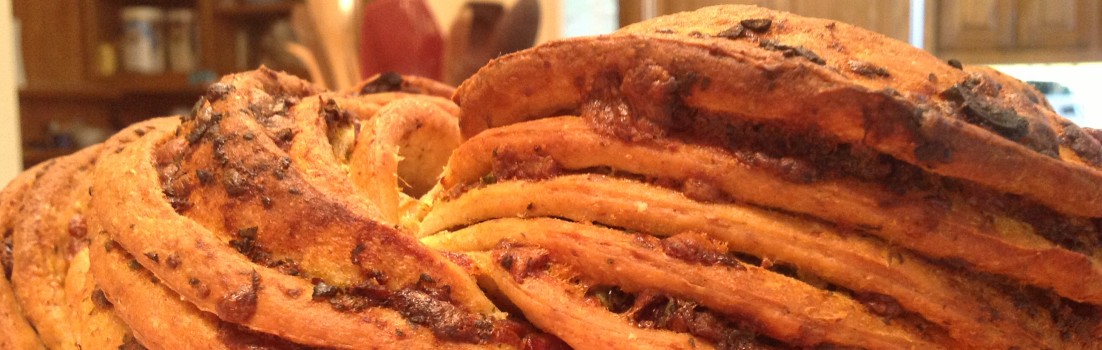
Rustic Pumpkin-Shaped Bread
Makes: 2 Loaves
Pâte fermentée:
400 grams all-purpose flour
100 grams whole wheat flour (I used semolina)
325 – 375 grams water
7-8 grams / 1 teaspoon fine sea salt
25 grams sourdough starter (100% hydration) *
Final Dough:
Pâte fermentée, all of the above
280 grams all-purpose or bread flour
32 grams whole grain rye or other whole grain flour
¾ tsp. / 6 grams fine sea salt
1-2 Tbsp. / 7-14 grams pumpkin pie spice or other spice of choice
200 grams pumpkin puree
2-3 Tbsp. / 40-60 grams maple syrup or honey (I used 40 grams of maple syrup)
Extra flour or water as needed
*Using yeast instead of sourdough.
To make a yeast version, add 1/8 teaspoon of dried yeast to the Pâte fermentée and an additional teaspoon in the final dough and omit the sourdough starter.
First Day: Make the Pâte fermentée
In a large bowl, whisk together the flours and salt. To keep from dirtying another container, make a well in the center and add the starter. Pour the water in gradually and mix using a large wooden spoon or Danish dough whisk until everything comes together to form a smooth ball.
Adjust the water or flour as necessary to make a dough that isn’t too sticky or stiff. Knead the dough until it is soft and pliable and tacky but not sticky, about 4 to 6 minutes.
Cover the bowl with plastic wrap or a kitchen towel, and ferment at room temperature for 1 hour or longer. The dough should swell to about 1 ½ times its original size.
Remove the dough from the bowl and degas it by kneading it gently. Return the dough to the bowl and cover tightly with plastic wrap. Place in the refrigerator overnight or up to 3 days. Or freeze in an airtight freezer bag for up to 3 months.
Next Morning/Afternoon: Make the Final Dough/Bake Bread
The next day, remove the Pâte fermentée from the refrigerator. Cut it into 10 – 12 small pieces using a bench knife or serrated knife. Place the pieces in the bowl of a stand mixer and allow them to warm up for about 1 hour.
In a separate bowl, whisk together the flours, pumpkin pie spice, and salt.
Add the pumpkin puree, maple syrup or honey, if using, to the Pâte fermentée and mix on low speed to break up the pieces. Gradually add in the dry ingredients and continue mixing on low speed until everything comes together to form a coarse ball. Add extra water if necessary to form a soft and pliable dough. ***In retrospect, next time I would add 30-60 grams of water.
Mix on medium speed using the dough hook and adjust with flour if necessary to make a soft, pliable dough that is tacky but not sticky.
Transfer the dough to a clean large bowl and cover with plastic wrap or a kitchen towel.
Let the dough ferment at room temperature for 2 hours. Stretch and fold the dough after the 1st hour, then let it rest the final hour.
Remove the dough to a work surface dusted with flour. Divide the dough into two pieces and shape roughly into rounds. Let them rest on the counter for 15 minutes.
Shape the pieces into tighter boules, and place in lined banneton proofing baskets, between the folds of a heavily floured baker’s couche, or on cornmeal-dusted parchment paper. Let them proof 2 hours or until 1 ½ times their original size.
Proceed to baking or cold ferment the loaves overnight
After the loaves have proofed in the baskets at warm room temperature, proceed to baking, or cover the baskets tightly with plastic wrap and place in the refrigerator overnight to cold ferment.
About 45 minutes before you plan to bake the loaves, place a Dutch Oven or other baking pot on the middle lower rack of the oven and the lid on the upper rack and preheat the baker to 450 degrees F.
While the oven is preheating, cut a piece of parchment paper to fit the bottom of your baker. **** My parchment round was to fit the Dutch Oven with wings.

Cut four 30-inch pieces of food-safe twine. ****I poured olive oil in the bottom of a ramekin, coiled the twine to fit and soaked the twine in the oil. Place the oiled strings crisscrossed on the parchment. It should look like a pie divided into 8 wedges.
If you cold-fermented the loaves overnight, remove one loaf from the refrigerator at this point.
Invert one of the boules from the proofing basket onto the parchment paper. Center it on top of the string. Tie the strings on top being careful not to pull too tightly to give the loaf room to expand.
Score the loaf uses small slashes, if desired.
****Pull the middle rack with the Dutch Oven on it out of the oven. Using the parchment wings, lift the tied pumpkin loaf (on the parchment paper) and carefully place it in the pot. Pull the lid off the top rack and place on the Dutch Oven. Push the rack into the oven.
Bake for 15 – 20 minutes with the lid on and another 15-20 minutes with the lid off. The loaf should be a rich golden brown all around and register 200 – 205 degrees F in the center of the loaf. It should sound hollow when thumped on the bottom.
****I used the parchment wings to lift the loaf out of the Dutch Oven. Transfer the loaf to a wire rack and let it cool for 1 hour before removing the strings.
To remove the strings, cut them with scissors and carefully pull them a little bit at a time. If you pull too fast, the string could leave residue. A small knife works well for scraping the string off as you go. ****I had no difficulty removing the twine.
After the string has been removed, let the loaf rest on the cooling rack until completely cool.
Repeat the process with the other loaf allowing the oven and baking pot to preheat to 450 degrees F. before baking.


Bread Experience is the host kitchen this month. If you want to bake along with us and receive your Buddy Badge, please send Cathy a photo and link by October 29th to be included in the roundup.
Send an email to breadexperience at gmail dotcom and include BBB October Submission in the subject. It’s time to get baking!
