I figure the first question here is: What is your secret/individual/unique way to eat peanut butter? The almost universal answer is probably: on a spoon straight out of the jar … and yes I certainly have enjoyed my share of peanut butter that way. But from a very long time ago, 65 years ago, my favorite peanut butter sandwich has always been open face peanut and mayo. In the last year that has morphed into bacon hot chili jam, peanut butter and mayo on toast.
Happy chaos!
One should never worry about pronunciation when bread is this easy to put in the oven and brings smiles when someone takes a first bite.
All together now.
Aparna is our Kitchen of the Month and she will have the full recipe on her site. True to the Babe Code, she gave us lots of room to play with this recipe. Recipes on offering: Aparna adapted this recipe; make it with SourDough; make it NoKnead; Google the title and you can find any number of variations. Filling? Don’t be silly, sweet red bean maybe the traditional but in true Babe Fashion please use your imagination, I certainly did.
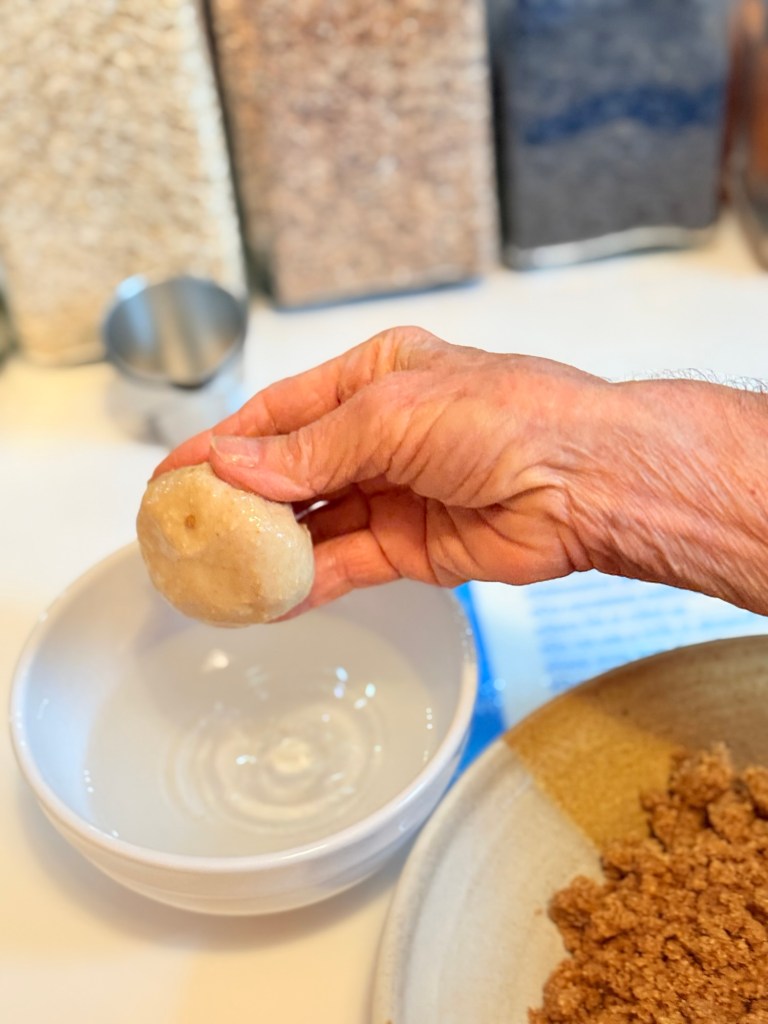
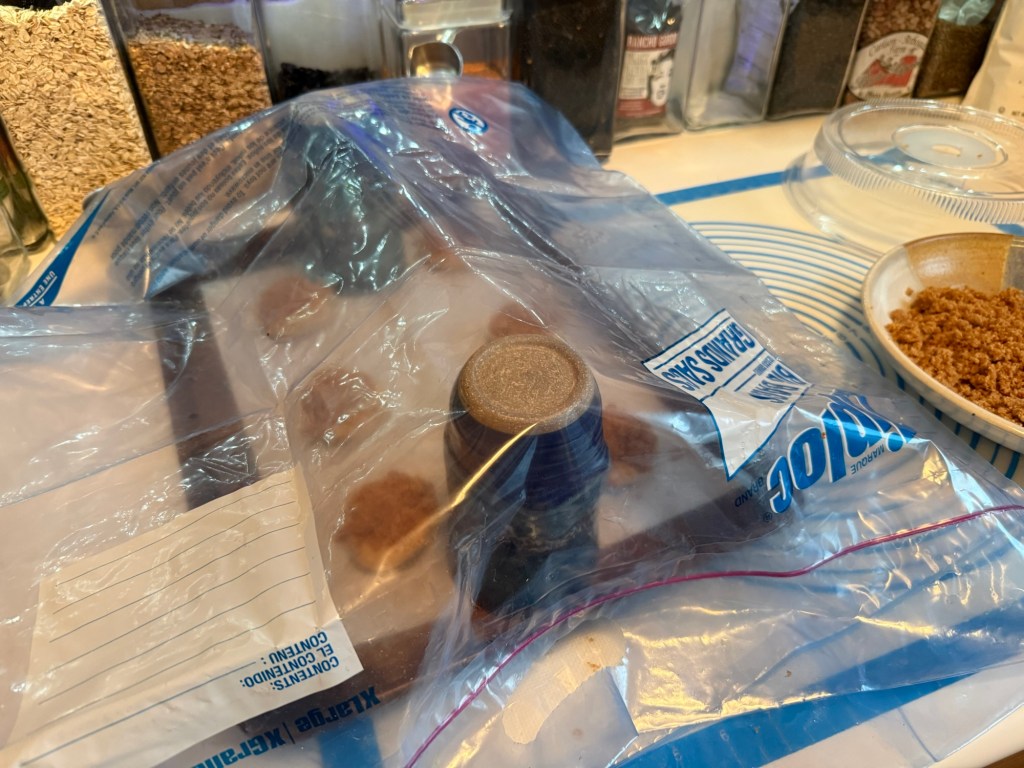
For something of a demo on applying the streusel check out this video. BUT what ever you do DO NOT MISS OUT ON THE STREUSEL! This is a winning topping. I have some left in the refrigerator and know I will find another fantastic way to use it.
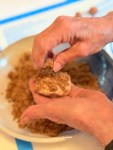
Change? Fiddle with a recipe? Well of course. In the STREUSEL I replaced cornstarch with oat bran (my theory was oat bran will make it more crumbly, I think it did). I cut any place the recipe called for any kind of sweetener by 5 to 15 grams. To make the DOUGH, I used 140 g white whole wheat flour + 100 g AP flour to replace 238 g AP flour. FILLING I totally ignored any amounts and mixed some canned red beans, peanut butter, bacon hot chili jam and coconut flour to a consistency I could roll into balls.
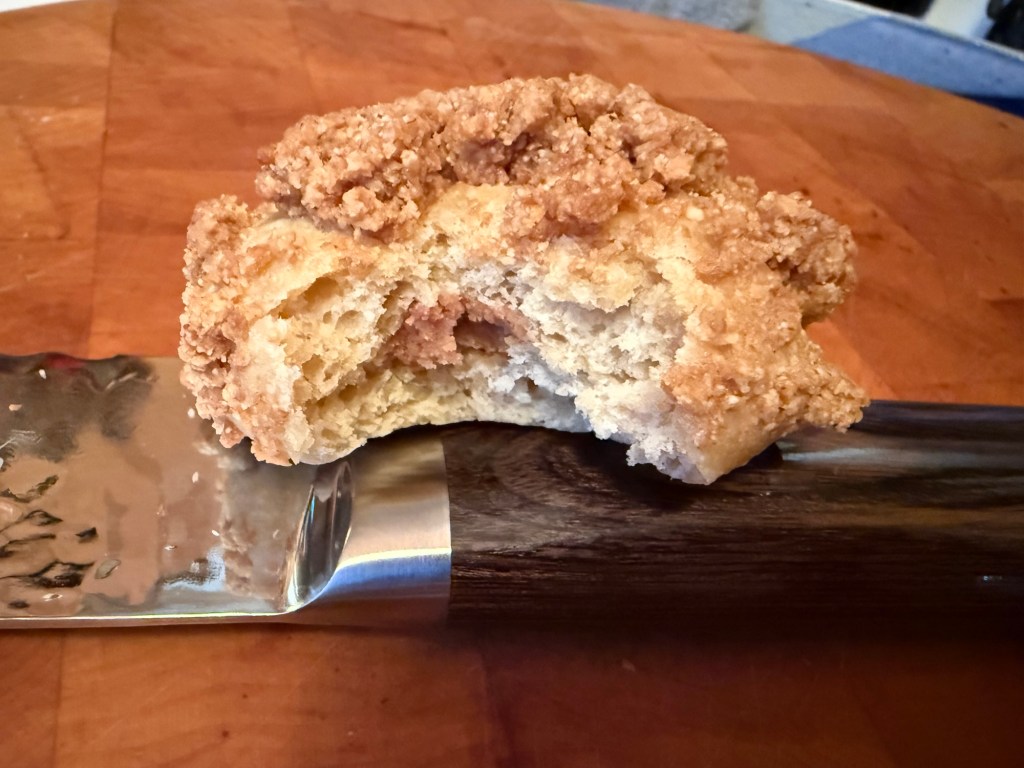
Take a bite … and Smile!!
It’s not really about the filling, it’s all about that streusel topping. Go for it. Bake with us if you dare! Put your own touch on it and Smile!
Going fast …
We would love for you to bake along with us this month and try out these crispy topped rolls. Check out our Facebook group to see the participants’ baking results. If you would like to post your results with a Buddy badge on a blog, let us know in the comments or on the Facebook page.
What happens when you refresh your sour dough yeasties and then ask them to stay alive for 33 days in a dark refrigerator … I find they are VERY reluctant to greet you with bubbling smiles upon your return. I had 7 days to coach the little boys and girls back into bubbles. It didn’t go as well as one would hope.
I took the two that seemed to have the most bubbles yesterday … and I spiked it with a pinch of yeast.
Our Kitchen of the Month, Judy of Jody’s Gross Eats, presented us with SourDough Hawaiian Rolls and gave us two options … I should have gone with the sourdough discard seeing’s as how I was discarding everyday for over a week. I tried for the straight sourdough. My yeasties were sluggish and I didn’t get the light fluffy ones like I’m imagining all the other Babes did BUT I did get some incredibly glorious aromas and delicious rolls that my husband is crazy for.
I followed Judy’s Sourdough recipe in every way except I replaced 100 grams of bread flour with King Arthur’s Golden Wheat. So right there is a small degree that accounts for the lack of fluffy.
Ingredients added to the mixer and the dough comes together easily.Dough ball 948 grams.Last dough ball 107 gramsAll other dough balls 105 grams7 hours after shaping …Brush with cream …
BAKE!
Tops … brushed with butter.Bottoms …Side …Nine all together…Not the lightest crumb …I do love toasted!
The aroma of these is not not pineapple but it’s not pineapple … I think the vanilla does some alchemy with the pineapple and it is glorious.
All in all, I’m very happy. I believe anyone would be happy with these.
I’m giving my starter one more try before I start over. We’ll see.
I’ve baked bread and I’ve baked BREAD and then I’ve baked BREAD and then some. But, I’ve never gotten tired of baking bread. Karen from Karen’s Kitchen Stories suggested the Babes bake Dollywood Cinnamon Bread. It’s bread but it’s also Cinnamon Bread but then it’s Cinnamon Bread like you’ve knot known it before. Oh and it’s not a knot! It’s more pull apart log but different even so.
Karen found this recipe in a beautiful new book – and yes I succumbed and now have a copy in my library. I love all the stories Anne Byrn has, one for each recipe. And I’ve bookmarked too many to ever get them all baked but life should be full of challenges one chooses!
I used two rolling pins about the same size so I could cut without going through to the bottom.
Ready to slice …
The slice in allows all the goo …
To filter down and permeate the loaf … I will confess, the two best slices are the ends…heaven.
I did observe the overnight rest in the fridge. I will make it again with double the topping and open those slices more to allow that topping further in if that’s at all possible.
Karen’s got her adaption of Anne Byrn’s recipe on her site but I’d encourage you to check out the book and the other Babes baking this month.
Our host kitchen of the month is Judy at Judy’s Gross Eats. She can tell you about this bread taking the internet by storm. I’m going to tell you about how this is simply amazing. Our son and his three kids raved about the milk bread they baked all during the pandemic. They loved how you could squeeze it and it came back. They just really loved it. Whole grains…ha, those were awful tasting things that ruined any bread. This was all white. This was real bread. I loved watching their productions, the photos and the movies and what they put on their slices. But white bread just isn’t my thing. I didn’t try it.
Then here comes Judy with this milk bread. AND here’s a friend with a birthday. Wow! Great opportunity to bake a spectacular white bread that I can give away. So I baked white bread…I was taking it to the party…there was wind and rain…party got canceled…didn’t give away bread…Gorn loved it.
Truly, this makes for spectacular baking but in my mind, on my taste buds, white bread even with the fillings I used (and they were really really good) I just find white flour bread bland. I feel sure there will soon be a time I bake this again and make it with some character flours.
The magic of three basic ingredients always blows my mind. With this bread, it is a technique and shaping that bring it into the realm of the GLORIOUS. Technique is cooking the flour into a paste, the tangzhong, and adding that to the dough. Shaping adds the final magic. I’m astounded by breads that look spectacular and difficult…then turn out to me relatively simple to execute, and this definitely fits in that category.
My fillings. Well, this recipe called for dividing the dough into five pieces. That gives you the opportunity to use five different fillings all in the same loaf. I used Biscoff Crunchy Cookie Butter, peanut butter, brown sugar & cinnamon, chocolate and left the last plain. Not surprisingly I liked the Biscoff and the peanut butter the best. Fillings can be sweet or savory and my mind swims with the possibilities.
I lost track of width I should have made the five rolls and ended up with misfit. Judy’s misfit I think was stunning, mine not so much but it still worked. I did like the idea of different fillings. Fermenting in my mind, you could make these five rolls smaller and make more pieces and create many surprise flavors. That might make more work but it sounds interesting.
Japanese Milk Bread from King Arthur Baking Company
1. To make the tangzhong: Combine all of the ingredients in a small saucepan, and whisk until no lumps remain.
2. Place the saucepan over low heat and cook the mixture, whisking constantly, until thick and the whisk leaves lines on the bottom of the pan, about 3 to 5 minutes.
Three minutes.
3. Transfer the tangzhong to a small mixing bowl or measuring cup and let it cool to lukewarm.
4. To make the dough: Weigh your flour; or measure it by gently spooning it into a cup, then sweeping off any excess. Combine the tangzhong with the remaining dough ingredients, then mix and knead — by mixer or bread machine — until a smooth, elastic dough forms; this could take almost 15 minutes in a stand mixer. I started doing this by hand as I like that best BUT I quickly felt I would get a much better result with the kitchen aid AND I got the smoothest dough ball ever.
Baby smooth bottom! Twelve minutes in the KitchenAid.
5. Shape the dough into a ball, and let it rest in a lightly greased bowl, covered, for 60 to 90 minutes, until puffy but not necessarily doubled in bulk.
6. Dough shaping: Divide the dough into 5 pieces. Roll each piece into a thin, oblong shape, then, using a sharp object (I used my 6 inch bench scraper), start about 2/3s from the designated top and make 1/8” to ¼” cuts.
This is almost five minutes long I’m sorry, I have to learn some editing 😌 Yes, we have pesky fruit flies in the film. Please excuse the straw like grey hair that gets in the way.Continue reading →
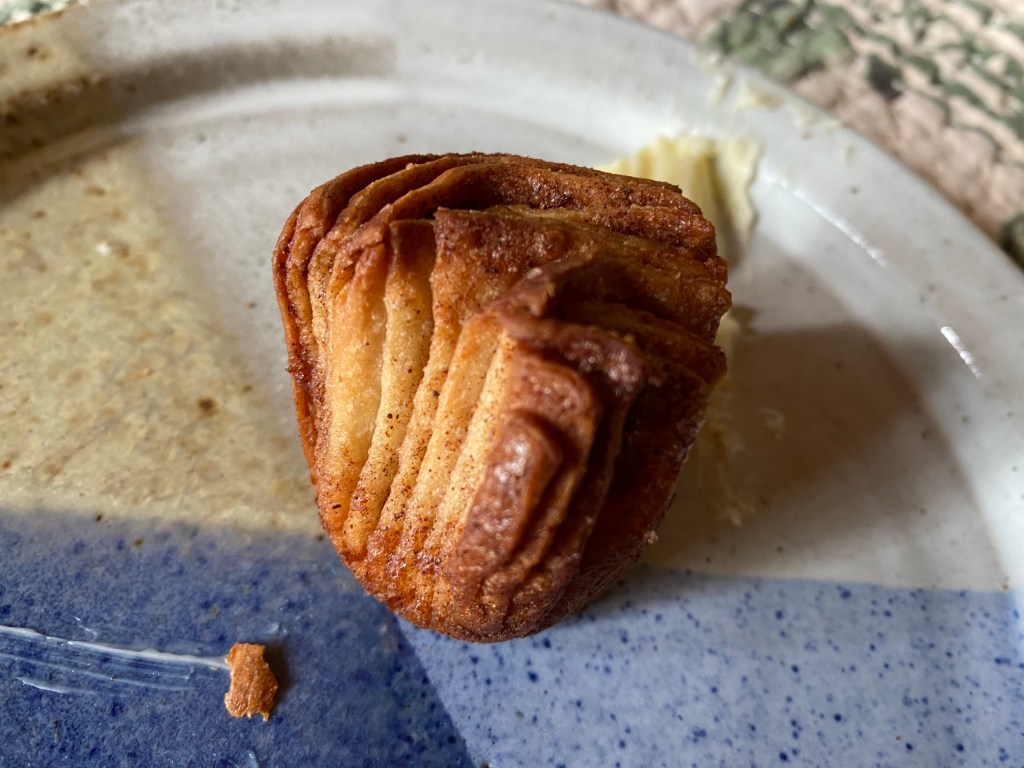
What you may ask is a Cruffin? Since the Babes are Baking Cruffins this month, that would be a fair question. In simplest terms a cruffin might be a cross between a croissant and a muffin but it is neither a croissant nor a muffin. Mostly what you need to know about a Cruffin is: they are insanely beautiful and taste marvelous! That’s really what a Cruffin is BUT if you want to know more details check out Aparna’s post at My Diverse Kitchen.
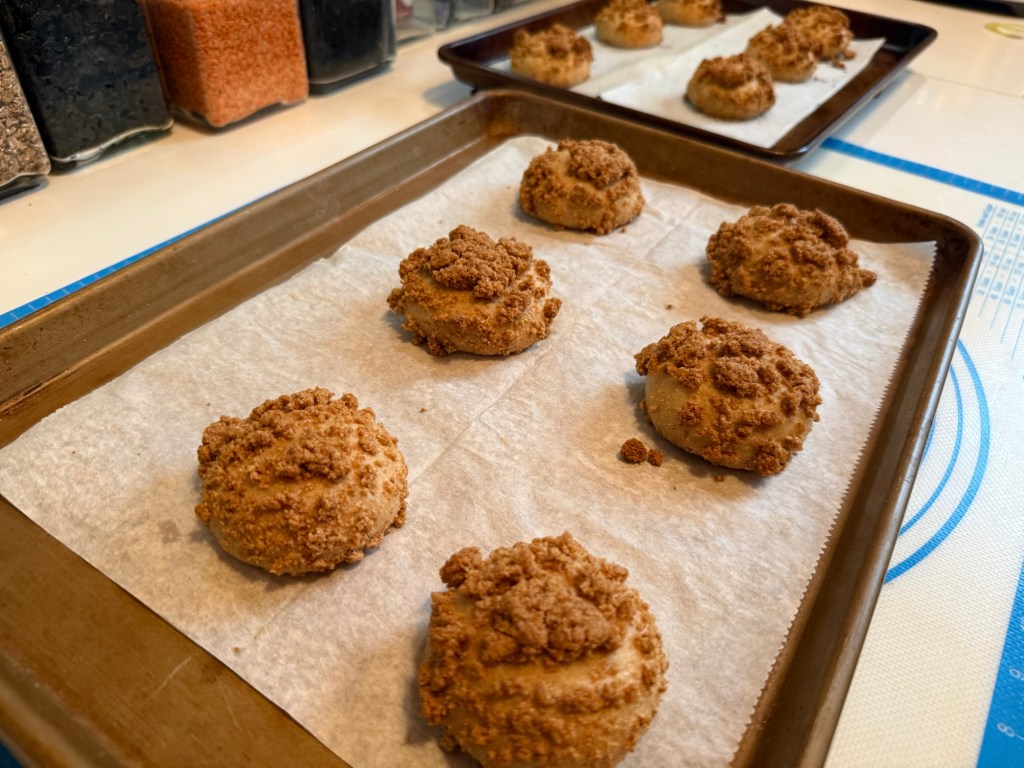
I think these should be named oatmeal mushrooms.
There is an art to writing a recipe BUT there is an art to reading a recipe as well and clearly I am woefully lacking in reading skills. Perhaps my math is just as lacking. The recipe Aparna gave us clearly stated “this recipe makes 8 cruffins” … I ended up with 17. Can’t read, can’t count.
My cruffins are dark – I used half white whole wheat with half regular AP flour and brown sugar – and I’m ok with that. I will admit the BBB’s who bake with white flour got a gorgeous gourmet picture perfect golden cruffins. I’ll settle for the subtle caramel flavor I get with the brown sugar.
This recipe makes 8 Cruffins (see it said it right there)
For the Dough :
25 grams brown sugar (this was just sweet enough for us)
1 1/4 tsp dry yeast
100 grams white whole wheat flour
101 grams white AP flour
50 gm unsalted butter, chilled
1/4 tsp salt
183 oat milk (did not use any water but used all oat milk)
For Lamination :
120 gm unsalted butter, at room temperature
To Decorate/ Serve :
Speculaas spice/Cinnamon sugar
DIRECTIONS :
I add the dry yeast directly to the flour with other ingredients.
In a medium bowl mix together the flour, yeast, sugar, salt and chilled butter cut into small pieces. Add milk and knead into a soft and elastic dough that comes away from the side of the bowl. The dough should not be sticky. Add a little more milk or flour, as required to achieve this consistency of dough. I found I needed at least half cup more of regular AP flour to obtain a soft supple dough that was not sticky.
Shape the dough into a ball and transfer it to an oiled bowl, turning the dough to coat it well. Cover and let the dough rise till double in volume. This should take between an hour to two depending on ambient temperature. Mine took about an hour and 45 minutes.
In the meanwhile prepare your baking pan and keep aside. Butter and very lightly flour the cavities of your muffin or popover tray.
Dust your working surface lightly with flour and turn the dough out. Lightly knead to deflate the dough. Divide into four equal pieces. Roll out each piece to a 60x20cm (24X7 inches) sized piece. The dough sheet will be very thin. If you have a pasta machine you can use that as it is easier to roll out thin sheets with it. I cut the dough into two pieces (60cm x 40cm each) and cut into 4 pieces after buttering each.
Spread about 30 to 38 gm butter (I started with 150 grams of butter and had 50 left) of soft butter over each rolled out piece of dough. I sprinkled half with cinnamon sugar and the other half with speculaas spice. Cut each piece into half, lengthwise, creating two thin strips.
Roll one thin strip into a tight roll. Place this at the edge of the second strip and continue rolling till you have one thick roll. This will give your cruffins more layers.
Cut roll in half lengthwise. Roll each half, like a circle (cinnamon roll style)with the cut layers side showing the outside. Make sure to tuck both ends under so it doesn’t open up on baking. Place the roll in the prepared muffin or popover pan.
Repeat with all the dough pieces. Cover the pan with a kitchen towel and allow to rise for about 45 minutes. The rolls should look puffy and have risen to almost the edge of the cavities.
Bake the cruffins at 190C (375F) for about 30 minutes or till golden brown and done. My smaller size baked in about 24 minutes. Turn them out onto a rack and let them cool. I skipped toppings and thought they were just perfectly delicate and sweet enough. Serve warm with coffee or tea.
My Cruffin were small (17 instead of 8) and more brown than golden but still insanely beautiful and marvelous tasting with coffee in the morning, hot tea in the late afternoon, coffee in the morning, hot tea in the late afternoon … oh gosh, it’s time to bake again as I know you will want to do. I want these again with my morning coffee … and my late afternoon tea!
Coffee or tea?
And I do thank you just very much for cruffins Aparna!
Our Kitchen of the month was Kelly (Hobby Baker) at A Messy Kitchen and she brought us a doozy of a bread but wow oh wow it will give you cause to celebrate. Maybe you got your vaccination, maybe you got a new car, maybe you got sunshine when rain was expected, maybe the cat came home, maybe you can’t think of a reason to celebrate: if you bake Potica you’ll have reason enough to celebrate.
The start.
I baked again with my friend Mary. She baked a rye loaf for her family and then took photos of the Potica. What that really translated to is the story of how we’ve all let looking at a picture and reading through a recipe intimidate us into not trying. I still remember Bread Chick in the Daring Bakers putting up Julia Child’s baguette recipe some 30+ pages long and thinking REALLY, then stepping back and just taking it one step at a time gets you started on the journey. Before you know it you’ve come to: Bake it in the oven and BINGO you have bread! Now Mary wants to come back to bake with me again to tackle Potica and I want to try the poppyseed filling with walnuts and chocolate…and I want to try a Spanakopita filling. I am absolutely sure spanakopita will be spectacular. Sort of hoping one of the Babes went that way.
Do not be intimidated by photos that make things look difficult. Do not let long directions in a recipe intimidate, just take one at a time. You truly can do this! Bake with us.
Povitica or Potica
Add in butter.
DOUGH 100 grams whole wheat pastry flour 185 grams pastry flour 1/2 teaspoon 0.05 oz (1.4 g) dry yeast (~½ tsp) 135 grams whole milk 0.5 oz (15 g) water, used more milk instead 1/2 teaspoon salt 1 large egg 40 grams sugar, divided 22 grams butter melted, divided WALNUT FILLING 9.9 ounces (280 g) walnuts 3.35 ounces (95 g) sugar ½ tablespoon unsweetened cocoa powder 0.1 oz (3 g) cinnamon powder pinch of salt 2 ounces (58 g) unsalted butter 2.1 ounces (60 g) whole milk 1 large egg yolk ¼ teaspoon vanilla extract TOPPING, Looks pretty but adds too much sugar for my taste
Makes seeing when a dough doubles so much easier.
POPPYSEED FILLING This is the filling I used but NEXT bake will use walnuts and/or chocolate added to it. 250 g poppy seeds (8 oz or 1-1/2 cups) 50 g sugar (1/3 cup) 50 g honey (2-1/2 tablespoons) 50 ml milk (4 T) to start (may need up to 3/4 cup) 1 tablespoon butter 1 egg (can be omitted) 1 tablespoon cinnamon 3/4 teaspoon cloves 2 tablespoons rum (or other spirits) 1 tablespoon vanilla grated rind of 1 lemon
1. In a bowl or stand mixer, combine the flour together with the dry yeast. Then add the milk, water, egg and salt. Mix the ingredients in the bowl until a fairly smooth and homogeneous dough is obtained. Add the sugar in two additions, kneading each time until it is fully integrated. Knead the dough until it is smooth and silky with at least a medium gluten development. Work in the butter in about three additions until smooth again. Knead for about 12-15 minutes to develop the gluten well and obtain an elastic, soft, and very well developed dough. It may be slightly sticky but should pass the windowpane test. If it does not, the final stretching will not be possible without tearing.
2. When the dough is properly developed, form into a ball and place in a lightly oiled bowl. Cover with plastic wrap and let rise until it doubles its volume. This can take up to three hours.
3. Make the filling while the dough is rising. Grind poppyseeds in small batches in coffee grinder for about a minute. The resulting mixture should look and feel like damp sand. Melt honey and butter in milk, add sugar, and stir till dissolved. Add poppy seeds and stir. Simmer for a few minutes, adding more milk if needed. Take off stove. Beat egg with rum, then stir it in gradually so the filling doesn’t curdle. Add other flavorings. Add more liquid if needed and continue to simmer till thick. (Don’t overdo this–it thickens as it cools.) Makes about 2 cups.
In a food processor add nuts together with sugar, cinnamon, salt and cocoa powder. Blend until the nuts are finely chopped and transfer to a bowl. In a saucepan or microwave, heat the milk along with the butter until it just boils. Remove from the heat. Pour the milk into the nut mixture. Add the vanilla and the egg yolk and mix until completely homogenized. Set aside at room temperature, covered, until ready to fill the povitica.
4. Stretching the dough:
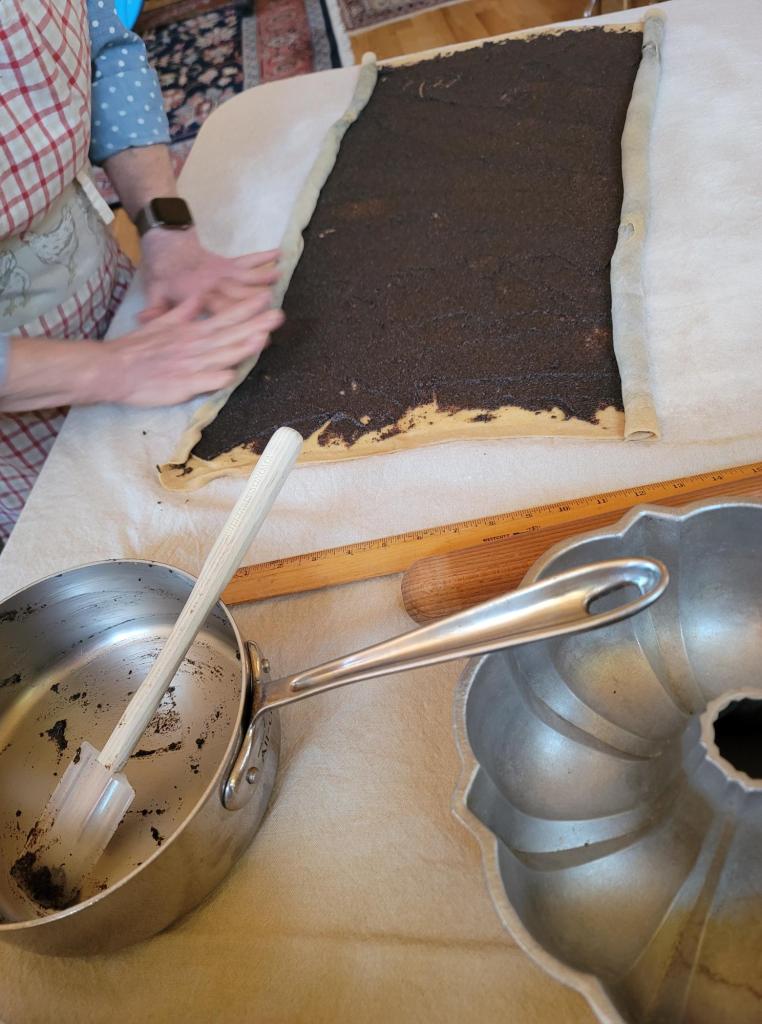
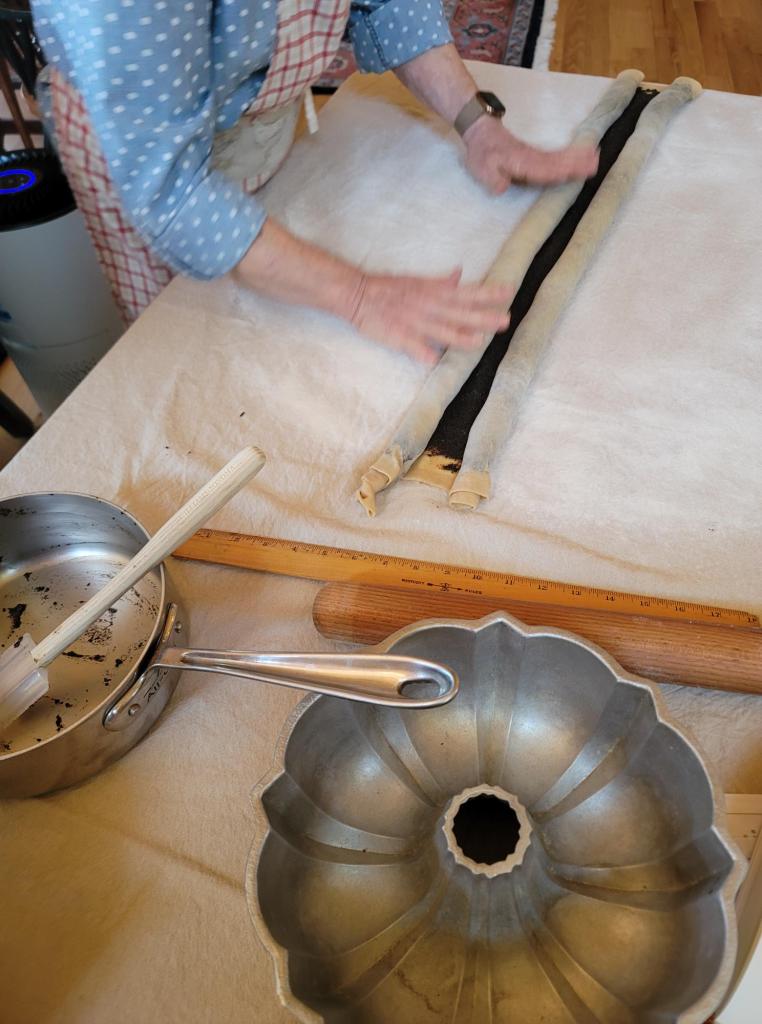
Lay out a sheet or cloth on a wide, flat surface. I used a drop leaf table and a linen table cloth but a card table would probably be the perfect size. Sprinkle the work surface very lightly with AP flour. Turn out the dough and de-gas it gently. Roll the dough out into a very thin rectangle with a rolling pin, then continue to carefully stretch with hand to about 25½x18-in. (65 x 45 cm) rectangle. **The dough should be about three times as long as your pan. Very gently and slowly work the dough with your hands, stretching from the center to the edges. It should remain soft and elastic and stretch without tearing as long as the gluten was developed and the process is taken slowly.
Stretching the dough.
5. Roll up the dough. Starting with the long edge that has filling to the edge, roll the dough on itself making sure that there is no gap between each layer. Start at one end and just turn up the edge all the way across. Then continue to roll from edge to edge carefully and with the help of both hands. I rolled from both long edges into the center then laid it into a bundt pan; it only went around one and a half times.
Rolling Rolling Rolling
Come together now…
6. Once the entire sheet is rolled up, carefully pinch and seal the long edge. Shape the roll into an S and place it into the pan. It will take two hands, scoop in from the ends and carefully lift into the pan. Other shaping methods including rolling up in a circle like a snail and baking in an earthenware baker, or cutting the roll into sections and lining them up in the loaf pan. Using sections and a smaller loaf tin will yield a taller loaf.
And throw it in the pan!
7. Cover with plastic and let the dough rise until the dough has puffed up somewhat. This will be most evident looking at the ends of the dough to see any increase in size. Again, this can take 1-3 hours.
Bake Povitica. Preheat the oven to 350ºF. Brush the top of the loaf with half of the butter and place in the center of the oven. Bake for 15 minutes, then reduce heat to 300ºF and leave for 45 minutes more. The total baking time is 60 minutes.
Remove from the oven and brush with the remaining butter. More butter is always better. Let it rest in the pan for 20 minutes. Then turn out the loaf and allow to cool completely on a rack. Dust with powdered sugar if desired.
Top line is putting dough into pan seam side down. Bottom line is where the dough was doubled.
8. This loaf should ideally be cut from the bottom to keep the outside edges/top from crumbling. Excellent with coffee or tea!
Really, you think you could keep this in the house 5 days …. I don’t think so.
This loaf will keep for 4-5 days in a sealed bag or a week in the refrigerator. That is totally laughable because with two people in my house half of this was gone in a day and a half. My friend took the other half home and it was gone that night. It is either store it or look for bigger pants. It may also be frozen in portions.
We would love for you to try this impressive looking and very tasty bread and bake along with us this month! (It’s not as difficult as it looks!) No blog is necessary to participate, a picture will do. Just send a picture or your post of your finished povitica to Kelly by the 30th of this month at eleyana (AT) aol (DOT) com. New recipes are posted every month on the 16th. Check out our Facebook group to see the participants’ baking results during that time.
Saint Patrick’s Day or Spring this is the CELEBRATION BREAD to CHEER!!
This is a naturally-leavened loaf made with matcha green tea powder and flavored with candied orange peel and orange blossom water. It doesn’t include any extra sweetener which neither Cathy nor I thought it needed. It is a beautiful green color before baking and becomes a lighter green after baking.
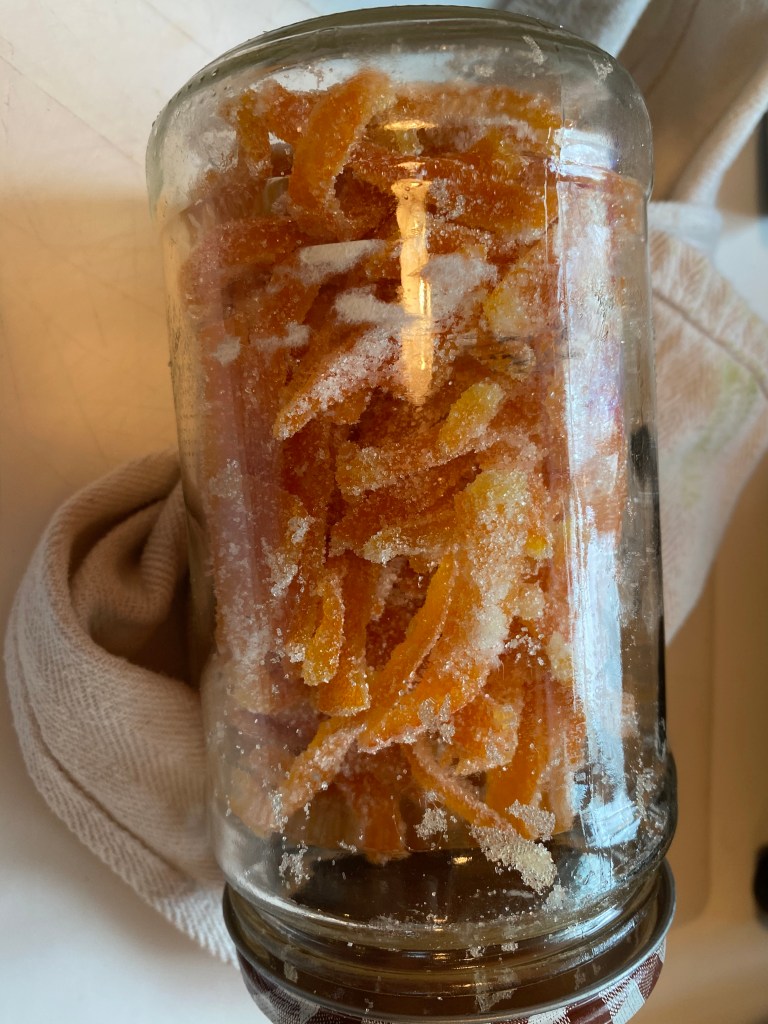
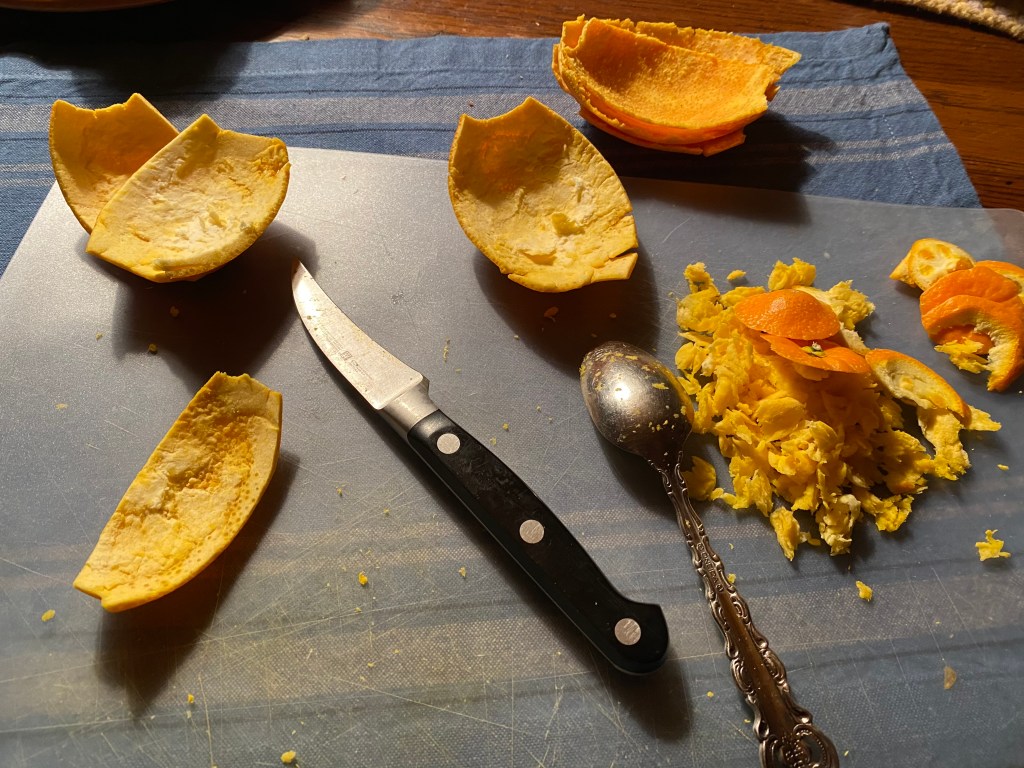
LEARNED: Again: homemade is better. DO NOT wear your favorite white while messing with matcha … unless you want it to be green which is fine for St Patrick’s Day. 150 grams of orange peel will probably make prettier loaves but with less orange sweetness. Allow the homemade orange peel to dry at least 24 hours or more. Plan ahead to made it several days in advance. I used Cathy candied orange peel process found here (https://www.breadexperience.com/making-candied-orange-peel/)
My first bake I used a total of 510 grams flours made up of 255 grams organic AP, 100 grams white whole wheat and 155 grams bread. My second bake I used 260 grams organic AP and 250 grams white whole wheat. While both bakes gave me dense loaves, I believe the bread flour bake gave me a slightly less dense loaf.
CANDIED ORANGE PEEL: When I was in high school, I remember my mother making candied grapefruit peel to give as Christmas gifts one year. Her comment was it was spectacular, certainly the most spectacular thing she had ever made and she would never do it again…and she didn’t. I will tell you I cursed most of the five hours it took for me to remove the pith from the rind. I followed Cathy’s candied orange peel recipe HERE. The orange peel I bought was dramatically fatter (contained lots of pith). It was bitter when tasted alone and much less sweet when baked in the bread. Still, the friend I gave a loaf of the second bake loved the bread. Would I do it again … maybe, it would depend on how gracious I was feeling. When I used the homemade orange peel, I baked with it the following morning. Kneaded in, it caused the dough to come apart and took considerable time to come back together.
Cathy admonished us not to cheat on the orange peel. Being the Babe I am of course I had to increase what was called for in the recipe. Yes I used 200 grams. The increased amount made it harder to incorporate it into the dough and probably caused a more rustic and rougher surface (less pretty) but I think the addition was worth the exponential increase in taste. The first bake I added the matcha with the salt. It took considerable kneading to get an even distribution. The second bake I added the matcha with the flour. I will add it to the flour from now on and have changed the directions to reflect that.
First Bake on left, 2nd Bake on right.
Green Tea and Orange Loaf
Recipe From: Cathy (breadexperience) Adapted from The Larousse Book of Bread by Eric Kayser Yield: 4 small loaves Levain 50 grams all-purpose flour 50 grams water 25 grams sourdough starter (I used 100% hydration starter)
Final Dough 500 grams all-purpose flour, plus more for dusting 250 – 300 grams water, divided 125, 125, 50 10 grams salt + 15-20 grams water 30 grams olive oil 25 grams orange flower water 10 grams (2 tsp) matcha tea powder 150 grams candied orange peel, chopped or finely diced
There are two ways to incorporate the starter in this bread. 1) Feed your sourdough starter the evening before you plan to bake, let it rest overnight at warm room temperature, then use 100 grams of the fed sourdough in your loaf. If you choose do use the fed starter without creating a levain, you may need less water. Cathy actually used more water with this method. 2) Create a levain. This method is presented below.
Levain
In the evening of the day before making the bread: Place the starter, flour and water in a small bowl. Mix with a wooden spoon until the flour is stirred in well. Cover the bowl with a plate, or bees wrap, and let it rest overnight in a warm place.
Final Dough
1. Pour 125 grams water, orange blossom water and olive oil over the levain. Mix completely to break up the levain.
2. In a large bowl, add the flour and matcha. Pour the levain/water mixture over the flour and mix to incorporate. Add the rest of the water, gradually, and as needed to fully hydrate the dough. I used the 300 grams.
Cover, and let the dough rest for 20-30 minutes, then sprinkle the salt over the top and dissolve it with 15 grams of warm water.
3. Cover, let rest for 30 minutes, then fold in the candied orange peel and knead the dough until it becomes smooth, and elastic. Add more water if the dough starts to tear. My dough tore horribly and required more kneading to come back together. Note: Cathy’s dough was sticky after adding the candied orange peel and almost too dry up until that point. My dough never seemed dry. Shape into a ball, cover, proof for 2 hours. Stretch and fold the dough after 1st hour. Let rest for final hour. It should increase in volume by the end of the final proof.
On left: very moist adding orange peel. On right: broken up after adding salt in 20 grams water 1st bake. Did better 2nd bake with just 10 grams water.
4. Remove the dough to a lightly dusted work surface. Divide the dough into 4 equal pieces, about 300 grams each. Cathy’s divided into 260 grams each. Shape into balls, cover with a dish towel and let rest for 15 minutes.
5. Roll the dough pieces between your hands to create tension, and form smooth and well-rounded boules. Place the loaves, seam-side down on a parchment-lined baking sheet. Cover with a damp cloth and let proof for 1 hour 15 minutes. I allowed mine to proof for 2 hours. I put the four loaves on parchment and covered them with a large stainless steel bowl that also then was used to cover them in the oven.
6. Preheat the oven to 450 degrees F. with a baking stone on the bottom shelf . Score the loaves in a crosshatch pattern (or the pattern of your choice). Transfer the loaves on the parchment to the preheated oven. Then place covering pan/bowl on top. Bake for 18 minutes. Mine took an additional 16 minutes to come to an internal temperature of 200°F. Whole grains take longer to bake. Don’t burn them. Remove from the oven and leave to cool on a wire rack.
Would you like to bake with us?
Bread Experience is the host kitchen for March, and would love for you to make this Green Tea and Orange Loaf with us! You’ll get your own Buddy Badge! Plus a delicious bread to enjoy.
Bread Submission Guidelines:
Just bake your version of this bread and post about it on your blog (by March 29th).
If you don’t have a blog, no worries, just post a photo in the Bread Baking Babes Facebook Group
Mention Bread Baking Babes with a link to the Kitchen of the Month, that’s – Cathy of Bread Experience.
Then send an email to breadexperience (at) gmail (dotcom) with BBB Green Tea and Orange Loaf, and Cathy will send you your Buddy badge to display on your blog.
If you make your own or buy the candied orange peel, I know you will enjoy this bread!! Go for it.
I don’t know about where you are but where I am it’s dark really early. Before 6 in the evening the sun is long gone and it’s gotten to dark. Our Kitchen of the Month, Judy, has picked a wonderful roll/bun to light up the short early dark days of December! Saffron is the spice to provide the light. These are a traditional Christmas celebration bread in Italy and Scandinavia.
I found this a wonderfully silky dough to work even using a lot of white whole wheat flour. I always try to bake with some whole grain flour.
Why did I feel compelled to convert this to a sourdough? I think just because I’ve recently gotten a sourdough going again and so I’m trying hard to keep it going. The way I did the sourdough does add considerable time to the process and I’m sure if you follow Judy’s yeasted recipe you’ll have these little bun coming out of your oven much sooner. Still I really enjoyed the longer time and am totally delighted with the end product.
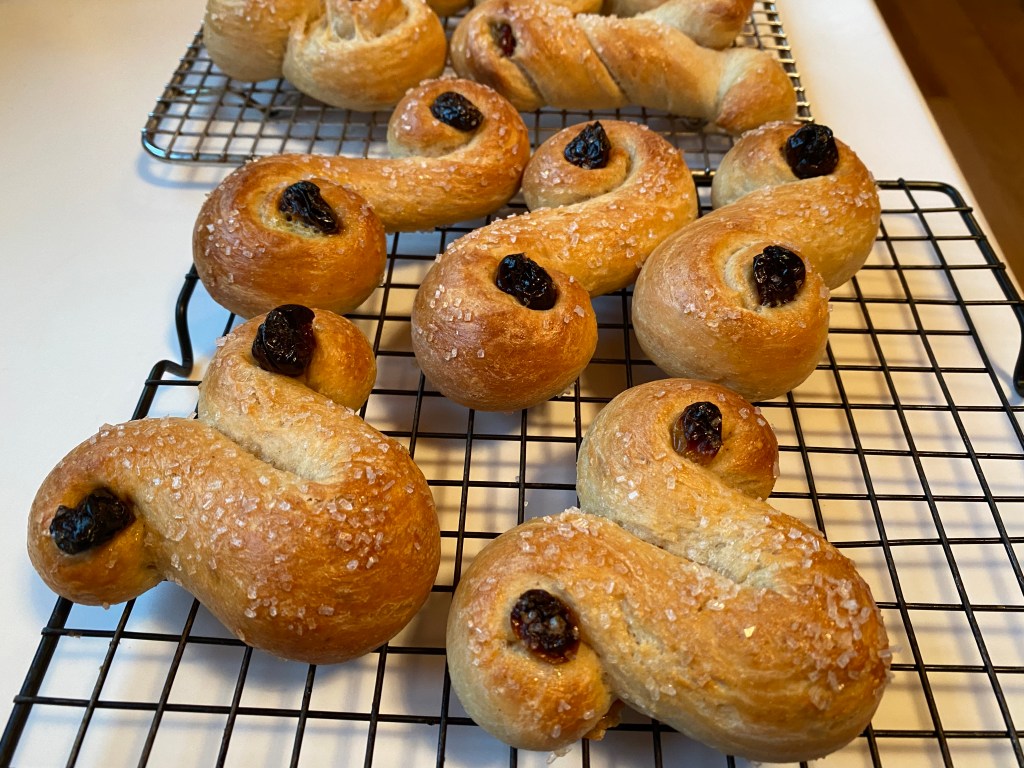
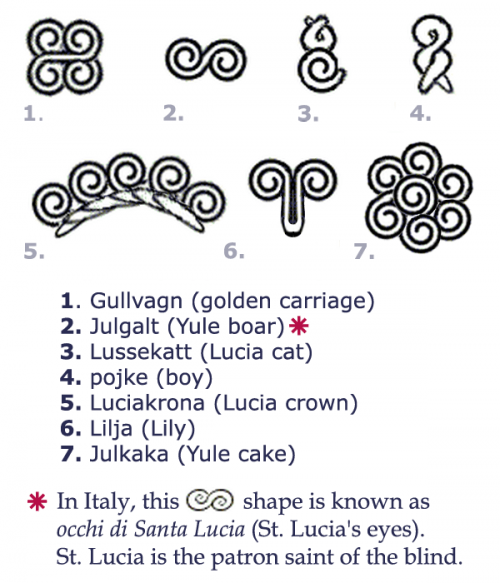
My only regret is when I got to the shaping and my hands were deep into this I’d forgotten the simple shaping of making these into cats. I really want to do that next time. I think Elizabeth will be doing cats but won’t be posting yet for several days. Maybe one/some of the other Babes will be doing the cat shape but I’m sure one/some will have some variety so check them out.
The shapes are really pretty self explanatory and simple to do.
St. Lucia Saffron Buns, Lussekatter
Yield: 18 rolls
LEAVEN 60 g starter 70 g water 60 g white whole wheat DOUGH All of the above leaven 105 g water 1/4 teaspoon saffron threads 3 tablespoons King Arthur dry milk powder 220 g white whole wheat 120 g bread flour 110 g AP flour 1/2 teaspoon kosher salt 1/2 teaspoon ground cardamom 56 g unsalted butter, softened 60 g of sour cream 30 g wildflower honey 2 large eggs Raisins, currants, dried cherries, cranberries, blueberries GLAZE 1 egg, beaten
The night before mix together the leaven. Cover and leave at room temperature for 10 to 14 hours until bubbly.
Warm water and saffron in microwave about 20 seconds. (I held the butter for the second fold, next time I may try adding it when I’ve finished kneading it the first time and before starting the folding). Stir in the honey, sour cream and eggs until blended. Let cool until about 80-90°F, or warm to the touch.
Whisk flours, dry milk powder and cardamom: I held out the salt until after the first folding.
Make a well in the center of the flour and add the saffron-water mixture, the eggs, and the sour cream. Mix the ingredients until well incorporated.
Knead the dough: Knead to incorporate. Do this until the dough is still a little sticky to the touch, but does not completely stick to your hands when you handle it.
Let dough rise: Shape the dough into a ball and place in a large bowl. Cover. Butter and salt: I added these at the second fold. The dough really came apart. Next time I will add Butter and Salt earlier: after kneading let rest 20 minutes then add butter & salt. Let sit in a warm place for 2-3 hours, Do at least 2 fold about 45 minutes apart then let the dough rest until about doubled. This dough became silky smooth, lovely to work.
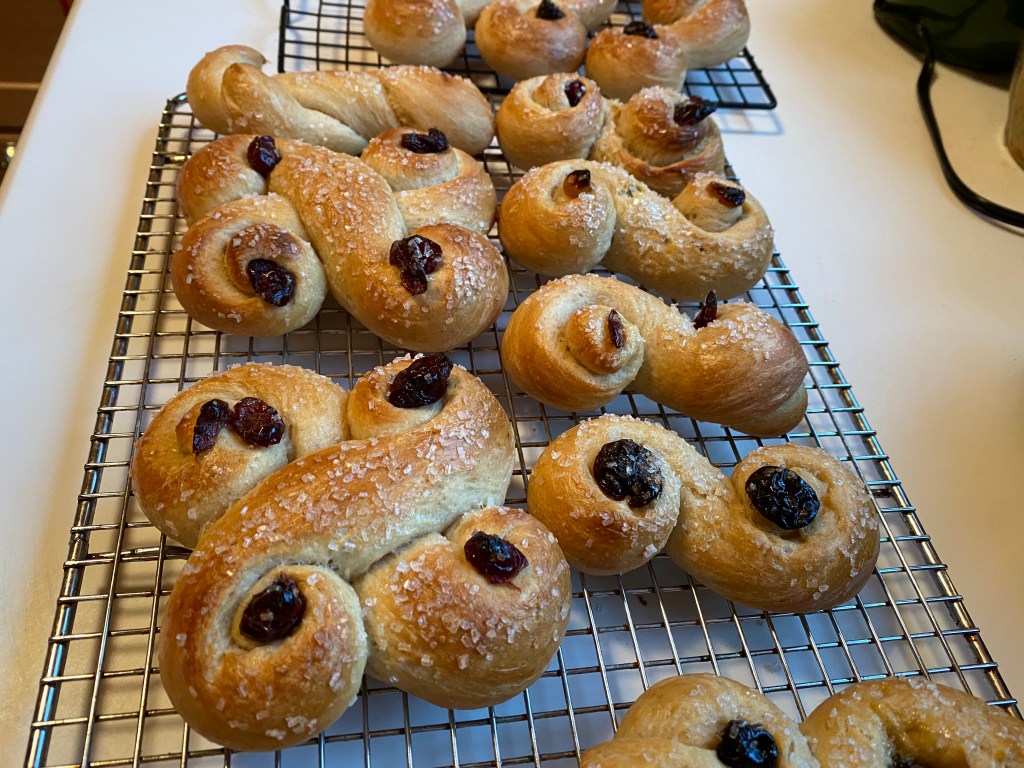
Form dough into shapes: When the dough has doubled in size, gently press it down and knead it a couple of times. I weighed the dough and divided by 18 which required each roll to weight about 60 grams. Break off a piece and form it into a ball about 2 inches wide. Roll the ball out into a snake, about 14 inches long. Then Curl the ends in opposite directions, forming an “S” with spirals at each end. Place on a lined baking sheet and repeat with the rest of the dough. There are a number of shapes commonly accepted for these rolls.
Let sit for final rise: Cover and place in a warm spot until the dough shapes double in size, mine took an hour.
Brush with egg wash, place raisins in buns: Preheat oven to 400°F (205°C). Using a pastry brush, brush some beaten egg over the tops and sides of the uncooked buns. Place raisins, cranberries or cherries by really poking them in deeply otherwise they may well jump ship.
Bake: Place in the oven and bake at 400°F (205°C) for about 18 to 20 minutes (turning halfway through cooking to ensure even browning), until the buns are golden brown. Remove from oven and let cool for 5 minutes before eating.
Would I do these again? In a heart beat. The shapes can be varied easily and are all interesting. The sparkling sugar gives the buns just the perfect crunch and sweetness along with the honey. I would try a little more saffron next time as I really didn’t taste or even see much of it in the bun. These are just beauties.
If you wish to bake with us as a Buddy, please submit your post and photos by December 29th to be included in the roundup and earn your baking badge. Send to jahunt22 at gmail.com.
Visit the other Babes to check out their versions of Lussekatter.
Totally an Awesome bread, just slightly sweet. Thank you Aparna!
History and origin may call this an Easter bread but I say it’s nice just about anytime. It makes terrific toast with tea or coffee, morning, noon or night.
Two cautions:
I got a nice oven rise with this but with all bread flour I think it might have been truly huge and so … as Aparna did, placing a ramikin or ring in the middle might be a good idea to keep a hole open in the middle of the ring.
Aparna saw no reason to toast the almonds before baking and neither did I: this is baked with the almonds on top at 400°…how are they not going to toast? As Karen said, watch this and cover with foil so that it doesn’t get too dark.
Aparna Balasubramanian April 2019 from Ultimate Bread Eric Treuille & Ursula Ferrigno
Yield: one round
This slideshow requires JavaScript.
DOUGH:
2 teaspoons dry yeast
1/2 cup lukewarm milk
430 grams 1/2 bread flour; 1/2 AP
35 grams ground flax seeds
2 teaspoons salt
3 tablespoons maple sugar
grated zest of 3 lemons
113 grams unsalted butter, softened
3 eggs, beaten
1/2 cup water
TOPPING:
4 teaspoons ground cinnamon
3 tablespoons maple sugar
1 cup blanched almonds, roughly chopped
1 egg yolk
1. Mix the flour, yeast, salt, sugar, and lemon zest in a large bowl. Make a well in the center of the mixture and add the butter, eggs, and milk.
I’m trying to use up what is on hand and only had 1/2 the bread flour called for so used AP.
2. Mix in the flour from the sides of the well. Add the water 1 tablespoon at a time, as needed, to form a soft, sticky dough.
I used all the water called for.
3. Turn the dough out onto a lightly floured work surface. Knead until smooth, springy, and elastic, about 10 minutes.
4. Put the dough in a clean bowl and cover with a dish towel. Let the dough rise until doubled in size, about 4 hours. Punch down the dough, then let rest, covered with a dish towel, for about 10 minutes.
5. Divide the dough into two equal pieces and roll each piece into a 16-inch-long rope. Twist the two dough ropes together.
6. Place the dough rope on a buttered baking sheet. As you might see here, I used a skillet. Shape it into a ring by bringing the two ends of the rope together. Pinch them to seal and cover with a dish towel. Proof until doubled in size, about 11 ⁄2 hours.
7. To make the topping mix the cinnamon, sugar, almonds, and egg yolk in a bowl. I used my hands to spread the mixture as evenly as possible over the top of the ring.
8. Bake at 200C (400F) in the preheated oven for 45 minutes, until golden -cover with foil to prevent it getting to dark- and hollow sounding when tapped underneath. Cool on a wire rack.
We would love for you to try out this recipe and join in as a buddy baker this month! This is a wonderful bread to quickly bake. You don’t have to have a blog to participate, a picture will do. Just send a picture or your post of your finished bread to comments my kitchen at mac dot com, along with a photo and your baking experience by April. 30 and be sure to put BBBuddy in the subject line. You will receive a Bread Baking Buddy graphic to keep or add to your post, and be included in our Buddy round up at the end of the month. New recipes are posted every month on the 16th. Check out our Facebook group to see the participants’ baking results during that time.
These were fun and easy to put together. We enjoyed them, friends thought they were excellent. The sugar is perfect in these, not over the top sweet but still a treat.
Pat from “Feeding My Enthusiasms” found and adapted this from a recipe by Robert Jorin, of the Culinary Institute of America at Hyde Park, NY
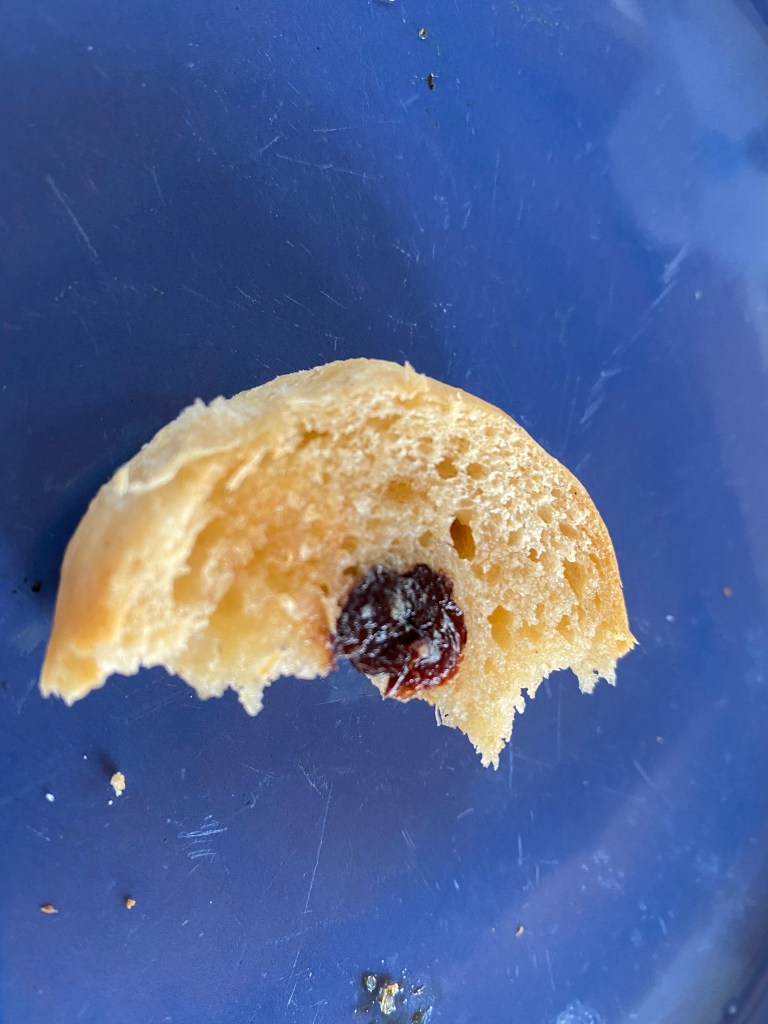
The spice is perfect and the cherries were excellent. The grandkids would think these were fabulous and they could participate.
For my part, this is not the way I would want to use my sugar calories so I probably won’t make them again. Besides, since I grew up with my Dad’s fresh fried yeast doughnuts, not much else comes even remotely close. I am glad to have baked them so I thank you Pat.
BBB ~ Baked Cherry Doughnuts
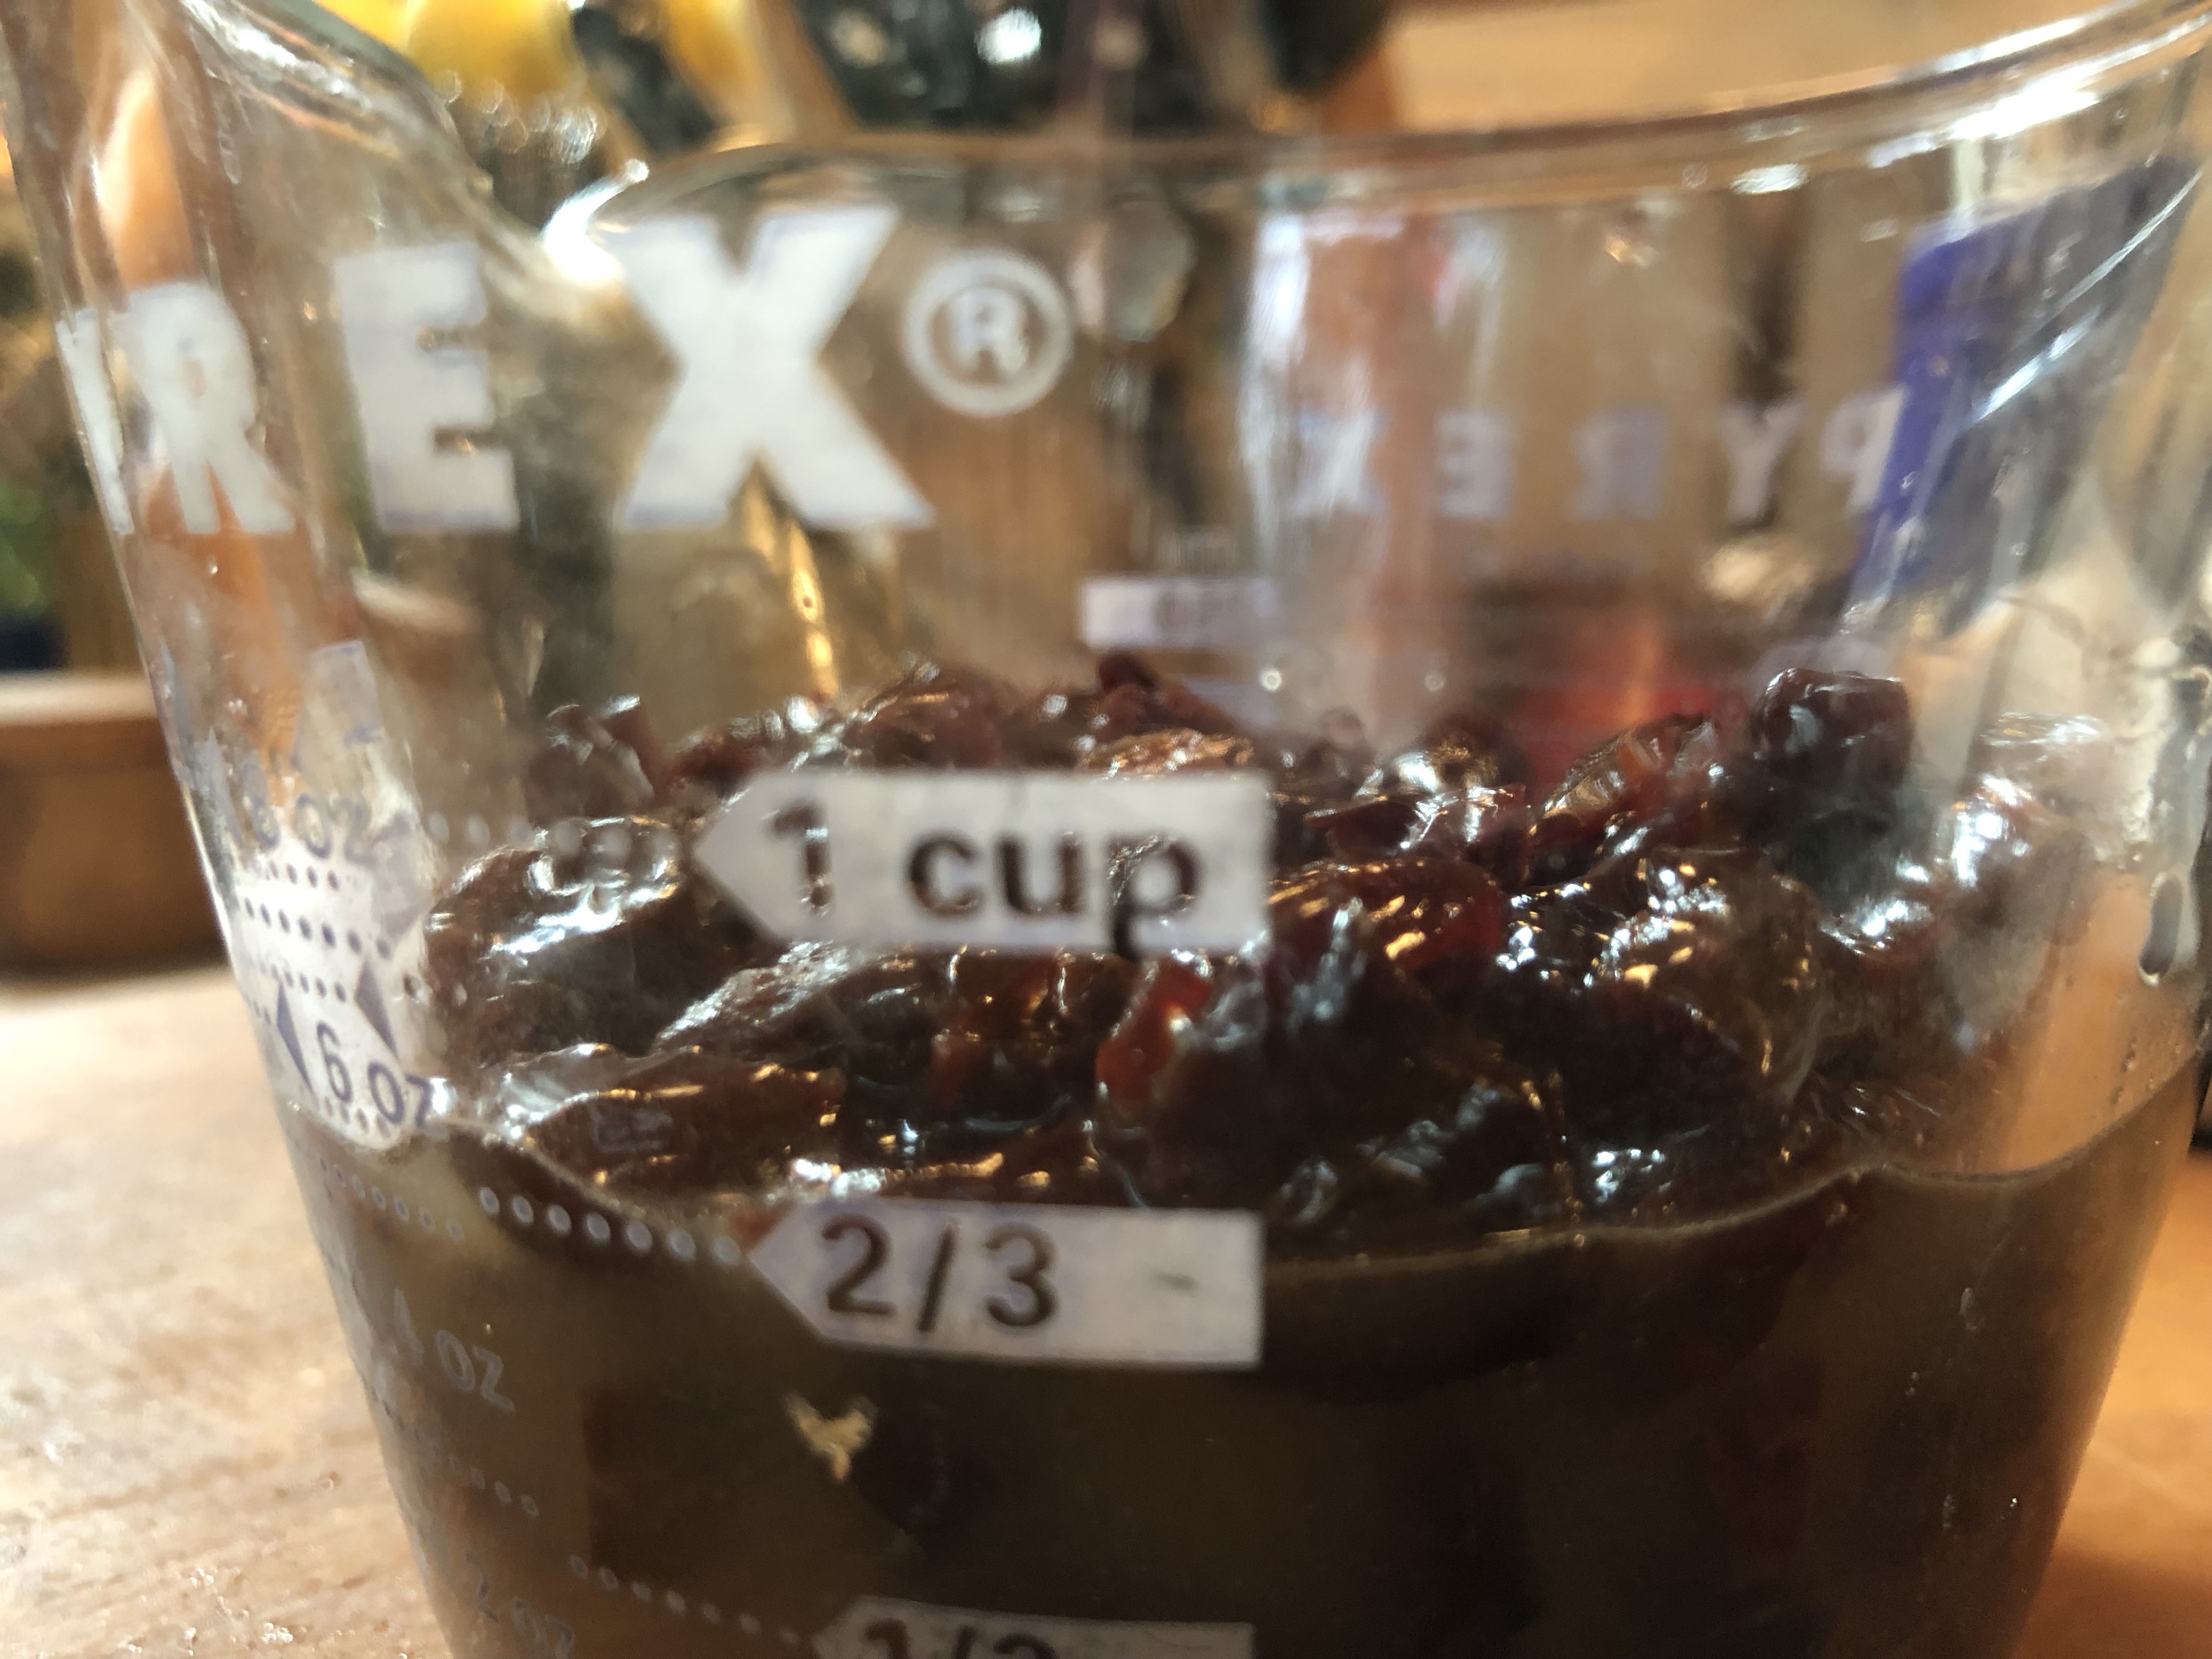
1 cup dried Michigan cherries
1 quarter oz. (1/4 ounce) packet active dry yeast
2 tablespoons warm water
1/4 cups brown sugar
3 cups all-purpose flour (I added about another 1/2 cup in 1 tablespoon increments)
I had no AP flour so used: 130 grams bread flour, 250 grams whole wheat pastry flour + extra bread flour about 1/2 cups
3/4 teaspoon freshly grated nutmeg
1/4 teaspoon ground cinnamon
3/4 cup milk all I had was buttermilk, warmed
1 large egg plus 1 large egg yolk
113 grams unsalted butter, softened, plus 4 tablespoons melted butter
2 teaspoons kosher salt
parchment paper
1. In a medium bowl, cover currants – or diced dried fruit of your choice – with hot water and let stand until softened, 20 minutes.
2. Meanwhile, in a small bowl, stir yeast with 2 tablespoons warm water and a pinch of sugar and let stand until foamy, 5 minutes.
I have not done this for years. I simply add the yeast to the flour and the liquid all at once.
3. In bowl of a stand mixer fitted with dough hook, combine flour, nutmeg, and cinnamon with 1/4 cup of sugar. Add milk, egg, egg yolk and half of softened butter; beat at low speed for 3 minutes. Beat in yeast mixture, then add salt. Beat dough at medium speed until soft and silky, about 8 minutes; the dough should pull cleanly away from bowl.
My KitchenAid mixer is still packed and I believe in the shed. I didn’t really have any problem mixing this by hand. I did add extra flour before it became a silken dough.
4. With machine on, add remaining softened butter to dough in walnut-sized lumps, beating at low speed between additions until incorporated.
5. Drain Michigan dried cherries in my case, pressing out any excess water. Add to dough and beat in at low speed.
6. Transfer dough to a greased bowl, turn to coat dough with grease. Cover and let stand in a warm place until doubled in bulk, 1 hour. Punch dough down, form into a ball, and return to bowl. Cover and let stand until billowy, 1 hour.
7. Grease two large baking sheets. (Or line with parchment or foil.) Turn dough out onto lightly floured work surface & cut it into 12 equal pieces. Pinch each piece into a ball and arrange six balls on each prepared baking sheet, smooth side up. Cover with plastic wrap and let stand for 10 minutes.
8. Using lightly floured hands, press each ball into a flat 4-inch disc. Using a 1 1/4-inch round cutter stamp out center of each disc. Return holes to baking sheets. There will be six donuts and six donut holes on each sheet. Cover loosely with plastic wrap and let stand for 1 hour, until risen slightly.
9. Preheat oven to 400 degrees F. Position racks in upper and lower thirds. Bake donuts and holes for 25 minutes, shifting pans from top to bottom and front to back halfway through baking time. Donuts are done when they are golden and puffy and when the internal temperature at thickest part registers 200 degrees F.
10. Spread sugar in a shallow bowl. Brush hot donuts and holes on both sides with melted butter and dredge them in sugar. Transfer to a serving dish and serve at once.
And yes I used the crunchy sparkling sugar! that is worth the WOW.
Hope that you enjoy these between now and December 29th…which will get here sooner than you think. If you do, send Pat an email at plachman at sonic dot net along with a photo and your baking experience and she’ll include you in the Buddy post, plus send you a gorgeous Buddy Badge designed by Elizabeth.