MyKitchenInHalfCups

Once Upon a time: Cooking … Baking … Traveling … Laughing …


11 Comments

BBB ~ Arkatena Bread

Arkatena Bread

Our kitchen of the month today is Elizabeth, blog from our Kitchen.  Some say this is a difficult bread … I found it very cooperative in coming together.  I was surprised that you could get a starter in just three days with the chickpea flour!  The recipe Elizabeth has brought us is based on Andrew Whitley’s recipe for Arkatena Bread in “Bread Matters”, p.190-193.  I had this book on my iPad and tended to follow those recipe amounts but Elizabeth’s directions.  The places I deviated you’ll see underlined.

What would I change: Instead of fennel seeds (which I do love) I’d use rosemary.  The fennel brings out a sweetness here that was nice just not what I was looking for.  This starter has a very strong aroma that I thought would benefit from the fennel but seemed totally absent from the final loaf.  I goofed using the fennel on the topping and should have made it sesame seeds.  I might up the salt slightly, certainly I would not cut back on the salt.

If you like bread with a hefty crust, chewy crmb and intense flavour, this one is for you. It is like french Country Bread gone rustic. It is amazing what a difference the addition of chickpea flour can make to a bread […] called arkatena and made with natural fermentation of chickpeas.

Arkatena Bread


IMG_0543.jpegPlease note that the Chickpea starter takes 3 days to create.

Chickpea Starter (3 day process…) 

  • Day 1
    • 30g chickpea flour (aka gram flour, garbanzo flour, besan)
    • 40g water
  • Day 2
    • all the starter from Day 1 (total of 70g)
    • 30g chickpea flour
    • 40g water
  • Day 3
    • all the starter from Days 1&2 (total of 140g)
    • 80g 100% wholewheat flour
    • 60g water

Leavener 

  • 50g white whole wheat flour
  • 50g chickpea flour
  • 150 bread flour
  • all the bubbling arkatena starter from above (total of 160)
  • 120g water

Actual Dough 

  • 100g white whole wheat flour
  • 300g bread flour
  • 20g ground flax seed
  • 300g water, divided (keep back 25g for adding the salt)
  • all the leavener
  • 10g sea salt
  • 2g fennel seeds

Topping 

  1. starter: In the late afternoon, three days before you will be baking the bread:
    • Put 30 grams chickpea flour (aka gram flour, besan) and 70 grams water into a medium-sized bowl. Use a wooden spoon to mix it together. Cover the bowl with a shower cap and wrap in towel to keep drafts off then left on counter with heat vent underneath – the counter is warmed by the vent. 
    • In the late afternoon, two days before you will be baking the bread: Use a wooden spoon to stir 70 grams chickpea flour and 30 grams water into the mixture in the bowl. Re-cover the bowl with a shower cap and leave on warm counter top wrapped in towel.
    • In the late afternoon, one day before you will be baking the bread: Use a wooden spoon to stir 80 grams wholewheat flour and 60 grams water into the mixture in the bowl. Re-cover the bowl with a shower cap and leave on warm counter. Andrew Whitley writes: After a few more hours fermentation, you should have a lively arkatena starter.
  1. leavener: In the late evening of the day before you will be baking the bread, put all the leavener ingredients into a medium-sized bowl and stir with a wooden spoon to create dough.
  2. Cover with a shower cap and left on a warm counter top. Whitley writes that this takes about 4 hours and that the leavener is ready when it has “expanded appreciably but not collapsed on itself“. Elizabeth:  I confess that I am not likely to pay strict attention to Whitley’s temperature formula and may simply use body temperature water instead of getting my thermometer out… :lalala: I am also assuming that the covered bowl of leavener will be happy to staying overnight in the oven with only the light on.  I paid no attention to the temperature formula.
  3. actual dough: In the morning of the day you will be baking the bread:
    • Put flours, wheat germ, the leavener, and all but 25 grams of water into a large mixing bowl. Stir with a dough whisk (or wooden spoon). Cover with a shower cap and set aside on the counter for 30 to 40 minutes.  Several of the Babes commented that they had a very loose dough that made for a flat loaf.  When I mixed this I thought it was DRY and might never come together but it finally did. At no time did I find this a loose dough, it held it’s shape very well for me. No idea why.
    • Adding the salt: In a small bowl, whisk the salt into the final 25 grams water. Pour the salt mixture over the dough.
    • Kneading: Use one of your hands to squoosh the salt and water into the dough; use the other hand to steady the bowl – this way you always have a clean hand. At first the dough might be a bit messy and seem like it’s coming apart. Persevere. Suddenly, it will seem more like dough than a horrible separated glop. Keep folding it over onto itself until it is relatively smooth. Cover with a shower cap and leave to rest for about 30 minutes.
    • Stretching and folding the dough: Turn the bowl as you fold and re-fold the dough into the center. Cover the bowl with a plate and leave on the counter (or if the kitchen is cool like ours in winter and spring, into the oven with only the light turned on). Repeat the folding step about 3 times in all at 30 minute intervals. You’ll notice that after each time, the dough will feel significantly smoother (in spite of the grains from the multi-grain cereal). After the final time of folding, the dough is ready to pre-shape.
    • Pre-shaping: Scatter a light dusting of all-purpose flour on the board and gently place the dough onto the board. Fold the dough over in half, gently patting off any extra flour that might be there. Continue folding in half until the dough is shaped in a ball. Cover with the bowl and let rest for about 30 minutes.
    • Shaping and adding the topping: Without breaking the skin, use the dough scraper on the sides to tighten the dough ball further. Once it has been tightened, run your hands under the cold water tap. Poke a hole the center of the ball to form a ring, then gently rub the top of the ring to wet it thoroughly. Cover the top with a single layer of sesame seeds. Lightly spray again before putting the shaped loaf onto a piece of parchment paper (or into a rice-floured brotform). Cover with the tea towel again and let sit for an hour or so to allow the loaf to almost double.
    • I used a glass to hold the hole open.  Ultimately the hole closed in baking.
    • Baking: To know when it’s time to bake, run your index finger under water and gently but firmly press it on the side of the bread. If the dough springs back immediately, recover the bread with the tea towel and leave it in the oven with only the light turned on. If the dough gradually returns back after being pressed, leave the tray on the counter. Put cast-iron combo cooker and/or baking stone on the middle shelf of the oven and preheat to 400F. When the oven is preheated about fifteen minutes later:
    • I used a metal disk covered with parchment paper to shape my loaf. I placed a parchment sling (long strip of triple fold parchment) under the metal dish so I could lift the loaf and drop it into my cast iron cooker. Worked like a charm.
    • Combo Cooker: Use the parchment paper to lift the shaped loaf into the frying pan part of the combo cooker. Immediately put the hot deep-sided pan of the combo cooker on top as a lid. Put the bread in the oven and immediately turn the oven down to 375F. Bake for 30 minutes with the lid on. After 30 minutes, remove the lid and continue baking for another 30 minutes, until the crust is a lovely dark golden brown and the bread sounds hollow when knuckle-rapped on the bottom.
      • Freeform on Baking Stone: Transfer the shaped loaf (including the parchment paper) onto the hot stone. Place an overturned stainless steel mixing bowl to cover the bread. Immediately turn the oven down to 375F. Bake for 30 minutes with the lid on. After 30 minutes, remove the lid and continue baking for another 30 minutes, until the crust is a lovely dark golden brown and the bread sounds hollow when knuckle-rapped on the bottom.
    • Cooling: When the bread has finished baking, remove it from the oven and allow it to cool on a footed rack before slicing and eating. The bread is still cooking internally when first removed from the oven!
    • I measured the internal temperature at 205° and took it out of the oven.  In future I might leave it a little higher by 3 or 4 degrees.  Whole grain breads always need a higher internal temperature than white flour.
    • If you wish to serve warm bread (of course you do), reheat it after it has cooled completely: To reheat any uncut bread, turn the oven to 400F for 5 minutes or so. Turn the oven OFF. Put the bread into the hot oven for about ten minutes. This will rejuvenate the crust and warm the crumb perfectly.

We are enjoying this bread! just sliced, as avocado toast and for meatloaf sandwiches and just buttered toast.

I know that in spite of all the warnings that it’s so drastically difficult, you’ll want to make this bread! To receive a Baking Buddy Badge to display on your site: make Arkatena Bread in the next couple of weeks and post about it (we love to see how your bread turns out AND hear what you think about it – what you didn’t like and/or what you liked) before the 29 January 2020.

Here’s how to let us know:

  • email Elizabeth
    » Remember to include your name and a link to your post
    » Please type “BBB January 2020 bread” in the subject heading

Please note that it’s not enough to post about your bread in the Facebook group. Because of the ephemeral nature of Facebook’s posts, your FB post may be lost in the shuffle. Please email if you want to be included.

If you don’t have a blog or flickr-like account, no problem; we still want to see and hear about your bread! Please email me with the details, so your Arkatena bread can be included in the roundup too.


8 Comments

BBB ~ Apple Bread with Cider and Calvados

What are the things in your kitchen that you’d say are super time savers and so become a favorite thing.  When I baked this bread I put myself in a tight place by not cooking the apples when the dough was shaped and on it’s final rise. Suddenly I needed to shape the bread and hadn’t chopped the apples yet .  My original plan was to use the grandmother’s  apple peeler, corer, slicer and then chop the slices … Or I would get out the big real mandoline and slice the apple … my timing was off, I didn’t want to go through all that … what to do?

Enter the Adjust-A-Slice and Julienne Mandoline. I saw this about a year ago on Amazon, it was getting rave reviews and my kitchen was still not together. As I remember it was under $20, now I think its gone up slightly and is under $24. But I still buy it for gifts because it is a wonder tool and now one of my favorite things. I use it to chip my chocolate (1 teaspoon chips into my morning coffee ~ it’s medicinal you know), I use it to julienne carrots, radishes, zucchini you name it and throw them into salads.  I used my corer which sits next to this simple mandoline in a drawer to core the apple and made short work of chopping the julienne sticks; the plate went into the freezer for a quick chill and I was ready to go!

Our kitchen of the month is Kelly at A Messy Kitchen. She’s got the original recipe and a great alteration for making just one loaf on her site.


Apple Bread with Cider and Calvados (makes 2 loaves)

Poolish:

¾ tsp yeast

500 grams apple cider

160 grams bread flour

200 King Arthur Irish Whole Meal flour

Final Dough:

1 tsp yeast

300 grams apple cider

200 grams bread flour

200 Irish Whole Meal flour

100 grams coarse rye flour

3¾ tsp sea salt

Add-ins:

200 grams Granny Smith

20 grams butter

1 tablespoon demerara sugar

50 grams boiled cider

Poolish:  Whisk flours and yeast.  Add cider and mix well.  Cover with shower cap and leave to rise for at least 4 hours at room temperature or overnight in the fridge.  The poolish is ready when a cavity has formed in the middle.

Kneading:

Whisk flours and yeast, add poolish and apple cider (if this is apple bread, I decided apple cider was better than water).  Knead well; about 10 minutes by hand.  Add the salt; I sprinkled it on the counter much like I would have if I’d needed to add flour to the dough.  Knead until very elastic .

Place dough in a lightly oiled lidded plastic container and leave for 90 minutes.

Add-ins:

Peel and dice the apple(s).  Melt butter and sugar in a frying pan; add the chopped apple and fry until golden brown.  Add apple cider (the calvados, I do love it but there was none to be found here) and boil until the mixture is dry.  Leave to cool.

Press the mixture into the risen dough.  Divide into two and form oblong loaves without first making a ball. Place on a tea-towel dusted with flour and pull the cloth up between the breads.

I covered the loaves with bowls and allowed to rise until doubled in size, about 75 minutes.

Preheat the oven with baking stone to 475ºF.

Place the loaves directly on the stone and mist with water.

Lower the temperature to 400ºF after 5 minutes.  Open the oven door after another 10 minutes to let some air in. Nice oven spring.

My loaves baked for 60 minutes and reached 207°F.  Even though I made smaller loaves (I had three) because I used so much whole grain, I knew this would take longer than the original recipe. Photos look really dark but they did not burn.

Take out the loaves, I brushed with butter and allowed to cool on a wire rack.

m%tJW4eURCyMBeTEOCUM5Q

We would love for you to try out this flavorful and seasonal recipe and join in as a buddy baker this month!  You don’t have to have a blog to participate, a picture will do. Just send a picture or your post of your finished loaf to me at eleyana (AT) aol (DOT) com by the 31st of this month. Be sure to put BBBuddy in the subject line. You will receive a Bread Baking Buddy graphic to keep or add to your post, and be included in our Buddy round up at the end of the month.  New recipes are posted every month on the 16th. Check out our Facebook group to see the participants’ baking results during that time.


9 Comments

Tootmaniks Gotovo Testo ~ BBB ~ Bake Me!


11 Comments

Shubbak el-Habayeb ~ BBB

BBB ~ Shubbak el-Habayeb ~ Lover’s Window
IMG_2108

One of my tasters described Shubbak el-Habayeb in this way “Kept drawing me back.  Familiar but not.  Unidentifiable but I should know it.”  I found this to be a VERY compelling aroma and flavor.  If judgement didn’t intervene, you’d eat all 12 rolls at one sitting.

Yes, I have plenty of cookbooks and Yes, I have a multitude of bread books.  No, I do not NEED any more cookbooks or bread books.  YES, The Book of Buns by Jane Mason (Virtuous Bread) arrived in the mail today because it seems I do KNEAD another bread book! 
Who do I have to thank (blame) for this latest itch for another bread book?  BBB and Kitchen of the Month Karen of Karen’s Kitchen Stories.
When translated the name Shubak el-Habayeb means The Lover’s Window.  With a name like The Lover’s Window, you’d think there would be a story.  If there is I couldn’t find it. Now, as I think about how my taster described this and how I just wanted to keep eating this, that pretty much describes how you feel about a lover.  There’s your story.

Perhaps visually these might resemble some older factory windows I’ve seen but mostly they make me think of some oddly misshapen face with extra eyes. However, they seem to be sweet, kind eyes. I feel strange I’m having strange visions but these rolls are mysteriously exotic in all the right ways and pair well with elegant cheese and common peanut butter and jelly.
My crumb you can see on this is very tight.  I think that might be due to my using a majority of whole wheat flour and no sugar.  I’ll probably try adding a tablespoon of some sweetener next time (agave, honey or brown sugar) but I doubt I’ll reduce the whole wheat in fact I’m more likely to use all white whole wheat.
IMG_2116
Shubbak el-Habayeb ~ Lover’s Window
DOUGH
600 grams white whole wheat flour, 4 3/4 cups
1/2 teaspoon instant yeast
30 grams ground flax seed
100 g/1/2 cup sugar, omitted
1 cup buttermilk, scalded
2 large eggs
1/2 teaspoon orange blossom water
1/2 teaspoon rose water, omitted
1/2 teaspoon ground cardamom
1/2 teaspoon ground mahlab
1 tablespoon salt, cut this a little short
50 grams butter, 3 tablespoons melted and cooled
about 1/2 cup water, added to the dough by wetting you hands as you knead the dough.
For the Glaze
1 egg
1 tablespoon water
Pinch of salt
Pinch of sugar
Sesame seeds

IMG_2114
1. Pour the flour (I used 3 cups white whole wheat and 1 cup bread flour; held back 3/4 cup white whole wheat) into a bowl and whisk in the yeast.   Create a well in the middle and add the milk. Cover the full buttermilk with some of the flour from the sides. Cover the bowl with plastic wrap or a towel, and let rest for one hour. I used buttermilk because it was there, I didn’t scald it. I omitted the sugar on purpose: experience has taught me that adding cardamom to anything brings a sweetness that satisfies my taste. Next time I might, maybe add 1 tablespoon for the yeast but I was pretty happy with the rise on these.

2. Add the eggs, flower waters, cardamom, mahlab, and salt to the mixture in the bowl and mix with your hands to form a rough dough. Turn it out onto an unfloured counter, and knead for 10 minutes.

3. Add the butter, and knead for 10 more minutes. While kneading, if the dough is too stiff, dip your hands in the water, and continue to knead. Continue to dip your hands in the water until you have a supple dough. You can also do this with a dough hook, adding the water, one tablespoon at a time.
Since I held back the 3/4 cup white whole wheat, I didn’t really need to add extra water
IMG_1565

4. Place the dough into an oiled bowl and let rise in a warm spot, covered, for about two hours, until doubled.
I left mine two and a half hours to rise.

5. Turn the dough out onto a clean work surface. Divide the dough into 12 equal pieces and form them into balls. Cover with a towel or oiled plastic wrap, and let rest for 15 minutes.

6. Roll each ball with a rolling pin into a square that is about 1/2 inch thick. Cut the dough with a sharp knife to make short vertical cuts in each quadrant of the dough. Open the slits with your hands to make sure they are cut through.

7. Place the squares on baking sheets (you will need two sheet pans, prepared with parchment or Silpat), six squares per pan.

8. Cover each sheet pan with oiled plastic wrap, and let rise for one hour. In the meantime, preheat the oven to 425 degrees F (220 degrees C) with a rack in the middle of the oven.

9. Whisk together the glaze ingredients and brush the glaze over the rolls on one of the sheet pans. Sprinkle with the sesame seeds. Bake the first pan of rolls for 15 minutes, until golden. Remove them from the oven and cool on a wire rack. Repeat with the second pan of rolls.

http://www.virtuousbread.com
IMG_2126

The shape of these reminds me a little of Dhakai Bakharkhani/ Baqeerkhani (Crisp Flatbreads from Dhaka, Bangladesh) that we baked when Aparna was kitchen of the month but there the similarity ends.

If you make this recipe by the end of this month and send Karen a photo or a link to your blog post (if you don’t have a blog, just send a photo), you will be featured in a round up on her blog. She’ll even send you a fancy Buddy Badge! Send your contribution to her at karen.h.kerr@gmail.com, with the subject line, BBB. Please visit all of the Bread Baking Babes and check out their versions of this month’s recipe:

Come On! You KNEAD to bake these.


5 Comments

Pain Bouillie or Porridge Bread

The Village Baker introduces this bread in the following way:

“Whenever you see a French recipe that begins with the instructions “Faire une boiullie…” you know you have come across a very old recipe because it starts off with a mush made by pouring boiling water over flour.  The mush, which will ferment slightly overnight, is used the next day mixed into a bread.  The most fascinating recipe I have heard of for pain bouillie is one from the Alpine region of France around the town of Villar-d’Aréne.  The bouillie is made with dark rye flour and set aside to rest for seven hours.  The porridge is then mixed into a dough, without any yeast, and allowed to rest for another seven hours.  When the dough is finally made into loaves, they are placed in an oven that has already been used for bread and so the temperature is only about 200ºF.  The loaves bake for seven hours and the process produces a moist, dense, completely sourdough bread that last well over six months – or so the story goes.  The bread is traditionally made in November and it keeps best when stored in wine cellars and hay lofts.”

Now that is the kind of bread I really do love to wrap my brain around and then even my schedule … BUT (ah yes there is that proverbial but) I am just way beyond incredibly grateful to Kelly (A Messy Kitchen) for searching out such a wonderfully accessible alternative.  And I’m incredibly grateful to Joe Ortiz in The Villiage Baker for putting this one together. I do enjoy that book.  Perhaps one day I can bake the above Faire one boiullie but right now my life is too far out of control to do that.

img_1347

This bread got me back to baking with my Babes and put butter back on good bread!

I can’t remember when I ever weighted a loaf of bread I bake but I think I need to start.  When I looked at this recipe yield of 2 loaves 14 oz each, it gave me considerable pause. 

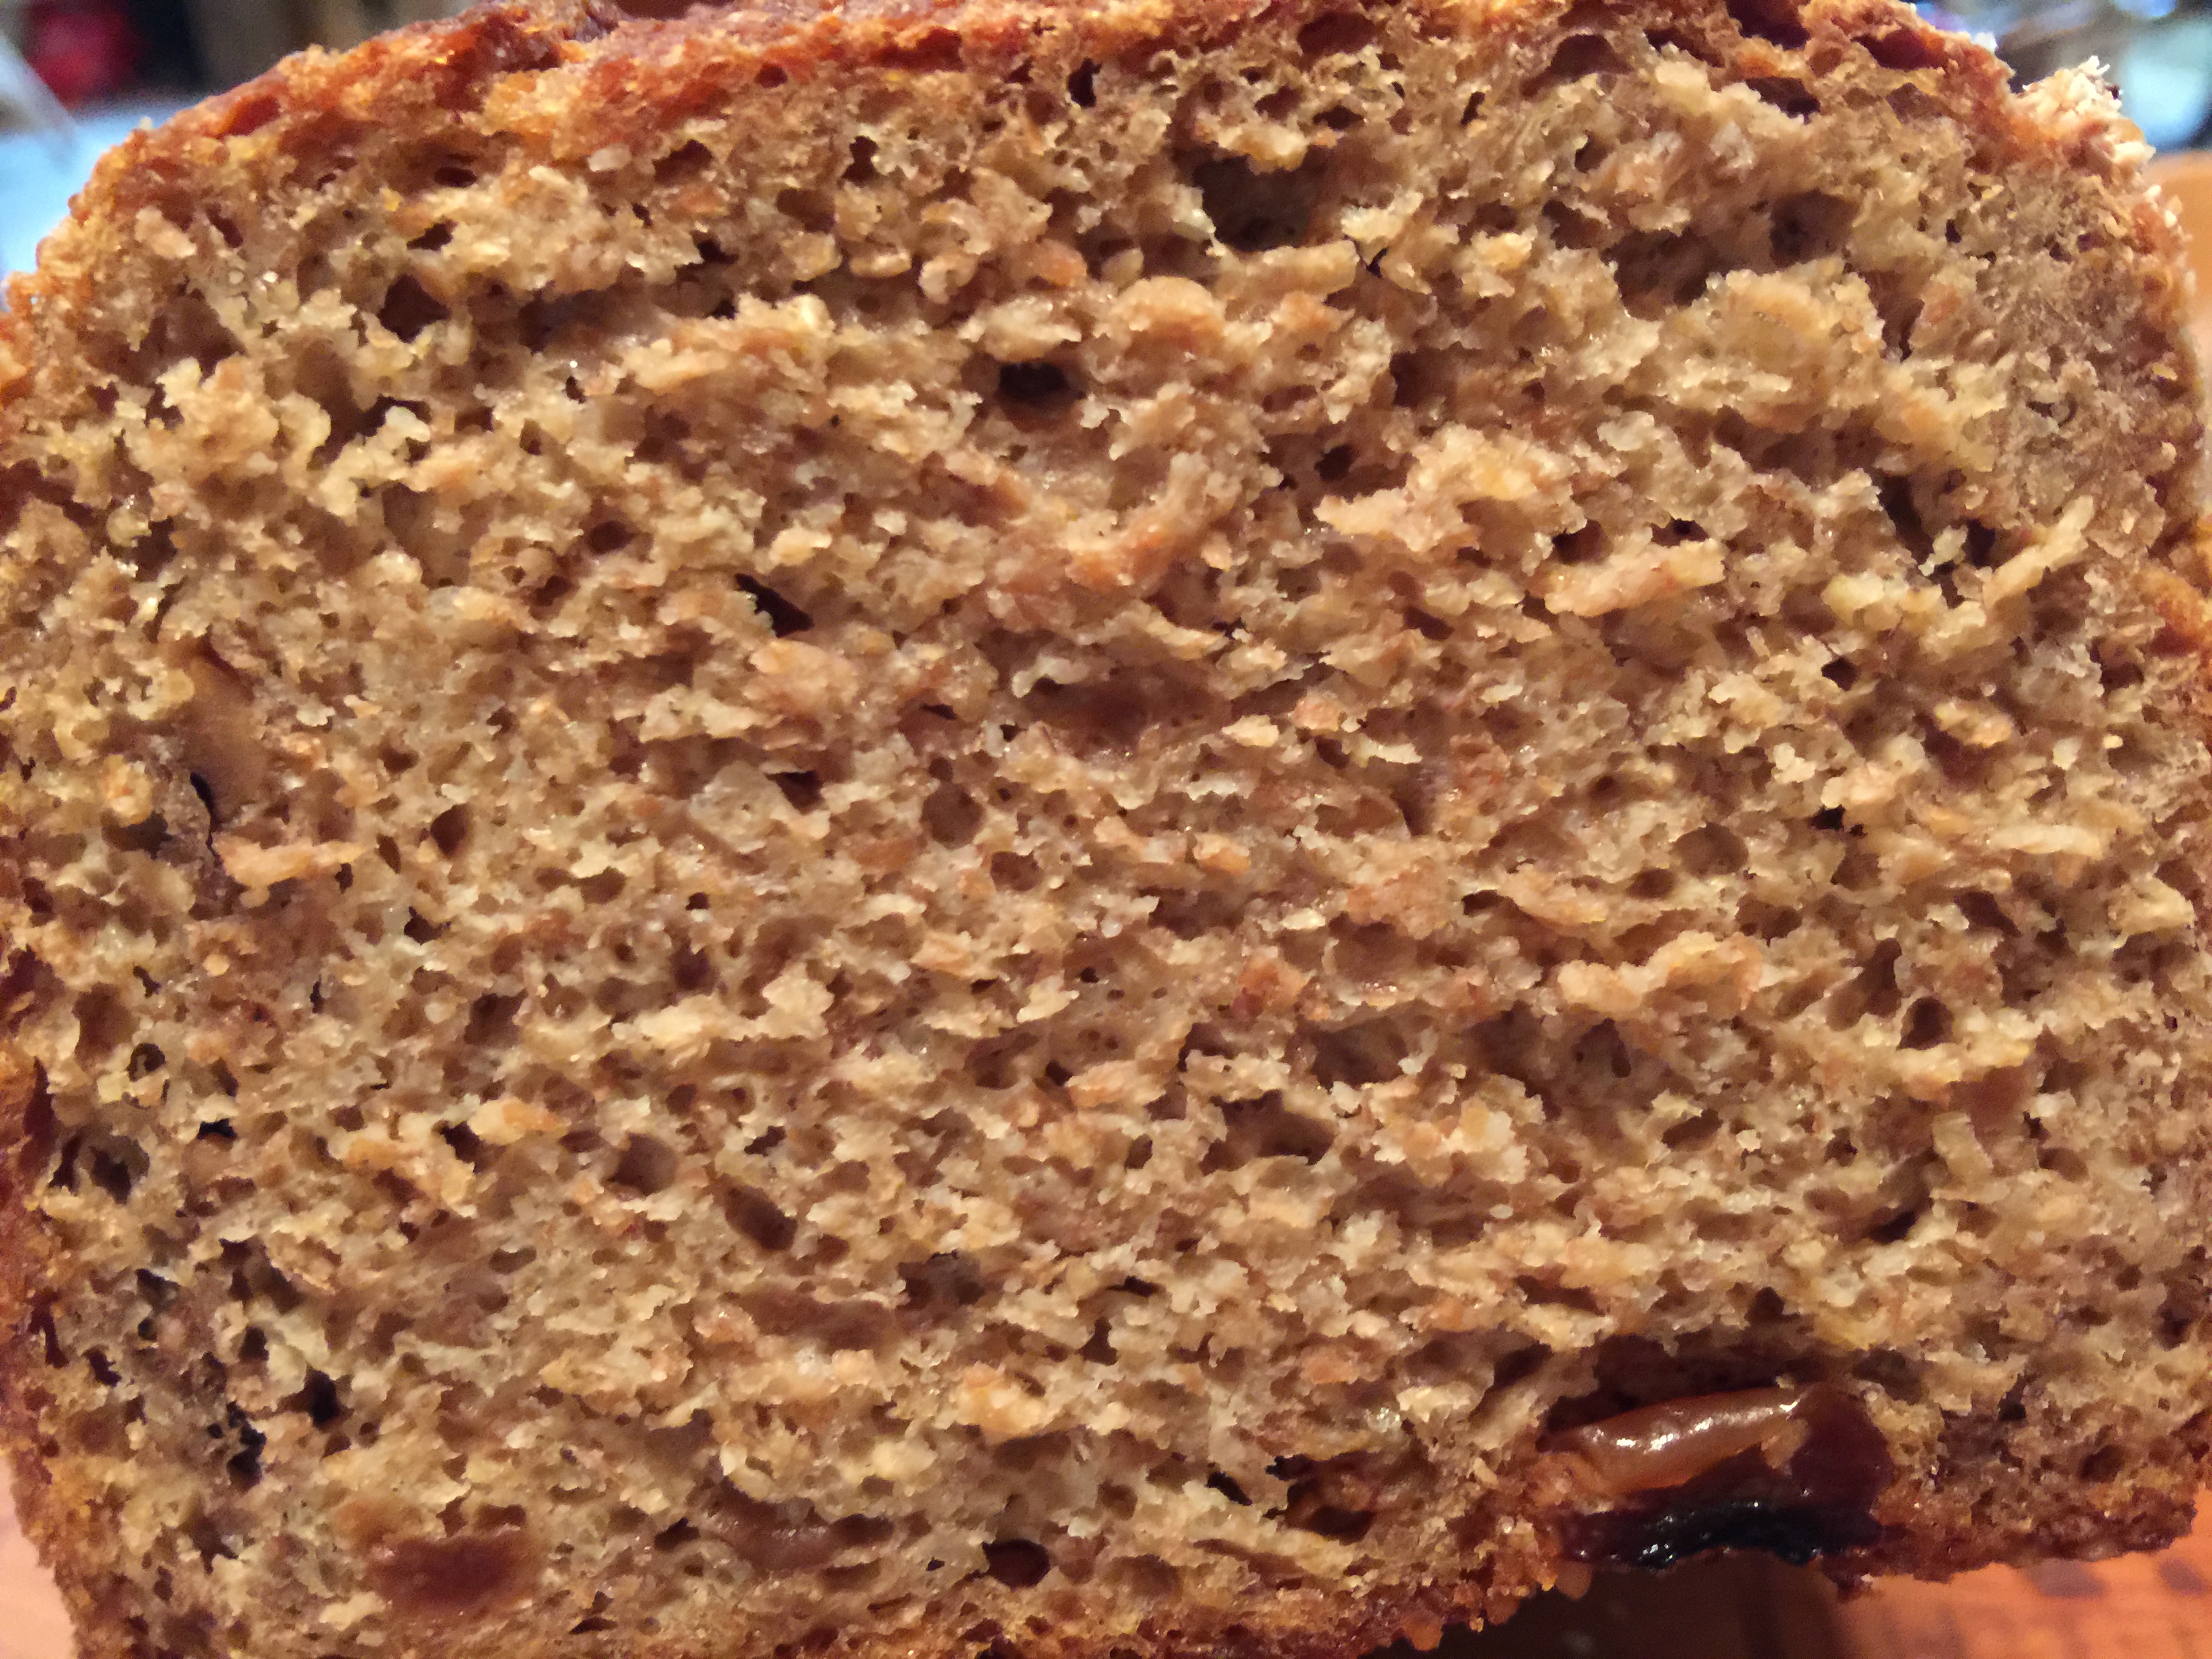
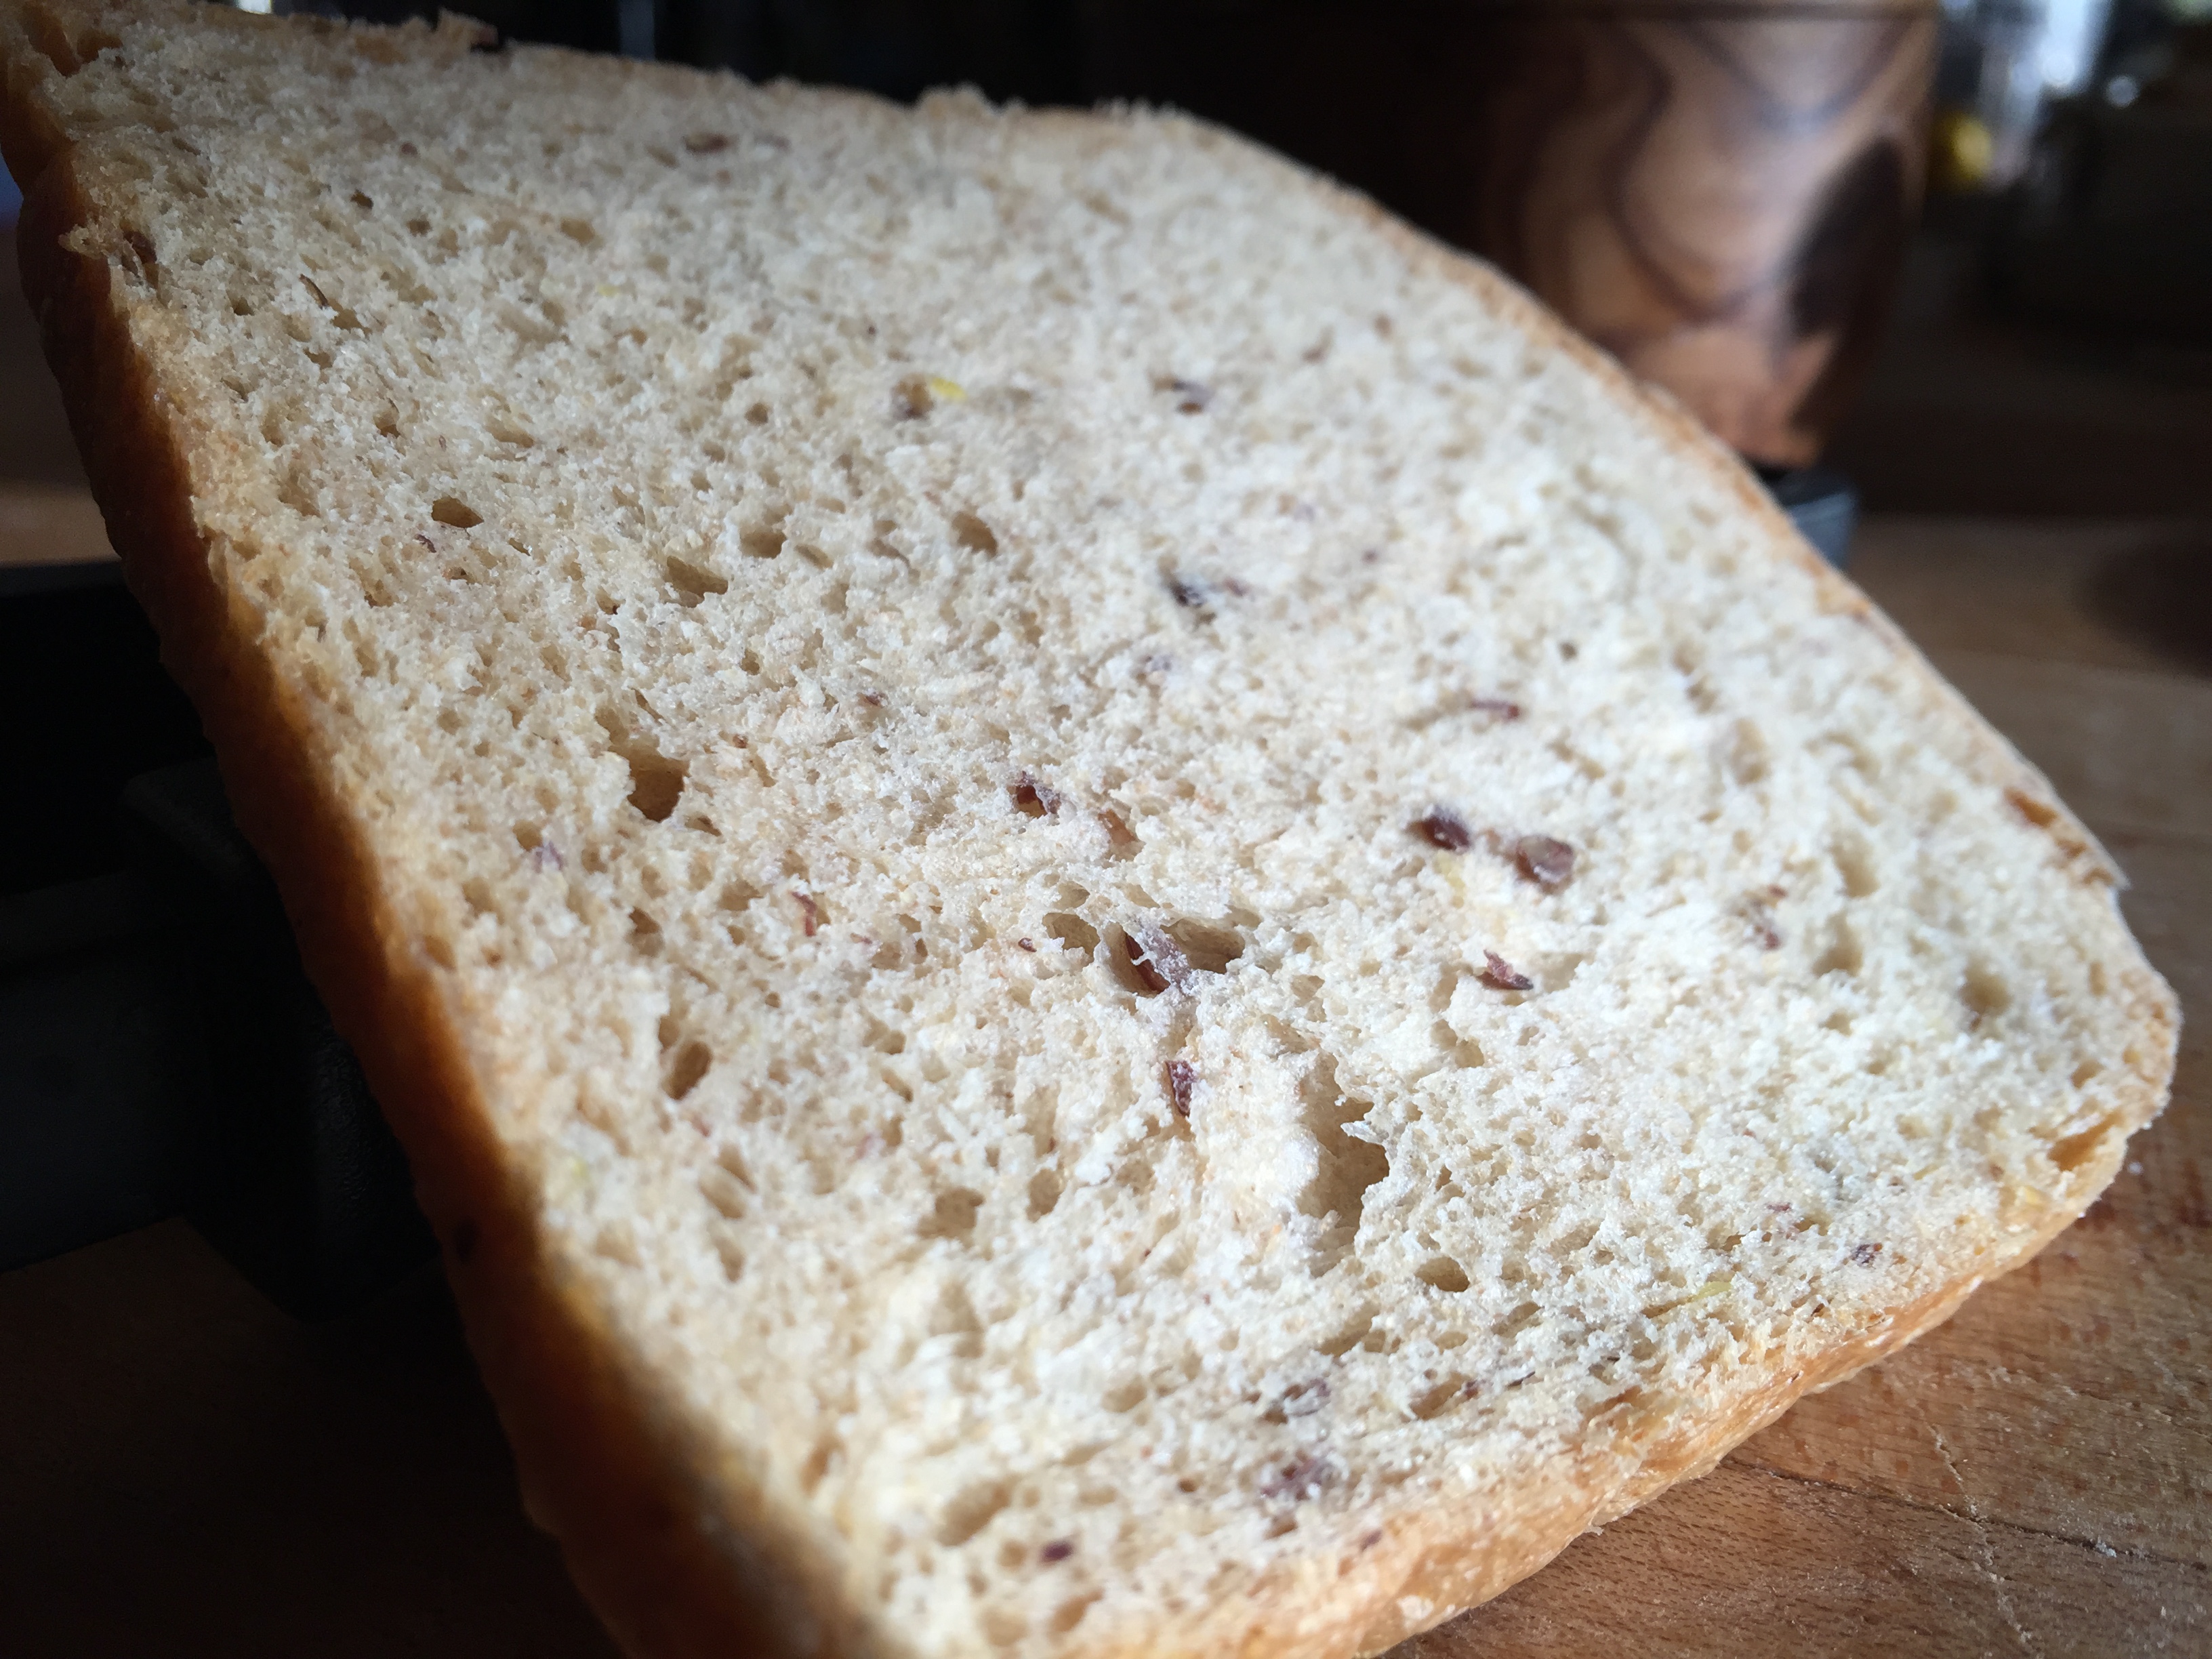
The contrast between weight and volume can be dramatic.  Think about those plastic wrapped White Wonder loaves, maybe 90% air and the rest library paste.  This does not bake a brick but it does not have that Wonder loaf volume either.

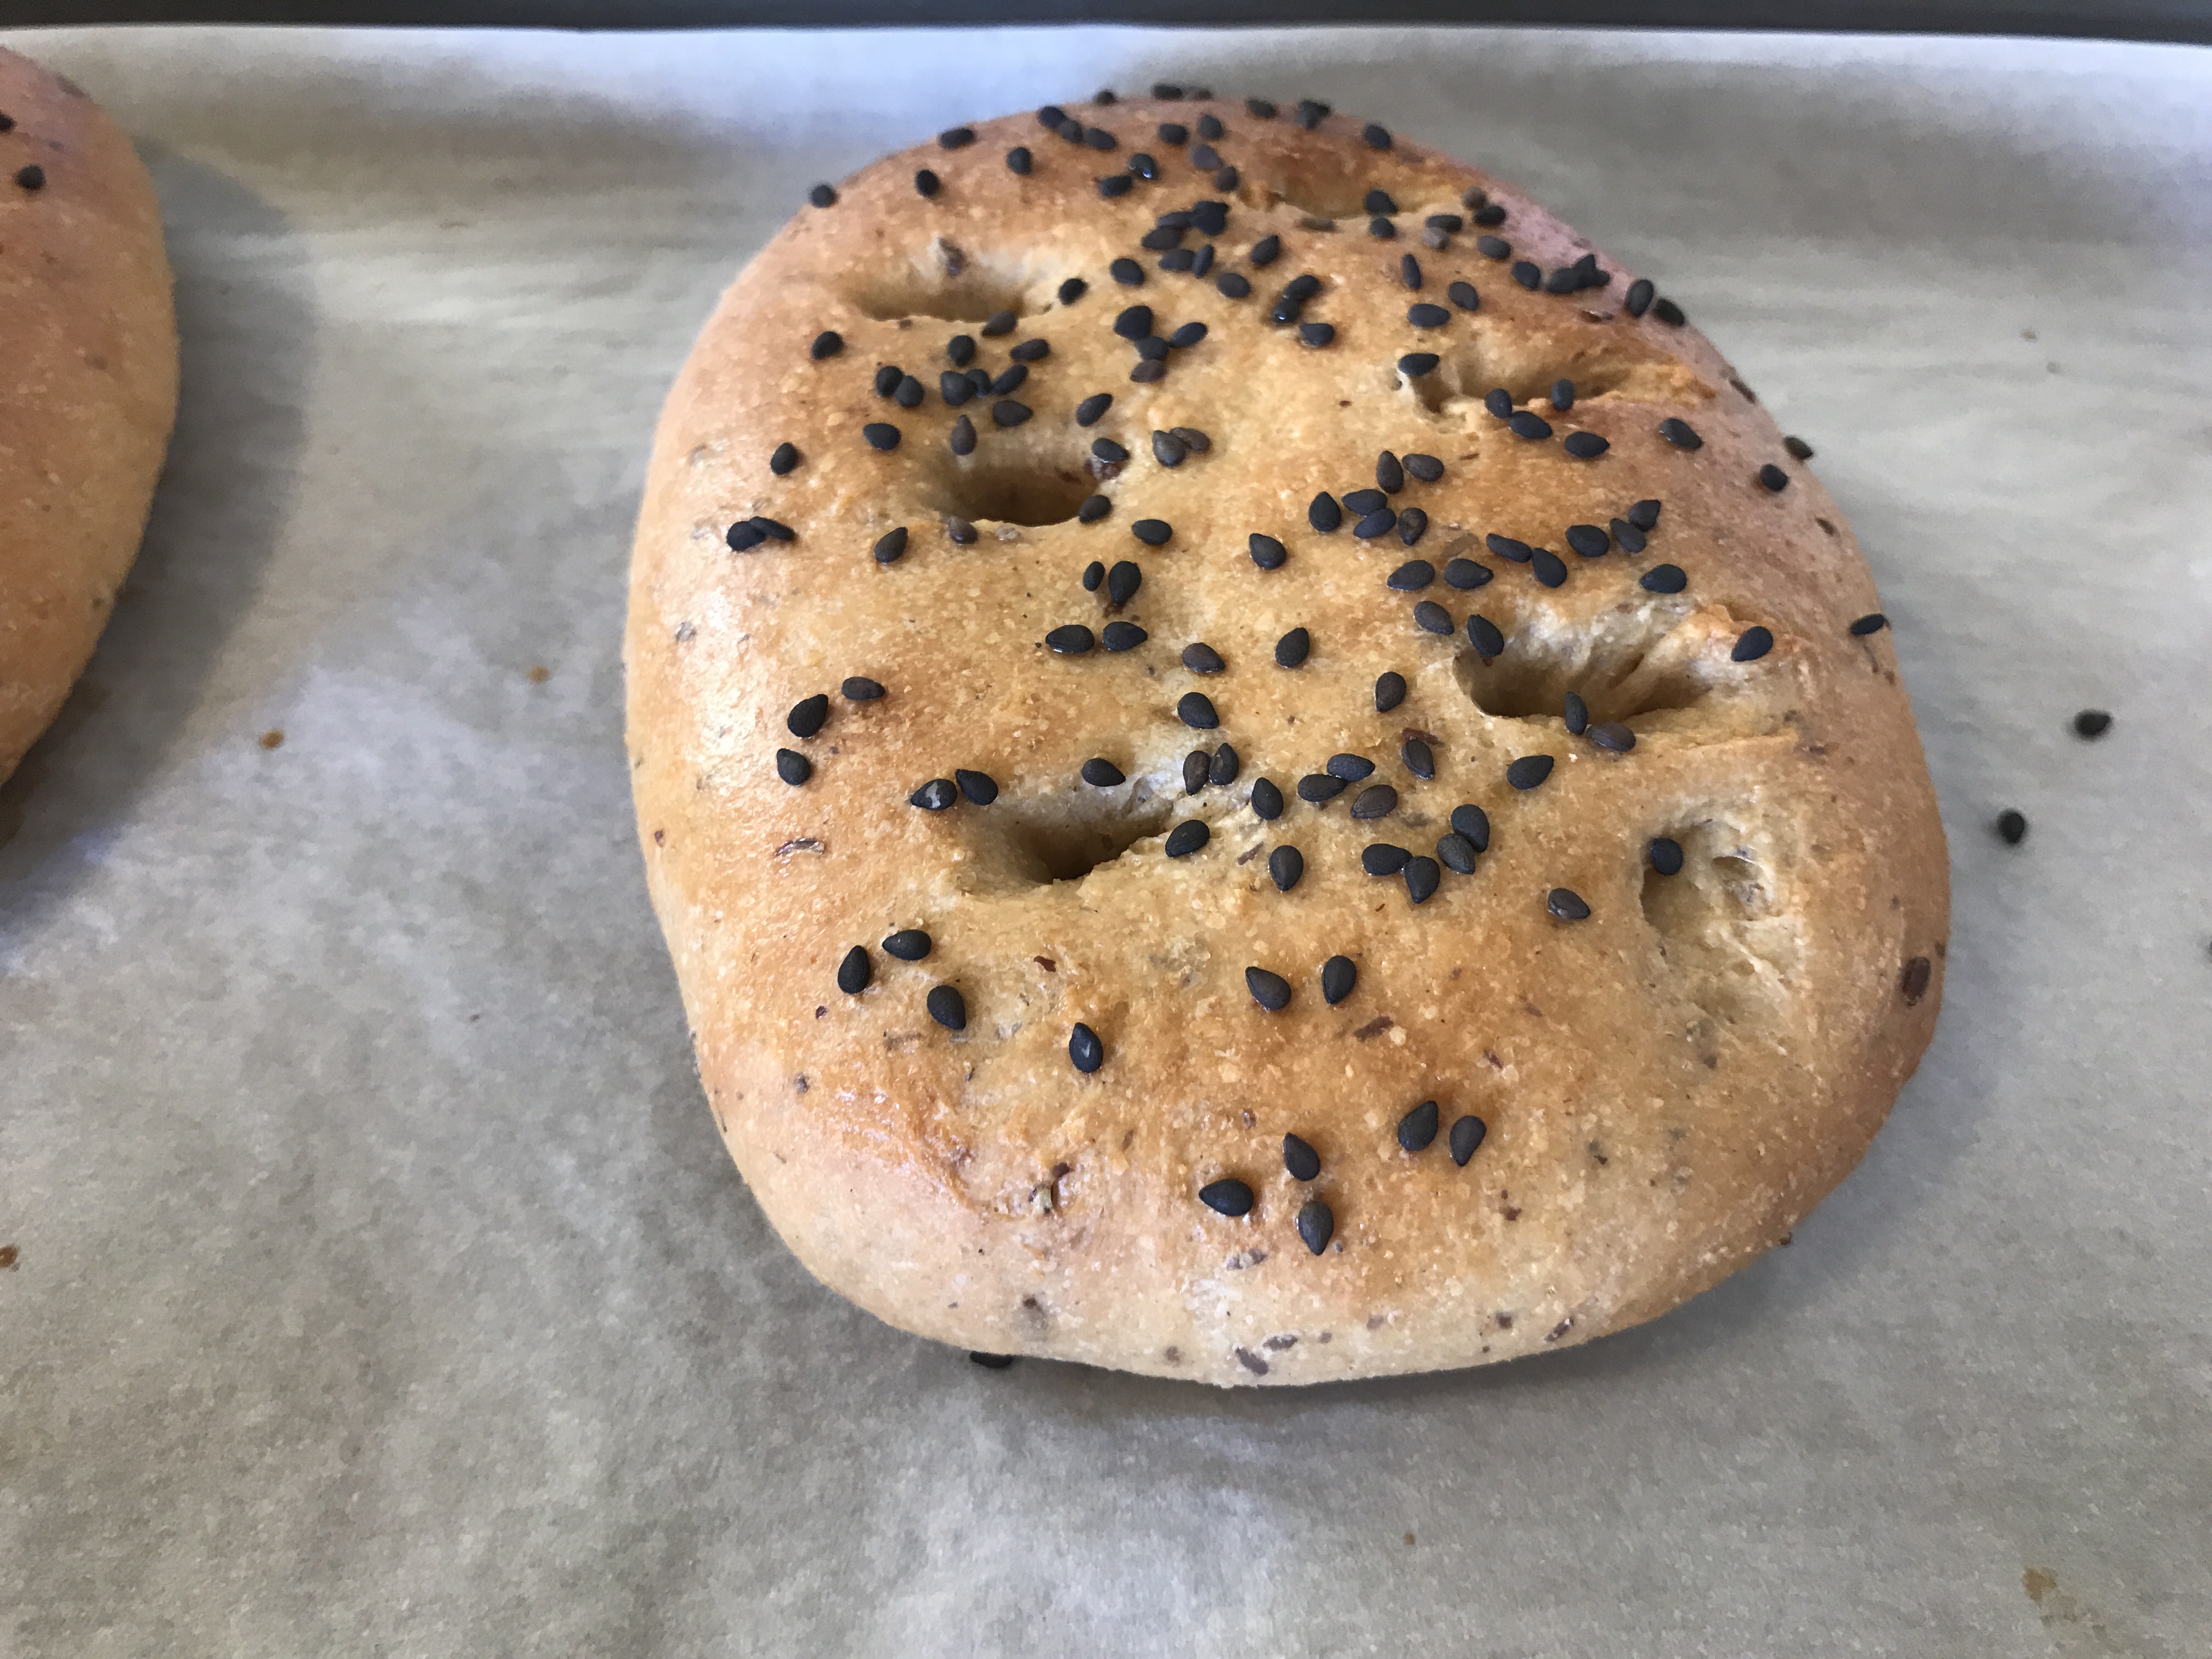
I loved the caraway!  And the raisin paste while unique, does add just the right subtle sweetness to this.  The original recipe called for measuring the raisins in a tablespoon … that just seems wrong to me.  How do you put raisins in a tablespoon to measure them?  So I didn’t.  But, I did weigh the small handful I put in so that I would know what I used the next time.  Starting this in a cold oven requires less anticipatory planning and so worked really well for my totally scatter brain of the moment.

Pain Bouillie or Porridge Bread

Recipe By: Kelly (Hobby Baker) A Messy Kitchen via The Village Baker

Yield: 2  14 oz loaves

Ingredients:

The Bouillie (Porridge)

10 grams (10 ml) honey

1¾ cups (414 ml) boiling water

140 grams organic rye flour , I used dark stone ground

1 cup rye chops from KAF, barley flakes or rye chops

The dough:

1 1/4 teaspoon active dry yeast

45 grams warm water

All of the bouillie from the previous step

2 teaspoons fine sea salt 

2 teaspoons caraway seeds, heaping

30 grams raisins – yellow

140 grams organic white whole wheat, original total (250 g) unbleached white or all purpose

140  grams organic AP flour

Directions:

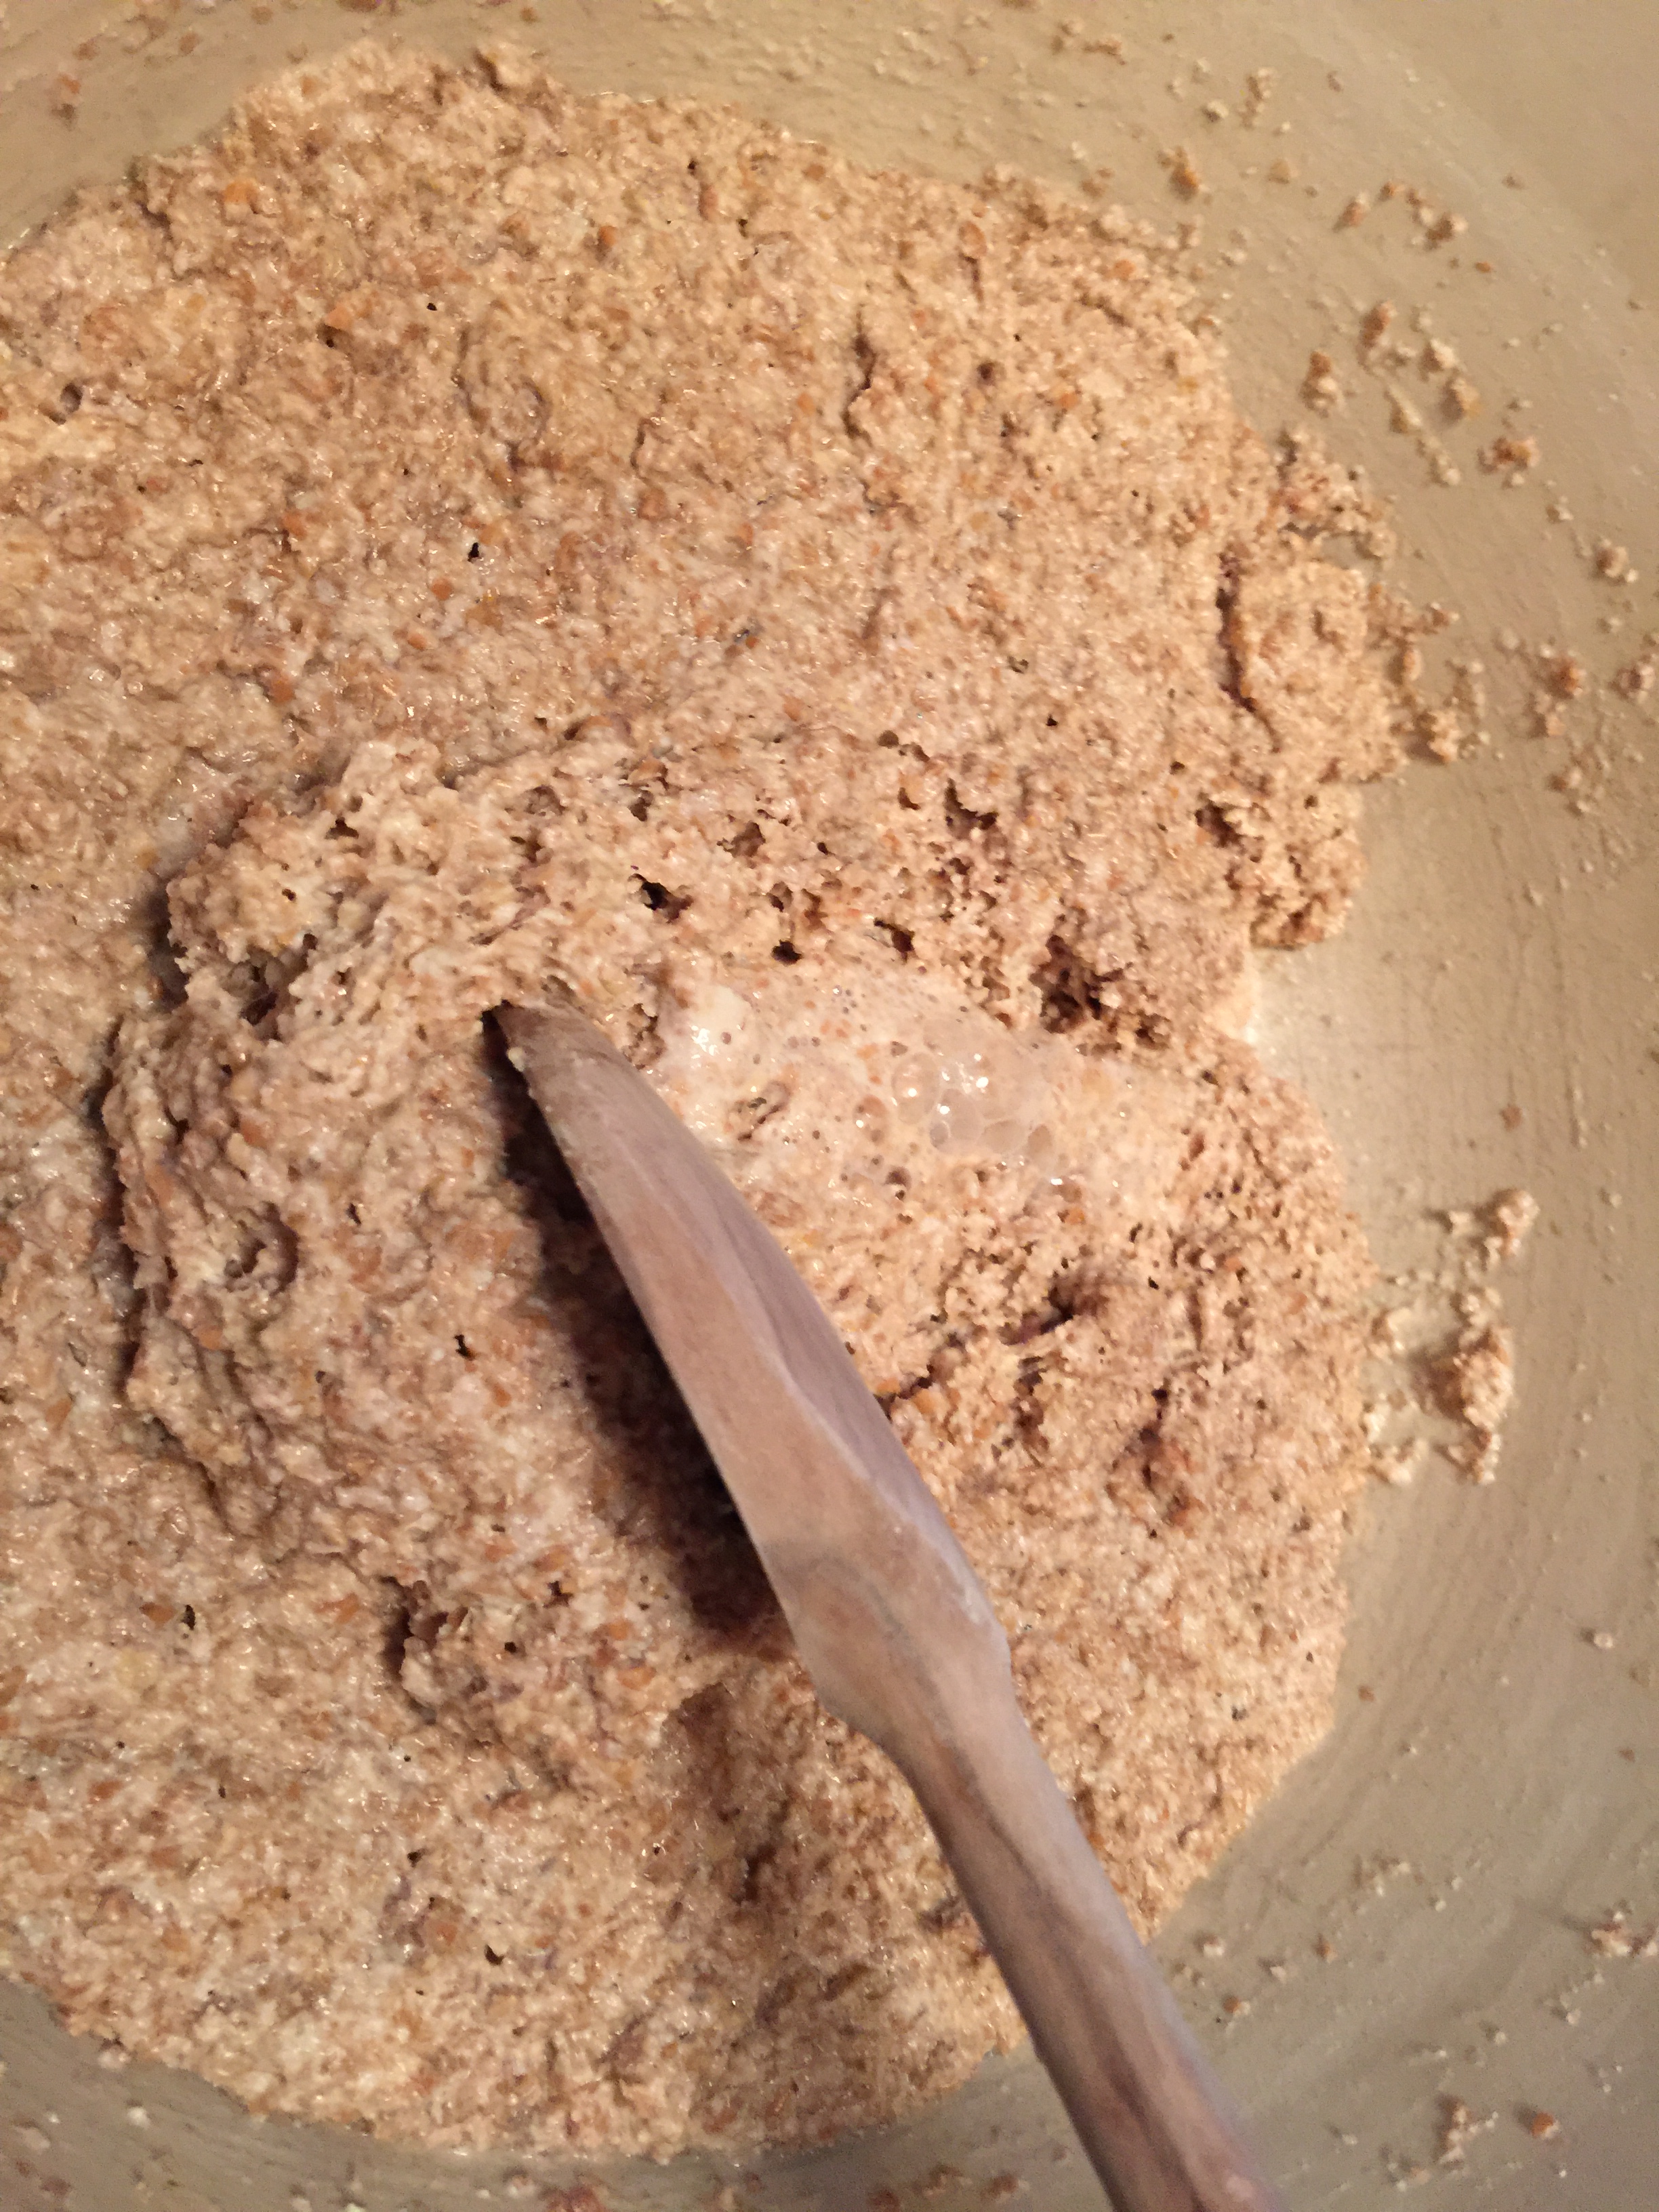
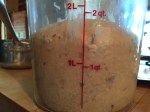
1. To make the porridge starter (bouillie):  Mix the honey into the boiling water until dissolved.  Pour it over the rye flour and grain in a bowl.  Let it soak for a few minutes, then give it a stir to make sure all the flour is moistened.  Cover the bowl and set aside overnight in a warm area.

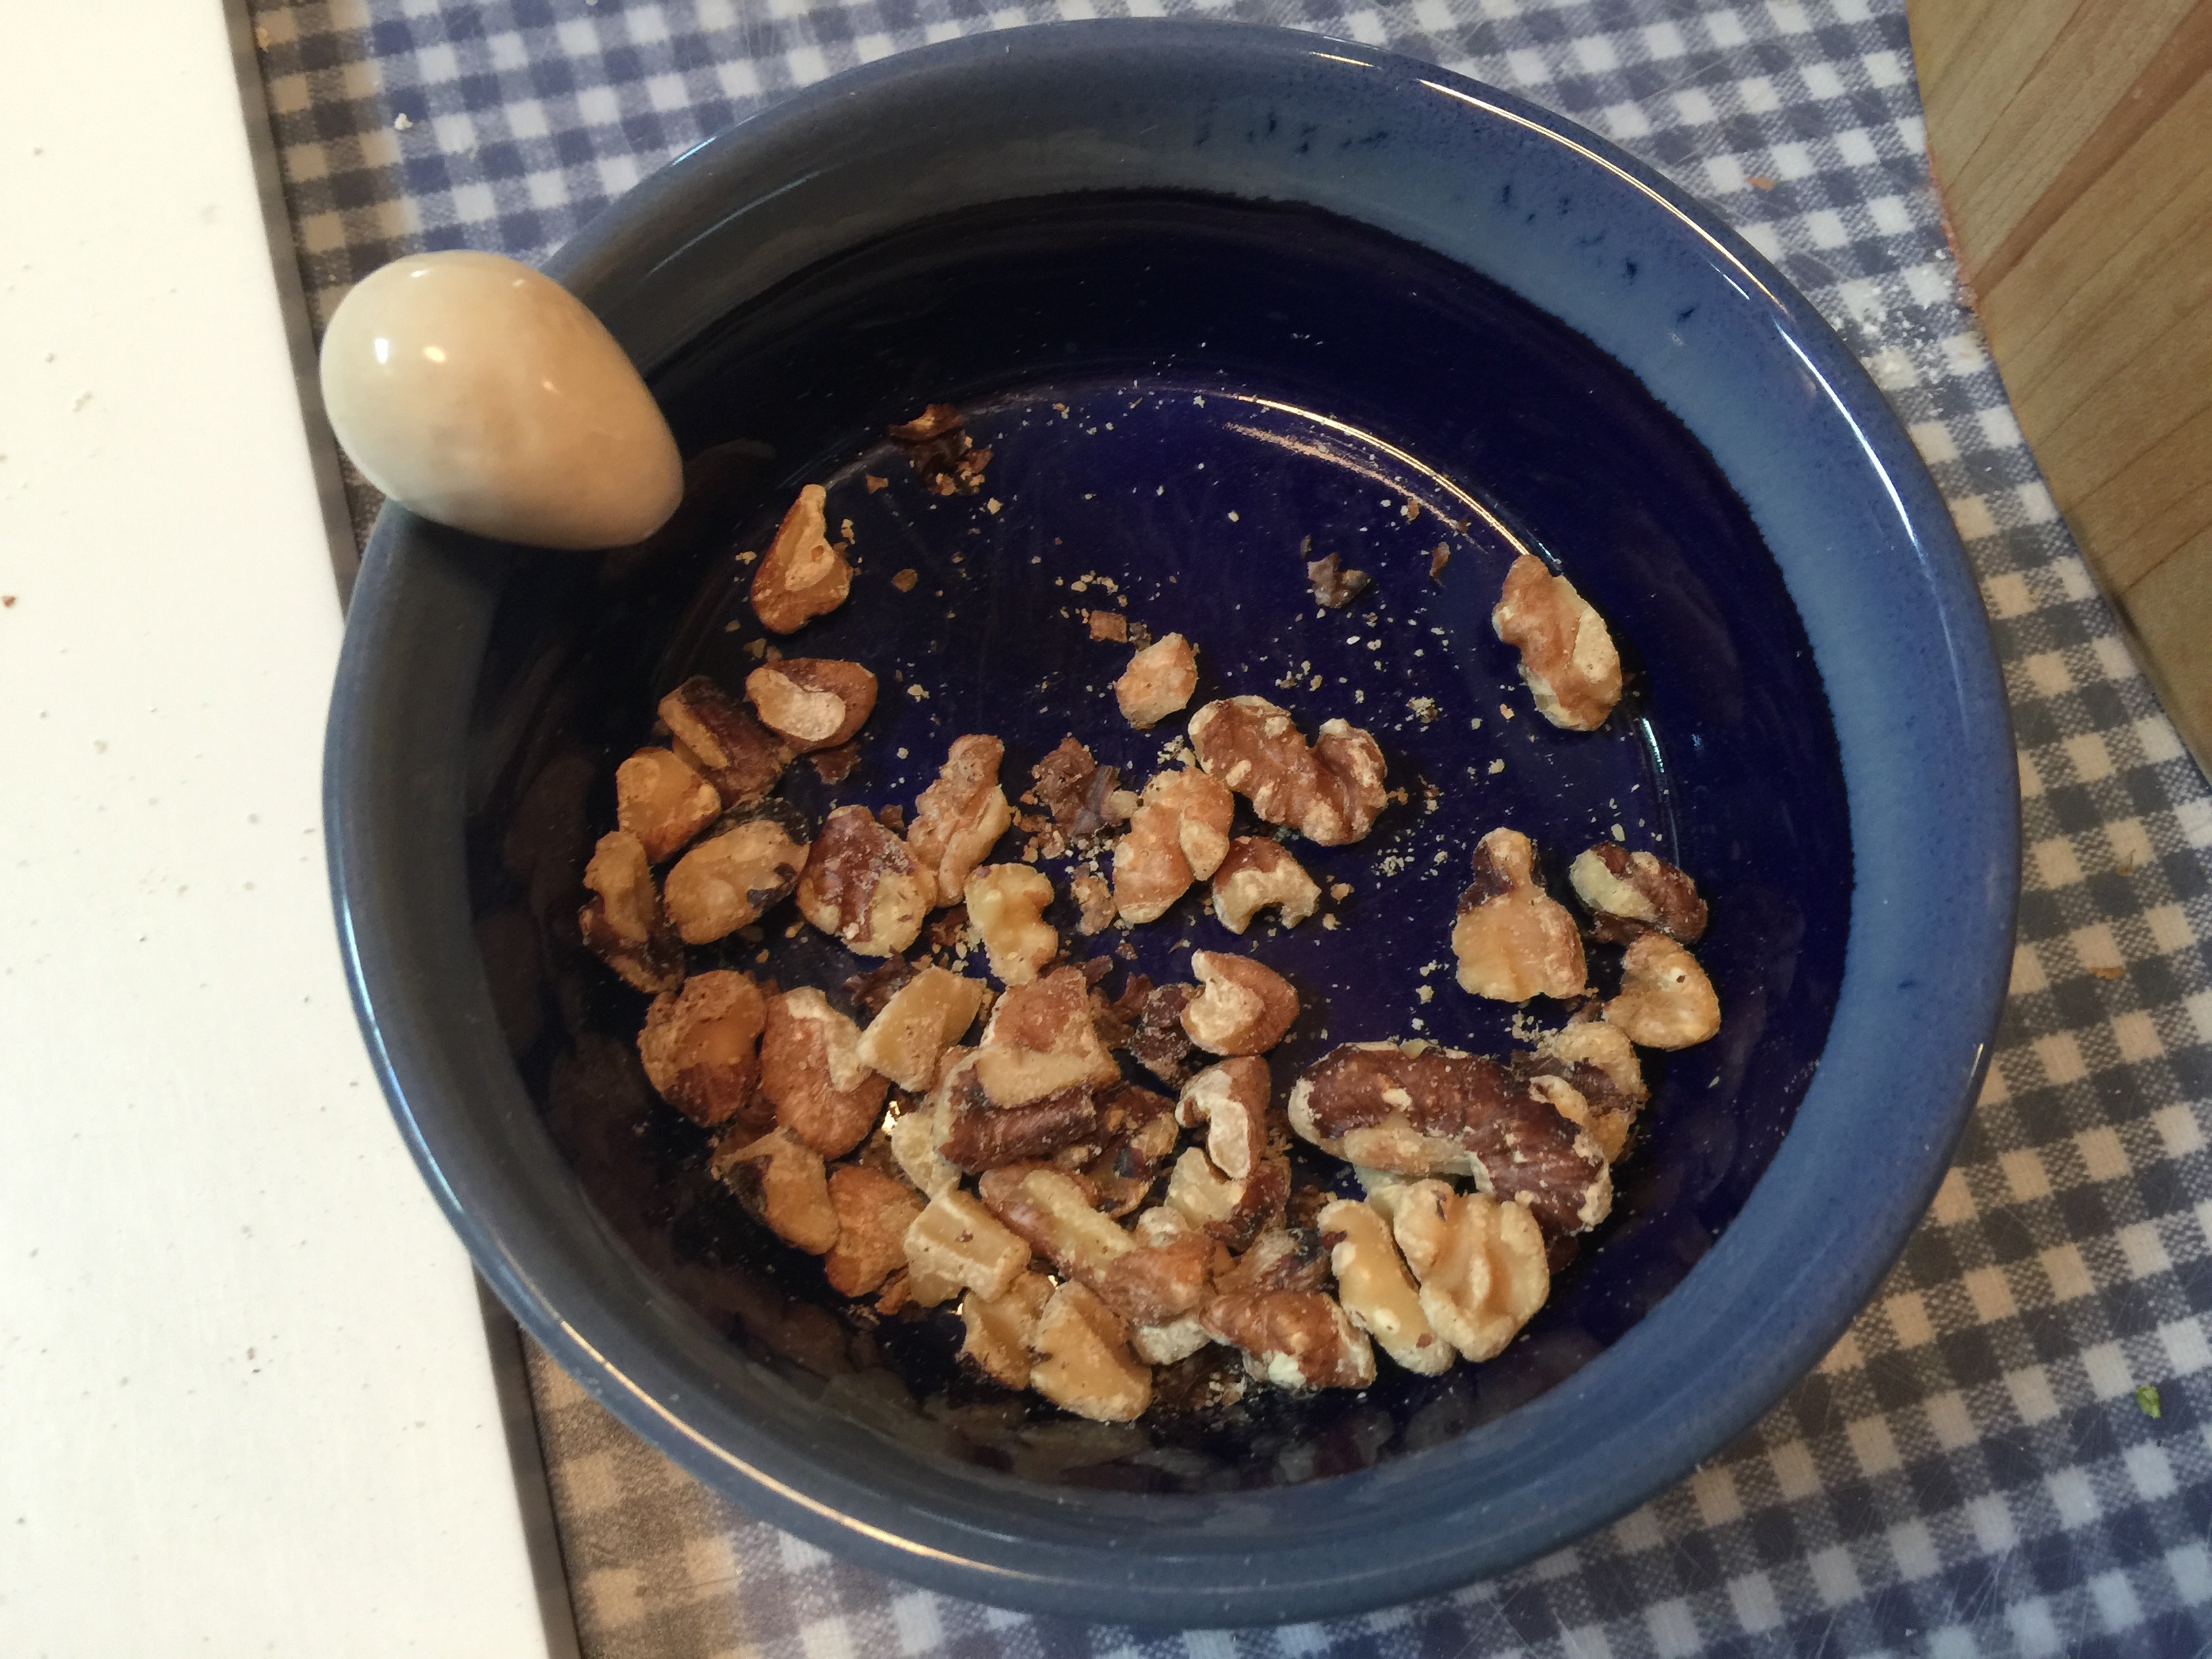
2. For the dough:  You’ll note that the original recipe calls to desolve yeast in a little water … I poured the water over the bouillie and whisk the yeast into the flour.  Put all of the porridge (bouillie) into a madium bowl or stand mixer and mix in the salt.  Crush the caraway seeds with a mortan and pestle until fragrant and broken.  Add the raisins and grind into a paste.  Stir the last 1 tbsp water into the caraway/raisin paste.  Add 2 tsp of the resulting caraway flavoring into the porridge.  Slowly add 1½ cups flour, mixing in on low speed or with a plastic dough scraper.  Mix in the yeast.  Continue adding the remaining flour slowly until the dough is a medium firm consistency.  Knead for 5-8 minutes, adding a little more white flour if necessary.  The dough will be sticky but should be firm.  I used all the flour and then probably used another half cup in kneading.

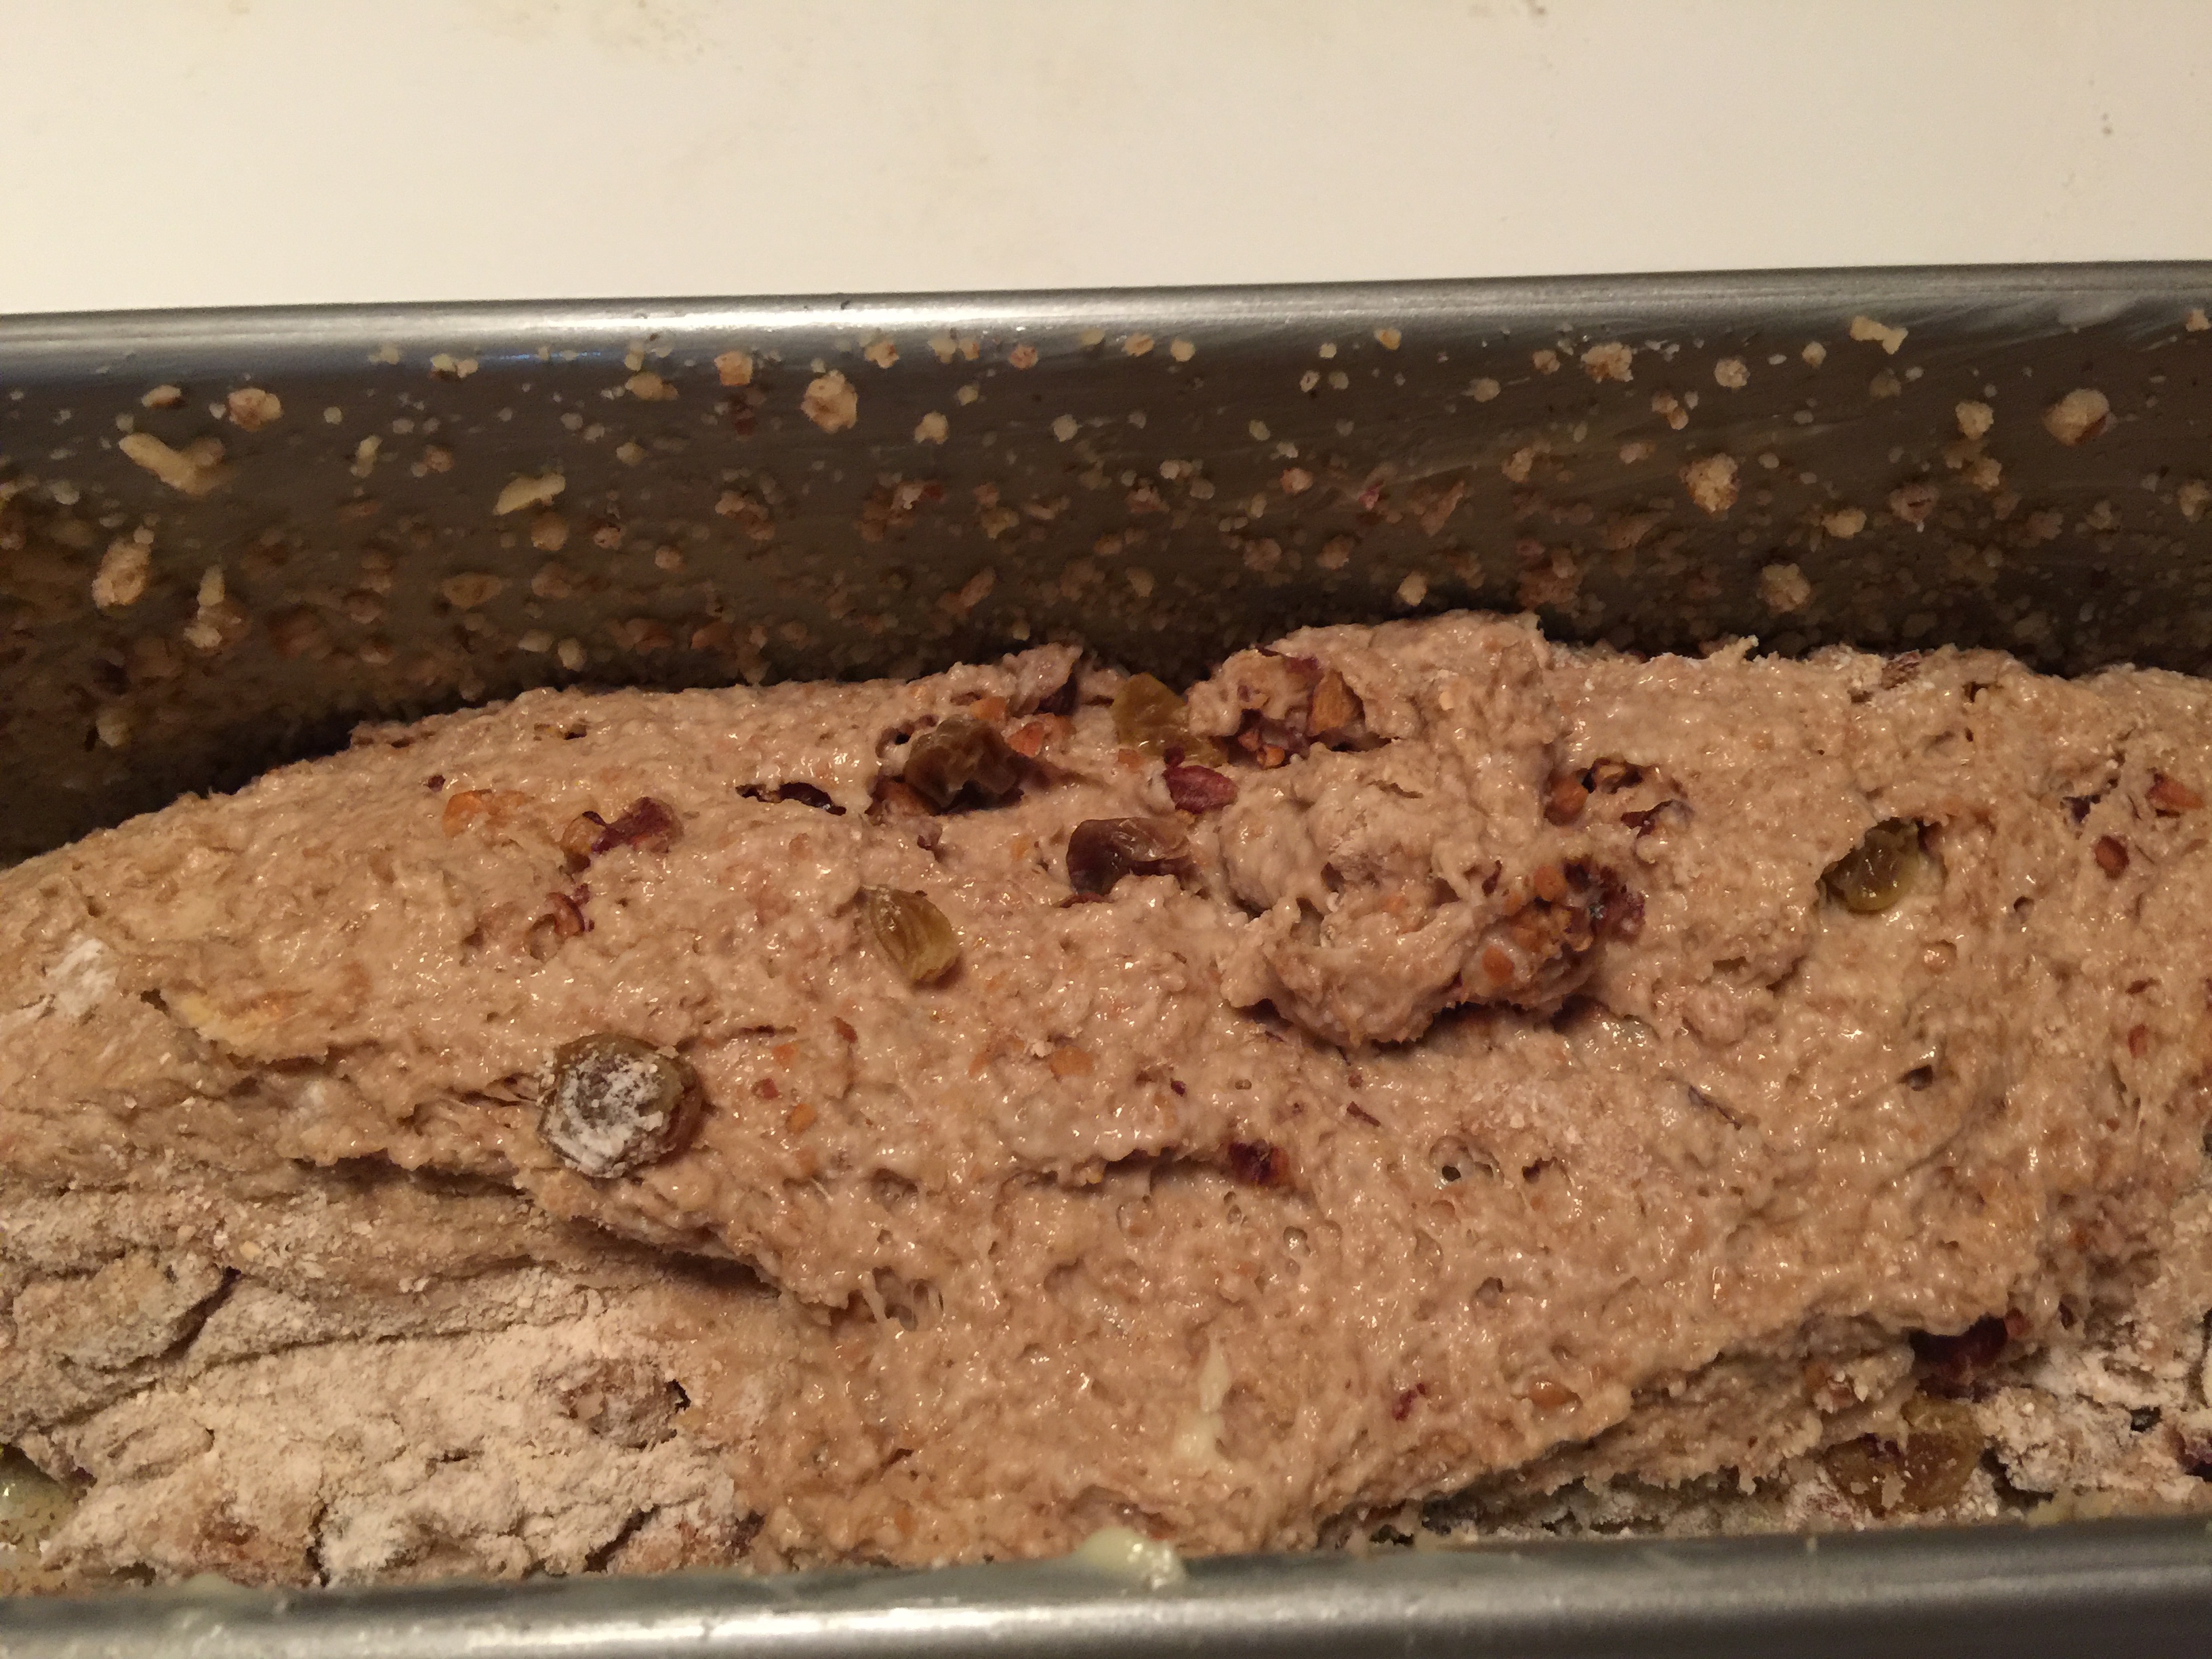
3. Put the dough in the bowl, cover with a moist towel, and let rise in an unlit oven (or warm place) for 1½ – 2 hours.

img_1325

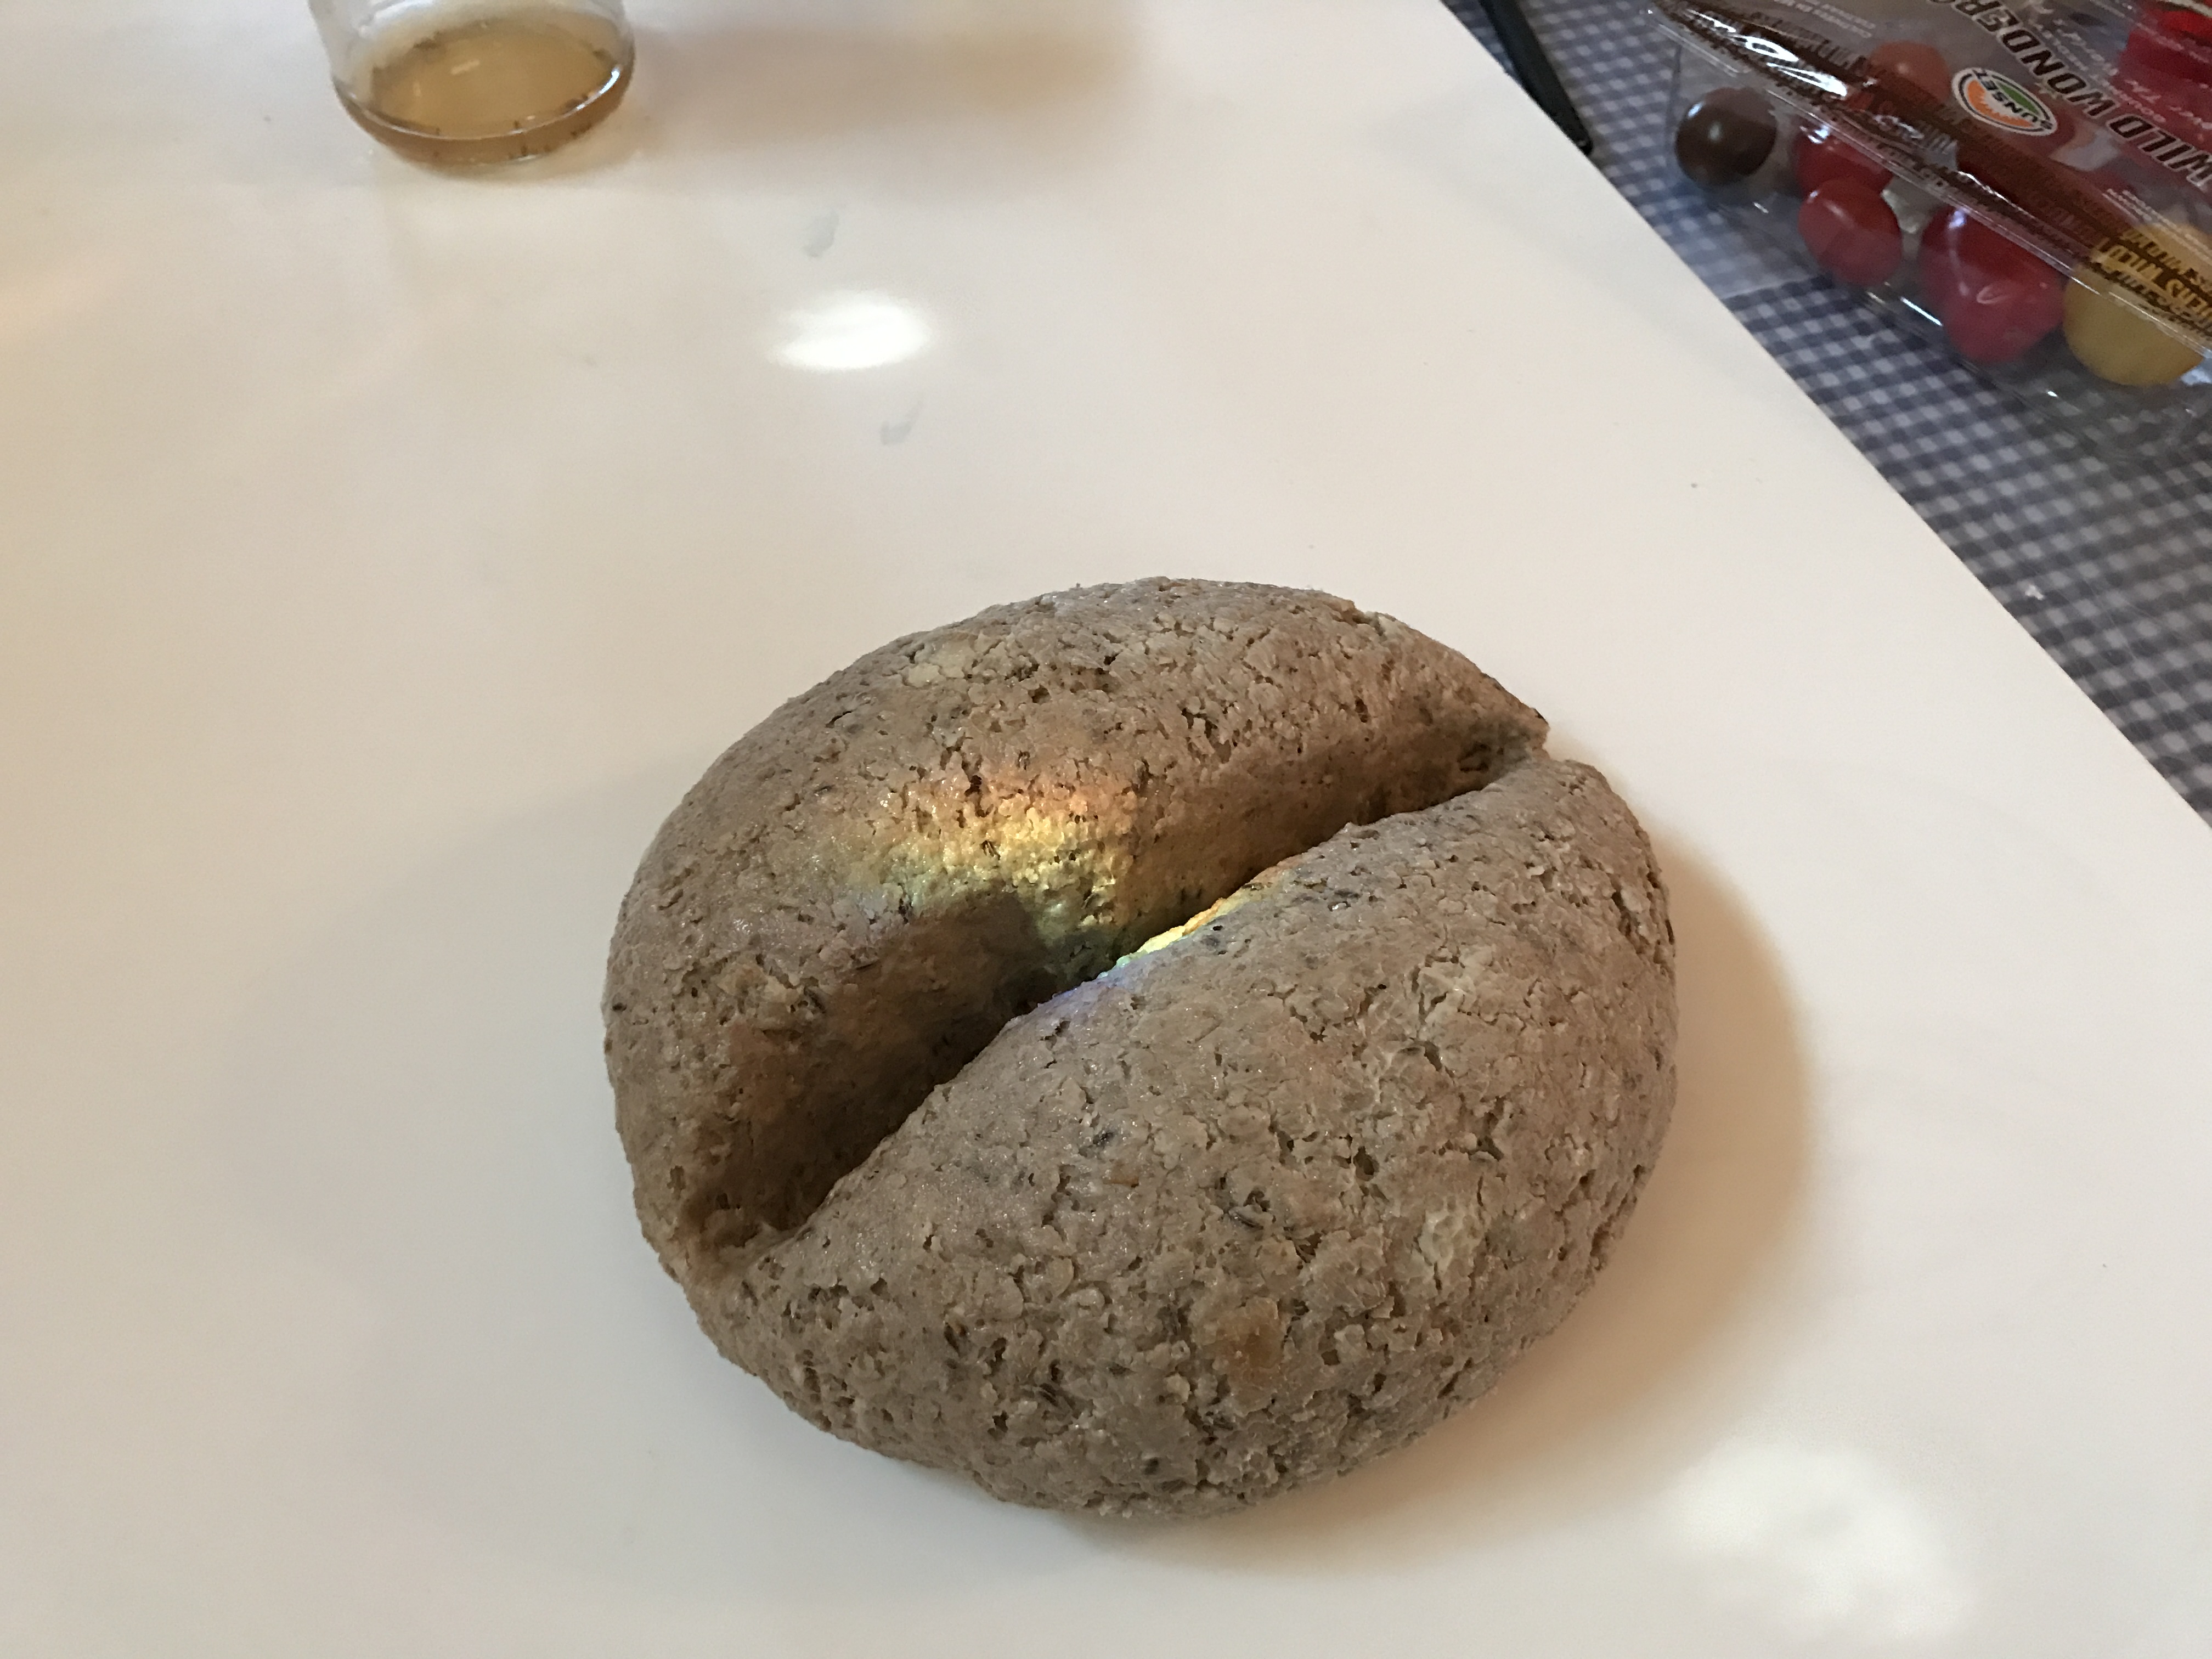
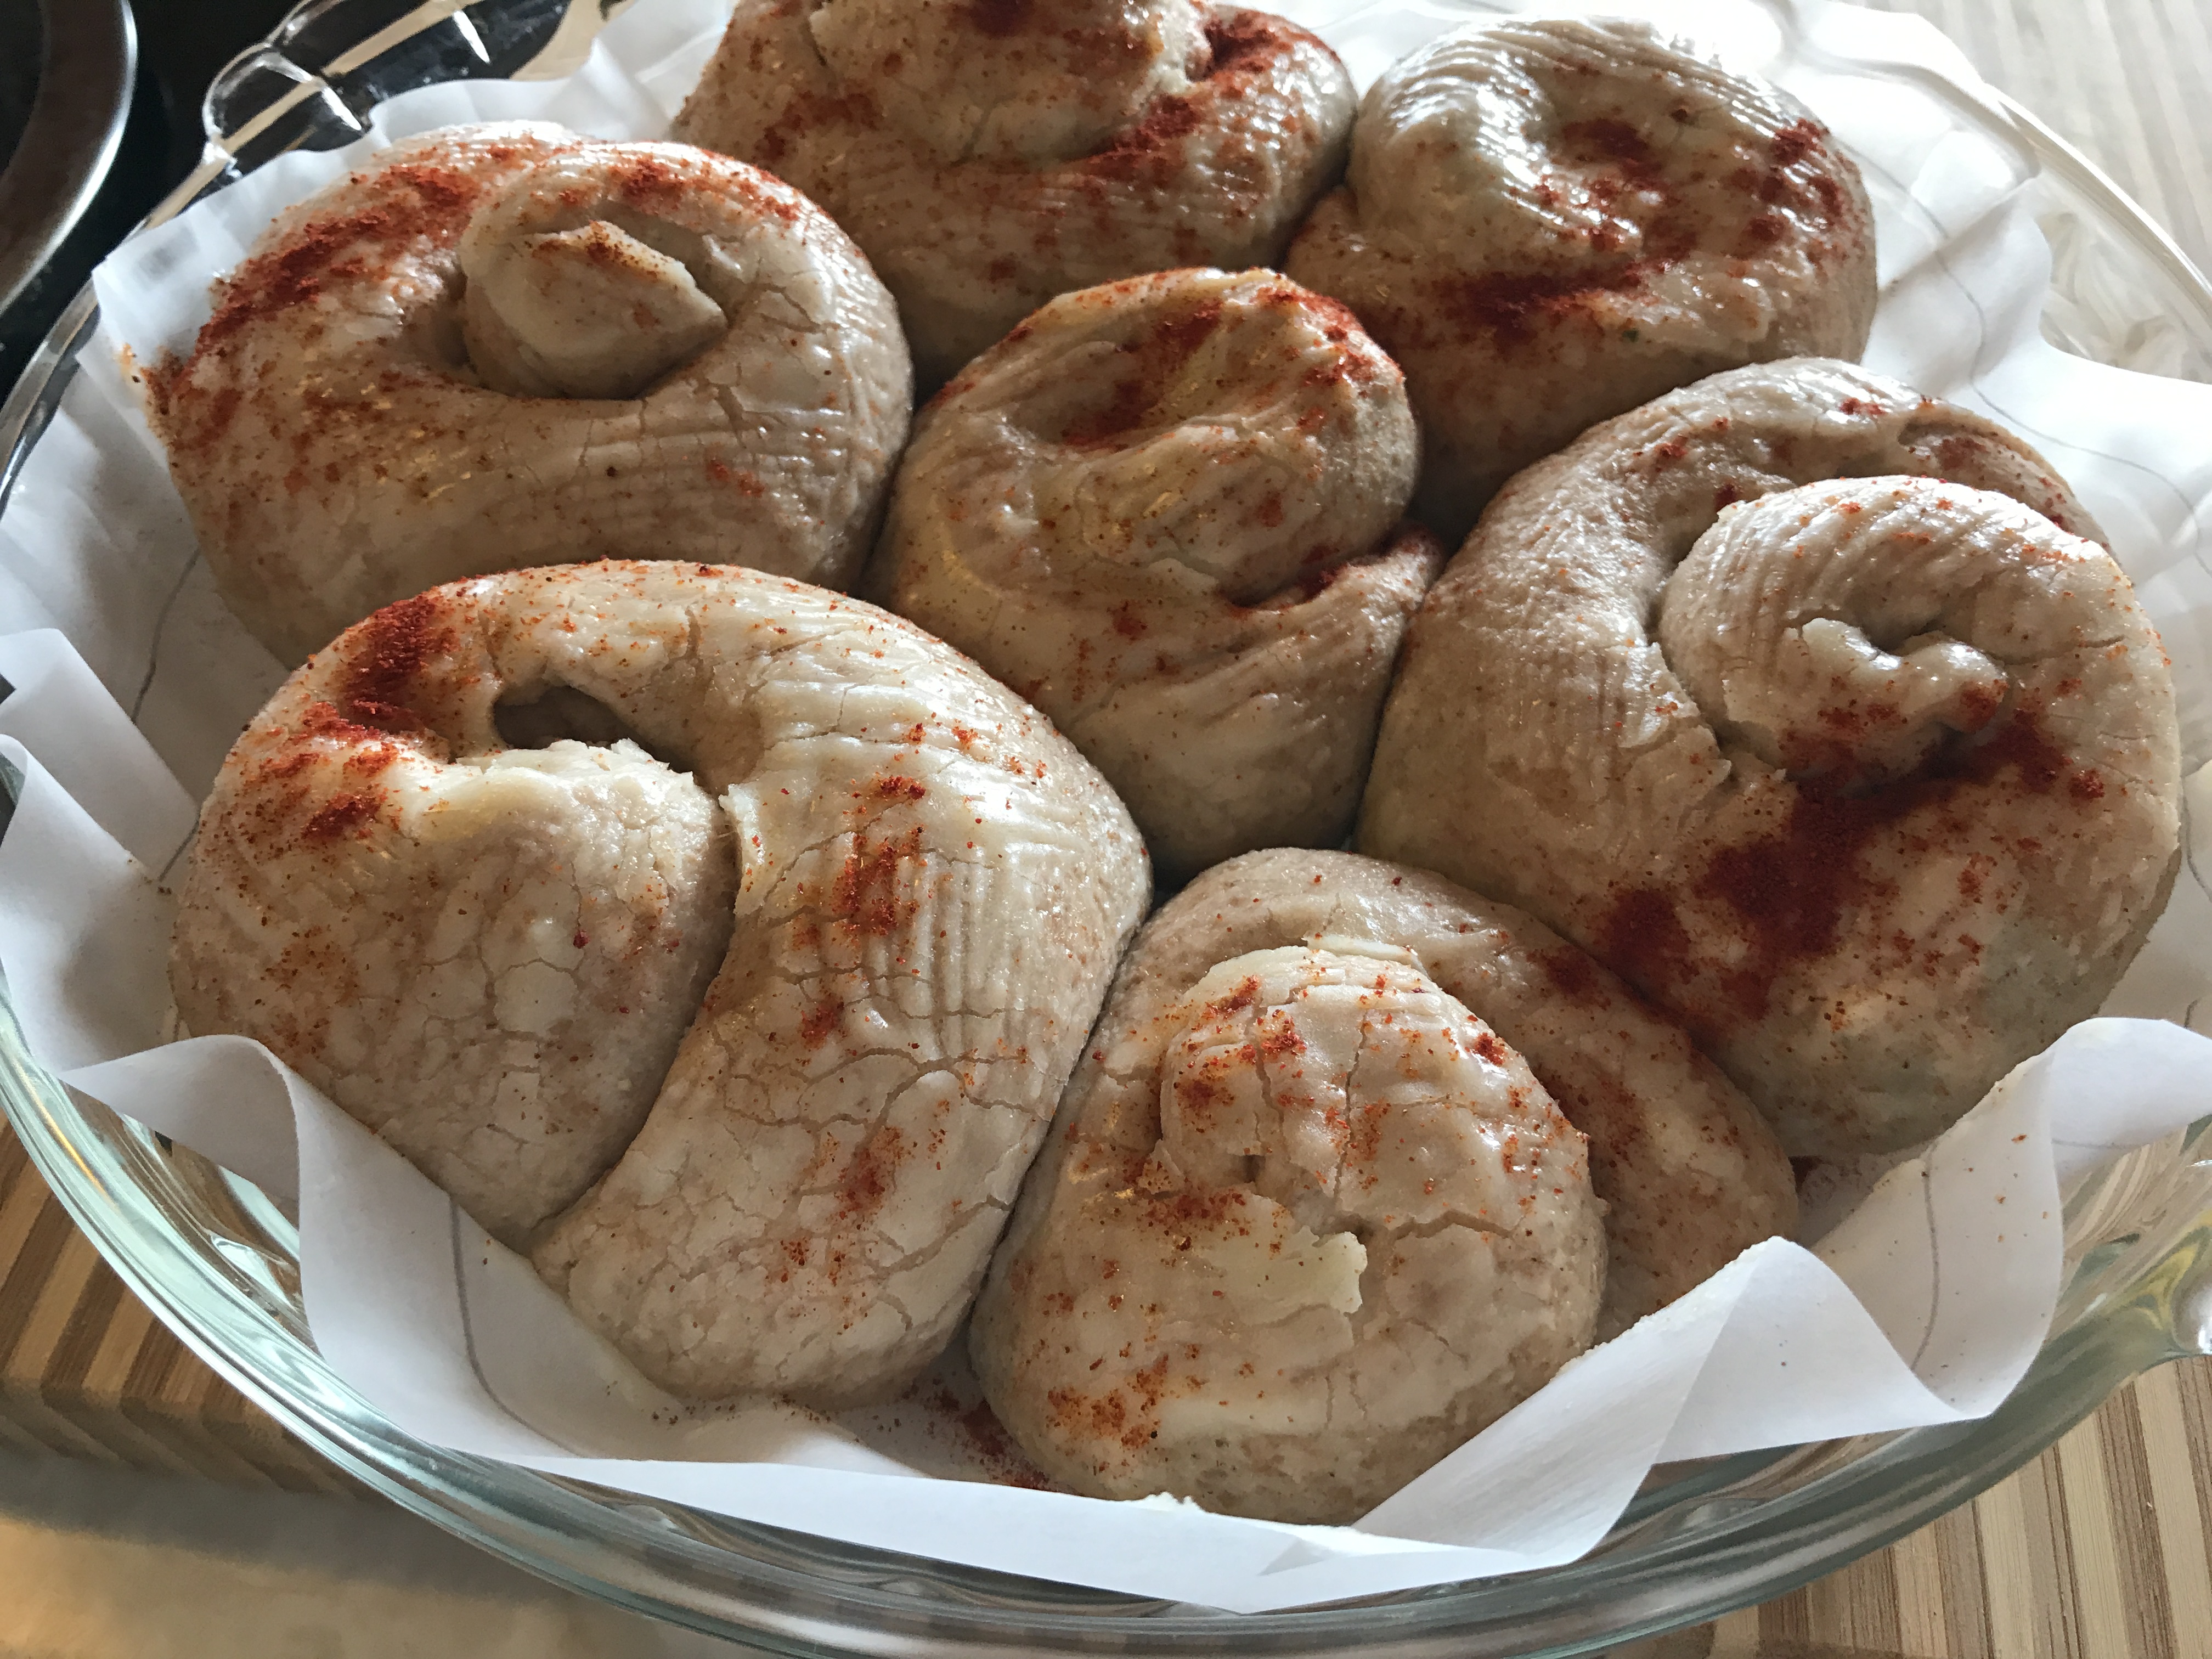
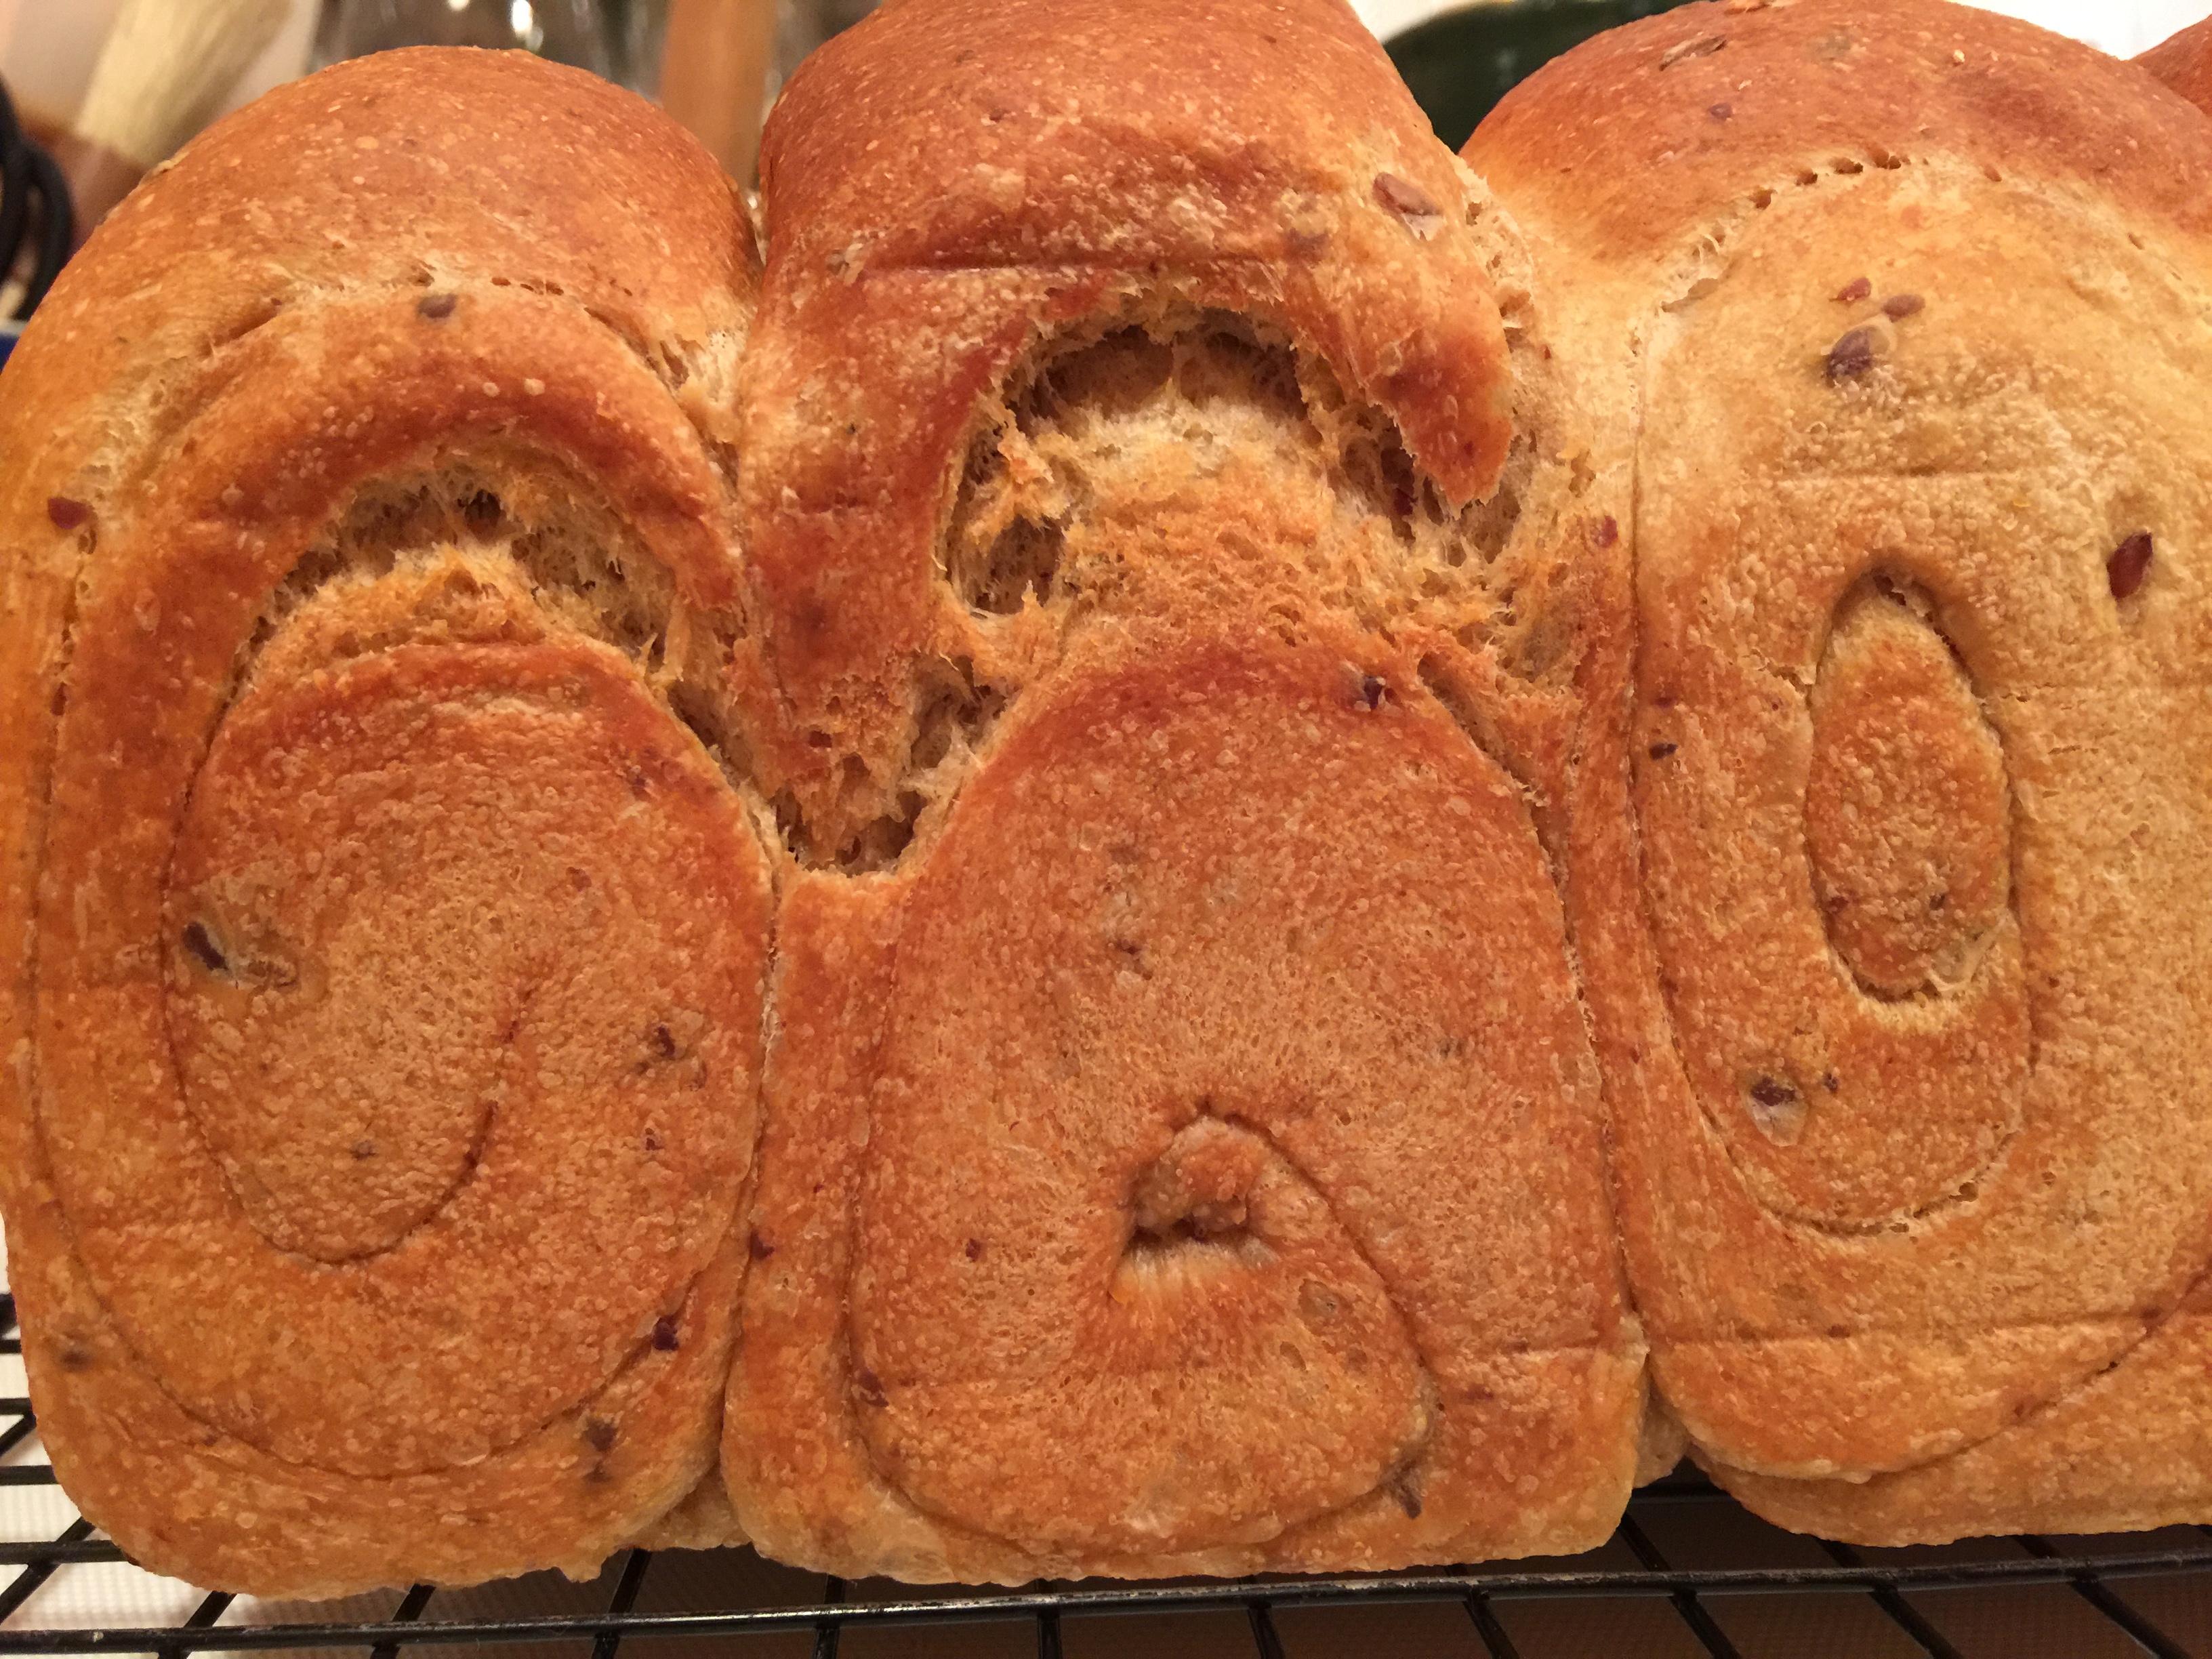
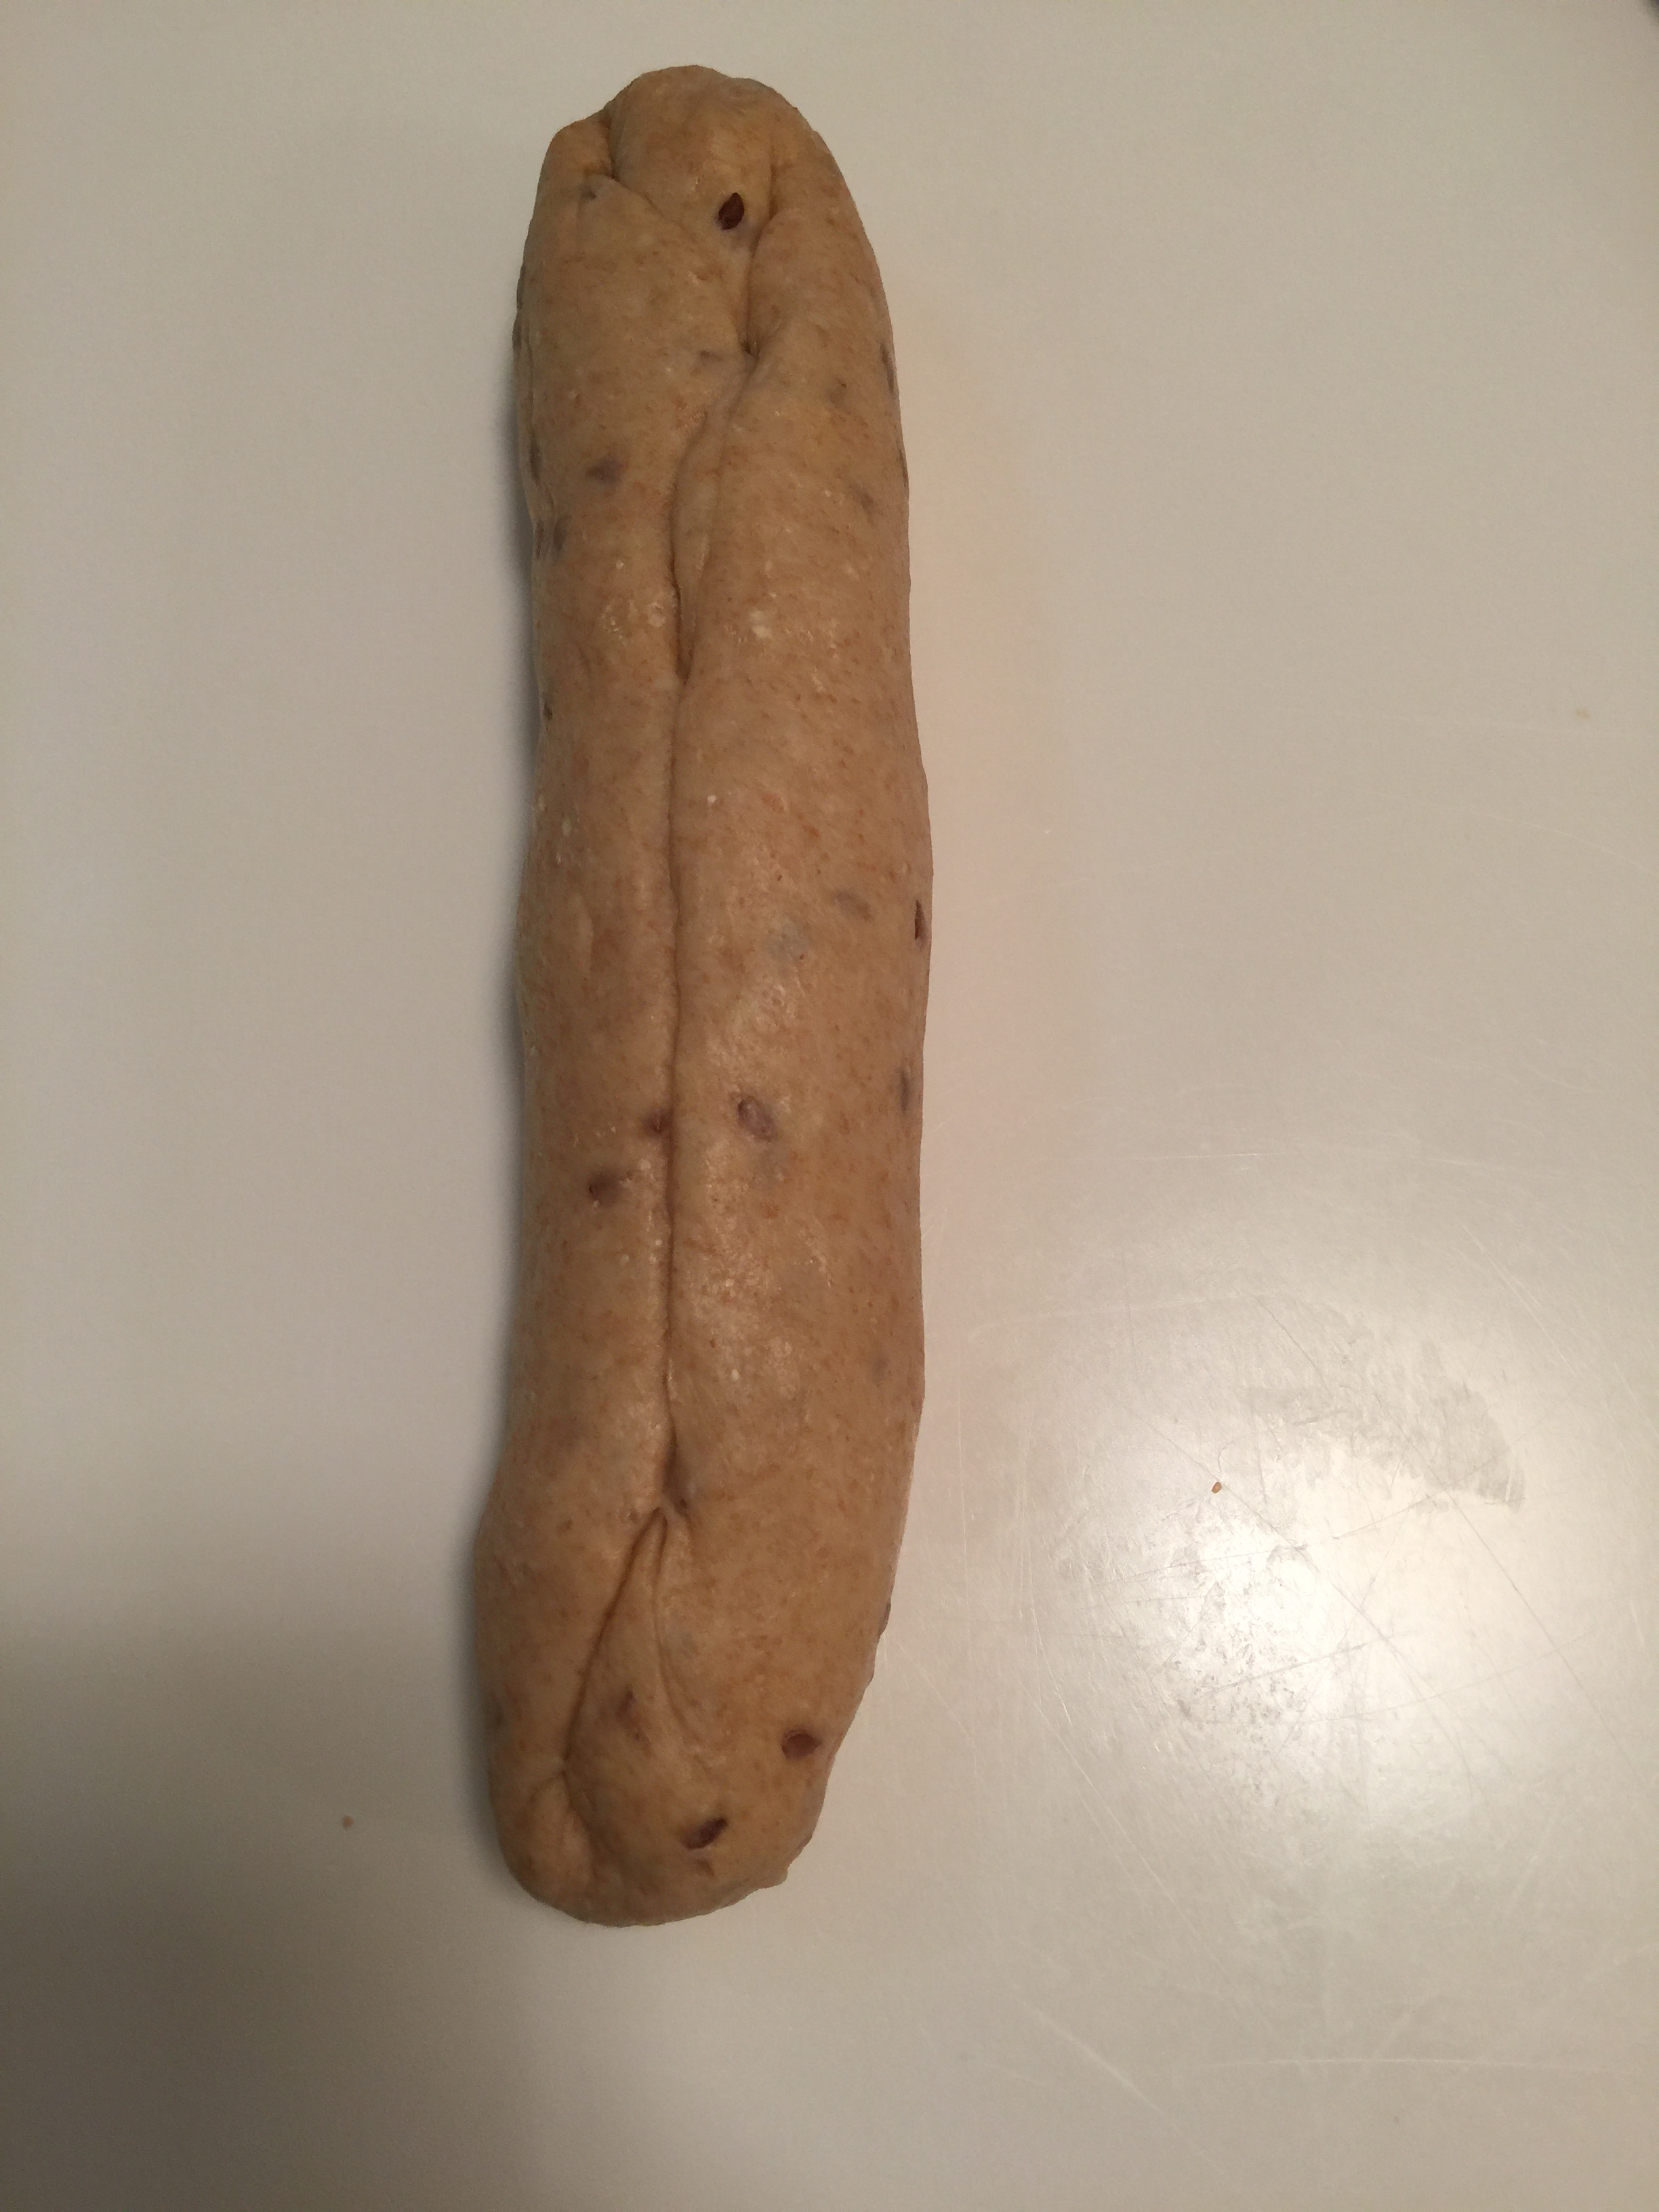
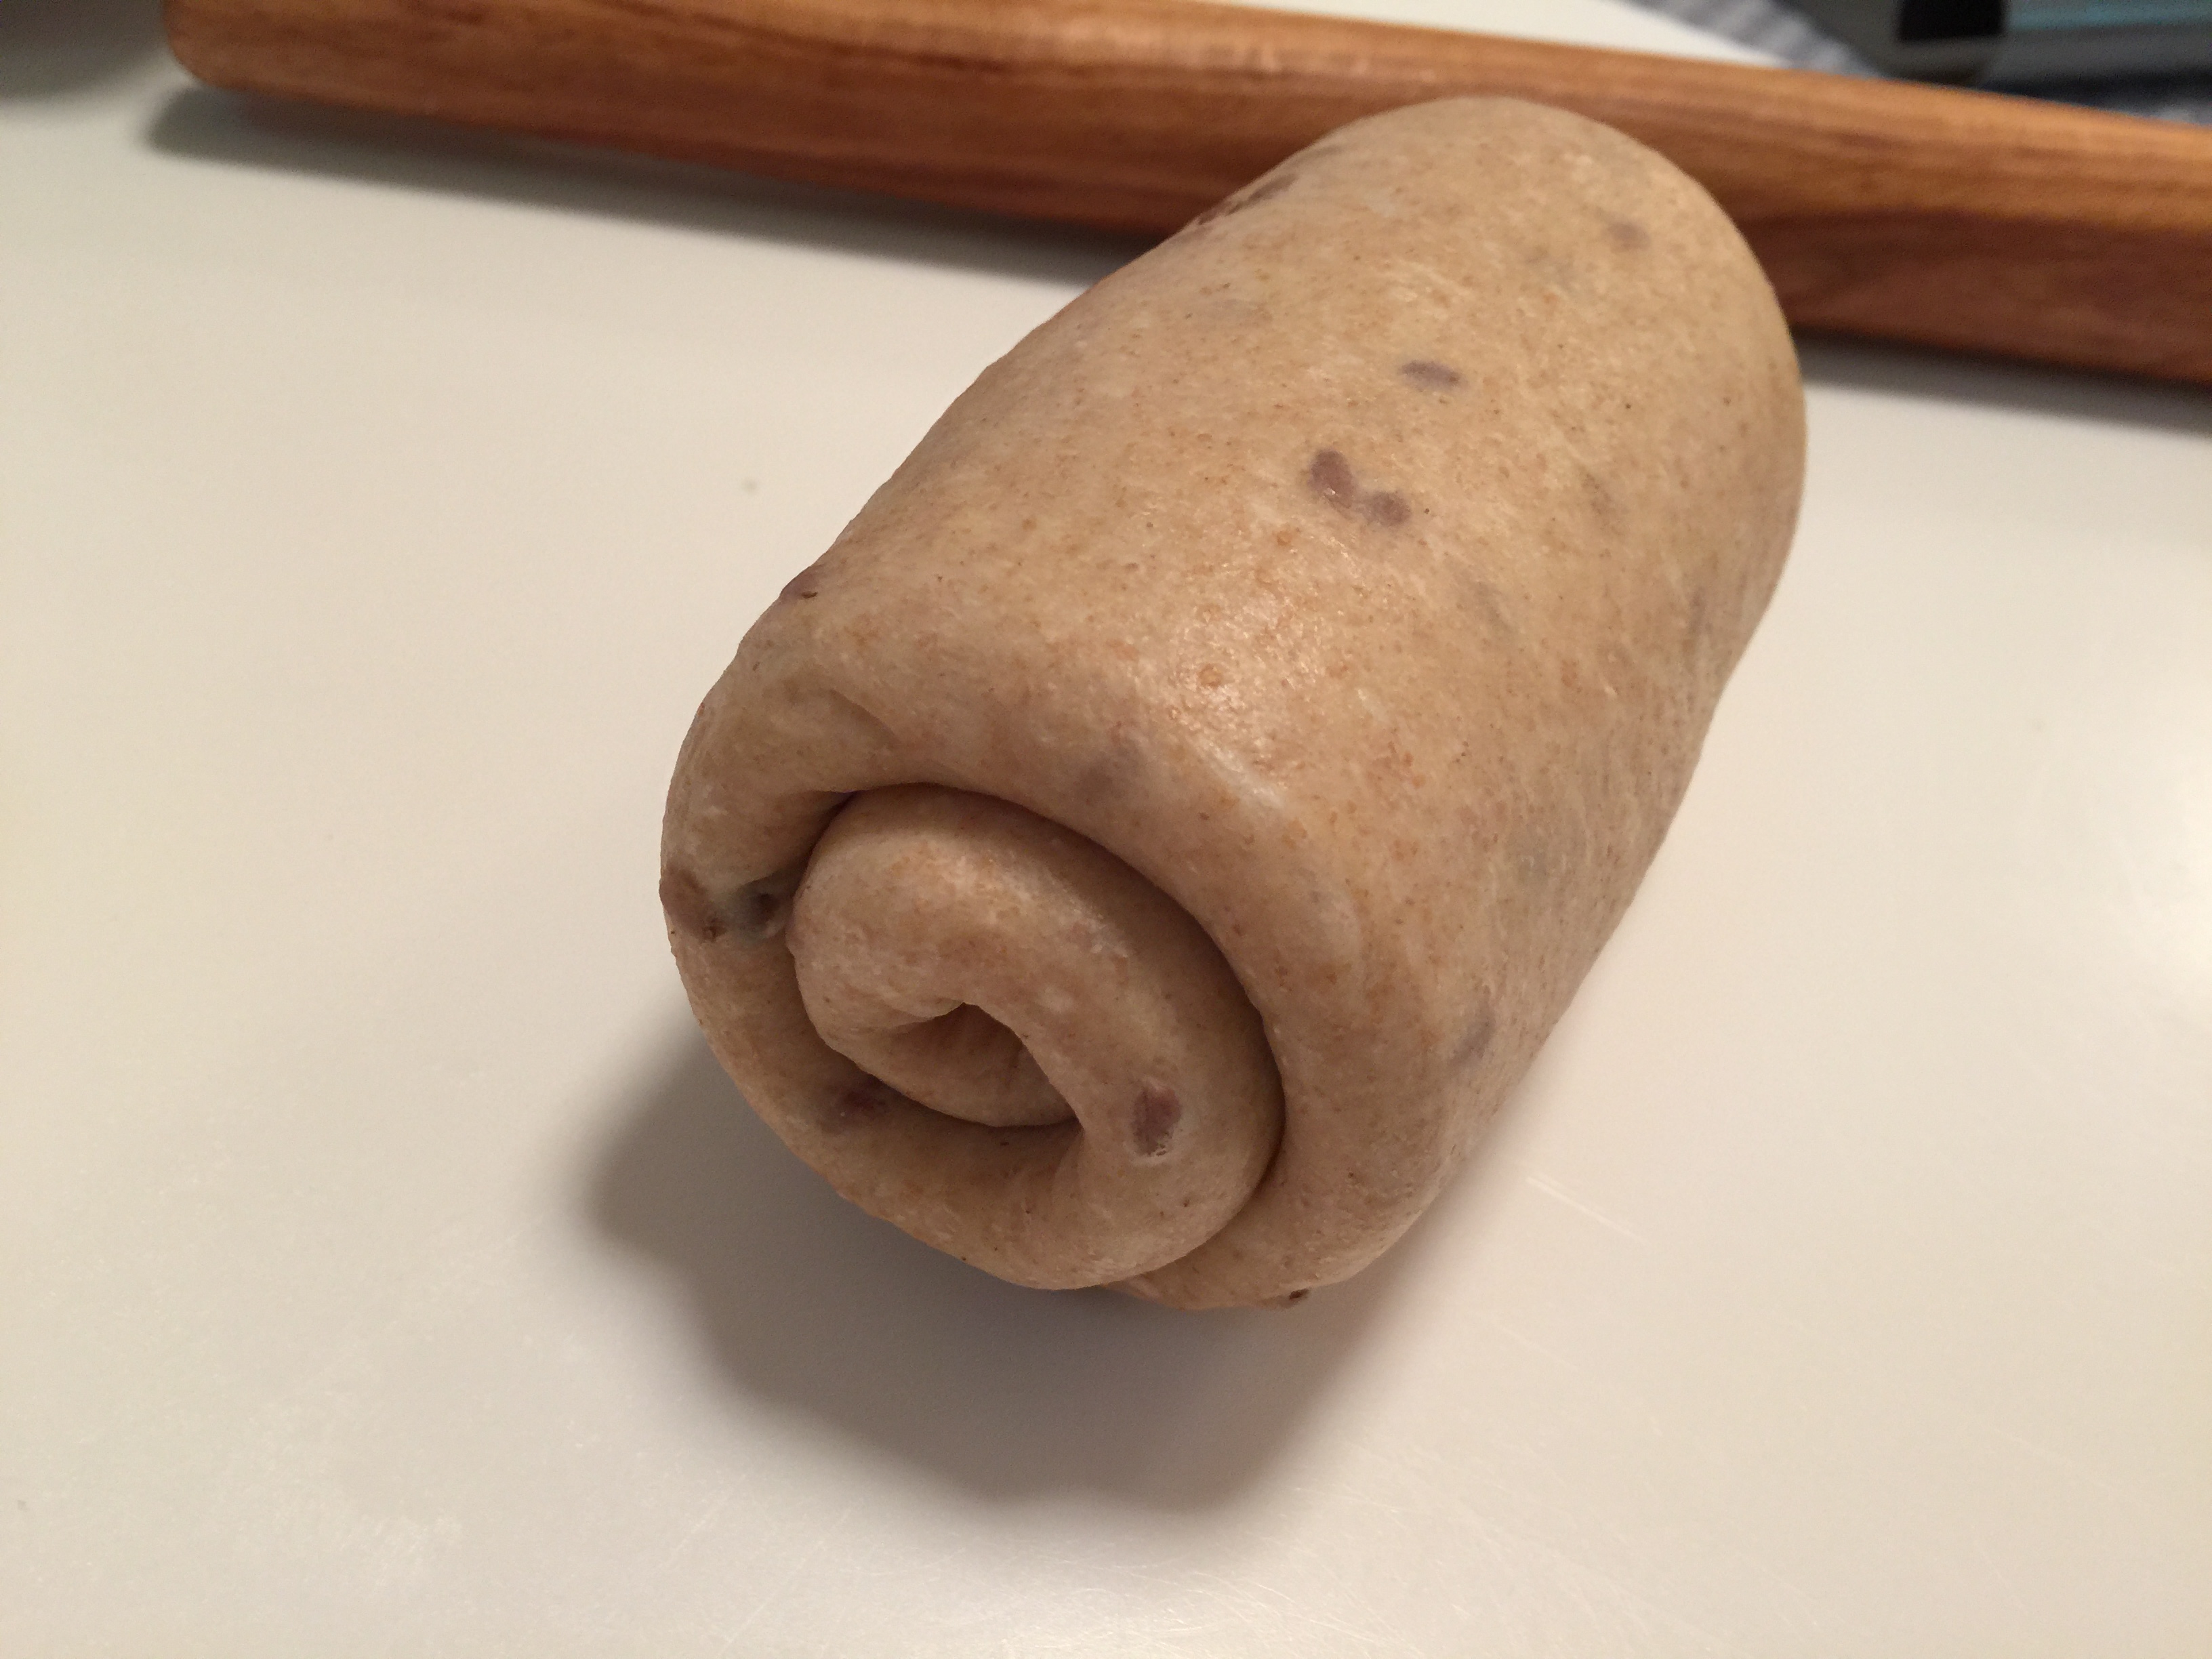
4. When the dough has doubled, cut into two pieces.  Shape into flat loaves that are 5″ square and 2″ high by flattening and then folding the edges toward the middle and sealing the edges with the heel of the hand.  Grease a 9×5½” bread pan and oil one side of each loaf.  Place them together in the pan with the oiled sides touching.

5. Cover again with a moist towel and let rise for 30-45 minutes in a cold oven until the dough has crested the edge of the pan by ½-inch.

img_1330

Funny as it may look, this is a great way to use this pan when a recipe doesn’t fill the pan.

6. Slash the top of each loaf with a little 2″ cut, and brush tops with oil.

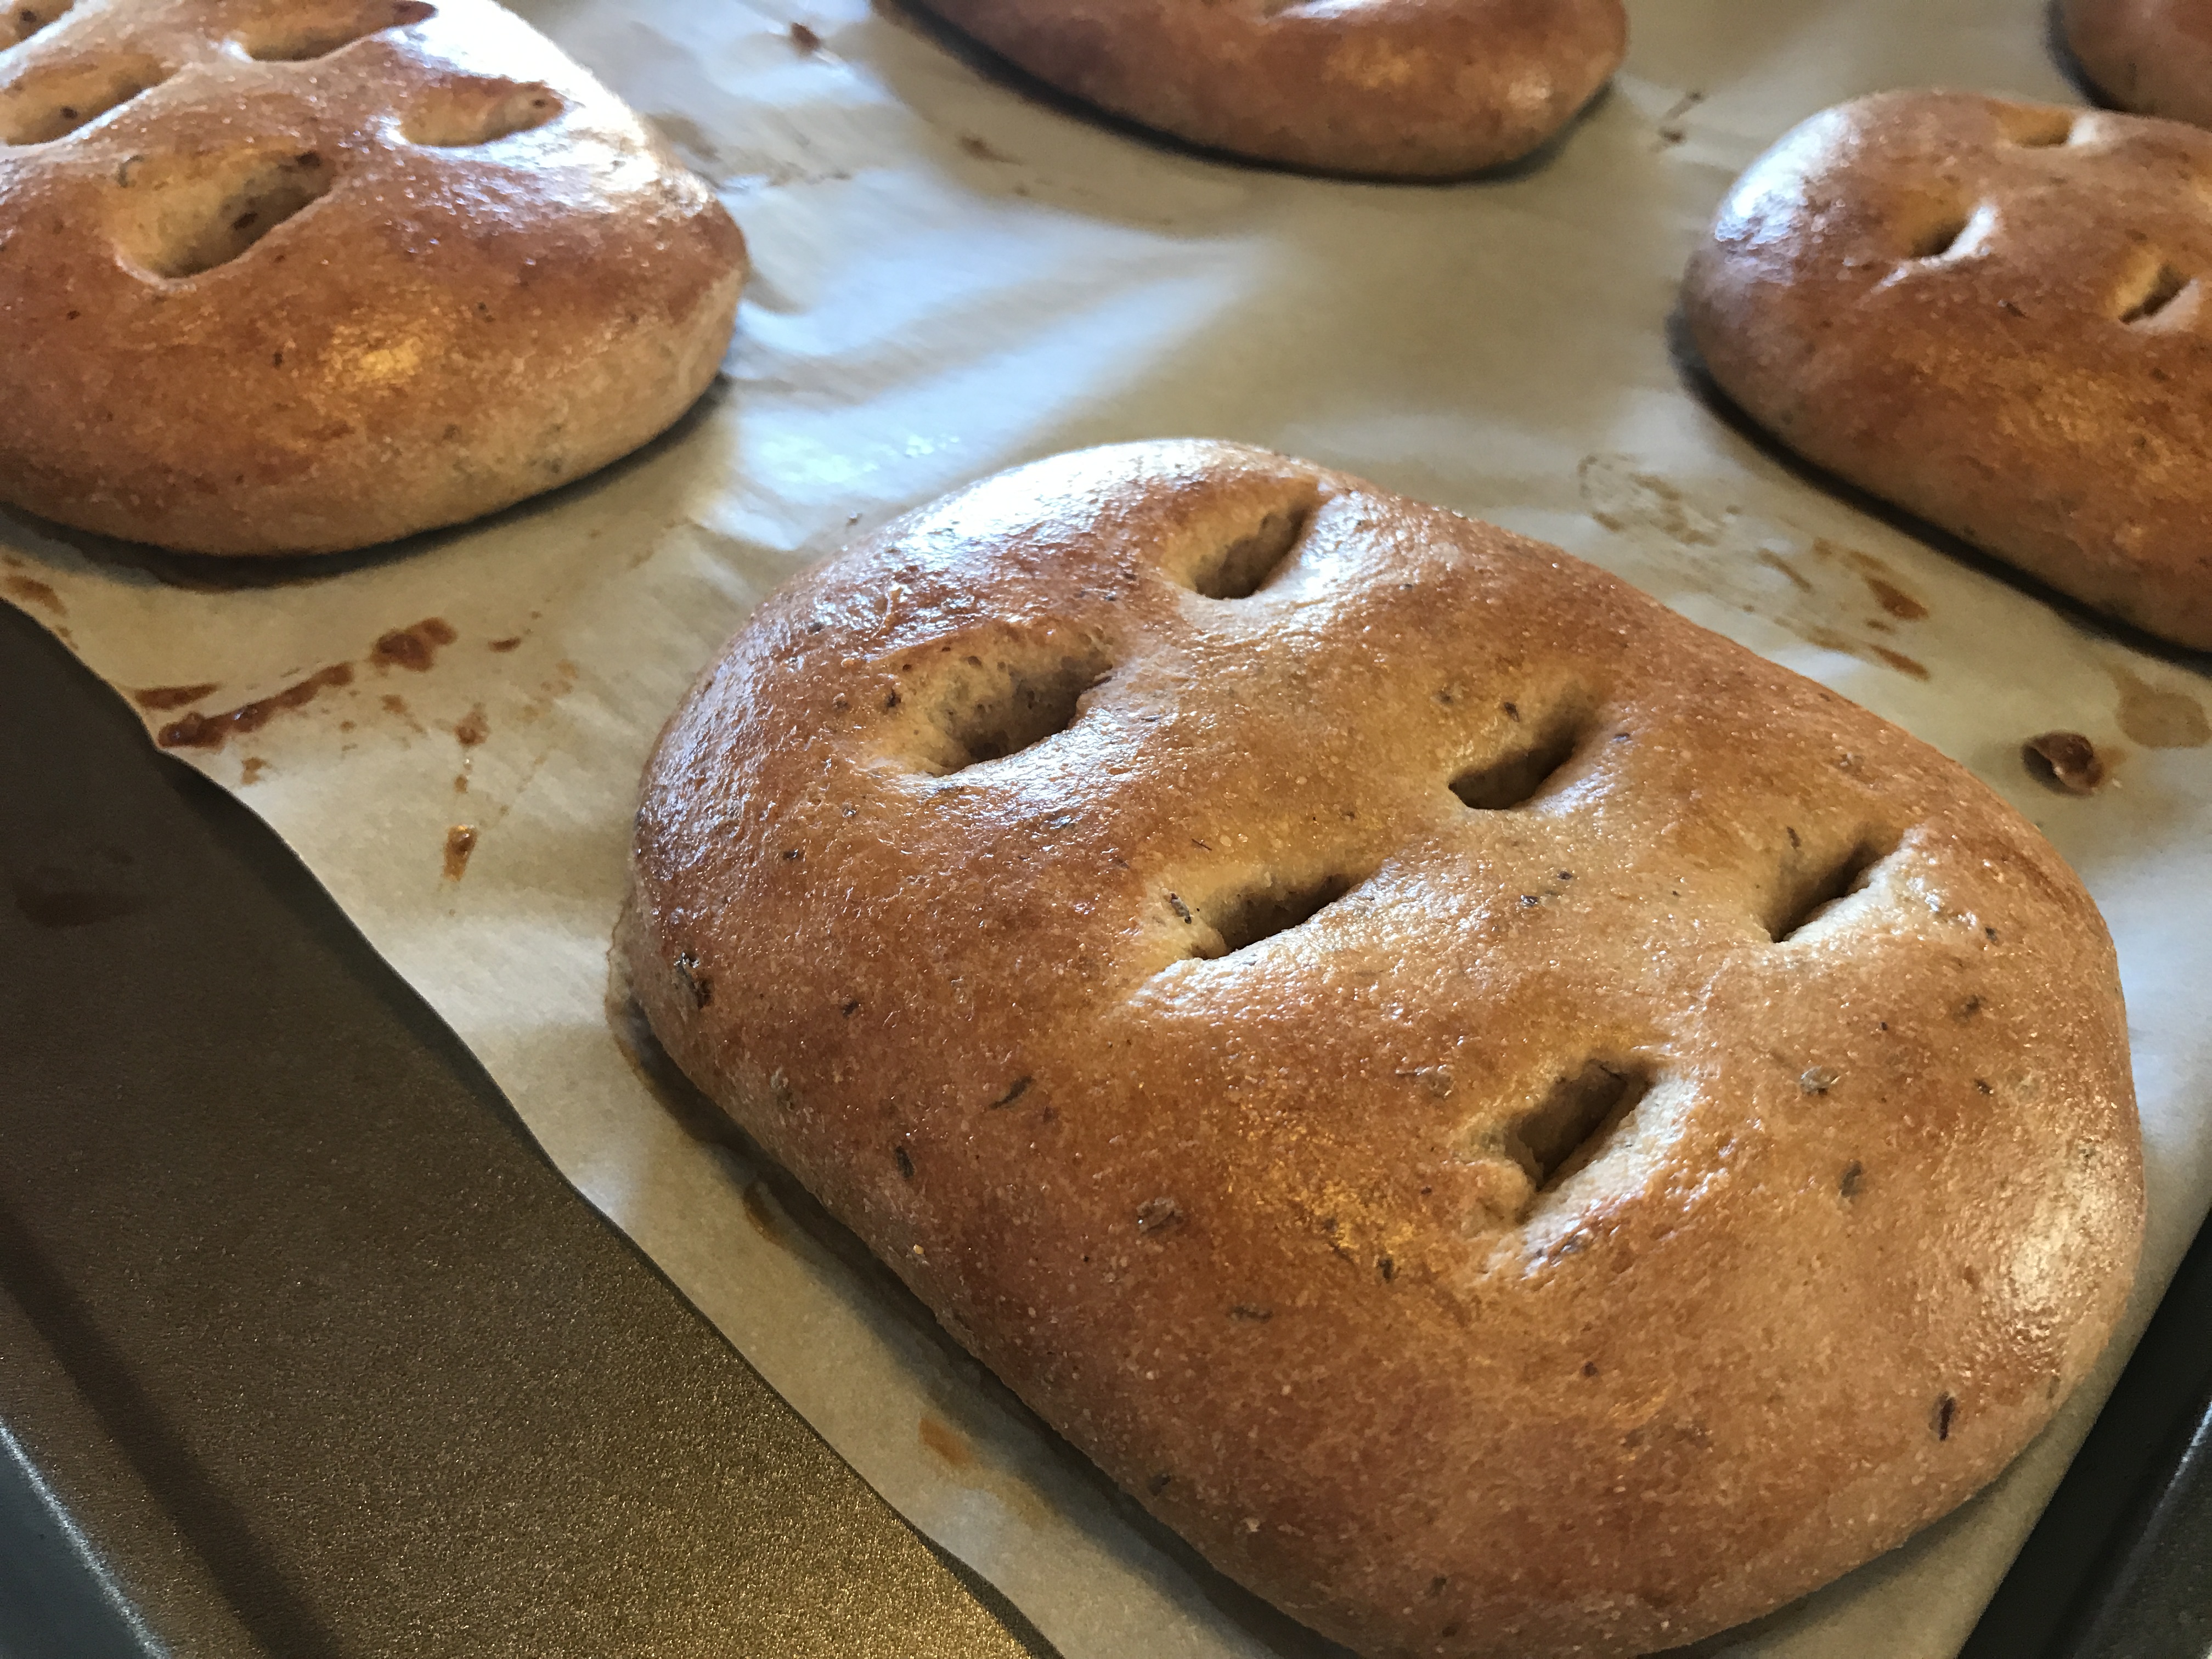
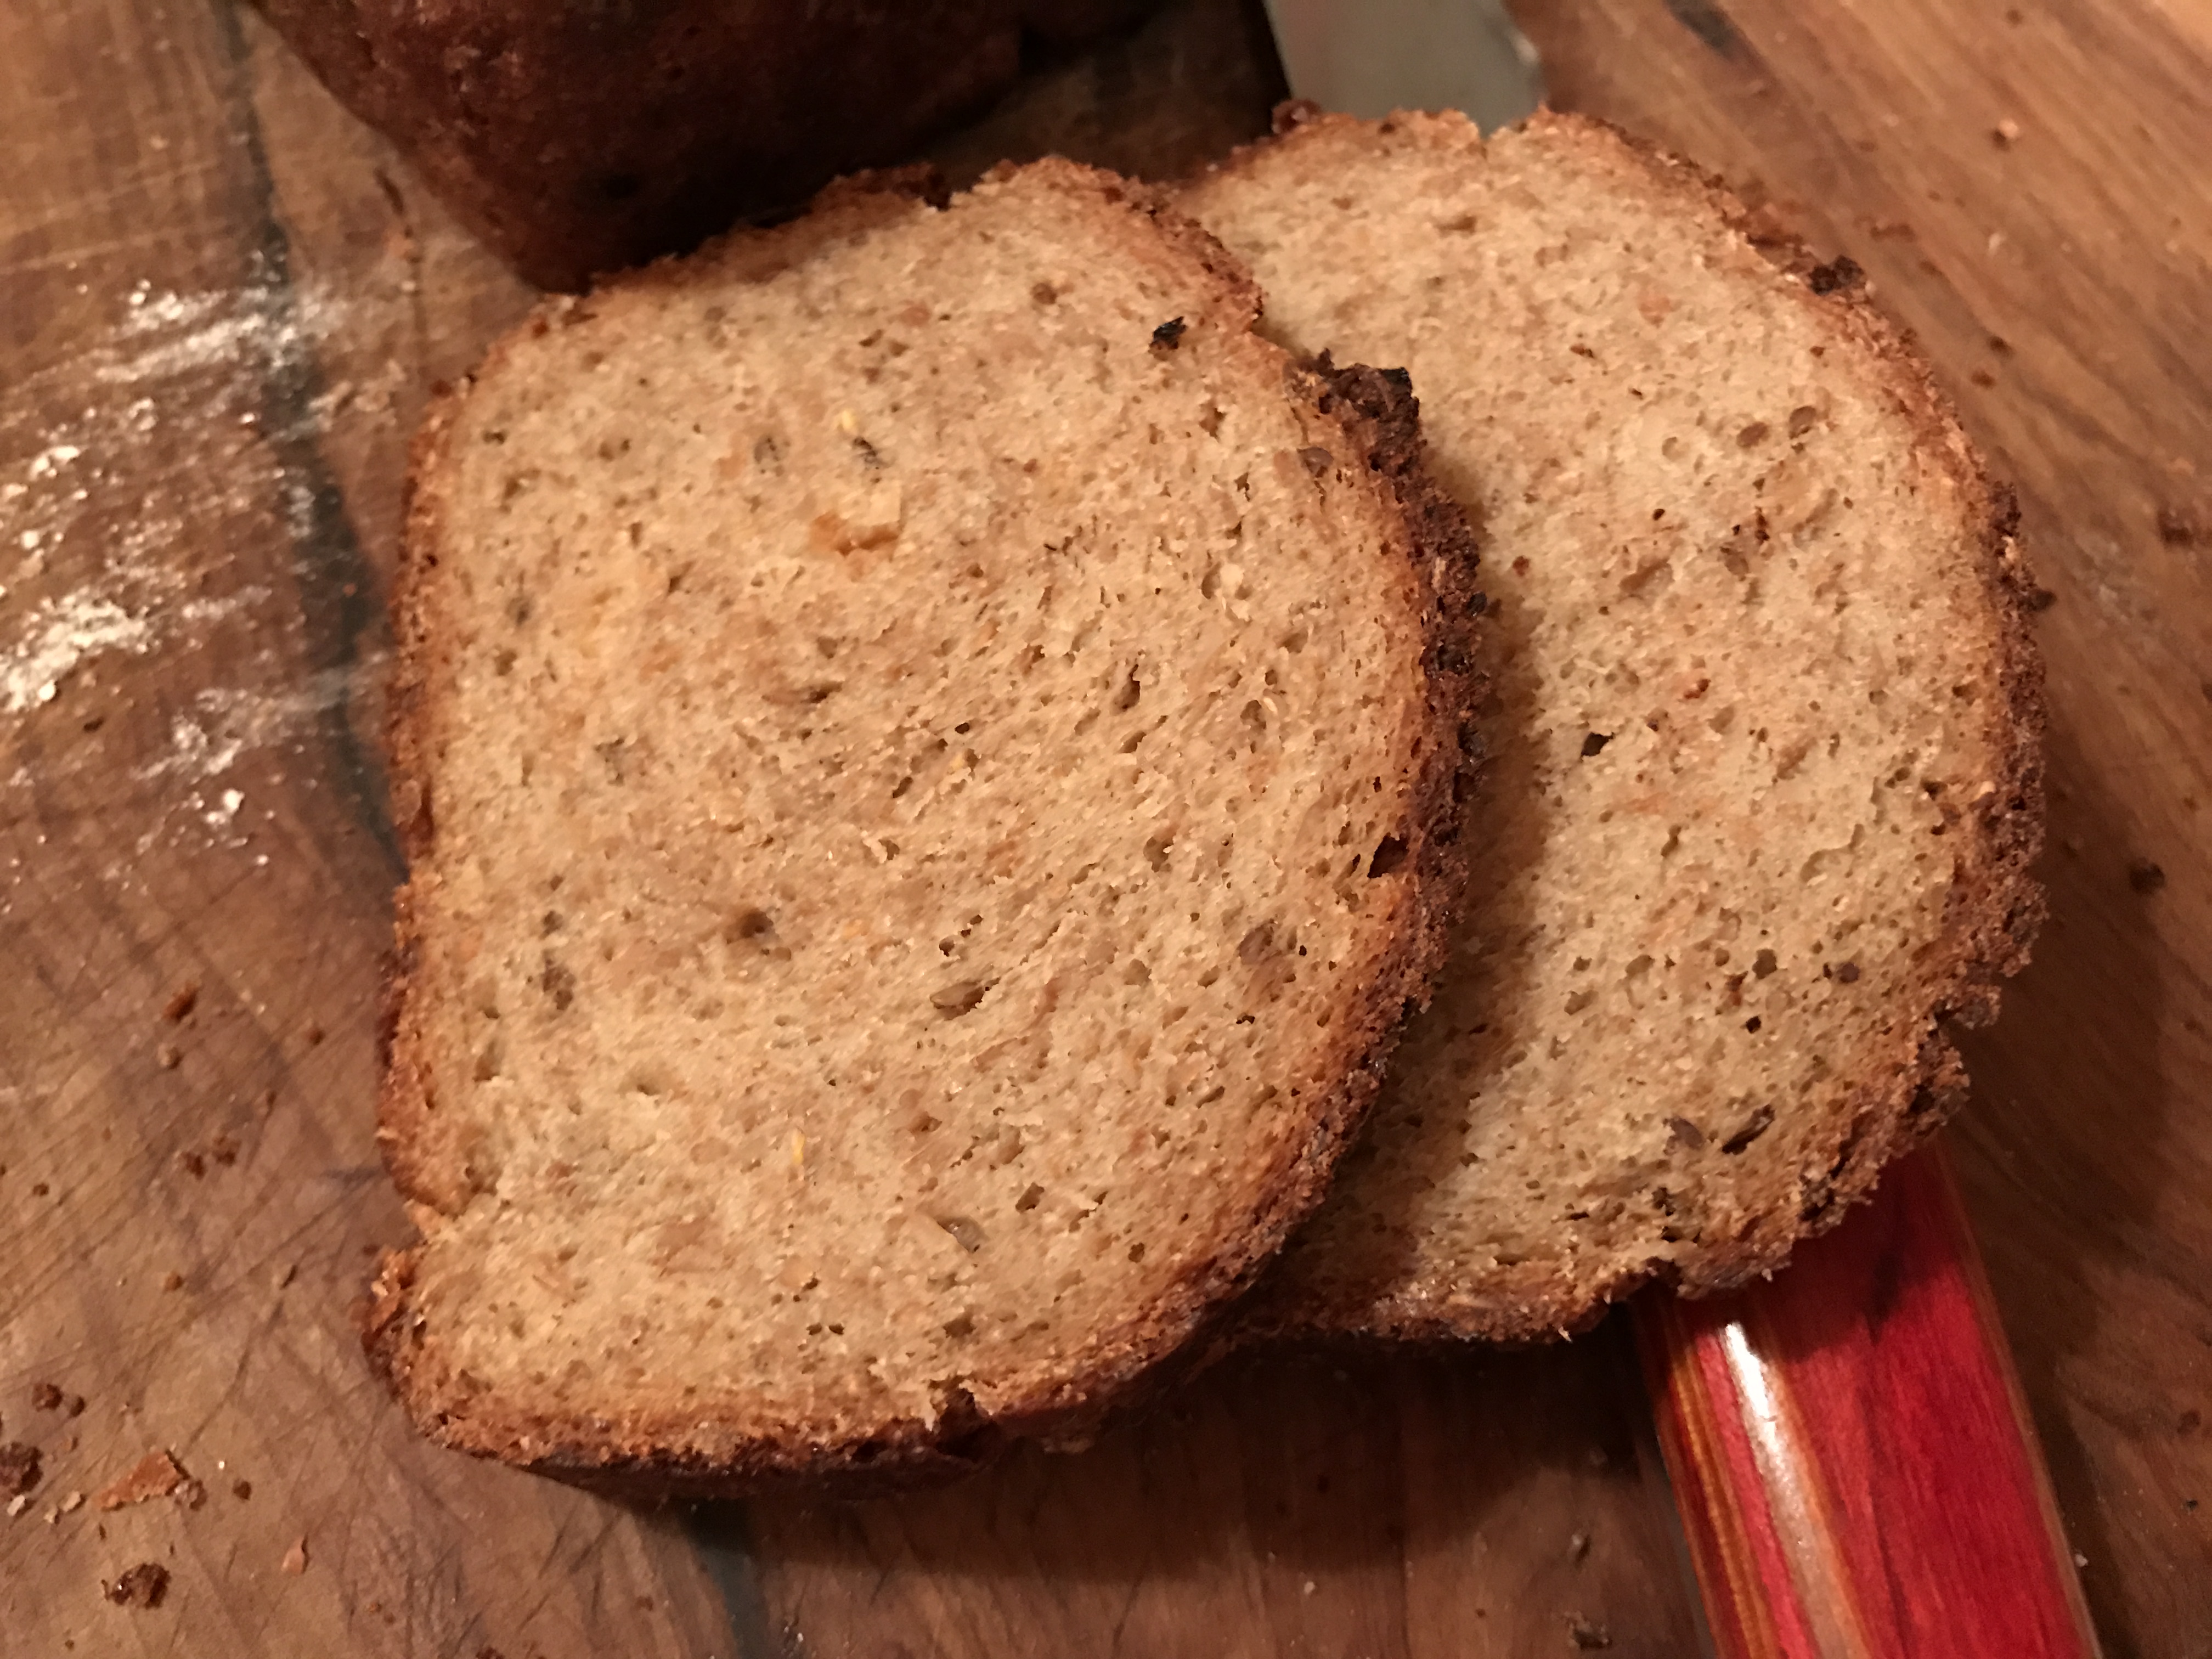
7. Set the oven to 450ºF and immediately place the loaves in to bake.  Bake in the heating oven for 25 minutes.  Reduce heat to 400ºF and bake for 45 minutes longer.  They will be quite dark.  (My oven runs hot and I pulled mine at 40 minutes.)

8. Cool on a wire rack and slice thinly when bread is completely cooled.

Notes:

There are two things wrong with this bread:

img_1363

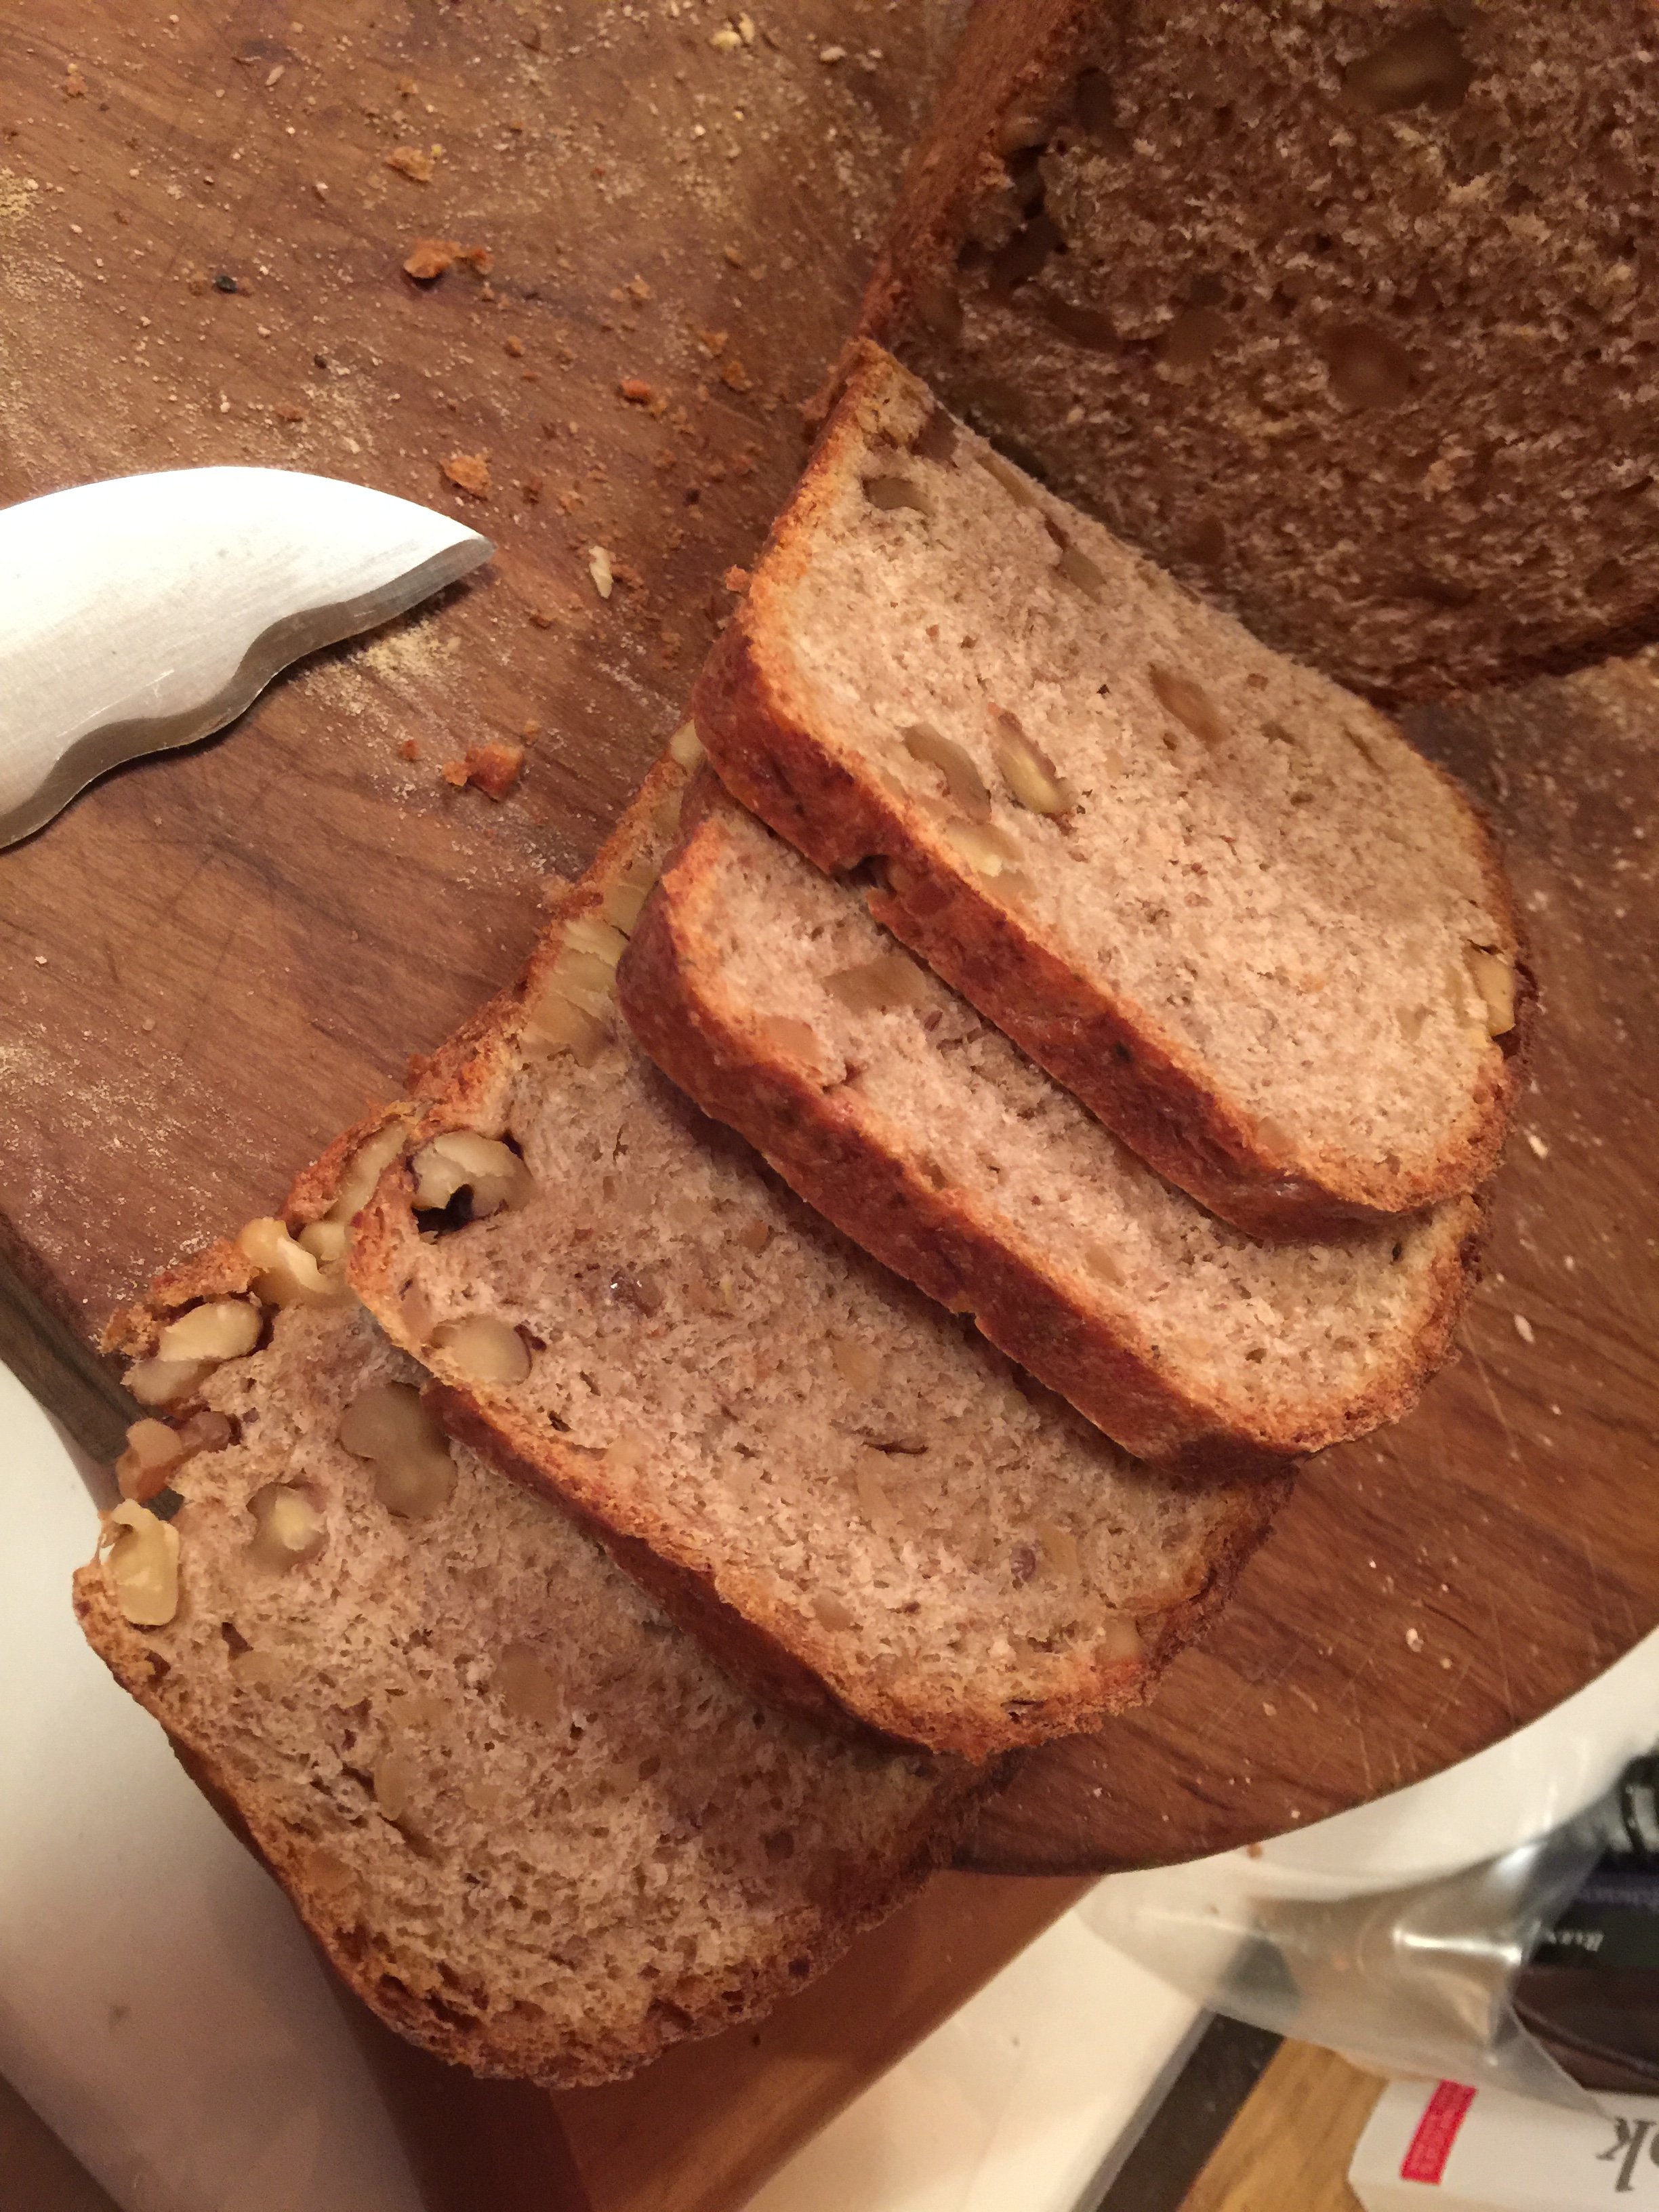
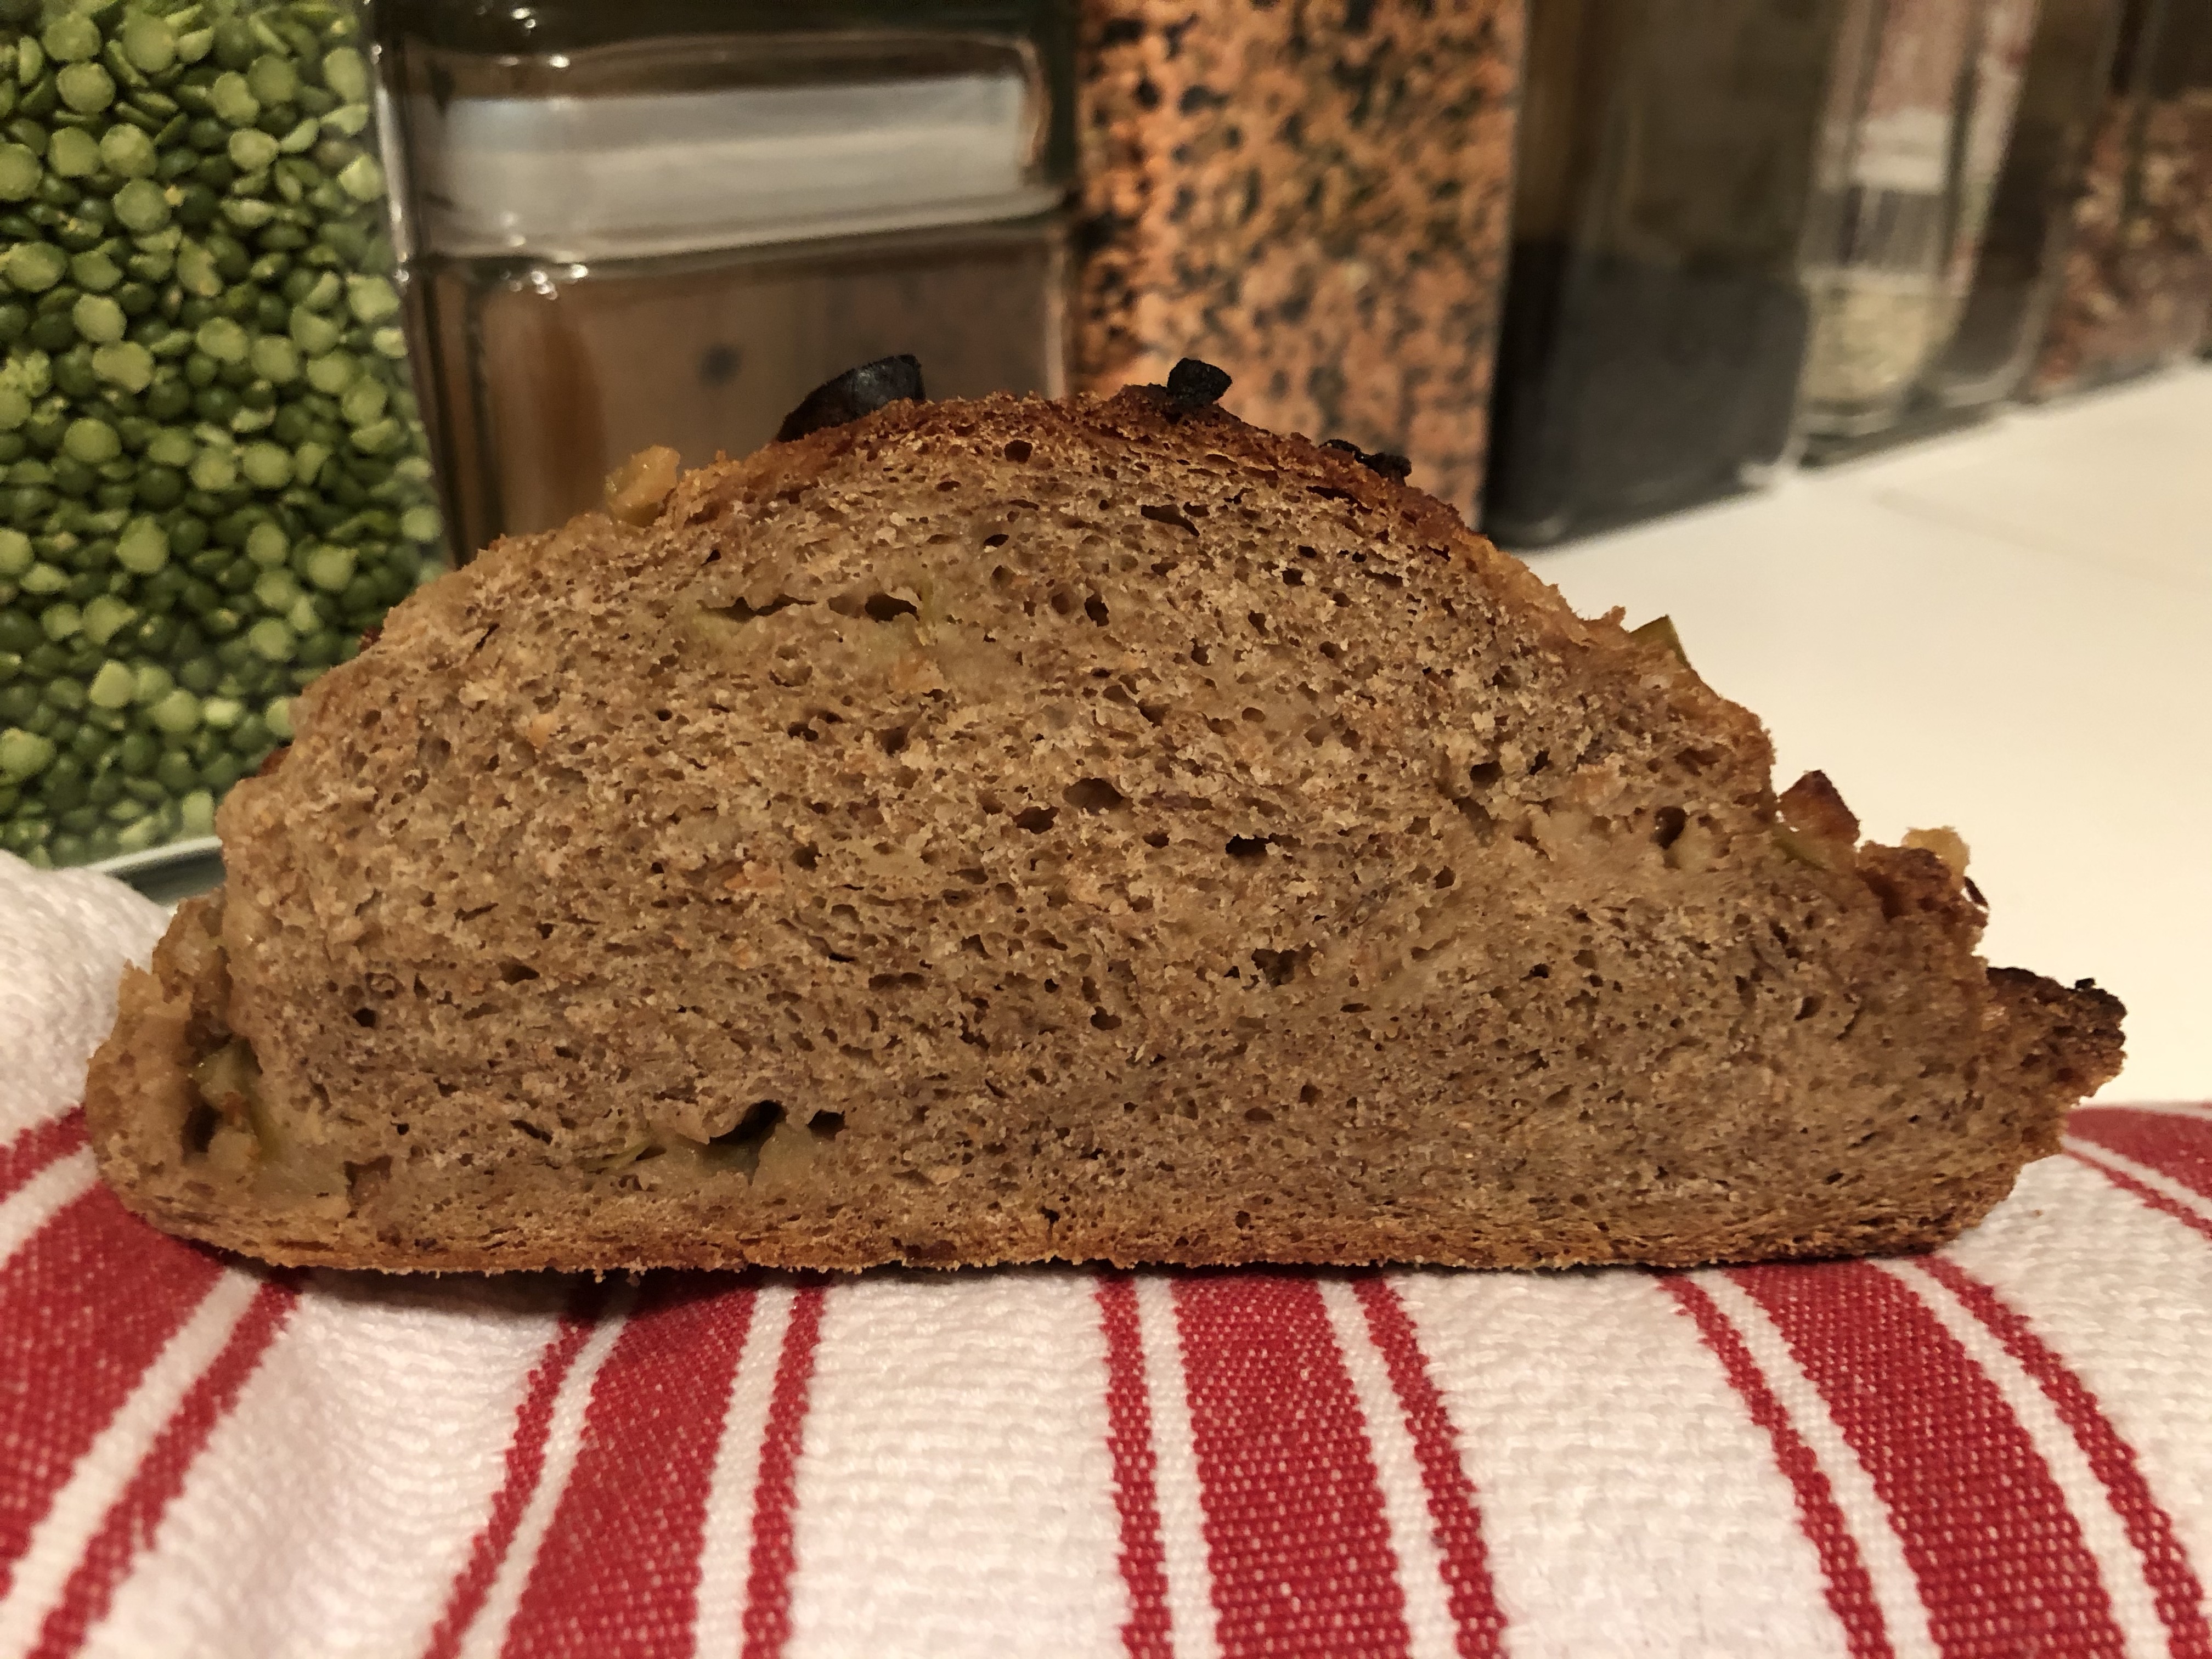
The little chips are the a thin layer of the top crust sliced off. Makes it much easier to slice thin slices of the bread.

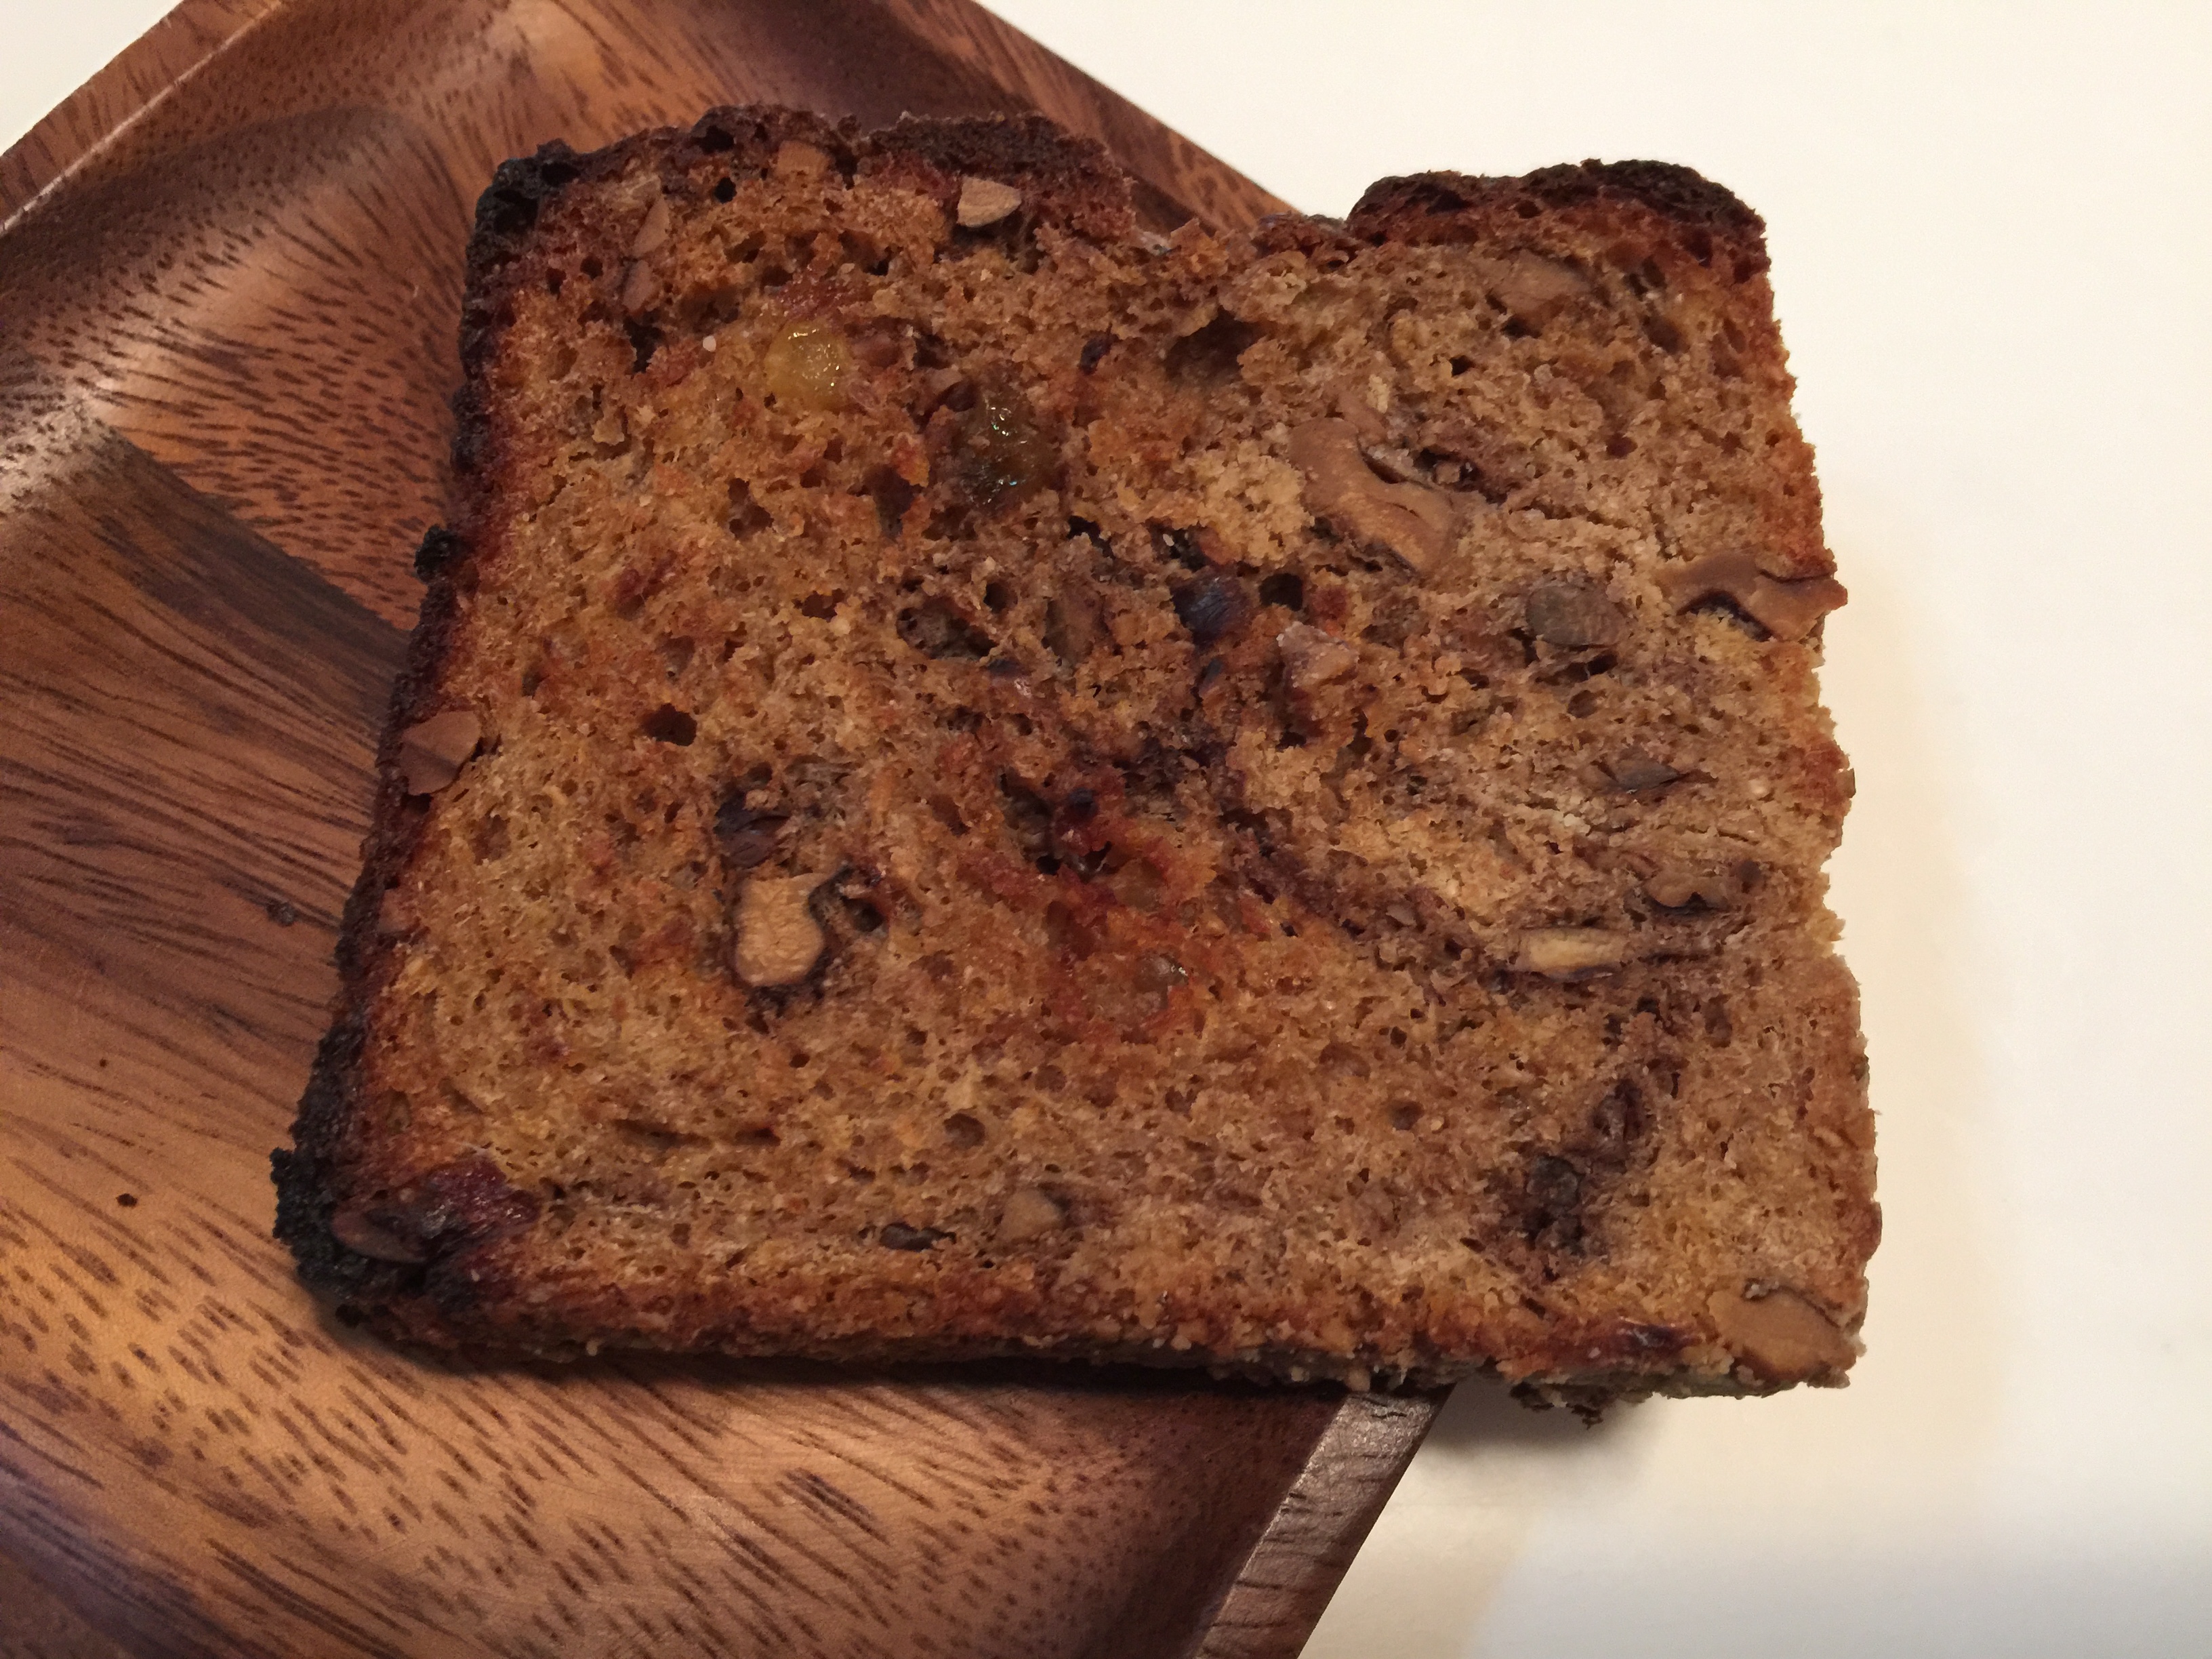
1. The crust is really thick, so as I worked my way through the loaf I would cut off just about an inch of the top crust.  That allowed me to slice beautifully thin slices.

2. It’s gone in a flash.  So fast in fact, I found my self baking it again two days later … there was only two of us eating it.

img_1335

As dark as this looks, there was no burnt flavor or order found here but the crust is thick.

Half my loaf weighted 428 grams

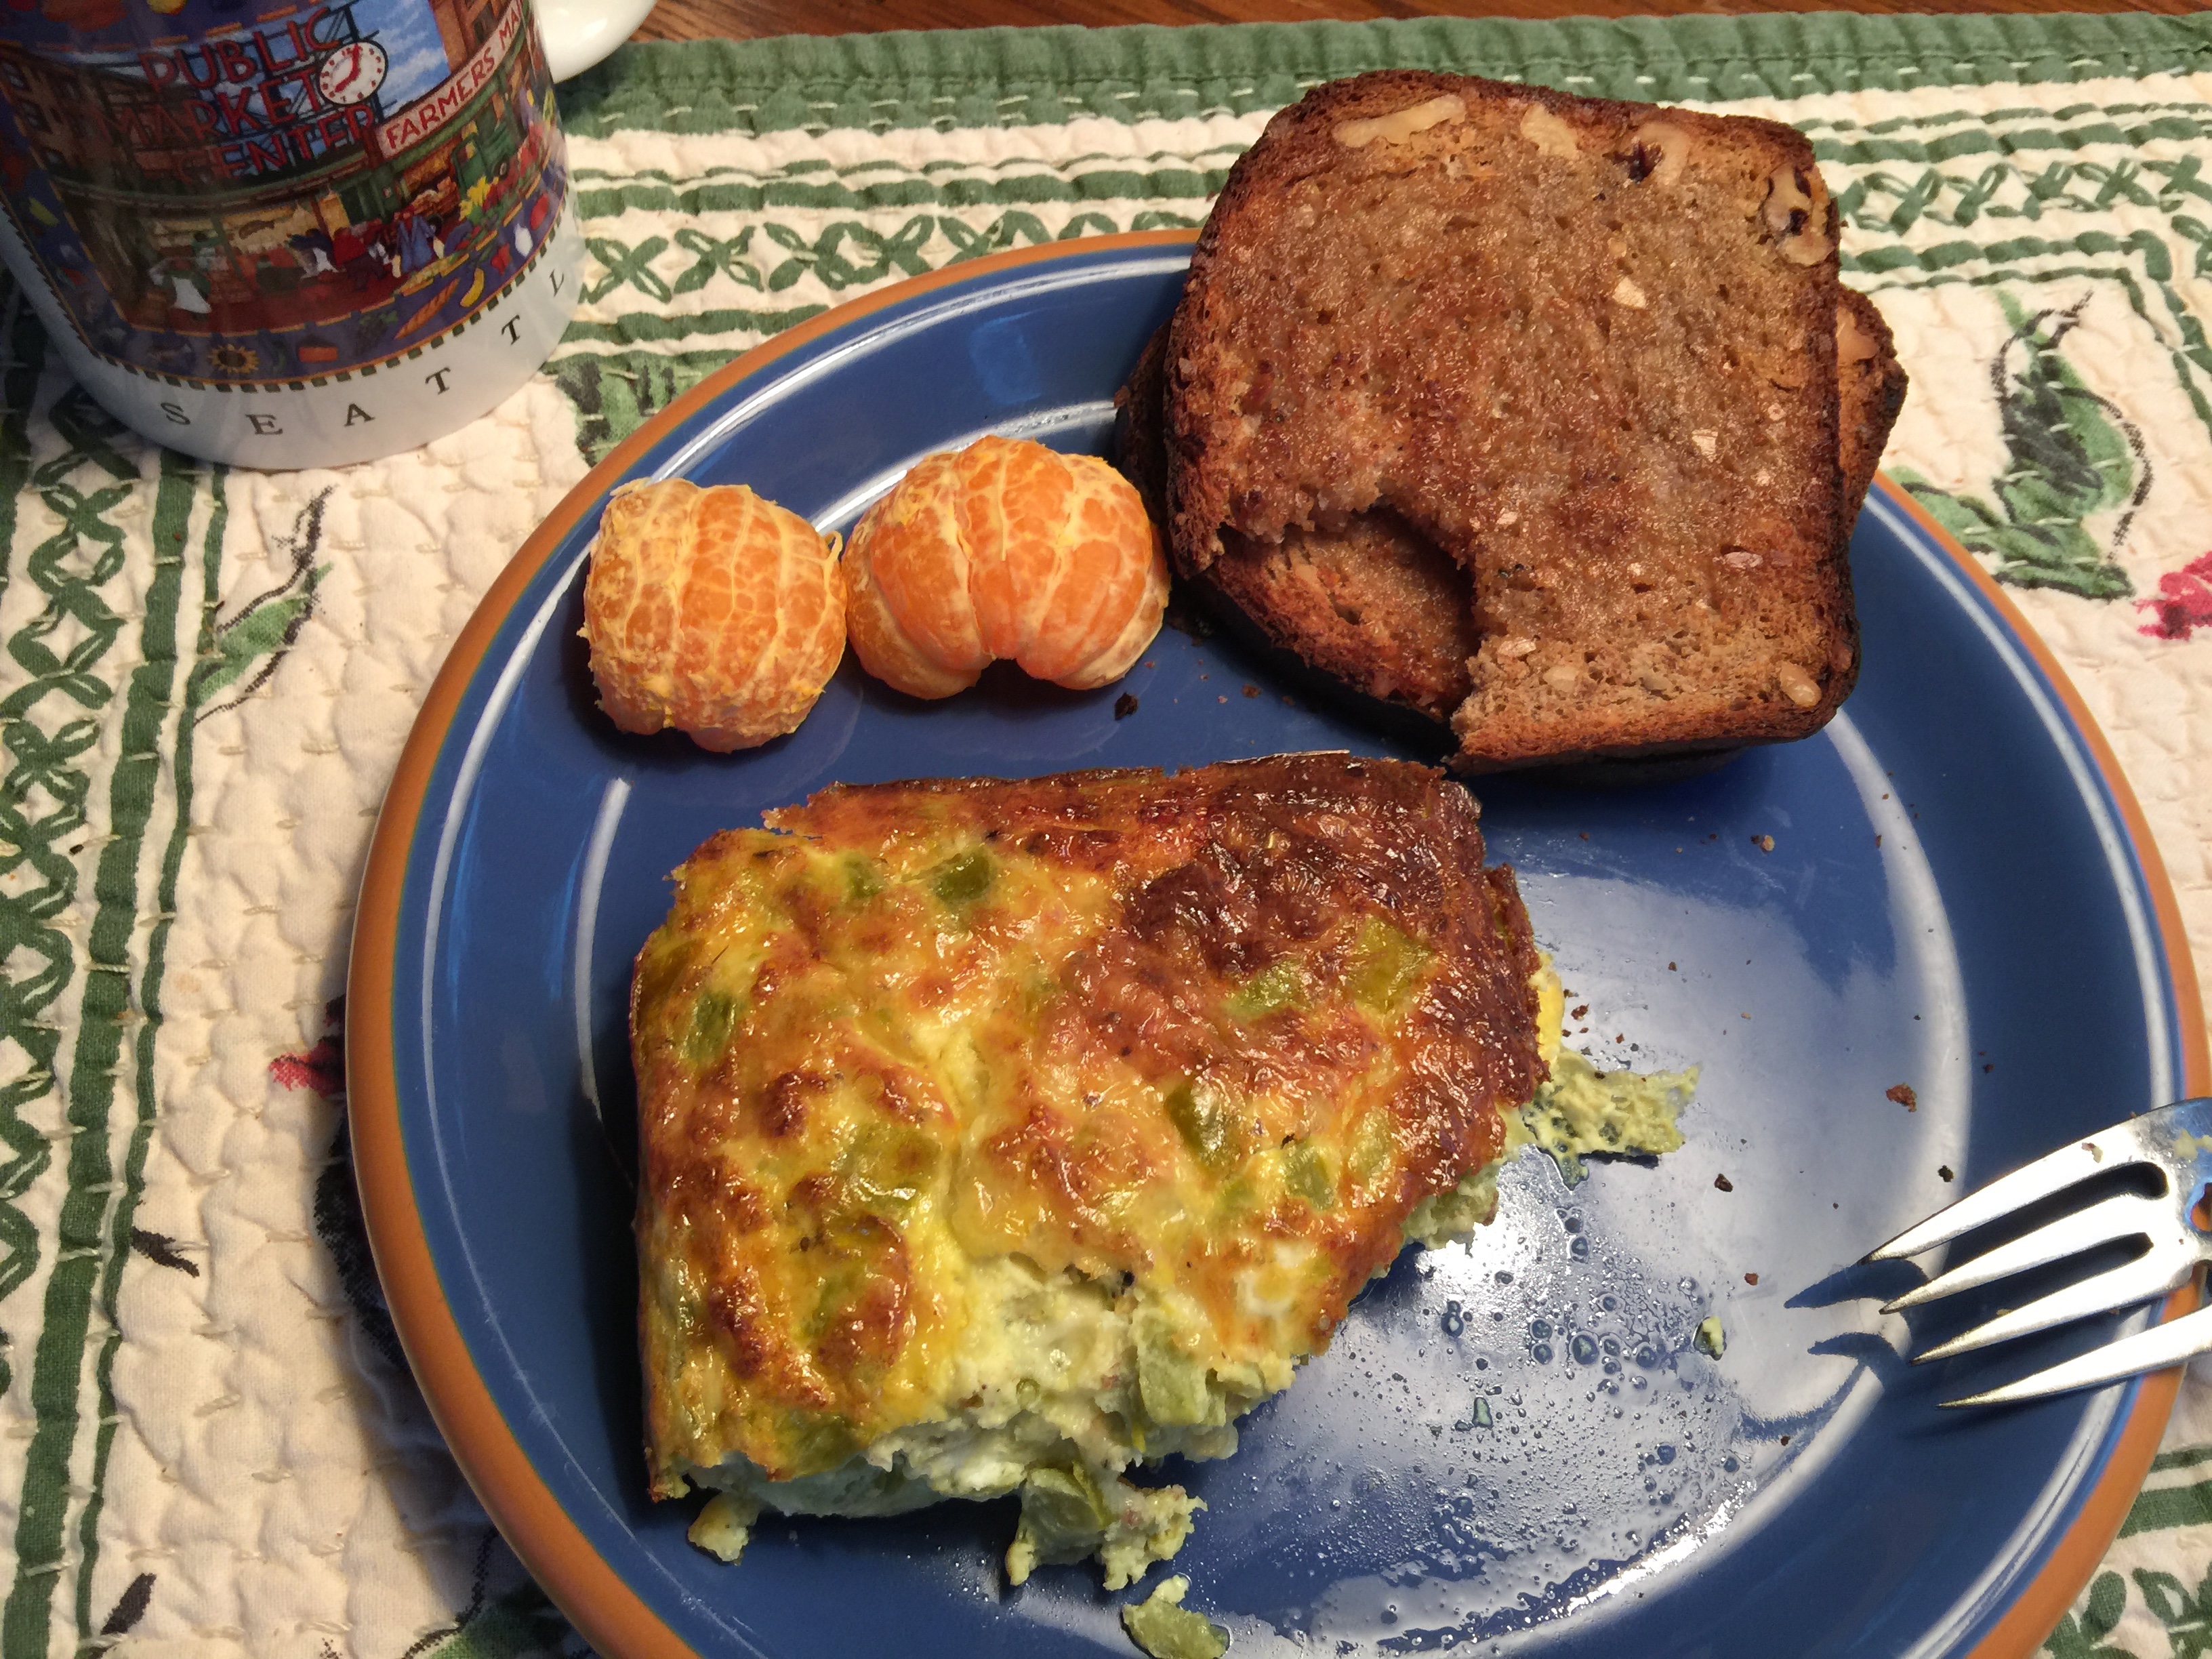
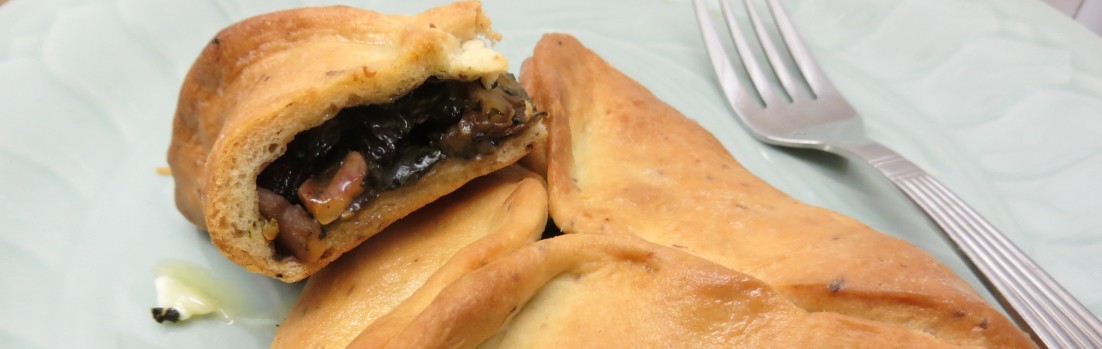
Don’t miss this bread.  It is a delightful rye and really very simple to put together.  We enjoyed it with poached eggs, smoked salmon and I’m trying to get the ingredients for a Rubin before this last loaf is gone.

img_1361

We would love you to bake this great loaf with us and become our Bread Baking Buddy. Here’s how: (I copied this from Lien who copied it from Kelly)  Just bake your version of this bread by November 30th and send her a note with your results and a picture or link to your post at eleyana(AT)aol(DOT)com with Buddy Bread in the subject line and she will include you in our buddy round up at the beginning of next month and send you a badge to keep and/or add to your post.  You don’t have to have a blog to participate, a picture is fine!

fullsizeoutput_7361

See you next month!  Baking my heart out.


7 Comments

Lien’s Bran Bread ~ BBB

BBB Bran Bread ~ 100% Whole Wheat

Recipe From Lien: from the sisters Margherita and Valeria Simili

Yield: 2 loaves or 1 pullman

While this is a tricky bread to explain; it is an easy bread to enjoy.  Lien’s goal with this bread, I think, was a super healthy bread that tasted really good.  I think she succeeded exceedingly well.  There is a lot of bran in this bread and you really never really think “bran” while you’re eating it.
I believe I did a number of very small things wrong that together left me feeling this loaf missed something, missed a spark and yet we both of us kept going for another slice.  The loaf was gone in three days.  This loaf had great texture and very good crust.  I short changed on raisins and nuts, use more next time.  I very often cut down and often eliminate sugar, I think perhaps this was the spark that I missed; use some sweetening next time.

Would I make this again … I’ve got my ingredients ready to mix a starter tonight.

STARTER FOR SLOW RISE
250 grams whole wheat flour
450 grams water
75 grams wheat bran
2 pinches active dry yeast
DOUGH
110 grams whole wheat flour
150 grams whole sprouted wheat flour
20 grams rye flour
160 grams water, used water raisins soaked in

30 grams honey (omited first baking** must add next baking)
2 grams active dry yeast
30 grams butter
9 grams salt
50 grams instant skim milk powder
1 tablespoon diastatic malt flour
75 grams walnuts (next time make at least 100 grams)
75 grams raisins (next time make at least 100 grams)

Directions:

1. STARTER:  Mix white whole wheat, wheat bran and yeast with water.  Cover and let sit over night.  (Elizabeth used crushed malted rye berries also; I wish I’d had some.Next time: try some rye flour, rye flakes or malted something.)

IMG_0858

Starter after the overnight rise.

2. NEXT MORNING: Soak dried fruit in water.  My initial call was to use cranberries but Gorn wanted raisins (98% of the time).  I should have used at least 100 grams of either.  Another time I might use apricots.

Mix starter and all dough ingredients – holding back walnuts and dried fruit.  I used the water I soaked the raisins in – why throw away flavor?

3. KNEAD not really.  I mixed and let it sit about 20 minutes.  I added a little more flour and it still didn’t really knead.  I wasn’t willing to add more flour, in retrospect I probably should have because it never reached kneading consistency.

4. Turn the dough out on a lightly floured surface and press or roll it out flat in a big oval. Add nuts and/or raisins over the dough, fold the dough in two, press or roll out again and sprinkle on the remaining nuts/raisins. Roll the dough (jelly roll style).

5. Heavily butter pullman pan and sprinkle liberally with walnut crumbs.

6. I rolled the dough roll into my pullman pan.  Sprayed the top with water and put the pan cover on sliding it closed short of half an inch.

IMG_0866

7. 45 minutes later I had a really nice rise.

8. Preheat your oven to 200ºC (400ºF).
9. Make slashes in the dough (maybe if I’d added more flour).  Check the temperature of the bread (95ºC/200ºF) to be sure it is cooked.
Baked uncovered 50 minutes.  Internal temp at 201 when taken out of oven.
Take the loaves out and leave to cool completely on a wire rack.

There is no bitterness in this bread so often associated with all whole wheat breads.  I never felt like I was being made to eat this bread because it was good for me; this is easy eating bread.

IMG_0872
GOOD EATING.
IMG_0883
Do you see the big smily face upper right?  He’s telling you to get into the kitchen and Bake!
It would be great if you could join this challenge, how much bran can you add to still make good edible bread?  Get your bag of bran, knead, post and let us know how it went. And join us as a Bread Baking Buddy, send your results and what you thought of this to the Kitchen of the Month (that’s Lien this time!) type BBB Brab Bread as subject to notitievanlien(at)gmail(dot) com and you’ll be sent a Bread Baking Buddy Badge that you can add to your blogpost if you like. Deadline the 29th of June. Take on the challenge and let’s bake!


Auberge Walnut Bread

Nuts.  Do you love nuts?  Walnuts, toasted. Do you love walnuts toasted?

Elizabeth was our lovely hostess for the March 2016 bread ~ I guess I’m a little late it now being April 7.

So, what did I change … I didn’t have to add ground flax!  I didn’t have vital wheat gluten; I did use organic bread flour (no all purpose).  I used powered ginger but there was also fresh ginger sitting on the counter and I gave that several swipes on the microplane; any ginger flavor or aroma was in the background, I didn’t really identify it.

Butter – salted or unsalted.  Before I moved to the woods, I always had both salted and unsalted on hand and used unsalted when called for.  Now, there is a place called Country Dairy   http://www.countrydairy.com/about    just 8 miles from us.  I love this place!
IMG_0610
You may ask what does butter (salted or unsalted) have to do with ice cream.  You can ask that.  Here’s my story, why I don’t buy salted butter anymore:  Growing up I was a lover of ice cream.  What kid isn’t!  In my world as an Air Force brat, I had ice cream from all over this country.  But for me the very best ice cream, the only ice cream worth eating was only to be found in a little mid-west town where we spent all holidays, many other times and actually lived one year while my father was stationed overseas.  My favorite aunt loved ice cream and watermelon as much as I did and so she was always willing to take me into Central Dairy for a cone.  That was childhood when I was always into ice cream.  As we struggle with waist lines in what some might call my “adulthood” (I don’t call it that even into my 70’s because it just doesn’t seem likely that I could be an adult even now.) ice cream is something for rare occasions.  Even so, I did one day find myself in Country Dairy and allowed a treat … that would be ice cream.  I don’t really remember which flavor it was but the first lick … I was suddenly 5 years old again, back on those small black and white floor tiles in Central Dairy.  People, this was ICE CREAM like it is supposed to be.  This was the real deal.

When you have that kind of a moment in a place where the people are terrific, your husband says this is the best skim milk ever, they do wonderful panini breakfast sandwiches and there is terrific cheese and sausage in the counters along with that ice cream, you can count on a VERY loyal customer – that would be me.  They only have salted butter.  Sorry, I just don’t buy unsalted butter any more.
IMG_0609

I brushed the mostly baked loaf with half and half.

Recipe From Elizabeth as found in Auberge of the Flowering Hearth by Roy Andries de Groot
Yield: 2 loaves

TWO LOAVES ~ Amounts
253 grams walnut halves, divided
»    200 grams 200g (2 c) whole walnut halves
»   53 grams 53g (0.66 c) walnut halves, finely chopped
420 grams (1.75 c) boiling water
34 grams (0.5c) skim milk powder
36 grams (2.5 Tbsp) unsalted butter (I used salted butter)
12 grams kosher salt (2 tsp table salt)
0.5g (0.25 tsp) powdered ginger
84 grams (4 Tbsp) dark honey
634 grams (~5 c) flour (de Groot’s recipe calls for 3c white bread and 3 c whole wheat, but that seems like too much. I switched to the equivalent of 2c white and 3c whole wheat.)
»   250 grams 250g unbleached all-purpose flour
»  9 grams 9g vital wheat gluten
»  15 grams 15g flax seed, finely ground
»   360 grams 360g whole wheat flour
29 grams (0.25 c) wheat germ
60 grams (0.25 c) water at ~98F
6 grams (2 tsp) active dry yeast
milk or cream for brushing during baking (de Groot’s recipe calls for egg yolk and milk)
HALF RECIPE ~ Amounts
ONE LOAF
170 grams walnut halves, divided
»   100 200g (2 c) whole walnut halves (I ended up using just 100g)
»   70 53g (0.66 c) walnut halves, finely chopped
210 grams (1.75 c) boiling water
17 grams (0.5c) skim milk powder
18 grams (2.5 Tbsp) unsalted butter (I used salted butter)
6 grams kosher salt (2 tsp table salt)
1/4 teaspoon 0.5g (0.25 tsp) powdered ginger, used powdered & fresh
42 grams (4 Tbsp) dark honey
267 grams (~5 c) flour (de Groot’s recipe calls for 3c white bread and 3 c whole wheat, but that seems like too much. I switched to the equivalent of 2c white and 3c whole wheat.)
»  125 grams 250g unbleached all-purpose flour
»    9 grams 9g vital wheat gluten, omitted
»    15 grams 15g flax seed, finely ground
»   185 grams 360g whole wheat flour
15 grams (0.25 c) wheat germ
30 grams (0.25 c) water at ~98F
1 teaspoon (2 tsp) active dry yeast
milk or cream for brushing during baking (de Groot’s recipe calls for egg yolk and milk)

IMG_0611
1. Walnuts: In the morning of the day you plan to bake the bread, spread the walnut halves in a single layer on a cookie sheet and toast them in a 400F oven for 8-10 minutes. Watch them carefully so they don’t burn! They’re done just at the moment you begin to smell them. Set aside 200g (2 c) onto a plate to cool. Using a very sharp knife, finely chop the other 53g to produce about 2/3 cup.

2. Mixing the dough: Pour just-boiled water into a large mixing bowl. Whisk in milk powder. Immediately add butter, honey, salt and powdered ginger and whisk until the butter has melted and the honey is incorporated.

3. Add flours, wheat germ and finely chopped walnuts (de Groot suggests grating them(!)) on top of one side of the large bowl.

4. Warm the water for rehydrating the yeast to around 98F, a little over body temperature. Or are you allergic to a thermometer? Heat it until it’s the temperature safe to feed to a baby: a few drops on the inside of your wrist feels warm but not hot. If it’s too hot, add cold water. (Tap water is okay, but please do NOT use water from the hot-water tap! You don’t know how long things other than water have been festering in the bottom of that tank.) Pour the warmed water into a small bowl and add the yeast. Whisk until the yeast has dissolved. Check to make sure that the milk mixture is not above body temperature (do the baby-bottle test on the inside of your wrist again) and then add the yeasted water to the milk mixture. Stir everything together with a wooden spoon to created a rough dough.

5. Kneading: Knead in the bowl (or use your electric mixer’s instructions for kneading) until the dough is smooth, “elastic and no longer sticky”.

6. Proofing: Cover the bowl with a plate and allow to proof in a draft-free area (oven with only the light turned on is ideal) until the dough has doubled.

7. Prepare the pans: Cover cookie sheets with parchment paper.

8. Walnuts and Shaping: Turn dough out onto a lightly floured board and divide in two. Roll each piece into a ball. Cover with a clean tea towel and allow to rest for 20 minutes. After their rest, flatten each ball into a disc and even divide the rest of the walnut halves on top, “pressing the nuts in slightly”, then roll each piece of dough to form a log. Joining the ends to make a ring, place each log seam side down on the parchment paper. Cover with a tea towel and allow to rise in a draft-free area until the rings have almost doubled.

IMG_0612
9. Baking: Preheat oven to 375F. Just before putting the bread in the oven, spray the tops liberally with water. Put the bread into the oven and immediately turn the thermostat down to 350F. After 35 minutes, brush the tops of the loaves with milk or cream (de Groot suggests using an eggyolk whisked with milk to create this glaze) and continue baking for about 10 more minutes until the loaves are nicely browned and have reached an internal temperature between 200F and 210F (the bread sounds hollow when knuckle-rapped on the bottom). Remove the bread from the oven. Don’t even think about touching that knife!!

IMG_0615
10. Cooling and Finishing: Allow the bread to completely cool on a footed rack before cutting into it. It’s still baking inside! Of course you may want to serve warm bread: reheat it after it has cooled completely. To reheat and/or rejuvenate Unsliced bread, turn the oven to 400F for 5 minutes or so. Turn the oven OFF. Put the bread in the hot oven for ten minutes.

You probably have already seen Elizabeth’s post and know all the fun things she put up about this bread.

IMG_0618
This was a delightful loaf.  Gorn requested it until it was gone … on the 2nd day.  We can really go through a loaf!
This is what we bread heads call a “keeper loaf” meaning I’ll make this one again and again.  I will say this is a keeper of the first order.  The determining factor of when that remaking may occur probably depends on when will the BBB’s run out of great keeper breads to bake.

I hope you found this bread early enough to bake it and make the Buddy list but if not, not to worry, you should still bake this one.  It is just too good to miss.

IMG_0620

Don’t miss out.  Bake this one.


16 Comments

BBB ~ Whole Wheat Tangzhong Bread

Bread … just flour, water, yeast … then maybe salt, butter, an egg … maybe nothing more, maybe just a tiny more … but good grief how as much as we love it and crave it; the variety using the same basics is overwhelming and awe inspiring.

IMG_9848

This month Karen K (Karen’s Kitchen Stories) in her debut as a BBB is bringing us a most interesting bread.  Tangzhong Bread (aka Japanese Milk Bread, aka Hokkaido Milk Toast).  The recipe is based on the book 65 degrees C by Yvonne Chen, and adapted by Christine Ho.  You will find several versions of this bread on Karen’s site but with this BBB bake she went with a whole wheat version and that of course really warms my soul.  The bread uses a Tangzhong, a concoction of cooked flour and water that is cooked to 65 degrees C or 149 degrees F.  Sounds pretty much like a roux if you ask me.  If  you don’t have an instant read thermometer cook, don’t even pretend you can make do without it, you need one.

After I’d made the Tangzhong and it was cooling, I started thinking I should really try this baked in my Pullman loaf pan but too bad it wasn’t going to make enough dough to fill my long pan.

READ, I’ll never learn.
It says clearly “makes enough for two loaves”.

I had the final dough ingredients all measured. Luckily for some strange reason I had left the bowl on the scale and tared it out because when I poured the Tangzhong into the bowl it measured 200 grams.  The recipe only called for 100 grams.  Woops.  I was setting up for a mis-measure disaster or total genius.  200 grams of Tangzhong = 2 loaves: That should be enough dough to fill the Pullman pan.  So, I quick like measured all ingredients for another loaf … well except no more sugar, no more butter and no more than the 30 grams of flax seed that I had already added.  I am overjoyed with this bread in a Pullman loaf pan both with and without the lid.

PicFrame

I know one bread baker who says that even bad bread makes good toast and thinks very poorly of toast.  I on the other hand have a very high opinion of toast.  I’ll agree that many times less than great bread makes pretty good toast BUT I find there is a toast continuum as there is with almost anything.  While this bread is marvelous for sandwiches of all sorts, this bread maybe the ultimate toast.  This bread maybe the very definition of toast!

And now if you’re up for my dirty little secret:  While I do finally begin to see that Gorn has really begun to appreciate, taste and even differentiate really good bread from the factory stuff (see how polite I’m being not labeling it “library paste”), he still craves his childhood baloney on white bread.  In his childhood it was WonderBread; today in Michigan it’s there’s … drum roll please … Hillbilly Bread.  I kid you not, it is labeled Hillbilly Bread.  He got one of his cravings the week before I baked this bread.  His Hillbilly was gone when I baked this but there was still baloney.  This bread is the only bread I’ve ever baked that fit’s his craving.  Light and fluffy, awesome.  With that in mind, I think this might be the first bread I bake that my 7 y/o grandson will like.

WHOLE WHEAT TANGZHONG BREAD

IMG_9795
TANGZHONG MIX: ENOUGH FOR 2 LOAVES
50 grams bread flour
240 water
FINAL DOUGH: ONE LOAF
110 grams milk
45 grams whisked eggs (about one large egg)
100 grams Tangzhong (half of above) unless of course like me you have that large pullman pan
40 grams sugar (optional: I left out)
5 grams salt
200 grams bread flour
150 grams whole wheat flour
6 grams instant yeast
40 grams unsalted butter, room temperature and cut into pieces

Tangzhong mixture (makes enough for two loaves)
Mix the flour and water together until there aren’t any lumps.
Cook, stirring constantly, until the mixture thickens and registers 149 degrees F or 65 degrees C. If you don’t have a thermometer, then yes, you really need to get one. Llook for lines in the mixture made by your spoon as your stir. Remove from the heat immediately when it reaches 149°.
Scrape the mixture into a bowl, and cover with plastic wrap, pressing it onto the surface of the tangzhong.  Covering the mixture surface eliminates evaporation.  Let it cool, and then refrigerate it for several hours.  I did not refrigerate either time I baked this.

IMG_9797
Bring it back to room temperature when you are ready to use it. Or just let it cool to room temp before using it as I did.
This will last a couple of days. If it starts to turn gray, toss it.

MIXING THE FINAL DOUGH:
Makes one loaf, and is easily doubled Add all of the ingredients except the butter to the bowl of a stand mixer. You can also mix by hand or bread machine.

Mix the ingredients until they form a dough. Add the butter, one tablespoon at a time, until incorporated. Knead until the dough becomes very elastic. More is better.

Place the dough into an oiled bowl, cover, and let rise until doubled, about 40 minutes. I’m sure it could cold ferment overnight, but haven’t done it.

SHAPING:

Divide the dough into 3 or four equal pieces and form each piece into a ball.
IMG_9798With a rolling pin, roll each ball into a 10 inch long oval. Fold the oval into thirds, widthwise, like an envelope. Turn the envelope so that the short side is facing you, and roll it into a 10 to 12 inch length.
IMG_9803IMG_9804
Roll that piece like a cinnamon roll, with the folded sides on the inside, and place the piece in an oiled bread pan, seam side down.
IMG_9801Repeat with the other pieces, placing them next to each other. IMG_9802Those words “Roll that piece like a cinnamon roll” should tell you this is just begging for a filling!  I had elaborate plans for my second bake (brown sugar butter, cinnamon brown sugar + dried blue berries, etc.) but things consipired against me.  But just think about it.  If you do one loaf, you can have 3 or 4 rollings going into one loaf.  Each one of those rollings gives you the opportunity to leave it as is – just beautifully light fluffy bread – OR put in a filling.  I leave it to your imagination.
Cover and let rise for about 40 minutes, until about 4/5  the height of the bread pan.

Baked in Pullman pan lid off

Baked in Pullman pan lid off

Bake in a 175 degree C/ 350 degree F oven for 30 to 35 minutes. Transfer the loaf from the pan to a wire rack and let cool completely.
Pullman pan with & without lid took 40 minutes.

Baked in Pullman Pan lid on, this is the side. I love those snails swirling.

Baked in Pullman Pan lid on, this is the side. I love those snails swirling.

I baked it with the lid on first and we loved the bread.

Served it one night with  a French Cassoulet.  Delightfully tight but light and fluffy crumb.

Served it one night with a French Cassoulet. Delightfully tight but light and fluffy crumb.

But it made me wonder what the crumb would be like if I baked without the lid.

Maybe the crumb was slightly more open baked with the lid off but it wasn't a great difference.

Maybe the crumb was slightly more open baked with the lid off but it wasn’t a great difference.

What did you say?  Well, of course you want a slice … oh well, yes a loaf would be better.  That’s a great idea.  Just get in that kitchen and bake it!  Then pop over to Karen’s Kitchen and get the details on how to be a Bread Baking Buddy this month.

This is lovely bread.  You’ll want to check out all the Babes baking this month, we are a most creative bunch.


11 Comments

Muesli Rolls ~ BBB

Muesli Rolls ~ BBB

Butter don't forget butter ... cheese was good as well.

Butter don’t forget butter … cheese was good as well.

Our Kitchen of the Month … Karen: Bake My Day and boy did she ever.

Karen found this recipe in Global Baker by Dean Brettschneider

As the baker says: a real breakfast roll for champions, full of seeds, dried fruits and chocolate. They are great fresh, or toasted the next day and the day after.

Karen said to try them with Swiss Emmenthal cheese, perfect partners! but we ran out of rolls before I could get any Emmenthaler.

These rolls may not have transformed us into Champions but they certainly brought joy to the table each time I served them; really that’s saying quite something don’t you think.

I believe if you follow the proportions of bread flour to whole wheat, you’ll get a reasonably light roll.  If on the other hand you are in a whole grain phase as I am and chose to cut the bread flour by half (using 250 grams bread flour instead of the 500 grams) and doing some strange numerical calculation like I did and use 250 grams white whole wheat flour (not the 50 grams of whole wheat called from in the recipe), you’ll take out a delightfully wonderful tight crumbed roll like I did.

Another word on the differences in flours and water or as Karen said: “what’s in a name, that what we call flour by any other name would bake as sweet….” provided that you add enough water that is.”  In all the years our little group has been baking together, the one lesson we all seem to have to learn over and over is flour on the other side of the pond is different.  When Karen, our kitchen of the month who happens to bake in the Netherlands, said this recipe worked perfectly for her that should have set off a warning bell to us on the other side to add a little more water.  I can’t tell you how much more water … just more.

So if you follow the directions exactly as Karen has them posted on her site and you’re using flour from the North American side of the pond, add a little extra water.  If you are so lucky as to have some potato water (and not like me watch it go down the drain and yell “NO wait, come back! I need that!”) or whey from a little cheese making as Elizabeth suggested, replace some or all of the water with it, I know you won’t be disappointed.

Muesli Rolls ~ BBB ~ 15 rolls

250 grams  strong bread flour, (Original:  500 grams)

250 grams wholemeal or whole wheat flour, (Original: 50 grams)

40 grams jumbo rolled oats

2 3/4 teaspoons gr  (2.3/4 tsp) instant dry yeast

10 gr (2 tsp) salt

20 grams blackstrap molasses

20 grams honey

20 ml olive oil

370 ml water (next time 390-400)

60 grams gr (scant 1/2 cup) walnut pieces (chopped small)

30 grams gr (3 Tbs) linseeds/flaxseeds, soaked in liquid

20 grams gr (2.1/4 Tbs) sesame seeds

80 grams gr (1/2 cup) sunflower seeds

80 grams gr (2/3 cup) pumpkin seeds

90 grams gr (1/4 cup) dried apricuts, cut into pieces

60 grams gr (1/2 cup) small chocolate chips/drops (optional: used 40 grams)

100 grams gr (1 generous cup) jumbo rolled oats to decorate

1. Place flours, oats, yeast, salt and wet ingredients in a large mixing bowl.  Using a wooden spoon, combine to form a dough.  Tip dough out onto a lightly floured surface and knead for 15 minutes, resting it for 1 minute every 2-3 minutes until dough is smooth and elastic. Check dough throughout kneading for stickiness; add a little more water or flour if necessary to achieve a soft dough that’s not too firm.

I did, I added mini-chocolate chips ... just not all the recipe called for.

I did, I added mini-chocolate chips … just not all the recipe called for.

2. Add walnuts, seeds, dried fruit and chocolate(if desired). Knead until well incorporated and combined into dough.

FullSizeRender 16

FullSizeRender 10

Have faith, keep kneading, it will all come together!

Place dough in  a lightly oiled bowl, cover with clingfilm (plastic wrap) and leave in a warm place for approximately  1 1/2, until dough has doubled in size. Gently knock back dough in bowl by folding it back onto itself several times. Cover again and leave for a further 30 minutes.

Squares ... that's really easy!

Squares … that’s really easy!

3. Tip dough upside down onto a lightly floured work surface.  Sprinkle flour over top of dough (which was on the bottom of the bowl).  Very carefully turn dough over and gently flatten to 2cm (3/4 in) thick.  Using a dough scarper or large chef’s knife, cut dough into 7cm (2 3/4in) squares.  Using a pastry brush, brush the tops with water.  Sprinkle entire surface of each roll with rolled oats, and pat down gently to stick them on.

4. Line a baking tray (cookie sheet) with baking (parchment) paper.  Place rolls onto lined tray (sheet), leaving a 2-3cm (3/4-11/4in) gap between each roll.  Cover (I always use a shower cap) and leave to prove for 30-45 minutes, depending on room temperature.

5. Place rolls on baking tray (cookie sheet) in a preheated 230C/450F/Gas 8 oven, apply steam and quickly close oven door.  Bake for 20-25 minutes, turning tray around halfway through baking if needed Remove rolls from oven and place on a wire rack to cool.

FullSizeRender 22

Notes:

Gorn’s comment: I know I’m going to regret this but I can’t stop eating them.  At that point I swiftly packed them up and put them out of sight.  Reports from the other Babes are these are knock their socks off GREAT!

FullSizeRender 6

We enjoyed these for breakfast several mornings, with soup in the evening twice and at least once in the afternoon with some lovely Earl Grey.  They keep wonderfully well in the fridge and then toasted.

Would you like to be a Bread Baking Buddy?

Karen is host kitchen this month and would love to see you baking with us. However… she was so clever to register for KOM in June ánd go on a vacation somewhere around that time. So luckily there is Lien to the rescue!! Lien (from Notitie Van Lien fame) will also be ready to receive your submission ánd send you your Buddy Badge!


Here’s how:

Just make the rolls, then email your link (or email your photo and a bit about your experience if you don’t have a blog) to BOTH  bakemyday {at} gmail {dot} com AND to notitievanlien(at)gmail(punt)com add subject BBBuddy

Submissions are due by July 1st.  Once you’ve posted, you’ll receive a Buddy badge for baking along, then watch for a roundup of all of the BBBuddies posts a few days after the close of submissions, or in this case…. as soon as Karen is home again and the laundry done.
The Bread Baking Babes are:

Hey pssst: have you seen them? We added a couple of new Babes…. and yes they scare us. Just a bit. We now have Karen from Karen’s Kitchen Stories  And we have Judy! Judy blogs at Judy’s gross eats and she has volunteered to be Kitchen of the Month next month! (we would never pressure. Babes just volunteer. by themselves. sure.) 

IMG_1386

And the Babes posting Muesli Rolls are:


6 Comments

BBB ~ Flaxseed and Plum Ciabatti-Style Loaves

Well, not exactly … no plums or prunes here but there were gorgeous dried black olives.  Perfect for wine and cheese!  Really this was astronomically wonderful.

Maybe not the world's most beautiful to look at but fabulous in the mouth!

Maybe not the world’s most beautiful to look at but fabulous in the mouth!

Cathy posting at Bread Experience is our hosting Kitchen of the Month with a recipe from the San Francisco Baking Institute.   I love this flaxseed soaker.  The whole flax seeds come through in the baked bread soft enough to give the bread a slight crunch between the teeth.  I believe the softening of the flax seeds would make them as digestible as ground flax meal.   While I’m in love with this bread made with the dried olives, I know there are innumerable combinations of fruits, nuts and olives that would create fabulous combinations.  Next time we have company, I’m making this with apricots and walnuts or with figs and walnuts.

Flaxseed and Plum Ciabatti-Style Loaves

Flaxseed soaker:

48 grams flax seeds

72 grams water

Mix all ingredients until well incorporated, cover and set aside. Let it sit for at least one hour.

Poolish:

125 grams bread flour

125 grams water

pinch of instant yeast

Mix all ingredients until well incorporated with D.D.T. of 70°F. Allow to ferment 12 – 14 hours at room temperature (65 -70°F)

Final Dough:

300 grams unbleached all-purpose flour, 1/2 white whole wheat

50 grams coarsely milled whole wheat flour

25 grams coarsely milled whole rye flour

278 grams water

10 grams salt

84 grams prunes, used dried black olives

2 grams instant yeast, 1/2 teaspoon

Directions: Hand Mix Mix together all the ingredients except the flax seeds, and plums. Once everything is thoroughly incorporated, mix in flax soaker and dried plums. Transfer the dough into an oiled container. Dough Temperature: 76-78°F First Fermentation: a total of 3 hours with 3 folds 45 minutes at room temperature; fold 45 minutes at room temperature; fold 45 minutes at room temperature; fold Divide: I made two loaves.  I placed the shaped dough on ovals of parchment paper.

Parchment paper on the right is darker because I'd used it for baking biscuits earlier.

Parchment paper on the right is darker because I’d used it for baking biscuits earlier.

Rest : 20 minutes at room temperature

Bake:  450°F with 2 seconds of steam. Bake for 20 minutes. Vent an additional 10 minutes. (directions for a deck oven ~ my dream).
Bake:  Preheated 450° oven with baking stone.
Slide ovals of parchment paper onto a preheated baking stone.  I used a preheated cast iron casserole pan and poured ice water into it when the bread went into the oven.  I baked for 15 minutes at 450°; turned the loaves and continued baking another 15 minutes at 430° convection.
So tempting to slice but the amount of whole grains told me I needed to allow this to really cool.

So tempting to slice but the amount of whole grains told me I needed to allow this to really cool.

We almost had gone through both these loaves before I caught the all important crumb shot.
Oh my it just occurs to me that figs would be wonderful in this bread.

Oh my it just occurs to me that figs would be wonderful in this bread.

I really encourage you bake this one.  Go fruit or olive or something none of use has thought of but bake it you should. As always, Cathy will have the round-up of Buddies at the end of the month.  Don’t know how to be a buddy and earn a buddy badge (more important have a great loaf)?  Check out her post.  Check out all the other Babes baking this month, list is on the right side bar.

Thank you immensely for this one Cathy. This is going to often be on our evening cheese plate with wine.