MyKitchenInHalfCups

Once Upon a time: Cooking … Baking … Traveling … Laughing …


14 Comments

BBB Granary Style Loaf

As Kitchen of the Month I welcome you to the BBB Sandbox for Granary Loaf.

IMG_8022
I always dreaded those essay exams at university and in graduate school. Gad, you really had to know your stuff.  Written was awful: you had to know it, organize it in your head and get in down on paper. Then in graduate school you had to be able to write it AND talk it.  Now, contrast that with how things work in the sandbox.  In our sandbox, the kids (that would be the BBBs and now you) all come together to “play”.  When kids play in a sandbox, they have fun, they experiment and they learn.  That learning can some times move into unexpected areas.
How did I come across Granary Bread?  A friend in Seattle showed me a bread book she’d gotten for Christmas and I came across Granary Bread.   I looked at several recipes for Granary Bread on the internet and settled on a trusted source, King Arthur.  But this bread sandbox is not so much about the recipe as about playing with a concept with creativity, independence all the while sharing and inciting discovery … even if that discovery takes us into the past where we learn again: there really is very little new under the sun.

In the Granary Loaf, I felt I’d found a classic, simple, conservative recipe with a potentially unobtainable ingredient for most of us: Granary flour is a proprietary blend not available unless you are in England or order it from them. Since we can’t get that special blend, that would require us to play together and come up with ideas that would allow us to create a Granary Style Loaf.
Along the way I explored barley extract, malting process (requires sprouting and drying the grain), malt (diastatic and non) and baking undercover.  I don’t feel comfortable putting up all that I scanned from Elizabeth David’s book but if you are interested I can e-mail you some copy  if you don’t have the book and would like to read some of it.  King Arthur is an excellent source to read up on malt extract as well.

When I started playing in this sandbox, I figured I would not be able to find the proprietary flour the Brit’s have.  I was thinking whole grain flours.  Sprouted would be a plus.  Toasting whatever “wheat flakes” would add some extra flavor in the neighborhood of malted.  I think if wheat flakes can’t be found, I’d try oatmeal.  Think whole grain and malty undertones.

IMG_8064

Almost immediately Heather came up with “I just ordered the flour from Amazon.”  Then I had to too … but coming from across the pond gave it a delivery date of March 12 … unless you were willing to pay some $70 to expedite delivery!

The only change I made here is using potato water and adding the ground flax meal.

The only change I made here is using potato water and adding the ground flax meal.

Mine came on the 12th and I baked using it on the 13.  I followed the directions on the label substituting only potato water for the water and adding in 30 grams of flax meal.  The Hovis flour was my second play in the SandBox.

Made with the Hovis Granary Flour.

Made with the Hovis Granary Flour.

Use your imagination.  Remember when you were little and made mud pies.  We’re playing around here.

Update Sunday night 15 March: King Arthur has what looks like a sort of updated/more recent Granary style loaf called Malted Wheat Flake Bread that I’m going to be starting tonight.  I very much like that it soaks grains overnight.

Authentic is not the goal, good tasty bread is. I leave it to you: loaf or rolls.

Just so not to leave you hanging, Elizabeth David in her “English Bread and Yeast Cookery” was writing about “baking bread undercover” in 1977.  She had “discovered” the idea from talking with and reading baker’s from the 1920’s.  Now, what does “baking undercover” make you think of?  Well, it makes me think about the first time I came across it was when Karen & I turned up baking (after midnight) the New York Times recipe put up by Mark Bittman from Jim Lahey in 2006.  Cast iron pot heated very hot and a lid put on it.  I thought that was revolutionary.  Turns out, not really that new under this sun.

Granary-Style Loaf

This is a bread beloved by the British. King Arthur calls it “granary-style” loaf because Granary Flour is a proprietary brand sold by a specific company in England.  A full-flavored bread with a hint of sweetness and a bit of crunch.
Recipe from King Arthur
Yield: 2 loaves
2 cups lukewarm water
1 to 2 tablespoons barley malt extract
1 cup malted wheat flakes
2 cups King Arthur 100% White Whole Wheat Flour
1 scant tablespoon instant yeast
2 tablespoons melted butter or vegetable oil
2 teaspoons salt
3 to 4 cups King Arthur Unbleached All-Purpose or Unbleached Special Bread Flour*
Flavor and texture come from those malted wheat flakes!

Flavor and texture come from those malted wheat flakes!

1. Pour the 2 cups of water into a mixing bowl. Stir in the barley malt, wheat flakes and white wheat flour. Mix in the yeast, and allow this sponge to work for 15 to 20 minutes.

2. Stir in the butter or oil, salt, and about 2 1/2 cups of the all-purpose or bread flour. Add flour slowly until you have a shaggy mass hat begins to hold together and pull away from the sides of the bowl.
*You’ll use less flour if you use Special(meaning bread flour) instead of all-purpose, due to its higher absorption capacity.”

3. Turn the dough out onto a lightly floured or lightly greased work surface, and knead until it’s cohesive. Give it a rest while you clean out and lightly oil your bowl. Continue kneading for several minutes, adding only enough flour (or oil) to keep the dough from sticking to you or the work surface.

4. Return the dough to the bowl, turning to coat all sides, cover the bowl with a damp towel or plastic wrap, and let the dough rise until it’s double din bulk, about 1 1/2 hours. Gently deflate the dough, cut it in half, and shape each half into a log. Place the logs in two lightly greased 8 1/2 x 4 1/2-inch bread pans. Allow the loaves to rise, covered, until they’re about three-quarters of the way to doubled.

5. Bake the bread in a preheated 350°F oven for 35 to 40 minutes, or until an instant-read thermometer inserted into the center of the loaf registers 190°F. Remove the bread from the oven, remove it from the pans, and transfer it to a wire rack to cool.

 IMG_8024

First Sand Box Play:
I cut the recipe in half because I wanted to bake again soon with different ingredients.
1 c water (260 g)
1 T barley malt extract became 8 grams brown sugar
1/2 c malted wheat flakes (from King Arthur)
30 grams golden flax meal
1 c white whole wheat became 75 grams sprouted wheat and 75 grams white whole whole
1/2 T yeast
1 T butter
1/2 t salt used 2 grams
150 grams bread flour
used about 1/3 cup more bread flour kneading

Mixed water, br sugar, wheat flakes, white whole wheat and sprouted wheat; allowed to sit 1 hour
Whisked yeast, salt, flax meal and bread flour.
And baked following KA recipe.

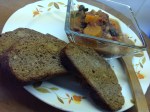
Gorn & I both found these two loaves to be excellent.  Good as toast; great for a sandwich. A background whisper of malt … sweetness … but just right.  The Hovis Granary flour made an excellent loaf but I think there was not a substantial difference from the King Arthur recipe when I baked the two.

I do hope you’ll want to play in the sandbox with us, maybe you will find something new under the sun that we’ve missed.

***  To be a bread baking buddy, post your bread (on your blog, on our FaceBook group, or send me a photo and comment on the bread).  In order to receive a BBBuddy Badge and appear in my round-up post at the end of this month you MUST e-mail me at comments my kitchen at mac dot com – you know no spaces and the @ sign – AND use BBB or SandBox on the subject line.

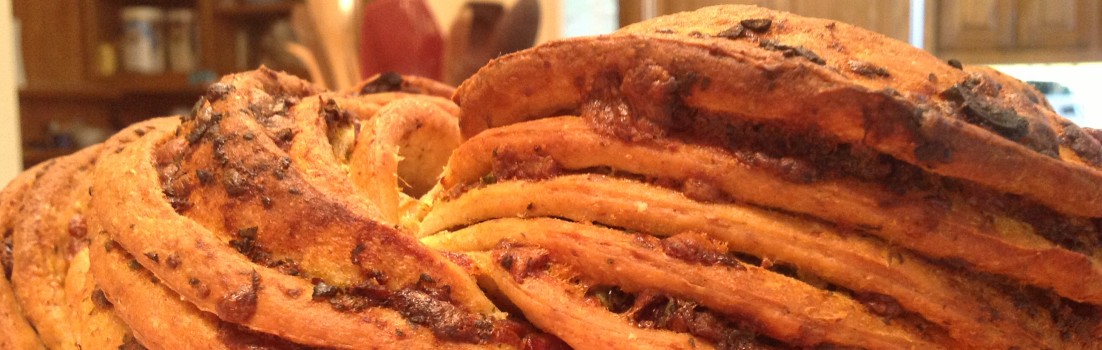
It’s not a fancy shape, just super good bread. BBB logo March 2015 See you in the SandBox!


11 Comments

BBB – Wild Rice and Onion Bread

Our Kitchen of the Month Karen blogging at BakeMyDay has us baking Wild Rice and Onion Bread from Peter Reinhart’s Artisan Breads Every Day.  We haven’t baked a regular “loaf” bread it would seem in forever … I guess a loaf could come to seem boring
Yield: 2 loaves or 1 loaf and 12 rolls

My thoughts and experience with NO-Knead:  The concept is instantly appealing. My first experience with the no-knead was through the New York Times Bittman-Lehay article. Karen (as in BakeMyDay) and I had a passing acquaintance through our blogs and one of us wrote the other that we were in the midst of doing that bread … funny thing … we had both started the bread within just hours of each other. I ended up taking my bread out of the oven about 4 AM(0400) … pretty crazy you think … I think I’m still that crazy. It was the first time I’d ever had my bread sing to me … I was so excited that I tried to record the sound, I mean at 4 in the morning who else was going to be hearing it? Alas, it was not to be. When I listened back on it, all I could hear was the refrigerator hum.  The bread itself was rather a disappointment. The crust was initially fabulously crisp … almost to the point (very sharp point) of being knife like and the interior was sort of gummy, lacking in flavor. 

However the experience was fabulous because it was probably what started Karen and I becoming fast baking buddies.
This loaf:  I loved the flavor from caramelized onions and the flash of the wild rice in the crumb. It was lovely fresh with just butter, as toast with butter, as brochette with fresh tomato and for tuna salad sandwiches. I’ll use it with herbs and spinach for a turkey stuffing.
Excellent bread. Fabulous rolls.
You will note: Reinhart does not require you to dissolve/proof the yeast in water in order to mix the dough.  This dough will rest overnight in the fridge or unto four days before it needs to be baked – my rolls were in the refrigerator 5 days and came out perfect.  You should feel free to use dried or fresh onions according to the recipe. I chose to caramelize the onion before mixing it into the dough.  Many of the Babes used a portion of whole grains instead of all white bread flour. I just enjoy the whole wheat flavor and I know it’s the healthier.
IMG_5870
Wild Rice and Onion Bread
2 loaves
6 cups (27 oz / 765 g) unbleached bread flour, used 250 grams KA Irish whole grain and bread flour combination
2 1/4 teaspoons (0.6 oz / 17 g) salt, or 3 1/2 teaspoons coarse kosher salt
2 tablespoons (0.66 oz / 19 g) instant yeast, used a short 2 tablespoons; use all next time
1 cup (6 oz / 170 g) cooked wild rice or another cooked grain
1/4 cup (2 oz / 56.5 g) brown sugar
11/2 cups (12 oz / 340 g) lukewarm water (about 95°F or 35°C), used milk & yogurt here
1/2 cup (4 oz / 113 g) lukewarm buttermilk or any other milk (about 95°F or 35°C), used water for this amount
1/4 cup (1 oz / 28.5 g) minced or chopped dried onions, or 2 cups (8 oz / 227 g) diced fresh onion (about 1 large onion)
1 egg white, for egg wash (optional)
1 tablespoon water, for egg wash (optional)

1. Do Ahead:
Combine all of the ingredients, except the egg wash, in a mixing bowl. If using a mixer, use the paddle attachment and mix on the lowest speed for 1 minute. If mixing by hand, use a large spoon and stir for 1 minute.
The dough should be sticky, coarse, and shaggy.  Let the dough rest for 5 minutes.

I simply mixed by hand.

2. Switch to the dough hook and mix on medium-low speed, or continue mixing by hand, for 4 minutes, adjusting with flour or water as needed to keep the dough ball together.
The dough should be soft, supple, and slightly sticky. Transfer the dough to a lightly floured work surface. Knead the dough for 2 to 3 minutes, adding more flour as needed to prevent sticking. The dough will still be soft and slightly sticky but will hold together to form a soft, supple ball.
Place the dough in a clean, lightly oiled bowl, cover the bowl tightly with plastic wrap, and immediately refrigerate overnight or for up to 4 days. (If you plan to bake the dough in batches over different days, you can portion the dough and place it into two or more oiled bowls at this stage.)
I mixed entirely by hand.

3. On Baking Day:
Remove the dough from the refrigerator about 2 hours before you plan to bake.
Shape the dough into one or more sandwich loaves, using 28 ounces (794 g) of dough for 4 1/2 by 8-inch loaf pans and 36 ounces (1.02 kg) of dough for 5 by 9-inch pans; into freestanding loaves of any size, which you can shape as bâtards, baguettes, or boules; or into rolls, using 2 ounces (56.5 g) of dough per roll. When shaping, use only as much flour as necessary to keep the dough from sticking.
For sandwich loaves, proof the dough in greased loaf pans. For freestanding loaves and rolls, line a sheet pan with parchment paper or a silicone mat and proof the dough on the pan.

4. Mist the top of the dough with spray oil and cover loosely with plastic wrap.
Let the dough rise at room temperature for 1 1/2 to 2 hours, until increased to about 1 1/2 times its original size. In loaf pans, the dough should dome at least 1 inch above the rim.
If you’d like to make the rolls more shiny, whisk the egg white and water together, brush the tops of the rolls with the egg wash just before they’re ready to bake.

5. About 15 minutes before baking, preheat the oven to 350°F (177°C), or 300°F (149°C) for a convection oven. I used convection oven at 305°
Bake the loaves for 10 to 15 minutes, then rotate the pan; rotate rolls after 8 minutes. The total baking time is 45 to 55 minutes for loaves, and only 20 to 25 minutes for rolls.
The bread is done when it has a rich golden color, the loaf sounds hollow when thumped on the bottom, and the internal temperature is above 185°F (85°C) in the center. Mine registered 195° and was not over done.
Cool on a wire rack for at least 20 minutes for rolls or 1 hour for loaves before slicing.

IMG_5857

Notes:

Karen Notes:
I like to add cheese (feta anyone?). And chives (or or…spinach? Tanna?). Not always. But it is a nice addition… I have successfully used yoghurt instead of buttermilk I also subbed potato water for the water (oh and added some mashed potato as well… tsk tsk) Hmm looks like I never can follow a recipe or leave good alone tsk tsk Have to admit that I never used the actual wild rice in the recipe but just the ordinary brown. Just make sure any rice you use is properly done (soft-ish) because otherwise any bits on top of your bread will be pointy and dry. Not appealing. Also… you can use any cooked grain. I’m thinking of using quinoa or whole wheat bulgur this time. Will update with pictures later …. and some more info. Just wanted to post the recipe for anyone to read and shoot.

IMG_5863

My Notes:
I know this would be lovely with some rye … but Karen suggests this results in a sticky sloppy dough when allowed to rise in the fridge.
I would use 2 large sweet onions caramelized next baking.
Rosemary or sage could be a lovely addition making this an ideal Turkey stuffing bread.  Cheese would be stunning.

Spinach! yes!

IMG_5887

And then I have visions of bacon … oh yes I do.

What is your vision? Bake along with us and be a bread baking buddy.  You know you want to. Bread Baking Buddy, be a Buddy and let us know all about it, by sending your details and results to Karen (as kitchen of the month this time). Send a mail with Buddy May 2014 in the subject line and please provide your name, blog url, post url and attach your favorite picture of the recipe. Send it to bakemyday (at) gmail (polkadot) com. Deadline is the 29th of this month. We want your breads!!
Round-up will be around the end of this month! (maybe a bit later as my twin boys celebrate their birthdays, by that time finished their final exams and will go on their first “vacation without parents but with friends”. Yikes. All in the course of those last days of this month.)


13 Comments

BBB – Molasses Fennel Rye

Surprise people!  Here’s another bread/recipe I would have read and passed on and I would have missed out big time.  Gorn would have missed out bigger time.  Do I repeat myself?  Perhaps but this is why I am so sold on baking with a group of friends.  Try something new that I wouldn’t have tried on my own.

The bread.  Some of us dressed and shaped our loaves with more style than I did but none of that would have changed the aroma coming from the oven or the fabulous flavor in every bite.  So mine is a very plain looking loaf everything else about this bread is stellar.

Kitchen of the Month: Elizabeth who blogs at From Our Kitchen.  For Elizabeth and her husband this is a super special bread because they shared it on on super special evening (see her story here).  For me it’s a super special bread because Gorn ate 2/3 of the first loaf in one evening and I don’t think it had that much sugar in it.  Raisins, it does have raisins in it and he’ll go for raisins every time.  I like molasses, I just don’t like too much of it SO, I only used 2 tablespoons molasses and then used 2 tablespoons of Rise Appelstroop (a long ago gift from Holland).

Molasses Fennel Rye Bread As Posted
——————————————————————————–

Recipe By: based on Jack Francis’ recipe for Molasses-Fennel Bread served at “Clark’s by the Bay” restaurant in Collins Bay, Ontario (near Kingston) – now sadly closed
Yield: 2 loaves

Ingredients:  my changes

1 1/2 teaspoon ( 6gm  5gm) active dry yeast
1/4 cup (63gm) lukewarm water
2 tablespoons molasses

2 tablespoons Rinse Appelstroop
1 3/4 cup (438gm) water, room temperature
1 tablespoon (6gm) fennel seeds
1 1/2 inch knob grated fresh ginger root
1 cup (103gm) rye flour
1 cup (122 gm) sprouted whole wheat flour
1/2 cup (59gm) wheat germ + 3 tablespoons flax seed
2 cups (254gm) unbleached white whole wheat flour
1 tablespoon (18gm) salt (I used 15 gm)
1/4 cup (36gm) Thompson raisins … it was more
up to ½ c (64gm) unbleached all purpose flour for kneading – I used about 2 tablespoons

Directions:

Mixing

In a smallish bowl, whisk yeast with the lukewarm water (do the baby’s bottle test on your wrist) until it resembles cream. Set aside.  Actually, I mixed the yeast in the entire 2 cups of water … and one cup of the two was potato water.
Meanwhile, in a bowl large enough for the dough to double, pour the rest of the water – In my case it was all the water.   Stir in sugar (I skipped the sugar) molasses. (If the molasses is stiff because of a chilly kitchen, use warm water instead of room temperature.) Add fennel seeds and ground ginger. Dump in flours, wheat germ, flax seed and salt and stir with a wooden spoon until the flour is mostly absorbed. Stir to form a rough dough.
Cover the bowl with a plate and let sit on the counter for about 20 minutes.
Kneading
Scatter a little of the flour for kneading onto a wooden board. Turn the dough out onto the board. Wash and dry the mixing bowl. (Please do not be tempted to skip this step.) Hand knead the dough 10 to 15 minutes, adding the smallest amounts of additional flour if dough is sticky. You don’t have to use up all the flour. When the dough is springy and silky to the touch, knead in raisins.
Proofing
Form the dough into a ball and put it in the clean bowl; cover it with a plate (there is no need to oil the bowl!) Let the dough rise in a no-draft place at room temperature (or in the oven with only the light turned on if you want) for about an hour or until it has doubled in size.
Gently deflate dough.
Recover with the plate and allow to rise until doubled again.
Gently turn the dough out onto a lightly floured board; cut it in half with a dough scraper if you have one, with a knife if you don’t.
Shape into two round balls and place them (not touching) on a parchment papered pan or a cornmeal dusted peel. Dust the tops with flour.
Cover with a large plastic bag overtop let rise until double in size. (about an hour if the temperature is around 20C) Baking
Place a breadstone, if you have one, on the middle to second from the top rack and preheat the oven to 400F. If you want, slash the top of the rounds with a very sharp knife. Liberally spray the tops with water. Put bread in oven and immediately turn the oven down to 350F – I left it at 400° for 5 minutes then turned it down to 350°. Bake the bread on the middle to second from the top rack for 35-40 (I bake it for  45-50  30-35) minutes until the bread reaches an internal temperature of 205-210F or until it is hollow sounding on the bottom.  My bread took 35 minutes total to reach 205° .  I took the bread out of the pans and set them on their sides for the last 5 minutes in the oven.   It’s a good idea to turn the bread  after about 20 minutes of  half way through baking to allow for uneven heat in the oven (remove parchment paper at the same time).
Remove to cool on racks. Please wait until the bread is cool before cutting it. It’s still baking inside! If you like to eat warm bread, reheat the bread after it has cooled.

This is a really lovely bread.  With the ginger, raisins, baking aromas and gorgeous flavors, I’d easily call this a holiday bread.

Elizabeth has some terrific suggestions for serving this bread but finding this a very simple, even rustic loaf I went with simple and rustic: Tuscan Bean Soup.

Simple Rustic Bread & Soup

Simple and Rustic foods … I very much like the contrast here between the today square style clear bowl, bamboo wooden spoon and the very old my Grandmother’s Jewel Tea plate.  The plate rim ring is long gone from years of washing … by hand as there was never a mechanical dishwasher in that house.  These are the plates my Grandmother collected every time she went to the grocery story and these are the plates all the family ate off of for so many years.  Sitting for hours around the table with lively talk of old times and heated political debates.  One such meal and debate ended with my father making a point by tapping my Aunt Dort’s chest which sent her over backwards (she always was tipping her chair on the back legs) and hitting her head on the molding around the floor.  Dr. Brown (John Brown) was called out to stitch her head requiring 15 stitches.  Doctors still made house calls in those days.

To receive a Baking Buddy Badge to display on your site: bake Molasses Fennel Rye Bread in the next couple of weeks and post about it (we love to see how your bread turned out AND hear what you think about it – what you didn’t like and/or what you liked) before the 29 September 2012. If you do not have a blog, no problem; you can also post your picture(s) to Flickr (or any other photo sharing site) and record your thoughts about the bread there. Please remember to contact the Kitchen of the Month (Elizabeth who blogs at From Our Kitchen) to say that your post is up.

Either email Elizabeth or leave a comment on her post that you have baked the bread and a link back to your post.

YeastSpotting
Yeastspotting - every Friday (wordle.net image)

Each week, Susan (Wild Yeast) compiles a list of many bread-specific recipes from across the web. For complete details on how to be included in the YeastSpotting round up, please read the following:

Bake Your Own Bread (BYOB)
BYOB is a monthly event hosted by Heather (girlichef)

that encourages you to start (or continue) getting comfortable baking bread in your own kitchen. Anything from simple quick breads to conquering that fear of yeast to making and nurturing your own sourdough starter. All levels of bakers are welcome to participate.

BYOB BadgeFor more information about BYOB, please read the following:

Spread it with cream cheese!  Lovely.  Today we’re finishing the second loaf with salmon, cream cheese & capers!  I know it’s going to be great.  Bake it!


6 Comments

Starting Over Again

Once upon a time there was a great shaking in my world … and for reasons only understood in the secret world of Apple and Steve Jobs … my web site at dot Mac created using iWeb will vanish from the blogging world sometime in July of this year 2012.  Actually, that’s really just trying to be a dramatic sentence.  I think the crux of the thing is that Steve probably said “Others are doing a better job of blogging platforms and we have other things to do.”  At least, now that I’ve gotten over my great disappointment and given up being angry about the whole thing, that’s my story and I’m sticking to it.

Within hours of the first release of iWeb in 2006, I had entered the intoxicating  world of blogging.  It was exhilarating.  Within the first year, I lost my Mac’s hard drive and had to start all over, that’s why this is now starting over again.

Threes charm and I hope this one takes.

If you followed me at all before, you noted how I slowed to one post a month, the Bread Baking Babes.  Some of that slow down was due to being in the North Woods without much ability to connect to the internet and some of it was due to building a house but a big part of it was due to reluctance on my part to finally give up on iWeb and face up to the fact I had to try something new, a new platform.

I have some familiarity with Blogger but everybody recommended I try WordPress … so here I am.  I feel like the proverbial fish out of water.  When I was finally able to get my mind around the idea that when I started blogging, I knew almost nothing about it and I wasn’t polished then either.  That’s where I am now.  Just starting out, primitive.  I hope I can get this site a little more polished by next year and learn enough to be comfortable with it.

One of my goals will be to sort of “reissue” blog posts from my old MyKitchenInHalfCups.com site.  If I look forward to anything it’s being able to categorize posts!