
Recipe By: Elizabeth from Vivian Howard’s “Deep Run Roots”
Yield: 1 loaf


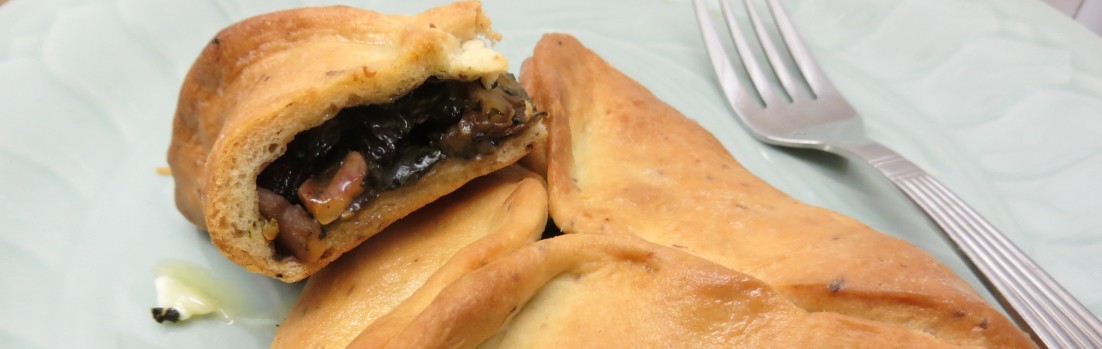
This has got to be incredible bread with the likes of Black Beauty Tomatoes and the like that’s why Vivian Howard named it Elbow Lick Sandwich.
Below you’ll see how I caramelize onions in the crockpot whenever I need them. I made this bread toward the end of November in Michigan when the temperatures were freezing at night … My current understanding of what happened is that set on LOW outside where the temperature dropped to 33, the crockpot overheated attempting to compensate and my onions were burned black by morning. Onions outside in the crockpot on LOW during daytime temperatures in the mid 40s did just fine. Really, I’ve never ‘burned’ anything in the crockpot till then.
Elizabeth is to thank for bringing this bread to our table. This has been a really really fun learning experience bread with lots of back and forth between BBBs.
To say we loved this bread is an understatement.
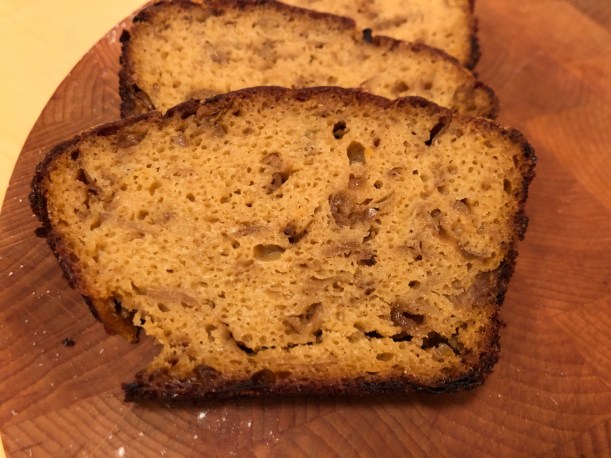
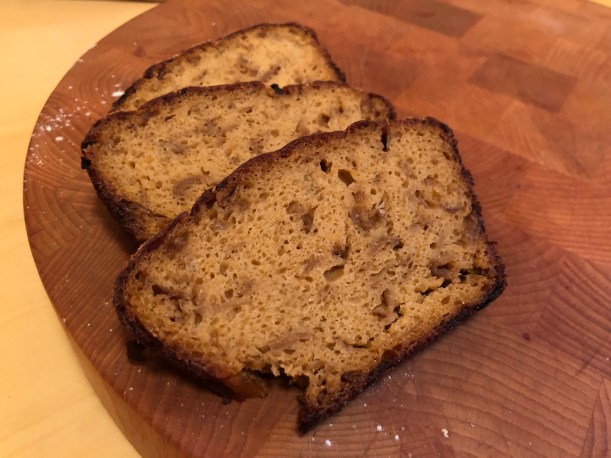
I baked this bread twice as a long thinner than usual loaf. The second time measurements were basically the same adding about 1/4 cup extra flour both times. The biggest difference was the second time I allowed for extra rising time at all stages and baked it for 20 minutes longer. I believe the excess moisture was due to the thickness of the loaf shape. This summer when I bake this as a round with a hole in the middle, thinner and flatter, I think this will be spectacular.
Elbow-Lick Sandwich Bread
Leavener
1/8 tsp active dry yeast
60grams water, body temperature
60grams 100% whole wheat flour
Sweet Potato
1 five-inch-long orange sweet potato (about)
Caramelized Onions
375g m (2.5 large) onions, diced
7grams (1.5 tsp) olive oil
3grams Kosher salt (0.5 tsp table salt)
Dough
232grams bread flour
5grams wheat germ
200grams water at body temperature
All of the Starter from above
7grams honey
9grams Kosher salt (1.5 tsp table salt) + 18gm (18ml) water
128grams roasted sweet potato puree (wow, I used more than twice that)
All of the caramelized onions from above

1. EVENING OF THE DAY BEFORE MAKING THE BREAD: Put the starter (or active dry yeast, if you’re using that) and water into a smallish bowl. Mix with a wooden spoon. Use the wooden spoon to stir the flour in well. Cover the bowl with a plate and set aside overnight in the oven with only the light turned on. This is the leavener.
EVENING OF THE DAY BEFORE MAKING THE BREAD: Preheat oven to 400F. Cut the ends off of the sweet potato and place it whole on a baking sheet lined with parchment paper. Bake until tender. This should take about 45 minutes. Vivian Howard wrote the following: Once you start to smell them, probably after about 45 minutes, give the potatoes a look. My mom always looked for a little of their juice to have leached out and caramelized, but that is more romantic than necessary. When the potatoes are done, their skins should have separated slightly from their flesh and they should pierce easily with a knife or fork.
2. Slice the baked sweet potato in half lengthwise and scoop the flesh out into a bowl. Mash well. Cover the bowl with a plate and set aside in a cool place until the next morning. (Keep the skins to make Vivian Howard’s arugula salad with shaved parmesan and sweet potato skins, or sweet potato skins with tahini dressing!! – Port City Daily, “Vivian Howard shares creative sweet potato recipes while in Wilmington”: arugula salad with shaved parmesan and sweet potato skins (around 0:35 on the video), sweet potato skins with tahini dressing (1:48 on the video) Links to the recipes are listed below the video.)
3. EVENING OF THE DAY BEFORE MAKING THE BREAD: Heat oil for onions in a cast iron pan. Add the onions and salt and caramelize the onions over medium heat until they are golden brown. Vivian Howard says this will take 30-40 minutes. Set aside in a cool place until the next morning.
***Alternate method I used: Once upon a time, I made Thomas Keller’s French Onion Soup … WOW! I actually followed his heating directions and stood at the stove top stirring and watching like a hawk for hours, really hours. That soup was good, far surpassing anything I’d ever had. No, I’ll never do that again. Now, my go to method is to caramelize onions in the crockpot. It seems I’ve always done this in the summer time and because Gorn hates the smell, I put them outside on a porch. It works like a charm.
Directions: Oil the pot. Slice thinly 6 large onions. Toss sliced onions with 3 tablespoons olive oil or melted butter. Fill Crockpot 3/4 full. Cover
Cook on LOW 10-11 hours.
Stir, leave lid ajar to allow evaporation of liquid and continue on LOW 3-5 hours depending on how dark you want them.
4. IN THE MORNING OF THE DAY YOU WILL BE MAKING THE BREAD:
When a small forkful of the leavener floats in a small bowl of room temperature water, you can go ahead and mix the dough. If the leavener does not float, stir in a little more whole wheat flour and water – even amounts by weight – cover with a plate and leave for about 30 minutes more. Chances are that it will now float. (If you have used active dry yeast, you can safely skip the floating test.)
Put flour, wheat germ, all but 18ml water, leavener, honey, sweet potato puree into a large mixing bowl. Use a wooden spoon or dough whisk to mix these ingredients to make a rough dough.
Cover the bowl with a plate and leave on the counter for about 40 minutes. adding the salt: In a small bowl, whisk the salt into the final 18gm (18 ml) water. Pour the salt mixture over the dough. kneading: Use one of your hands to squoosh the salt and water into the dough; use the other hand to steady the bowl – this way you always have a clean hand. At first the dough might be a bit messy and seem like it’s coming apart. Persevere. Suddenly, it will seem more like dough than a horrible separated glop. Keep folding it over onto itself until it is relatively smooth. Cover with a plate and leave to rest for about 20 minutes. stretching and folding the dough and adding the onions.
Put a quarter of onions on top of the dough and turn it by folding the dough into the center. Let sit 20 minutes.
Repeat at 20 minute intervals until all the onions are in the dough. You’ll notice that after each time, the dough will feel significantly smoother. Cover with a plate and leave on the counter (or if the kitchen is cool like ours in winter and early spring, into the oven with only the light turned on). Once all the onions are added, leave the covered bowl in the oven – with only the light turned on – for a couple of hours to allow the dough to double.
(A good way to tell if the dough is reading to shape is to run your index finger under water, then poke a hole in the center of the dough. If the hole disappears immediately, the dough still need to rise. If there is a slight whooshing sound and the hole remains in place, the dough has probably over-risen. If the hole very very gradually begins to close, the dough is ready to shape. prepare the brot-form: Put rice flour into a brotform and distribute it as evenly as possible. (If you don’t have a brot-form, you can line a bowl, basket or sieve with parchment paper. You can also use a liberally rice floured tea towel (but then you have to deal with a floured tea towel once the bread is baked). If you do not have rice flour, you can use any other kind of flour.
Note that higher gluten level make it significantly more difficult for the bread to be released from the basket…. pre-shaping: Scatter a dusting of wheat flour on the board and gently place the dough on the flour. Using wet hands, stretch the dough into a longish rectangle, then fold it like a letter, gently patting off any extra flour that might be there. Continue folding until the dough is shaped in a ball. Cover with a clean tea towel and let the ball rest for about 20 minutes. shaping: Without breaking the skin, tighten the ball further. Place it seam side UP in the well floured (rice) brot-form. Sprinkle the reserved bran evenly over the top of the bread. Loosely wrap the shaped loaf with a clean tea towel and enclose the whole thing inside a plastic bag and leave it in the oven with only the light turned on for 3 or 4 hours (until it has about doubled and there are bubbles).
5. Please note that Vivian Howard shapes her bread into rounds with holes in the center: Shape [the dough] into a round. Let [it] rest for 10 minutes. […]Line [a baking sheet] with parchment and dust with flour. Stick your finger through the center of [the dough ball]. […] Stretch it slightly to form a little hole. Transfer that dough round to the baking sheet and continue to carefully stretch the center into a 3-inch hole. Your bread round at this point will look like a giant flat doughnut.” – Vivian Howard, Deep Run Roots, Chapter 14: Sweet Potato | Sweet Potato Onion Bread baking: To know when it’s time to bake, run your index finger under water and gently but firmly press it on the side of the bread. If the dough springs back immediately, recover the bread with the plastic bag and leave it in the oven with only the light turned on. If the dough gradually returns back after being pressed, for the round loaf, put combo cooker (or a cast-iron frying pan and stainless steel bowl) into the oven and preheat all to 400F. When the oven is preheated about fifteen minutes later, put a square of parchment paper on the counter (the paper should be large enough to cover the bottom and sides of the frying pan). Overturn the shaped bread onto the parchment paper (the bran covered part will now be on the bottom). Using a lame (or scissors, or serrated knife), score the bread. Take the pan and bowl out of the oven (wear oven mitts!!) and place the frying pan on the stove (to prevent burning your countertop…). Transfer the bread to the middle of the frying pan and immediately put the lid of the combo-cooker (or stainless steel bowl) overtop like a hat. Put everything into the oven on the middle rack and immediately turn the oven down to 375F. Bake for 40-50 minutes in all, removing the hat half-way through baking. Turn the oven down to 350F when you remove the hat. The bread is done when the crust is a deep golden brown and the bread sounds hollow when tapped on the bottom. cooling: When the bread has finished baking, remove it from the pan and allow it to cool on a footed rack before slicing and eating; the bread is still cooking internally when first removed from the oven! If you wish to serve warm bread (of course you do), reheat it after it has cooled completely: To reheat any uncut bread, turn the oven to 400F for 5 minutes or so. Turn the oven OFF. Put the bread into the hot oven for about ten minutes. This will rejuvenate the crust and warm the crumb perfectly. At the beginning of the recipe for “Sweet Potato Onion Bread, Vivian Howard wrote: This stuff is special-chewy with deep flavor and a dark crust. If you want a sandwich that will make you cry tears of joy, make the Elbow-Lick Tomato Sandwich – Vivian Howard, Deep Run Roots | Chapter 14: Sweet Potatoes, Sweet Potato Onion Bread, p321 ~~~~ I knew this was it-the bread, the mayo, even the halfhearted tomatoes. I scarfed that sandwich down like a wild animal. Tomato juice mingled with smoked mayo and vinegary onions dripped down my arm all the way to my elbow. I licked my arms and did my best to lick my elbow. Licked the palm of my hand and imagined how unimaginable it would be with juicy, ripe Cherokee Purples. – Vivian Howard, Deep Run Roots | Chapter 12: Tomatoes, Elbow-Lick Tomato Sandwich, p260


From Elizabeth’s Blog, really a wonderful read and many more photos than I have:
We know you’ll want to make this bread! To receive a Baking Buddy Badge to display on your site: make Elbow-lick Sandwich Bread in the next couple of weeks and post about it (we love to see how your bread turns out AND hear what you think about it – what you didn’t like and/or what you liked) before the 29 January 2019.
Here’s how to let us know:
- email me
» Remember to include your name and a link to your post
» Please type “BBB January 2019 bread” in the subject heading
Please note that it’s not enough to post about your bread in the Facebook group. Because of the ephemeral nature of Facebook’s posts, your FB post may be lost in the shuffle. Please email if you want to be included.
If you don’t have a blog or flickr-like account, no problem; we still want to see and hear about your bread! Please email me with the details, so your walnut bread can be included in the roundup too.
For complete details about this month’s recipe, the BBB and how to become a BBBuddy, please read:
- BBB Kitchen of the month: Elizabeth, blog from OUR kitchen | April 2018
