MyKitchenInHalfCups

Once Upon a time: Cooking … Baking … Traveling … Laughing …


14 Comments

Glass Bread ~ Pan Crystal ~ BBB

Glass Bread ~ Pan Crystal ~ BBB

Flour Water Yeast ~ Basic Simple Same

Every bread recipe is the same simple basic: flour, water, yeast. And every time it comes out of the oven it’s 

Dramatic Complex Different ~ Flour Water Yeast

Years ago, the Babes baked the infamous “Crock” aka Coccodrillo, Crocodile Bread AND Babe’s Nightmare. You will find the recipe in Carol Field’s The Italian Baker.  At the time, it was the highest water ratio the Babes had ever dealt with. Now, along comes Kelly in AMessyKitchen bringing us Glass Bread with 106% water! There was at least one Babe with hellish memories of the “Crock” and the outcry was deafening. That Babe shall remain nameless at least here. It was not I. I found the “Crock” good bread and had no issues. Yeast can be fickle.

I strongly urge you to catch this sourdough version video because it shows the coiling turns so beautifully.  I guess I would say this is a bread to be handled delicately once you turn the dough out to cut and then move to parchment paper.  I was overwhelmed with how this dough transformed between coiling turns. Kelly advocates strong gluten bread flour to stand up to the huge amount of water and I would second that advice. Even I did not add flax or any whole wheat HOWEVER when I did the sourdough version I confess my starter is a whole grain rye and that is what I used.

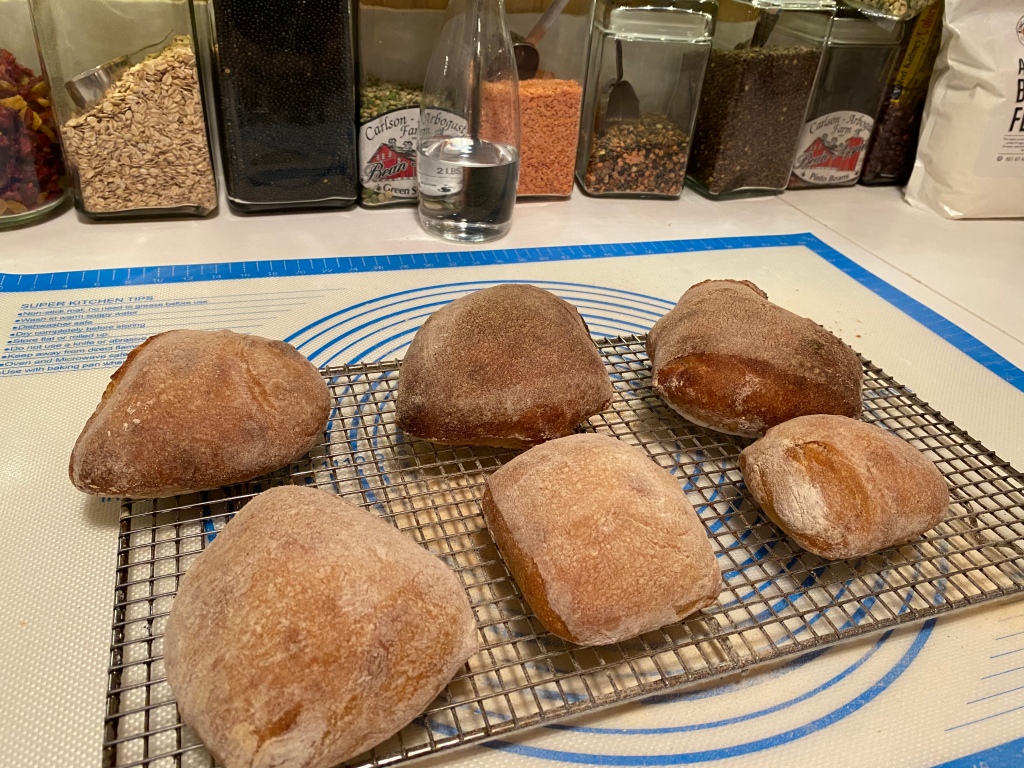
Comparing my yeast and sourdough bakes, I think you will find the yeast has better color, better rise and many more holes. Both had wonderful oven spring but still the yeast was the winner there as well. The crust was crisper on the yeast. I did leave the yeast bread in the oven longer.  I consider both versions excellent breads and would bake them again. I cut 6 rolls when doing the sourdough and find that the optimal size for sandwiches. I made travel sandwiches both times and it is excellent either way.

Using yeast…

King Arthur recipe:
    500g water
    500g King Arthur Unbleached Bread Flour
    2.5g (3/4 teaspoon) instant yeast
    10g salt
    15g olive oil, for the pan 


    To make the dough: Weigh your flour; or measure it by gently spooning it into a cup, then sweeping off any excess. (To measure by volume, see “tips,” below.)

    In a medium bowl, mix the water, flour, yeast, and salt until thoroughly combined and homogenous. Note: The dough starts off very slack and wet. That’s OK; it will transform itself through time and folds.

    Oil a two-quart rectangular baking dish (10” x 7”) with the olive oil. If you don’t have a 2-quart dish, an 8” or 9” square pan will work. Don’t worry about any pan you use being oven-safe; you won’t be baking the bread in it.

    Pour the dough into the pan. Check the dough’s temperature by inserting a digital thermometer into the center. If it’s less than 72°F, move the pan to a warmer spot, e.g., your oven with the light turned on.

    Cover the pan and allow the dough to rest for 20 minutes.

    Start with a bowl fold: Use your wet hands to grab a section of dough from one side, lift it up, then press it down into the middle. Repeat this eight to 12 times.

My amateur video


    Cover the dish and allow the dough to rest for 20 minutes.

    Then do a coil fold: With wet hands, reach under the dough and stretch the middle upward until the dough releases from the dish. Roll it forward off your hands, allowing it to fold over (or “coil”) on itself. This is called a coil fold. Rotate the dish 90 degrees (a quarter turn) and repeat. Continue performing this folding action until the dough feels like it won’t stretch and elongate easily, usually four to five times initially. Note: You’ll be doing this three more times, each time building strength and developing the dough. See “tips,” below, for more details,

    Cover the pan and allow the dough to rest for 20 minutes.

    Repeat the coil fold. Cover the bowl and allow the dough to rest for 20 minutes.

    At this point, the dough should be easier to handle and feel tighter. Repeat the coil fold using only two or three folds this time. Cover the bowl and allow the dough to rest for 20 minutes.

    Repeat the coil fold one last time, using only one or two folds if the dough is relatively strong. Cover the bowl and allow the dough to rest for about 80 minutes.

    To divide the dough: As gently as possible, turn the dough out onto a heavily floured surface, maintaining the rectangle or square shape – be careful not to deflate the delicate dough. Sprinkle a generous amount of flour on top of the dough, leaving no exposed sticky spots. Then, working as gently as possible, use a bench knife or other sharp knife to divide it into four pieces. Gently place two pieces on a piece of parchment, leaving space between them. Repeat with the remaining two pieces of dough, placing them on another piece of parchment.

    Allow the loaves to rest at room temperature for 2 hours, uncovered. While the loaves are resting, preheat the oven to 475°F with a baking stone or steel on a lower rack. (If you don’t have a stone or steel, see “tips,” below.) Allow the oven to preheat for 1 hour to ensure it’s thoroughly heated. The loaves are ready for the oven when there are a few large bubbles on the surface of each loaf and they feel light and airy.

    To bake the bread: Carefully slide the two loaves (still resting on the parchment) into the oven onto the preheated stone or steel. If space is tight and the full sheet of parchment won’t fit on the stone or steel, cut the parchment between the two loaves and arrange them as best you can. Allow the other two loaves to continue to rest.

    Bake the loaves for 15 minutes, then transfer them, from the stone or steel, directly onto a rack in the upper third of the oven for an additional 13 to 15 minutes. (Leave the stone in place.) Moving them to the rack allows the baking stone or steel to become hot again in preparation for the next two loaves. After a total of 27 to 30 minutes of baking, remove the loaves from the oven and allow them to cool on a rack.

    Repeat the process with the two remaining loaves. Cool the bread fully before slicing.

    Storage information: Wrap the bread loosely and store it at room temperature for up to several days; freeze for longer storage.

SOURDOUGH VERSION

Formula for four:
470g strong flour
470g water (400+70)*
10g olive oil
11g salt
100g whole grain rye starter (100% hydration)

Method:
Mix flour and water.
Autolyse above for 45min.

Add 100g starter to autolysed flour and water and work it together well;
Give that a 60 minute rest.
Combine 70g reserve COLD water & 11g salt,
add half and fold/mix together.
Allow 10min rest
Add remaining water/salt & mix well;
add EVO & mix,
Allow 15 min rest
1.  Folds: Oil square cake pan,
add dough and do a few large (coil) folds.
45 min rest
2.  Folds: Large (coil) folds in thirds, then rotate 90 and fold in thirds,
rest 45 min
3.  Folds: Repeat folds,
rest 45 min Folds:
4.  Repeat folds,
rest 45 min Folds:
5.  Repeat folds, 

In retrospect I believe I should have given the dough another 2 folds; every fold and rest really give this dough strength.

Overnight in fridge for cold bulk
Room temp rest 60 minute .
Heavily flour table and pour the dough out, ~ if you watch the video you’ll see I think the move that works the best: just turn the pan upside down, hold it 2-3 inches above and let it fall out.
divide into 4 pieces – I did 6 for my 2nd bake and place on parchment.
60 min rest
Bake on steel at 500ºF for 8min with steam,
drop to 410 and bake for 20 minutes – I would give it 5 or more minutes more next time.

*Note that the 70g is mixed with the salt and kept aside to incorporate after initial autolyse..

Sample timeline:  
_______p.m. Mix the dough ____________
_______p.m. Bowl fold ____________
_______p.m. Coil fold #1 ____________
_______p.m. Coil fold #2 ____________
_______p.m. Coil fold #3 ____________
_______p.m. Coil fold #4 ____________ 

_______p.m. Coil fold #5 ____________
_______p.m. Coil fold #6 ____________
_______p.m. Coil fold #7 ____________
_______p.m. Coil fold #8 ____________
______p.m. Coil fold #9 ____________
______p.m. Coil fold #10 ____________

_______p.m. Divide ____________
_______p.m. Bake ____________

Want to bake with us?  We’d love to have you bake the Glass Bread with us.

This bread makes sparklingly crisp sandwich rolls. Really, you just need to try it!


16 Comments

BBB ~ Pepperoni Rolls

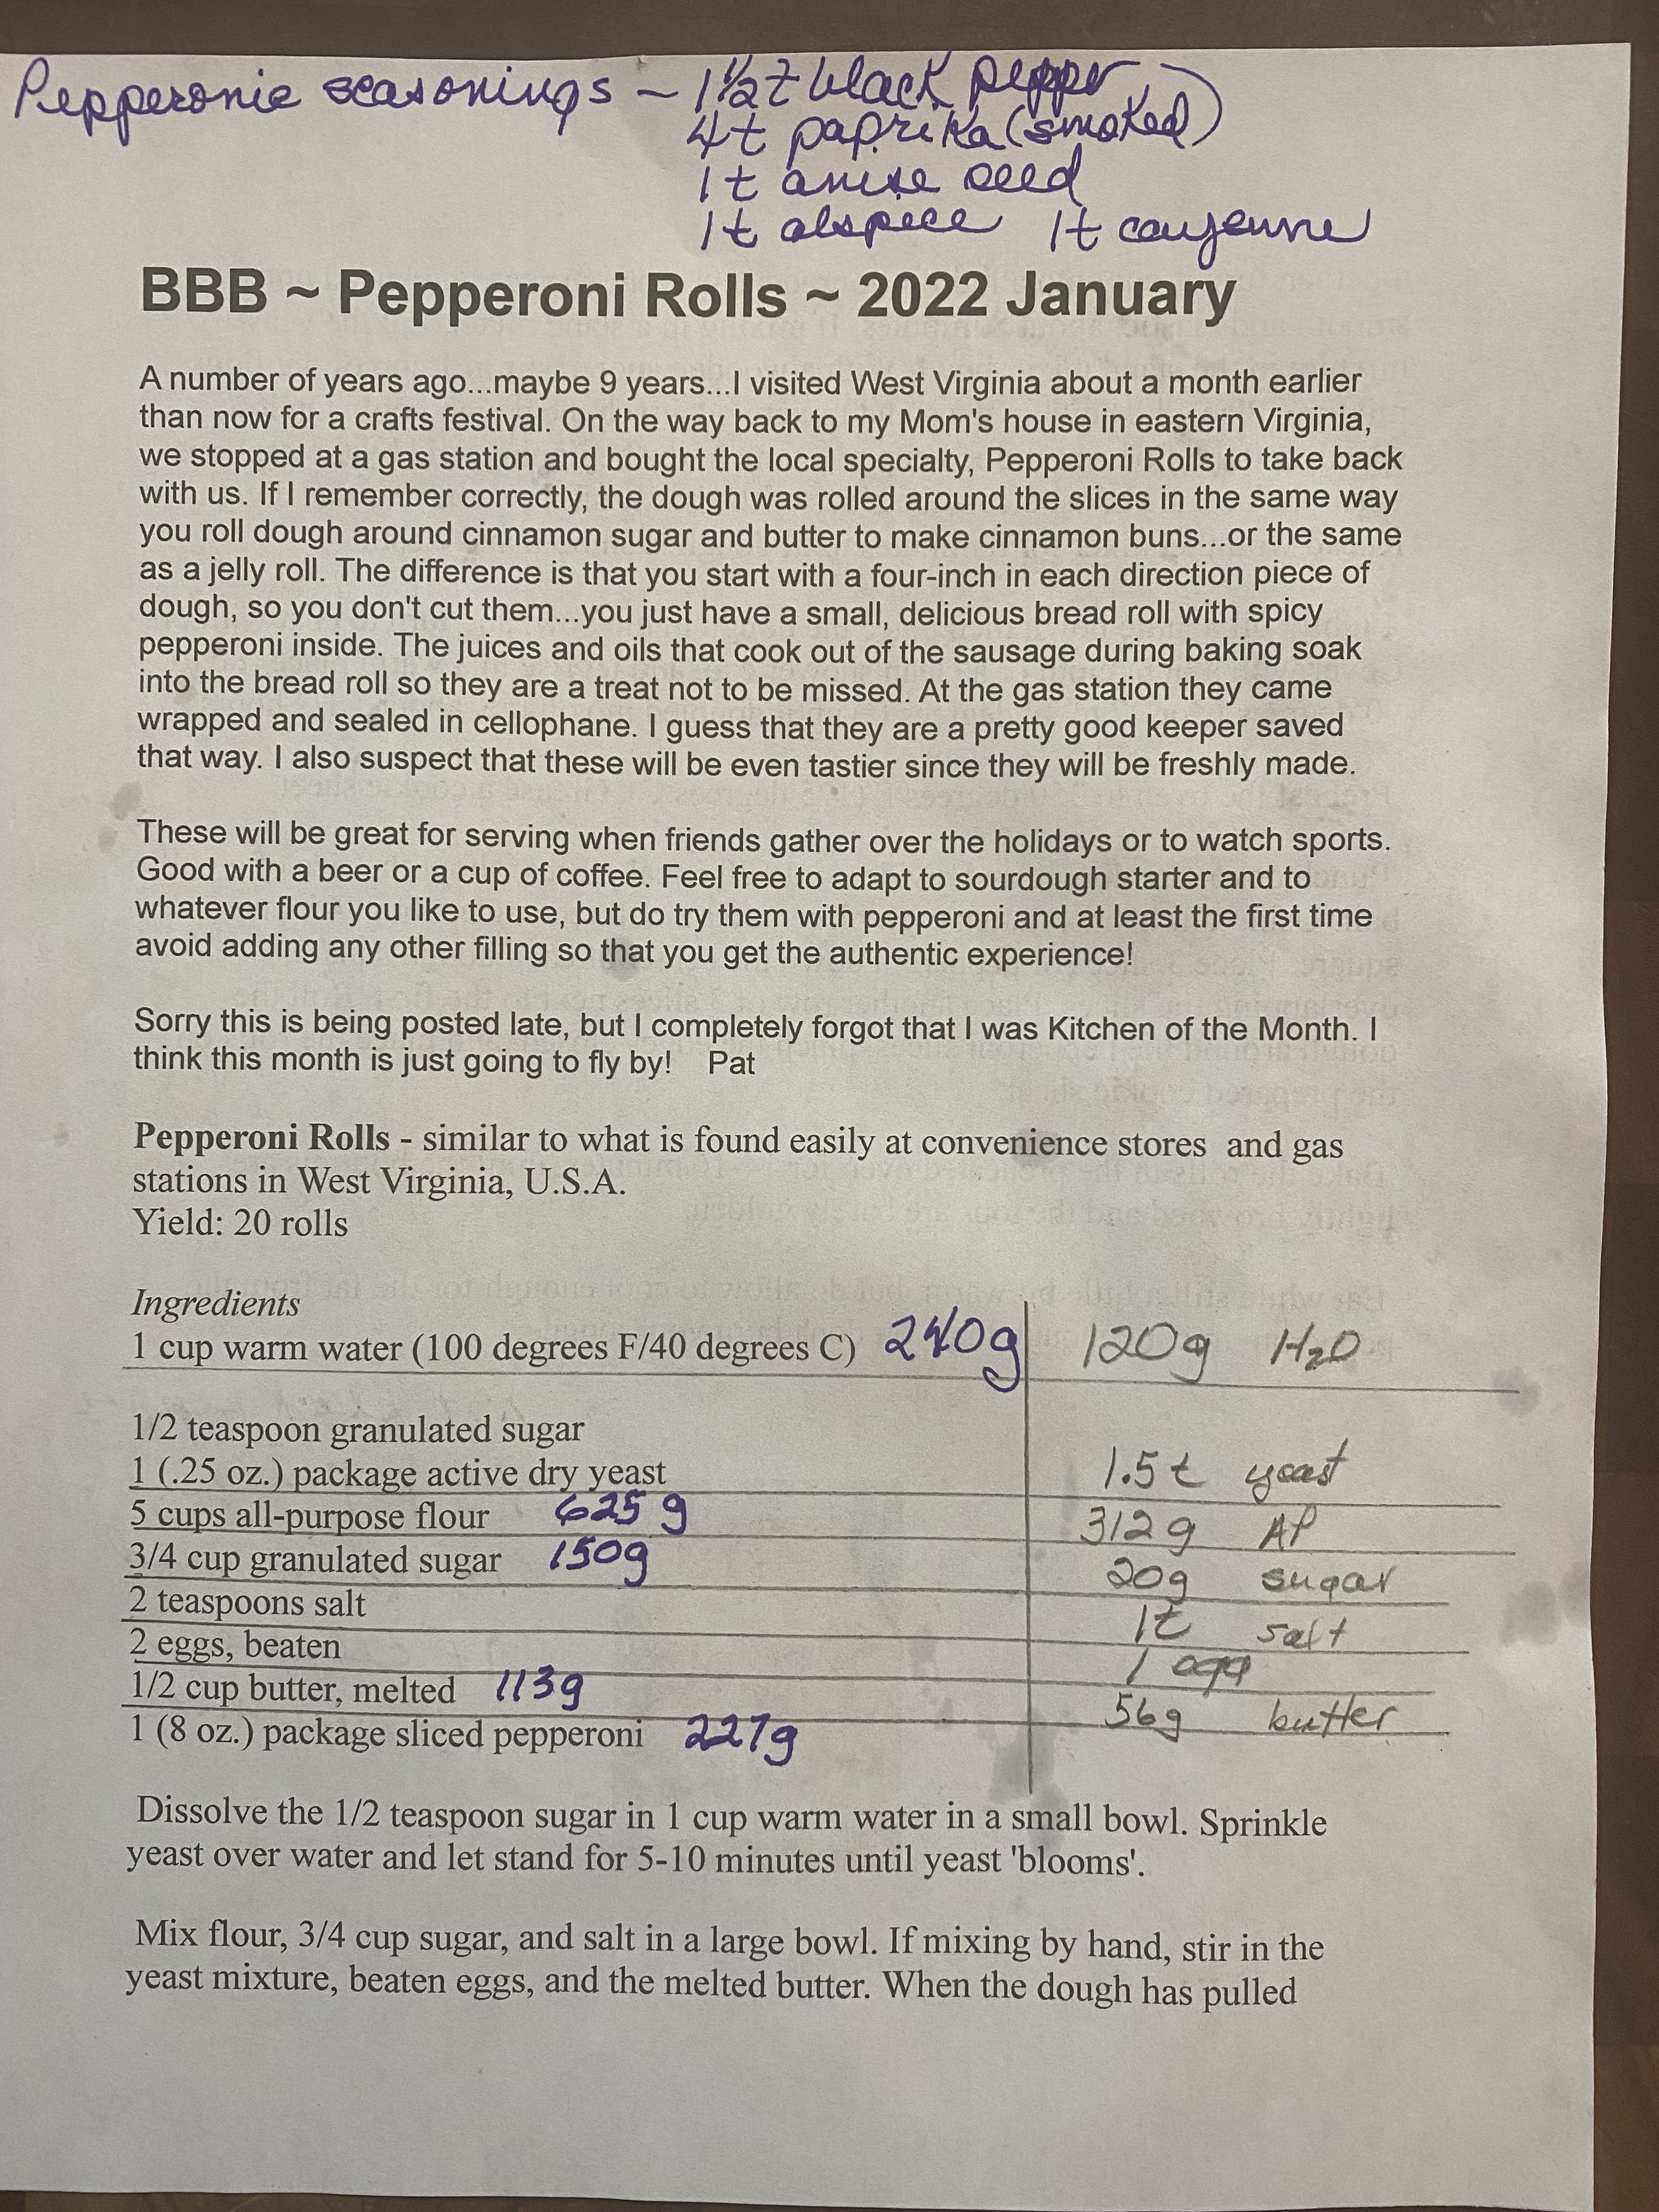
When I first saw the post for January’s Babe bread, I thought here’s a simple easy fun bake perfect for after the holiday crazy actions. A small stuffed roll perfect for just about anytime, anyplace and any occasion.  Our host kitchen, FeedingMyEnthusiasms, has a good story on finding this bread you should find fun.

A quick read through the recipe and … Pepperoni…ha, I’m in!

My next reading brought me up short. I left the following on the blog: Ye gad, I’m just looking at that 3/4 cup of sugar! Really with pepperoni?! Sounds terribly sweet. How much sugar does this need? What amount of sugar will change the texture here? Adding this much sugar to something that seems savory is REALLY foreign to me. I get the feeling this is a very Americanized food, we just add sugar to everything.

Simple and easy … Then there was a long discussion of what if you don’t want meat!! That how I happen to have the sautéed mushroom with pepperoni spices idea. VERY good.

Holy Batman! I made them. Did I follow the recipe? Better than I thought I had on initial inspection but I divided the ingredients in half and only added 20 grams of sugar … and when the dough just wouldn’t come together – fully 3/4 of a cup of flour was not going to incorporate – I threw  in the rye sourdough throw out from the night before. I threw that in and it was perfect. This took a full 90 minutes to double.  We were having our “pod” friends (pod being like minded fully vaccinated friends) for pepperoni pizza dinner. SOOOO for filling I used pepperoni seasoned baby Bella mushrooms sliced, there were 4 half slices of cooked bacon added to the mushrooms … then there were two dough balls left when I ran out of mushrooms and bacon, perhaps there was a slice or two of cheese as well.  The last two dough balls: one I filled with pepperoni and one I filled with ……..see below.
These were seriously good 😊!!!  They were a terrific appetizer for hungry boys before pizza! 

Continue reading


14 Comments

BBB ~ Wool Roll Bread

Flour Water Yeast = Basic

Flour Water Yeast = Basic + Technique + Shape =

Spectacular Magic Unique Breads

Our host kitchen of the month is Judy at Judy’s Gross Eats. She can tell you about this bread taking the internet by storm. I’m going to tell you about how this is simply amazing. Our son and his three kids raved about the milk bread they baked all during the pandemic. They loved how you could squeeze it and it came back. They just really loved it. Whole grains…ha, those were awful tasting things that ruined any bread. This was all white. This was real bread. I loved watching their productions, the photos and the movies and what they put on their slices. But white bread just isn’t my thing. I didn’t try it.

Then here comes Judy with this milk bread. AND here’s a friend with a birthday. Wow! Great opportunity to bake a spectacular white bread that I can give away. So I baked white bread…I was taking it to the party…there was wind and rain…party got canceled…didn’t give away bread…Gorn loved it.

Truly, this makes for spectacular baking but in my mind, on my taste buds, white bread even with the fillings I used (and they were really really good) I just find white flour bread bland. I feel sure there will soon be a time I bake this again and make it with some character flours.

The magic of three basic ingredients always blows my mind. With this bread, it is a technique and shaping that bring it into the realm of the GLORIOUS. Technique is cooking the flour into a paste, the tangzhong, and adding that to the dough. Shaping adds the final magic. I’m astounded by breads that look spectacular and difficult…then turn out to me relatively simple to execute, and this definitely fits in that category.

My fillings. Well, this recipe called for dividing the dough into five pieces. That gives you the opportunity to use five different fillings all in the same loaf. I used Biscoff Crunchy Cookie Butter, peanut butter, brown sugar & cinnamon, chocolate and left the last plain. Not surprisingly I liked the Biscoff and the peanut butter the best. Fillings can be sweet or savory and my mind swims with the possibilities.

I lost track of width I should have made the five rolls and ended up with misfit. Judy’s misfit I think was stunning, mine not so much but it still worked. I did like the idea of different fillings. Fermenting in my mind, you could make these five rolls smaller and make more pieces and create many surprise flavors. That might make more work but it sounds interesting.

Japanese Milk Bread from King Arthur Baking Company

Tangzhong

• 3 tablespoons (43g) water

• 3 tablespoons (43g) whole milk (used half & half)

• 2 tablespoons (14g) King Arthur Unbleached Bread Flour

Dough

• 2 1/2 cups (298g) King Arthur Unbleached Bread Flour

• 2 tablespoons (14g) Baker’s Special Dry Milk or nonfat dry milk

• 1/4 cup (50g) sugar (used 35 grams)

• 1 teaspoon (6g) salt

• 1 tablespoon instant yeast

• 1/2 cup (113g) whole milk (used half & half)

• 1 large egg

• 4 tablespoons (57g) unsalted butter, melted

1.      To make the tangzhong: Combine all of the ingredients in a small saucepan, and whisk until no lumps remain.

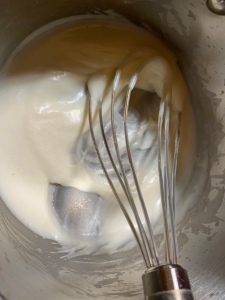
2. Place the saucepan over low heat and cook the mixture, whisking constantly, until thick and the whisk leaves lines on the bottom of the pan, about 3 to 5 minutes.

Three minutes.

3. Transfer the tangzhong to a small mixing bowl or measuring cup and let it cool to lukewarm.

4. To make the dough: Weigh your flour; or measure it by gently spooning it into a cup, then sweeping off any excess. Combine the tangzhong with the remaining dough ingredients, then mix and knead — by mixer or bread machine — until a smooth, elastic dough forms; this could take almost 15 minutes in a stand mixer. I started doing this by hand as I like that best BUT I quickly felt I would get a much better result with the kitchen aid AND I got the smoothest dough ball ever.

Baby smooth bottom! Twelve minutes in the KitchenAid.

5.      Shape the dough into a ball, and let it rest in a lightly greased bowl, covered, for 60 to 90 minutes, until puffy but not necessarily doubled in bulk.

6. Dough shaping: Divide the dough into 5 pieces. Roll each piece into a thin, oblong shape, then, using a sharp object (I used my 6 inch bench scraper), start about 2/3s from the designated top and make 1/8” to ¼” cuts.

This is almost five minutes long I’m sorry, I have to learn some editing 😌 Yes, we have pesky fruit flies in the film. Please excuse the straw like grey hair that gets in the way.
Continue reading


8 Comments

Cruffins ~ BBB ~ July 2021

What you may ask is a Cruffin? Since the Babes are Baking Cruffins this month, that would be a fair question. In simplest terms a cruffin might be a cross between a croissant and a muffin but it is neither a croissant nor a muffin. Mostly what you need to know about a Cruffin is: they are insanely beautiful and taste marvelous! That’s really what a Cruffin is BUT if you want to know more details check out Aparna’s post at My Diverse Kitchen.

I think these should be named oatmeal mushrooms.

There is an art to writing a recipe BUT there is an art to reading a recipe as well and clearly I am woefully lacking in reading skills. Perhaps my math is just as lacking. The recipe Aparna gave us clearly stated “this recipe makes 8 cruffins” … I ended up with 17. Can’t read, can’t count.

My cruffins are dark – I used half white whole wheat with half regular AP flour and brown sugar – and I’m ok with that. I will admit the BBB’s who bake with white flour got a gorgeous gourmet picture perfect golden cruffins. I’ll settle for the subtle caramel flavor I get with the brown sugar.

Cruffins

Recipe by Aparna from My Diverse Kitchen

This recipe makes 8 Cruffins (see it said it right there)

For the Dough :

25 grams brown sugar (this was just sweet enough for us)

1 1/4 tsp dry yeast

100 grams white whole wheat flour

101 grams white AP flour

50 gm unsalted butter, chilled

1/4 tsp salt

183 oat milk (did not use any water but used all oat milk)

For Lamination :

120 gm unsalted butter, at room temperature

To Decorate/ Serve :

Speculaas spice/Cinnamon sugar

DIRECTIONS :

I add the dry yeast directly to the flour with other ingredients.

 In a medium bowl mix together the flour, yeast, sugar, salt and chilled butter cut into small pieces. Add milk and knead into a soft and elastic dough that comes away from the side of the bowl. The dough should not be sticky. Add a little more milk or flour, as required to achieve this consistency of dough. I found I needed at least half cup more of regular AP flour to obtain a soft supple dough that was not sticky.

Shape the dough into a ball and transfer it to an oiled bowl, turning the dough to coat it well. Cover and let the dough rise till double in volume. This should take between an hour to two depending on ambient temperature. Mine took about an hour and 45 minutes.

In the meanwhile prepare your baking pan and keep aside. Butter and very lightly flour the cavities of your muffin or popover tray.

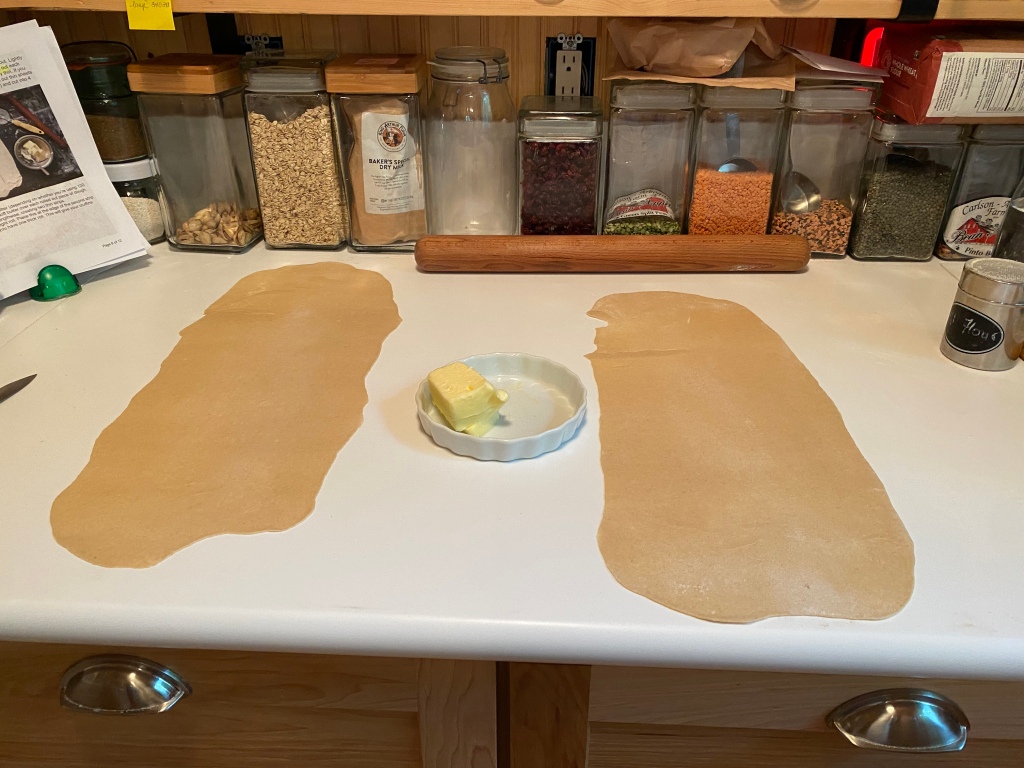
Dust your working surface lightly with flour and turn the dough out. Lightly knead to deflate the dough. Divide into four equal pieces. Roll out each piece to a 60x20cm (24X7 inches) sized piece. The dough sheet will be very thin. If you have a pasta machine you can use that as it is easier to roll out thin sheets with it. I cut the dough into two pieces (60cm x 40cm each) and cut into 4 pieces after buttering each.

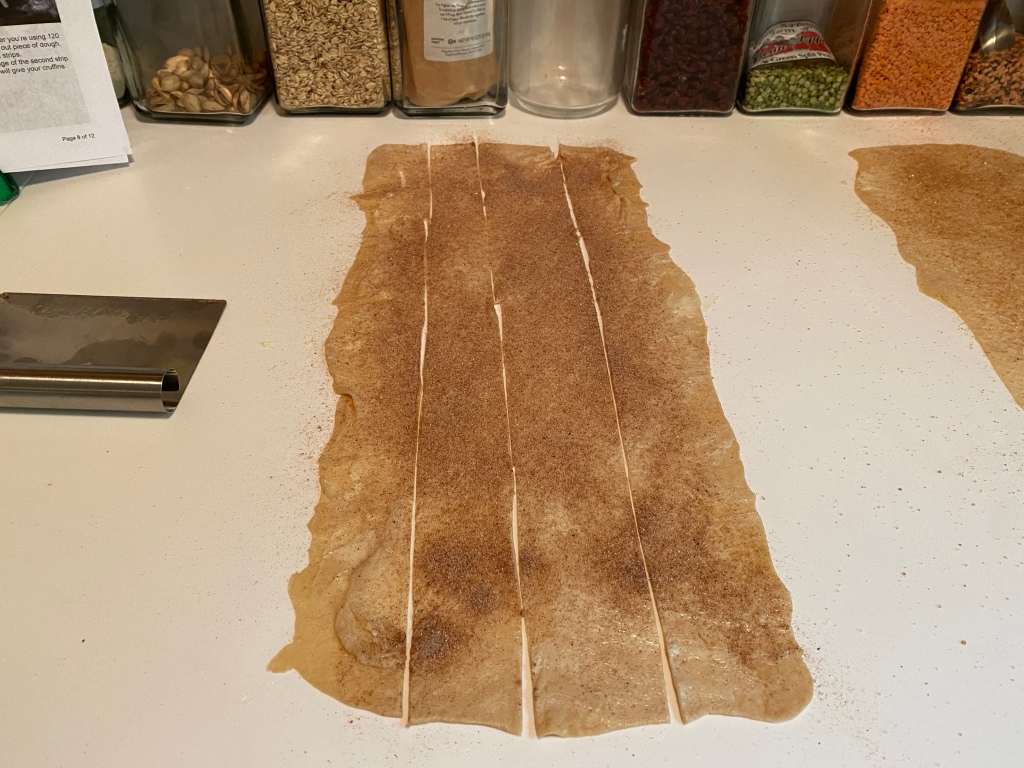
Spread about 30 to 38 gm butter (I started with 150 grams of butter and had 50 left) of soft butter over each rolled out piece of dough. I sprinkled half with cinnamon sugar and the other half with speculaas spice. Cut each piece into half, lengthwise, creating two thin strips.

Roll one thin strip into a tight roll. Place this at the edge of the second strip and continue rolling till you have one thick roll. This will give your cruffins more layers.

Cut roll in half lengthwise. Roll each half, like a circle (cinnamon roll style)with the cut layers side showing the outside. Make sure to tuck both ends under so it doesn’t open up on baking. Place the roll in the prepared muffin or popover pan.

Repeat with all the dough pieces. Cover the pan with a kitchen towel and allow to rise for about 45 minutes. The rolls should look puffy and have risen to almost the edge of the cavities.

Bake the cruffins at 190C (375F) for about 30 minutes or till golden brown and done. My smaller size baked in about 24 minutes. Turn them out onto a rack and let them cool. I skipped toppings and thought they were just perfectly delicate and sweet enough. Serve warm with coffee or tea.

My Cruffin were small (17 instead of 8) and more brown than golden but still insanely beautiful and marvelous tasting with coffee in the morning, hot tea in the late afternoon, coffee in the morning, hot tea in the late afternoon … oh gosh, it’s time to bake again as I know you will want to do. I want these again with my morning coffee … and my late afternoon tea!

Coffee or tea?

And I do thank you just very much for cruffins Aparna!


9 Comments

BBB ~ St. Lucia Saffron Buns, Lussekatter

I don’t know about where you are but where I am it’s dark really early. Before 6 in the evening the sun is long gone and it’s gotten to dark. Our Kitchen of the Month, Judy, has picked a wonderful roll/bun to light up the short early dark days of December! Saffron is the spice to provide the light. These are a traditional Christmas celebration bread in Italy and Scandinavia.

I found this a wonderfully silky dough to work even using a lot of white whole wheat flour. I always try to bake with some whole grain flour.

Why did I feel compelled to convert this to a sourdough? I think just because I’ve recently gotten a sourdough going again and so I’m trying hard to keep it going. The way I did the sourdough does add considerable time to the process and I’m sure if you follow Judy’s yeasted recipe you’ll have these little bun coming out of your oven much sooner. Still I really enjoyed the longer time and am totally delighted with the end product.

My only regret is when I got to the shaping and my hands were deep into this I’d forgotten the simple shaping of making these into cats. I really want to do that next time. I think Elizabeth will be doing cats but won’t be posting yet for several days. Maybe one/some of the other Babes will be doing the cat shape but I’m sure one/some will have some variety so check them out.

The shapes are really pretty self explanatory and simple to do.

St. Lucia Saffron Buns, Lussekatter

Yield: 18 rolls

LEAVEN
60 g starter
70 g water
60 g white whole wheat
DOUGH
All of the above leaven
105 g water
1/4 teaspoon saffron threads
3 tablespoons King Arthur dry milk powder
220 g white whole wheat
120 g bread flour
110 g AP flour
1/2 teaspoon kosher salt
1/2 teaspoon ground cardamom
56 g unsalted butter, softened
60 g of sour cream
30 g wildflower honey
2 large eggs
Raisins, currants, dried cherries, cranberries, blueberries
GLAZE
1 egg, beaten

The night before mix together the leaven. Cover and leave at room temperature for 10 to 14 hours until bubbly.

Warm water and saffron in microwave about 20 seconds.  (I held the butter for the second fold, next time I may try adding it when I’ve finished kneading it the first time and before starting the folding).  Stir in the honey, sour cream and eggs until blended.  Let cool until about 80-90°F, or warm to the touch.

Whisk flours, dry milk powder and cardamom: I held out the salt until after the first folding.

 Make a well in the center of the flour and add the saffron-water mixture, the eggs, and the sour cream. Mix the ingredients until well incorporated.

Knead the dough: Knead to incorporate. Do this until the dough is still a little sticky to the touch, but does not completely stick to your hands when you handle it.

Let dough rise: Shape the dough into a ball and place in a large bowl. Cover. 
Butter and salt: I added these at the second fold. The dough really came apart. Next time I will add Butter and Salt earlier: after kneading let rest 20 minutes then add butter & salt.
Let sit in a warm place for 2-3 hours, Do at least 2 fold about 45 minutes apart then let the dough rest until about doubled. This dough became silky smooth, lovely to work.

 Form dough into shapes: When the dough has doubled in size, gently press it down and knead it a couple of times. I weighed the dough and divided by 18 which required each roll to weight about 60 grams. Break off a piece and form it into a ball about 2 inches wide. Roll the ball out into a snake, about 14 inches long.
Then Curl the ends in opposite directions, forming an “S” with spirals at each end. Place on a lined baking sheet and repeat with the rest of the dough. There are a number of shapes commonly accepted for these rolls.


Let sit for final rise:  Cover and place in a warm spot until the dough shapes double in size, mine took an hour.

Brush with egg wash, place raisins in buns: Preheat oven to 400°F (205°C). Using a pastry brush, brush some beaten egg over the tops and sides of the uncooked buns. Place raisins, cranberries or cherries by really poking them in deeply otherwise they may well jump ship.

Bake: Place in the oven and bake at 400°F (205°C) for about 18 to 20 minutes (turning halfway through cooking to ensure even browning), until the buns are golden brown.
Remove from oven and let cool for 5 minutes before eating.

Would I do these again? In a heart beat. The shapes can be varied easily and are all interesting. The sparkling sugar gives the buns just the perfect crunch and sweetness along with the honey. I would try a little more saffron next time as I really didn’t taste or even see much of it in the bun. These are just beauties.

If you wish to bake with us as a Buddy, please submit your post and photos by December 29th to be included in the roundup and earn your baking badge.  Send to jahunt22 at gmail.com.

Visit the other Babes to check out their versions of Lussekatter.


13 Comments

Potato Focaccine ~ BBB

I will never forget my first Focaccia.  We were driving around Italy and wanted to stay in Portofino.  It got late, very dark and very rainy.  We stopped at the first hotel we came to just off the road and almost in the sea.  All night it rained and the waves washed upon to the patio just outside our room.   In the morning we discovered we hadn’t quite made it to the city.   We would have needed to stay on the road and go around one last curve.  The choice was to drive into the city and find a place to park OR cross the road and follow a path over the hill.  The path wound through olive groves and past several homes.  When we topped the hill, Portofino was at our feet.  We sent hours wondering the streets and finally ended up along the warf where there was a food market.  One of the town bakeries had tables displaying so many breads … I was in heaven.  We settled on a small flat loaf that measured maybe 9×9.  It had been slathered in olive oil and generously infused with rosemary.  That was the be all and end all of focaccias! 


Over the years I’ve baked focaccia many times.  There are many recipes, many just slightly different, all very good.  Carol Field (The Italian Baker & Focaccia: Simple Breads from the Italian Oven) has been my Italian bread geru for may years and indeed she talkes about Focaccine.  

Hard to stop eating to snap a photo!


Pat from Feeding My Enthusiansms is our Kitchen of the Month for November 2020.  She found this recipe on My Pinch of Italy.  Now, let me say this may not be the be all to end all focaccias after all we’re not in Portofino, but it is totally beautifully worthy of your baking. I’ve alread found myself baking it for the third time and know it will be coming out of my oven again soon.  The sage is excellent! The small size is wonderful.

Potato Focaccine ~ BBB

Recipe By: Pat “Feeding My Enthusiasms” 
Yield: 12

150 g of yellow or white mealy potatoes
300 g of Italian flour 
100 grams Durum flour
1 teaspoon of salt
1 1/2 teaspoons dry active yeast
3 tablespoons of Evoo – Extra Virgin Olive Oil
200 grams Lukewarm water
10 fresh sage leaves chopped
Maldon salt, to taste

Peel potato. Boil the potatoes in plenty of unsalted water.

Whisk together flours, salt, chopped sage and yeast. 
Add lukewarm mashed potatoes, olive oil and lukewarm water to flour mix.

Alternate shaping: My total dough weight was 820 grams. Divided by 12 makes for 12 balls each weighting about 68 grams. Mine ranged from 67 to 70 grams.

Pat the dough ball flat to about  1/2 inch – 3/4 inch thick. Use a large biscuit cutter and cut about 8 rounds of dough. The scraps of leftover dough divide and shape into about 4 more rounds. Place rounds  (stretch them out a little) on parchment lined sheet pan.  Dimple the dough with finger tips so the olive oil can collect in little puddles.  Allow to rest for another 30 minutes. 

Pour and or brush tops of disks with olive oil. Sprinkle with Maldon salt to taste.  

Bake at 180 ° C (160° C convection/fan) (350° F) for about 20-25 minutes, depending on your oven. 
Give them a moment under the broiler to give them golden brown color.
When cooked, flavor your focaccine with a drizzle of olive oil and more salt if needed.. 

Potato focaccine are good to eat freshly baked, however you can store them in a paper bag for a day.  I found these kept very well for several days.
These were excellent split in half and toasted.

Not to worry. YES you really should bake these! They are really that good. Check out the other Babes baking. Bake them for yourself and let us know what your experience was.

If you would like to be a Bread Baking Buddy, just bake by November 29th and send Pat an email with a photo and the URL where you posted. She will post the round-up as close to Dec. 1 as possible. Send your email to plachman at sonic dot net.

I look forward to how your little Focaccine turn out!


8 Comments

BBB ~ Chelsea Bun Valentine

Chelsea Bun Valentine
LOF54gPWS1+o5aWQVjHCjg

I can’t imagine where eleven years have come and gone baking bread after bread with Babes. Somehow, here we are on our eleventh anniversary.  Simple, complex, straight or sour dough, I never tire of flour and yeast. I never seem to see a bread coming either. Although there are breads I have sort of in a reserve place that I think the Babes must bake one day. One that comes to mind is salt rising bread. I’ve tired it twice and it’s good but not for the faint of heart.
Recently I got hooked on The Great British Baking Show. Obsession doesn’t come close to how much I was watching. And when it came to the breads, I watched many of them over again immediately. In late December, I watched one where they baked Chelsea Bun Christmas Trees. It some how caught me that the bread and the bun were basic but the shape and the filling should be the challenge that suited a February Valentine. I had some really fancy ideas in the beginning but when it came to execution, simple took over and Gorn was won with a very simple heart … I think it had something to do with the some what cherry pie like filling I came up with.  Cherries will win him over any day, even in a bun.

Ordinarily I would have added walnuts to buns but I was with grandkids and was told they wouldn’t eat them.
GNGAfLi%RsmyFrtLObg
Find the Original Recipe here.
Serving Size: 15

Dough
400 grams bread flour, plus extra for dusting
400 grams white whole wheat flour
1 tablespoon salt
15 grams sachet fast-acting yeast
400 ml milk
60 grams unsalted butter, plus extra for greasing
2 free-range eggs
Filling
You make it up!

5MXLtQmkQBm7YoomspYXNg

“I won’t eat raisins” “There are no raisins” “Cherries”

Place the flour into a large mixing bowl, add the salt to one side and the yeast to the other side.  (That’s how the cutie Paul Hollywood does it.)

Warm the milk and butter in a small saucepan until the butter is melted and the mixture is lukewarm.

Pour into the flour mixture, add the eggs and stir thoroughly until the contents of the bowl come together as a soft dough. The dough will be sticky.

Tip the dough onto a lightly floured work surface and knead well for 5 minutes, until the dough is smooth and elastic. Alternatively this can be done in a stand mixer using a dough hook. I found this to be an easy dough to do by hand.

Place the dough into an oiled bowl and leave to rise, covered with a shower cap, for one hour or until doubled in size.

Mix the filling. I used a cherry preserve that was cherry pie like filling and added some dried cherries to that.  I also sprinkled my dough with some brown sugar for that extra.

Tip the dough out onto a lightly floured work surface. Roll out dough into a rectangle about 20in x 14in.

Tack down the long side of the dough rectangle nearest to you by pressing it down onto the work surface with your thumb. Brush all over with the melted butter. Then spread the your filling over the dough leaving a 2cm boarder. Roll the opposite long side of the dough towards you quite tightly, until the roll is complete and tight. Trim the ends to neaten.

With a sharp knife cut into 15 thick rounds – about 1.5in.

Line a very large baking tray or use the grill tray from your oven with baking parchment.

Arrange rolls on the prepared tray, cut side up, in heart shape: I just drew a heart on parchment paper and filled it in. You want the buns to be close enough so that when they rise further and then bake; they will bake with their sides touching. They can then be pulled apart and you get a lovely soft edge.

Cover loosely and let rise for 30 – 45 minutes.

Preheat oven to 350F.

When the buns are ready, put them in the oven and bake for 20-25 minutes until golden-brown.

Check after 15 minutes or so and cover the buns with foil if they are getting too brown. Mine needed no foil.

Remove the buns from the oven and let them cool slightly before transferring them from the tin to a cooling rack.

Melt the additional preserves in a small saucepan with a splash of water until smooth. Brush the jam over the buns to glaze and allow to cool.


It’s sort of a heart … it went fast enough that the shape didn’t really matter.

Valentine’s Day maybe over but there’s always desire for sweet hearts and bread. Be a buddy, bake a heart overflowing with love, we’d love to see what you’d fill your heart with on top of all that love. I know the Babes will change things up, so don’t miss all their hearts.  Send me your post with photo before February 28, I’ll do a round-up post and add you in as well as send you a cool Buddy badge.


8 Comments

BBB ~ Steamed Bao Buns and World Bread Day

I am once again bowled over!  Once again I am humbled. Steamed bread just never seemed very appealing.  These were ridiculously easy and good. I went super simple with the dinner plan, BBQ poached chicken: brown the chicken (pound of thighs, pound of breast), poach in chicken broth and Stubb’s BBQ sauce, remove chicken pieces, boiled liquid to thicken slightly, shred chicken, return to the sauce. WOW these were great. Gorn kept thanking me for a wonderful dinner.
Disregarding all guidance, Gorn split these and toasted several to enjoy with eggs for breakfast. Good all over again!
Thank you Karen!  Below are my changes to Karen’s recipe. Check out Karen’s site Karen’s Kitchen Stories for her details, links to World Bread Day and all the other Babes Buns for all our craziness.

fullsizeoutput_896d

Rising! Oh the promise of bread.

Steamed Bao Buns

Recipe By: Karen’s Kitchen Stories from Food52
Yield: 10

140 grams bread flour
140 grams white whole wheat
1/2 teaspoon baking powder
1/3 cup (70 grams) sugar, I used 40 grams brown sugar(will use less next time)
4 grams instant or active dry yeast
1/2 cup (120 grams) water, about 100 degrees
1 teaspoon olive oil

Whisk together the flour, baking powder, sugar, and yeast in the bowl of a stand mixer. Add the water, and mix with spoon. Add the oil, and knead until smooth. The dough should not stick to the sides of the bowl. I did this easily by hand.

Cover with a damp towel or plastic wrap, and let rise until doubled (30 minutes to 2 hours).

I lined the bottom of steamer with lettuce leaves (the purpose is to keep the buns from sticking to the steamer).
j95Nw0PARo6NIwadvHl2Dg

Deflate the dough and divide it into 10 equal pieces (mine were about 45 to 48 grams each). Give each piece a quick knead.

On a floured surface roll the dough out into a 3 inch by 6 inch rectangle with rounded edges. Fold the dough in half lengthwise, and place on a parchment square. Cover lightly with oiled plastic wrap or a damp towel, and repeat with the rest of the dough pieces. Let proof for 30 to 45 minutes, until slightly puffy.

Bring a pot or wok of water to a steady boil (just slightly more than simmering) and fit your pan or wok with a steamer, bamboo basket, or steaming rack just above the water. Place the baos in the steamer, cover, and steam for 12 minutes. Cool slightly, fill with a filling of your choice, and eat.

You can refrigerate or freeze (I prefer freezing) leftovers. You can either thaw and re steam for 3 minutes, or wrap one in a damp paper towel and microwave for 20 to 30 seconds.  Or split and toast as Gorn did.


These go in the easy to do file!


15 Comments

BBB ~ Filipino Spanish Bread Rolls

Filipino Spanish Bread Rolls

This slideshow requires JavaScript.


I confess. These didn’t immediately excite me but they are bread and a Babe should bake. 
And then for me the magic took over.  I just do enjoy the magic of the yeast and flour and water.
My intent when I divided the dough was to shape half in traditional fashion as a log and half as crescents … but the crescent was so easy I did them all that way.  In retrospect, I think I might have enjoyed them more as a log: the outside would have gotten a uniform coating and maybe been more enjoyable with my coffee BUT these were marvelous even as crescents!
Aparna, I thank you.  These were really no trouble to make.  The dough easy to work.  Flexible enough to do well with a long rest in the fridge. 
I think they would do equally well perhaps shaped and rested in the fridge overnight and then go into a hot oven in the morning.  They would be company show stoppers for sure at any time.
And for the drama through poor reading … yes, I still have issues with reading. 
aGWySUn%RM2vmVkE6h74AA
Right well the best I can say is the smell communicated better than the reading and I was able to blow most of it off the brown sugar before I’d mixed it in.  Aren’t we lucky to have … smell! 

Filipino Spanish Bread Rolls

Recipe By: Aparna Balasubramanian
Yield: 16-24 rolls
For the Dough :
2 teaspoons active dried yeast
1/4 cup warm water
1 teaspoon sugar
426 grams white whole wheat flour
75 grams Kumet flour
20 grams flax meal
1 tablespoon brown sugar
1 teaspoon salt
1/2 cup milk
1/2 cup unsalted butter, melted
2 eggs
For the Filling :
1/4 cup unsalted butter, melted
1/2 cup breadcrumbs
1/3 cup brown sugar
2 teaspoons cinnamon powder (optional)
For Coating :
A little milk
1 cup bread crumbs
1/3 cup brown sugar

Whisk together the flours, flax, yeast, sugar and salt.
Mix the milk, melted butter and eggs.
Mix the dry and wet together.
Then knead until you have a smooth and elastic dough. I found this easy to knead by hand. Firm dough.

Cover loosely and let the dough rest for about 2 to 3 hours or till it has doubled in volume.
It became obvious to me that life was not cooperating with these directions and the dough went into the fridge overnight.

I took the bowl out as soon as I was in the kitchen fixing coffee in the morning.  That allowed the dough to warm up and it was ready to work 2 hours later.  Press down the dough gently and divide the dough into two equal parts.

There are two ways of shaping Filipino Spanish Bread. One is to roll out each portion into a round and spread the filling over it.

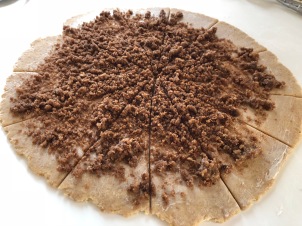
Spread the filling before cutting.

Then cut each into 8 triangles like you would a pizza. Each triangle can then be rolled up croissant style.

The more traditional way is to shape each half of dough into a log and divide into eight equal parts. Roll each piece into roughly a 3- by 5-inch rectangle. Brush with melted butter, sprinkle with breadcrumbs and sugar (or cinnamon sugar if you prefer). Roll the piece like you would a jelly roll, starting from one corner and rolling towards the opposite corner.

One dough ball gave me 10 rolls, the other gave me 12.  I did like the smaller size and would make smaller regardless of shape.

Alternately, roll each half the dough into a largish rectangle about 10” x 10”.  Then brush the surface generously and completely with melted butter. Sprinkle half the breadcrums and the cinnamon and sugar mixture over this evenly. Now cut the dough into half from top to bottom. Again cut each half into 4 left to right. You will have 8 rectangles about 5″ x 3.3″

Which ever way you shape your Filipino Spanish Bread, place the pieces seam side down on a lined or greased baking sheet. Let the shaped rolls rise for 30 minutes.

Brush them with a little milk and sprinkle with more breadcrumbs and sugar. You can also roll the shaped dough in the breadcrumbs and sugar if you like.

Bake until golden brown at 190C (375 F) for about 15 to 20 minutes. Because I made the rolls with all whole wheat, they took 22 minutes to bake.
Cool on a rack.

We’d love for you to bake with us as a Bread Baking Buddy. Here’s how it works.

Bake this month’s bread using Aparna’s recipe and post it on your blog before the 28th of this month. Mention the Bread Baking Babes and link to her BBB post in your own post. Then e-mail her at aparna[AT]mydiversekitchen[DOT]com with your name and the link to the post, or leave a comment on her blog post with this information. She will include your bread in the Buddy round-up at the end of this month.


10 Comments

BBB ~ Pumpkin Cornmeal Bread

Judy from Gross Eats is our Kitchen of the Month for October.  This was a most interesting bake!

I was excited to try this one because 1.) I have baked many of Beth Hensperger’s recipes from this book and her other books and always enjoyed them, 2.) the seasonal timing appealed and 3.) because of the ingredient combo.
I was delighted to try something pumpkin right now and I really liked the rye and cornmeal combo.
Of course I added that little bit of flax. I also had a large bag of pepitas on the counter and they seemed super appropriate. Of course pumpkin just pretty much begged for cinnamon in my book. I used a combo of flours replacing the original bread or all purpose flour.

The dough was silky and lovely to knead.
If I weren’t already in the process of perfecting another recipe (for a rye) bread, I would take this one on because it has so much promise but ultimately both Gorn & I were slightly disappointed with this bake.  We enjoyed the texture and the crust on this loaf but even using terrific flavor ingredients (strong molasses, great flour, cinnamon, pumpkin) we both of us failed to get much flavor from a slice.  We both agreed a slice has a lovely pumpkin aroma.  We just didn’t get it on the tongue.
I would recommend using more pumpkin (reduce or even entirely replace the water) and going with more cinnamon and/or pumpkin pie spice.

I did half the recipe and baked in a smaller pullman pan without the lid.

Recipe From  Judy(Gross Eats)  adapted from Bread for All Seasons by Beth Hensperger

IMG_3134

Pumpkin Cornmeal Bread

HALF RECIPE what I baked
1 ½ teaspoons active dry yeast
123 grams warm water (105˚ to 115˚)
124 grams warm buttermilk (105˚ to 115˚)
40 grams melted butter or oil
50 grams light molasses
1/4 cup pumpkin purée (either canned or homemade)
1 teaspoon salt
100 grams fine- or medium-grind yellow cornmeal
130 grams medium rye flour
124 grams Hovis flour, because I had it
130 grams sprouted wheat flour
140 grams white whole wheat flour
20 grams flax meal

1. In a large bowl, combine yeast, ground flax, salt, cornmeal, and rye flour.   Whisk to mix well.

Add warm water, buttermilk, melted butter/oil, molasses, and pumpkin purée. Beat until smooth (1 to 2 minutes) using either a whisk or the paddle attachment on a mixer.

Add the unbleached all-purpose flour or bread flour, ½ cup at a time, until it becomes a soft dough. Knead until smooth and slightly tacky, either by hand or with a dough hook.

2. Place in a greased bowl, turning once to coat the top; cover with plastic wrap. Let rise at room temperature until double, about 1 ½ to 2 hours, depending on how warm it is.

3. Turn onto work surface and divide the dough into 2 or 3 equal round portions. Place on parchment-lined baking pan, cover loosely with plastic wrap, and let rise at room temperature until doubled, about 45 minutes.

4. To make dinner rolls, divide the dough into 24 equal portions and shape as desired.

Place on parchment-lined baking pan, cover loosely with plastic wrap, and let rise at room temperature until doubled, about 20 minutes, or place in refrigerator for 2 hours to overnight.

Twenty minutes before baking, heat the oven to 375˚, using a baking stone, if you wish. While the oven is heating, brush the tops with melted butter.

Bake in the center of the preheated oven until golden brown: 40-45 minutes for loaves or 15 to 18 minutes for rolls. Remove from oven, let cool on rack until completely cool.

IMG_3140

Since this was all whole grain, I baked this at 370° F (convection) for 50 minutes at which point it registered 199°F internal temperature.  It was baked through and not raw as can easily happen with all whole grains when I don’t check temperature of the bread.

Here’s hoping you’re all in the mood for some fall baking, and you give this delicious bread a try.  If you do decide to be a Buddy, please send your baking story and photos to Judy at jahunt22 dot gmail dot com by October 29th, and they will be included in the Buddy Roundup.

PS: Well now we’ve enjoyed this as our afternoon treat with apple butter!  Somehow that brings out the pumpkin in the bread for me.