I am a little at a loss as to what I should talk about first … because I’m excited about so much happening. 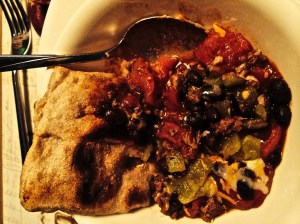 I’m excited to celebrate the Babes baking together for SIX -6- YEARS! I’m excited to welcome our two new Babes to keep us at an even active dozen.
Aparna from My Diverse Kitchen
Cathy from Bread Experience
And I’m very excited to have Lien as our Kitchen of the Month. Lien ( http://notitievanlien.blogspot.com ) is taking us to Morroco for a very delicate, sweet or savory if you fill it, flat bread.
Upon reading Lien’s recipe, my thoughts went something like this:
- Hahahaha…yes I am on the floor knees up holding on for dear life. Scared, terrified … Why go on! My best position with this maybe to just … Oh shut up, just gut it up woman, go find a kitchen … Yes, find a kitchen …
- The words that scared me: Thin as paper …
- This just rolled across your desk Lien. Um, it’s square … and flat … and thin … square & flat that must be why it didn’t keep rolling and fall off and get lost.
- I can’t imagine how this can work and I’ll have plenty of time to shake and be scared until visiting friends and family in Florida in February.
Well, the friends we’re staying with gave me the OK to try these out in their kitchen. These were good but I consider this bake “challenged”. It is always something of a distraction to bake in someone else’s kitchen and use what is there but it is also fun and can give a very new perspective to our “opinions” of what will work. Whenever I’m baking a recipe like this one … let me pause here to define what “this one” means to me … Bread in general has a long chain of history going back thousands of years. We were baking eons before fancy stand mixers, before yeast came in packets, before high tech designed pans and ovens and long before hybridized flours. This flatbread and others like it have long been baked by almost every culture we know and under very primitive conditions that you and I might consider impossible. That is a big part of why I think it is so wonderful to see “ancient” grains coming (back) onto the market and it’s the rational I use for adding whole grains of any kind even when not called for in a recipe. So while I may find an unfamiliar kitchen a challenge, I try to think of it as more fun than impossible. For this baking I used cups to measure the flour as no scale was available, bleached AP flour as that was what was on hand and one cup of whole wheat flour that I had brought with me from Seattle to Florida. I can’t remember the last time I bought “bleached” flour for anything but it must have been 25 to 30 years ago.
BBB Rgaïf – Moroccan Flat Bread
Recipe By: Lien from “Vrijdag couscousdag” by R. Ahali
Yield: 10-16 flat breads
Ingredients:
500 grams flour, half whole wheat, half AP(2+ cups total)
1/2 teaspoon crushed rosemary
30 grams ground flax seed, will use next time!
5,5 grams dry yeast (used 1 1/4 teaspoon)
1/2 teaspoon salt
250 ml 250 ml water
50 ml olive oil
(after watching the video & slide show, I’ll be much more liberal with the oil next time; probably make it a mix of butter and olive oil)
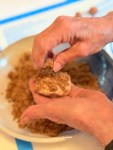
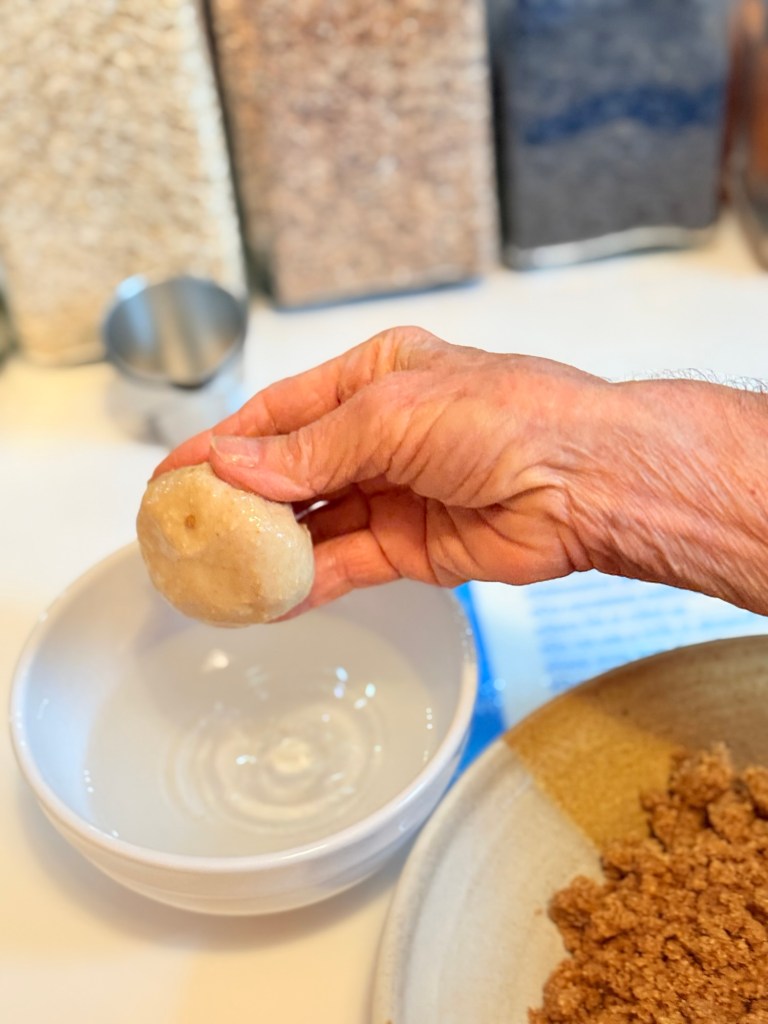
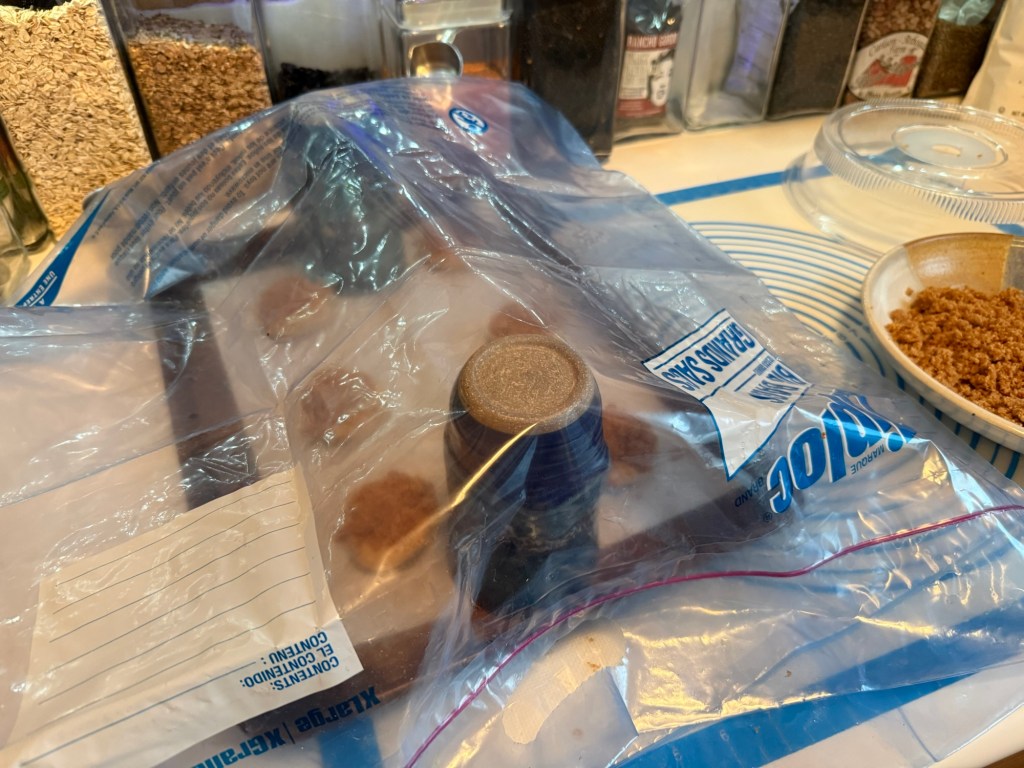
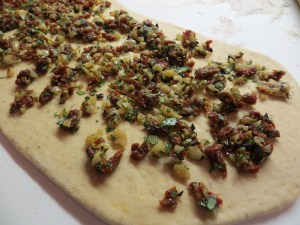
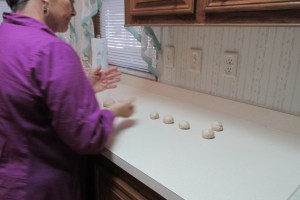
Directions: Mix flour, yeast and salt in a large bowl. Kneading by hand: Make a well in the centre and add some water, start mixing in the flour where it touches the water. Little by little add more water and keep mixing in the flour. Start kneading, grease your hands with a little oil to prevent sticking. Knead about 20 minutes. Mine took about 12 minutes to become smooth and supple. Add water if it feels too dry. Whenever I have to add water to a mixed dough, I try to add enough by wetting my hands and kneading it in – it takes time but it can be done. The dough needs to be very elastic and no dough should stick to your hands. There was no resting/rising time called for by the recipe … but, right you guessed it, rebel that I am to make it fit my schedule, at this point I oiled the dough ball, covered and refrigerated it. Several hours later it was shaped and baked as you see below. 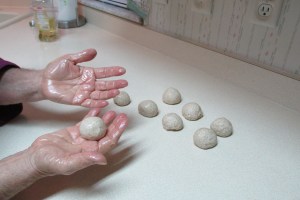 Shape: Make 10- 16 dough balls depending on your pan size and how large you want them. Coat every ball with a little olive oil. Let them rest for about 5 minutes. Flatten the ball with your hand as much as you can. Stretch the dough. Take care to get no (or a little as possible) holes in the dough. (While you only see 8 balls of dough here, this only represents half of the recipe. I divided the dough in half for ease of shaping and to prevent drying the dough.)
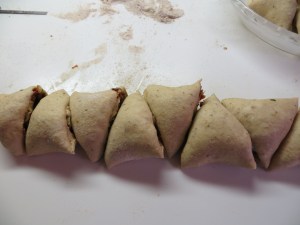
  You need to stretch the dough until it gets as thin as you can, thinner than paper if possible. It’s best done on a counter top, stretching the dough and sticking it to the surface, so it doesn’t spring back. This is not easy. Now fold the dough in squares by folding the round sides inwards.
  Just before putting the squares into the skillet on low heat, the squares maybe flattened and spread out some again. Bake the squares in a hot large pan on both sides. I found a lower heat allowed the squares to bake through without burning. Only use more oil if the Rgaïf stick to the pan. You can also deep fry them (as they do in southern Morocco).
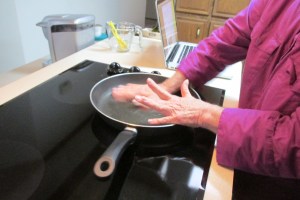 Serve: You can serve them with syrup, (strawberry) jam, chocolate sauce. But also you can use savory things, like thinly slices meat, cheese ecc. You can also spread some filling in them, before folding and baking them just keep in mind to make it thin.
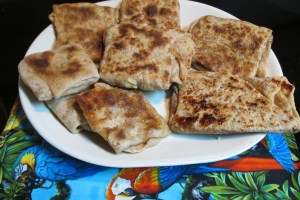 After I baked the breads, I watched the following and made the following notes. I believe you will find the note links one to a video and the second to a slide show. Notes from video:
Notes from slide show:
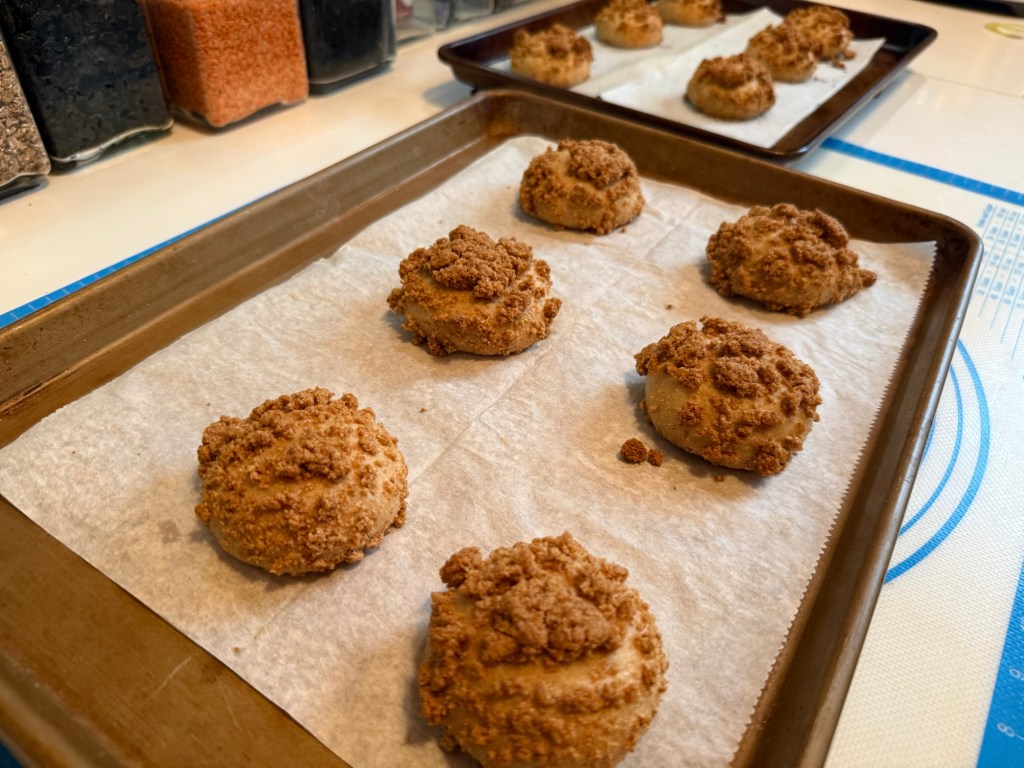
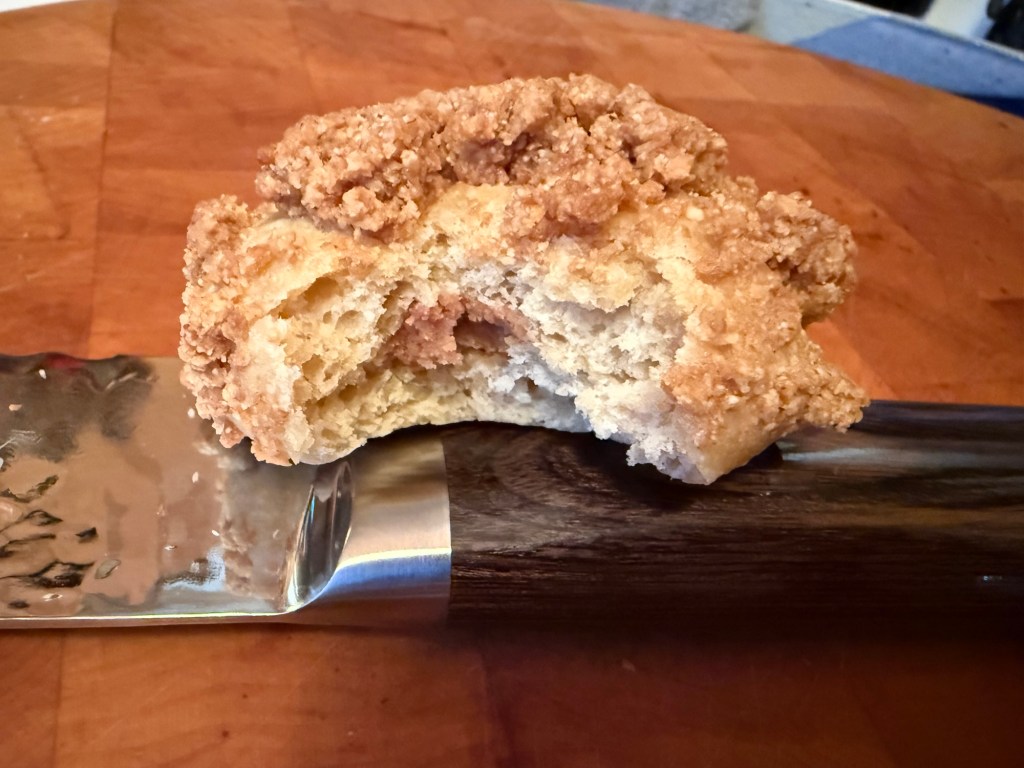
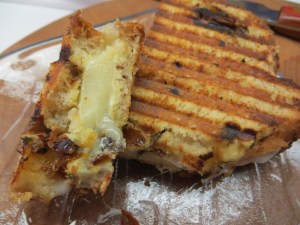
Before folding, I lightly sprinkled several of these with cheddar cheese, several with goat cheese and several with jack cheese and pepperoni. Some Beef Vegetable Soup was the perfect dinner with these Rgaïf!  On the plate above you’ll see one that looks burned (it was not) and is rectangular. That one I brushed with brown sugar and cinnamon before folding. We divided it. It was the hit of the bunch for the sweet lovers. I of course really loved the goat cheese. What did these look like in a side view? Did the yeast have any effect on these? You must forgive the poor quality photo next. It’s a little out of focus but it’s the only inside/side one I took.
  What will I do different:
- be prepared to start at medium low temperature not high
- flatten each square again before adding to the skillet for baking; aim to get thinner layering
- be more experimental with fillings
These were great fun! Good enough to do again. I’d like to try them with a Moroccan tagine. Check out all the Awesome Twelve Babes on my right side bar! Want to help us celebrate SIX YEARS OF BAKING and be a Most Awesome Bread Baking Buddy? That would be just super awesome with us. Lien is Kitchen of the Month: Become our Bread Baking Buddy, stretch, fold, bake, taste, eat and let us know all about it, by sending your details and results to me (as I’m kitchen of the month this time). Mail me your name, blog url, post url and attach your favorite picture of the recipe. Send it to notitievanlien(at)gmail(polkadot)com. Deadline is the 29th of this month. You’ll be added to the round up somewhere in the first week of March ánd of course receive a wonderful Bread Baking Buddy Badge to add to your own post. I’ll be happy to see your entries come in!!