On this our Fifth Anniversary, yes, really we’ve been Babes and Buddies for FIVE years, and I am here to tell you: “I no longer fear yeast.” There I’ve said it. In fact when I sat down to re-write this recipe in my own words, I have to think that to the novice in the kitchen who views yeast and baking with it the most frightful thing there is … I am an absolute hieratic. Truly I am not but I have become fast and best friends with yeast just as the Babes become friends. I have shared joy and tears with my yeast over the years just as I have shared joys and tears with my Bread Baking Babes for the last five years. We’ve all become friends and better friends. We’ve done it through repeated encounters, some really gloriously memorable … Royal Crown Tortano, our very first bread together, to name just one … and we shared loss and tears in real life … bread and friendship all around our virtual kitchen tables.

We really enjoy almost anything I’ve cooked or baked with spinach so this interested me because it uses lots of spinach but then it also introduced us to a new to me spice: Ground mahlab, made from the pits of sour black cherries, adds flavor to the dough. I found it fairly subtle and will use more of it next time.
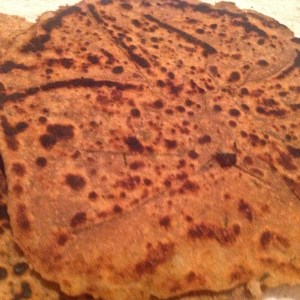
Assyran Spinach Pies
Recipe adapted from Greg Patent: A Baker’s Odyssey: Celebrating Time-Honored Recipes From America’s Rich Immigrant Heritage
DOUGH
1 tablespoon active dry yeast, (2 1/4 teaspoons) = 1 package
2 cups warm water (105° to 115°)
1/2 teaspoon ground mahlab, I’ll use 3/4 to a full teaspoon next time
5 cups unbleached all-purpose flour plus more for kneading, use some white whole wheat next time
3 tablespoons ground flax (my signature addition so optional, you are free to leave it out)
1 tablespoons granulated sugar, I cut this back from 2 tablespoons
2 teaspoons salt
1/3 cup olive oil
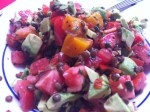
FILLING
2 tablespoons extra-virgin olive oil to sauté onion, 3 tablespoons to filling mix
1 large yellow onion, chopped
1 pound cleaned baby spinach, coarsely chopped
160 grams chopped walnuts, I increased this from 4 oz.
1 cup pomegranate seeds, increase these from 1/2 cup
2 cup crumbled feta cheese, increased from 1 cup
1/3 cup lemon juice
1 teaspoon freshly ground black pepper
Salt
1/2 – 1 cup lentils, optional but this was nice
Olive oil cooking spray
Plain yogurt for serving
Directions:
1. Whisk together the dry ingredients: yeast, flax, mahlab, flours, sugar, salt.
Mix together water (I usually “warm” it by microwaving it about 15 seconds, it’s just above room temp then) and olive oil.
2. Pour water, olive oil into dry ingredients and mix together until the dough gathers into a rough ball. Let rest 5 to 10 minutes letting the flour absorb some of the water.
Knead the dough on a lightly floured counter until the dough becomes smooth, elastic, soft and slightly sticky dough ball – mine took about 6 minutes.
3. WASH AND DRY THE BOWL – now aint that a kick in the pants, how many Babes are going to follow that directive. We know Elizabeth will. HAHAHAHAHAHAHA! and rub it lightly with olive oil Elizabeth won’t do that part.
Place the dough ball into a rising container … I have a wonderful straight side clear 4 qt container with lid: I can easily see when the dough has doubled in volume. The lid means I don’t have to use plastic or even a shower cap.

Allow the dough to double in volume – mine took about 90 minutes: if you press a finger into the dough and relase it, a depression should remain and it’s ready for the next step.
4. If you follow the recipe directions and divide the dough into 24 pieces (about 2 oz each) you’ll get what I consider a reasonable portion size hand pie although we were all eating at least one and a half each. I actually weighted the balls and they ranged from 50 to 60 grams each. I might have enjoyed them more made slightly smaller say weighting closer to 40 grams … then I’d have had no quilt eating two and probably even three.
When the balls are formed, allow to rest so they will be easier to roll out.
If you’ve made the full recipe and don’t want to make them all at one go, my suggestion here would be to immediately cover however many you want to bake tomorrow or the next day and retard the balls in the fridge.
Allow the dough balls you plan on baking to rest for the 30 minutes before rolling them out.
5. Saute the onion in the olive oil, they should be nicely caramelized. Allow to cool.
6. Chop the spinach and mix with chopped walnuts, pomegranate seeds, feta, lemon juice – I used the lemon zest as well – and the olive oil. Mix all with the sautéed onions. I used a pinch of salt and some aleppo pepper.

Good ideas for alternatives and additions: pine nuts, dried cranberry, dried cherry, goat cheese, small cubes or large grating of any cheese you like, lentils I added one night to some of the filling was a real winner.
7. Pre-heat the oven to 375°.
My large cookie sheet held 6 of these at the most. I lined the cookie sheet with a Silpat but parchment paper would equally as well.

8. With a light to good dusting of flour on your counter, roll the dough ball into a thin 6-inch circle. I was generous with the dusting to prevent sticking. I tried to really fill these and used at least 1/2 to 3/4 cup of the filling for each one.
Check out this video for shaping or try the recipes directions: “Pile 1/2 cup of the filling, loosely measured, onto the center of the circle, leaving about 1 inch of dough exposed all around. Brush the exposed dough lightly with water. Imagining the circle to be a clock, lift up the edges of dough at the 10 o’clock and 2 o’clock positions to cover the top part of the filling and pinch firmly to seal, going all the way to 12 o’clock. Lift the 6 o’clock position of dough to meet in the center and pinch the two edges firmly to seal. The seams will look like an inverted Y. Set the pie on one of the prepared sheets. ”
9. Before putting into the oven, rush the pies with olive oil before baking. I brushed mine with a mix of half olive oil and half melted butter 😉

10. Recipe suggested 375° I found I like them best at 380° (convection) and the full 30 minutes.
11. Bake for 25 to 30 minutes at 375° to 380° depending on your oven.
12. My very favorite pizza dough is a recipe by Peter Reinhardt. That dough you mix up, shape it into balls, cover it and refrigerate it then for unto 5 days. The glory is it’s ready when you are.
For who knows what reasons – they might sound like excuses – I decided on the first night to treat this dough as if it were like that pizza dough. So if it’s any indication of just how much we enjoyed these, we had them 4 days in a row. One day I had them for breakfast lunch and then dinner. By the fourth day the dough was looser to work with but the pies and the crust was still wonderful.
I did some additions to the filling along the way – lentils one night, chopped up lamb chop meat one night – you get the drift.

This is a terrific, easy and very versatile hand pie dough. I do think the filling with the spinach is terrific even though I believe it’s better with a little more cheese and spices. I guess I tend to favor excess flavor.
Notes:
Serve with: Everyone enjoyed these with plain Greek yogurt but we enjoyed them with the greek yogurt mixed with avocado, green salsa, red salsa … I’m sure there would be a delightful fruit salsa that would be excellent as well. We really enjoyed these tremendously the night I added lentils to the filling and I just knew in my heart that some ground lamb would be a wonder in these and it was.
Storing
Leftover pies can be frozen. When cool, arrange them on a baking sheet and freeze until solid. Transfer them to heavy-duty resealable plastic bags and freeze for up to 1 month. To reheat, thaw the pies in their wrapping, then set them on a baking sheet and pop into a preheated 350°F oven for 10 minutes. Serve warm or at room temperature.
Want to bake these and join the Bread Baking Buddies:
1.Bake the Spinach Pies, snap a pic & share your thoughts about how you liked it (or not liked it).
2.Send an email to Kitchen of the Month (that would be me this month). Please note in the subject line that this is for the BBB Buddy Bread.
3. I’ll have the Bread Baking Buddy Round up on the 29 and you’ll be in it IF you send me the above info by the 28th.
Now my question to you, especially if you are coming along as a Buddy: The spice/flavor/filling things: sumac, mahlab, spinach, pine nut, my feeling/taste tells me these are sort of mid-eastern and share a little astringent effect on the tongue. Anybody else have that thought/feeling/taste?
My Toast to All Babes and Buddies: Here’s to another great year in our virtual kitchens, the fully stocked back bench, classy panties and the wonder of bread and friendship rising.
Don’t forget to visit my fellow Bread Baking Babes to see how they baked
The Bread Baking Babes
Bake My Day – Karen
Bitchin’ Bread Baking Babe Bibliothécaire – Katie
blog from OUR kitchen – Elizabeth
Feeding my enthusiasms – Pat
GirlChef – Heather
Life’s A Feast – Jamie
Living in the Kitchen with Puppies – Natashya
Lucullian Delights – Ilva
Notitie Van Lien – Lien
Paulchens Foodblog – Astrid
Provecho Peru – Gretchen
and also… visit our Katie! She is the BBBBB (Bitchin’ Bread Baking Babe Bibliothécaire) who writes up such lovely round ups of all the BBB Breads every month!
This month we welcome a new Babe and believe me she is a BABE. Heather from GirlChef
Next bread for the BBB’s will post on the 16th of the month.