Oatmeal … how do I love you … let me count the ways … #1: Burger Buns
I do love oatmeal.
Super Bun!
Elizabeth – yes that Elizabeth of blog from our kitchen, has given the Babes our June bread, Oatmeal Burger Buns, and let me tell you, this is one not to miss that will be the star of your summer grill … and since I can attest that it works great in the oven and on the indoor grill, the star of your winter indoor grill as well. In fewer words, this is a star keeper. I suggest you check out all the Babes, because we all have our ways with the same recipe.
For my part – my way: in place of Elizabeth’s whole wheat starter, I used 200 grams of my refreshed the night before excited rye starter, in place of all purpose flour, 100 grams sprouted spelt, 20 grams bread flour and 130 grams white whole wheat, I added 20 grams of ground flax seed. I topped the buns with King Arthur’s Everything Babel Topping. I did use the added dry yeast, not sure why. For the ultimate ‘my way’ I added 50 grams of slow cooker caramelized onions! I highly recommend the caramelized onions!
Here’s where I added those caramelized onions!Heirloom Tomatoes.On my stove, top grill.Where’s my burger? Amazing crosshatch!
I think because I added those caramelized onions and all the liquid, my dough required more flour. Because I used whole grain flours, my buns required an extra 15 minutes (30 minute total) in the oven.
Let me count the ways after that first burger: #2 used for avocado toast, then #3 topped with Dishoom’s House Black Daal (page 215 from Dishoom: From Bombay with Love by Shamir Thakrar, Kari Thakrar and Naved Nasir – WOW of a Daal), next #4 topped with mushrooms & spinach, and finally #5 topped with black beans and broccoli!
My notes.
If you bake this we’d love to hear about it. I can just about guarantee you won’t be disappointed and more than likely it will become your routine bun.
When I first saw the post for January’s Babe bread, I thought here’s a simple easy fun bake perfect for after the holiday crazy actions. A small stuffed roll perfect for just about anytime, anyplace and any occasion. Our host kitchen, FeedingMyEnthusiasms, has a good story on finding this bread you should find fun.
A quick read through the recipe and … Pepperoni…ha, I’m in!
My next reading brought me up short. I left the following on the blog: Ye gad, I’m just looking at that 3/4 cup of sugar! Really with pepperoni?! Sounds terribly sweet. How much sugar does this need? What amount of sugar will change the texture here? Adding this much sugar to something that seems savory is REALLY foreign to me. I get the feeling this is a very Americanized food, we just add sugar to everything.
Simple and easy … Then there was a long discussion of what if you don’t want meat!! That how I happen to have the sautéed mushroom with pepperoni spices idea. VERY good.
Holy Batman! I made them. Did I follow the recipe? Better than I thought I had on initial inspection but I divided the ingredients in half and only added 20 grams of sugar … and when the dough just wouldn’t come together – fully 3/4 of a cup of flour was not going to incorporate – I threw in the rye sourdough throw out from the night before. I threw that in and it was perfect. This took a full 90 minutes to double. We were having our “pod” friends (pod being like minded fully vaccinated friends) for pepperoni pizza dinner. SOOOO for filling I used pepperoni seasoned baby Bella mushrooms sliced, there were 4 half slices of cooked bacon added to the mushrooms … then there were two dough balls left when I ran out of mushrooms and bacon, perhaps there was a slice or two of cheese as well. The last two dough balls: one I filled with pepperoni and one I filled with ……..see below. These were seriously good 😊!!! They were a terrific appetizer for hungry boys before pizza!
Do you love the crisp fall air, leaf raking, fresh apples, pumpkin and spices? I’m ready for the air to be cooler and cinnamon is always welcome in my kitchen! Pumpkin has never been my very favorite but in this bread it is perfect. This is the bread of fall. Totally my new favorite with fresh home made apple butter. How can you beat that? OK, well maybe put peanut butter AND apple butter on a slice of this. Yes, maybe that would be even better.
32 grams whole grain rye or other whole grain flour
¾ tsp. / 6 grams fine sea salt
1-2 Tbsp. / 7-14 grams pumpkin pie spice or other spice of choice
200 grams pumpkin puree
2-3 Tbsp. / 40-60 grams maple syrup or honey (I used 40 grams of maple syrup)
Extra flour or water as needed
*Using yeast instead of sourdough.
To make a yeast version, add 1/8 teaspoon of dried yeast to the Pâte fermentée and an additional teaspoon in the final dough and omit the sourdough starter.
First Day: Make the Pâte fermentée
In a large bowl, whisk together the flours and salt. To keep from dirtying another container, make a well in the center and add the starter. Pour the water in gradually and mix using a large wooden spoon or Danish dough whisk until everything comes together to form a smooth ball.
Adjust the water or flour as necessary to make a dough that isn’t too sticky or stiff. Knead the dough until it is soft and pliable and tacky but not sticky, about 4 to 6 minutes.
Cover the bowl with plastic wrap or a kitchen towel, and ferment at room temperature for 1 hour or longer. The dough should swell to about 1 ½ times its original size.
Remove the dough from the bowl and degas it by kneading it gently. Return the dough to the bowl and cover tightly with plastic wrap. Place in the refrigerator overnight or up to 3 days. Or freeze in an airtight freezer bag for up to 3 months.
Next Morning/Afternoon: Make the Final Dough/Bake Bread
The next day, remove the Pâte fermentée from the refrigerator. Cut it into 10 – 12 small pieces using a bench knife or serrated knife. Place the pieces in the bowl of a stand mixer and allow them to warm up for about 1 hour.
In a separate bowl, whisk together the flours, pumpkin pie spice, and salt.
Add the pumpkin puree, maple syrup or honey, if using, to the Pâte fermentée and mix on low speed to break up the pieces. Gradually add in the dry ingredients and continue mixing on low speed until everything comes together to form a coarse ball. Add extra water if necessary to form a soft and pliable dough. ***In retrospect, next time I would add 30-60 grams of water.
Mix on medium speed using the dough hook and adjust with flour if necessary to make a soft, pliable dough that is tacky but not sticky.
Transfer the dough to a clean large bowl and cover with plastic wrap or a kitchen towel.
Let the dough ferment at room temperature for 2 hours. Stretch and fold the dough after the 1st hour, then let it rest the final hour.
Remove the dough to a work surface dusted with flour. Divide the dough into two pieces and shape roughly into rounds. Let them rest on the counter for 15 minutes.
Shape the pieces into tighter boules, and place in lined banneton proofing baskets, between the folds of a heavily floured baker’s couche, or on cornmeal-dusted parchment paper. Let them proof 2 hours or until 1 ½ times their original size.
Proceed to baking or cold ferment the loaves overnight
After the loaves have proofed in the baskets at warm room temperature, proceed to baking, or cover the baskets tightly with plastic wrap and place in the refrigerator overnight to cold ferment.
About 45 minutes before you plan to bake the loaves, place a Dutch Oven or other baking pot on the middle lower rack of the oven and the lid on the upper rack and preheat the baker to 450 degrees F.
While the oven is preheating, cut a piece of parchment paper to fit the bottom of your baker. **** My parchment round was to fit the Dutch Oven with wings.
What has wings and flies in & out of a scorching hot 🥵 Dutch Oven?
Cut four 30-inch pieces of food-safe twine. ****I poured olive oil in the bottom of a ramekin, coiled the twine to fit and soaked the twine in the oil. Place the oiled strings crisscrossed on the parchment. It should look like a pie divided into 8 wedges.
If you cold-fermented the loaves overnight, remove one loaf from the refrigerator at this point.
Invert one of the boules from the proofing basket onto the parchment paper. Center it on top of the string. Tie the strings on top being careful not to pull too tightly to give the loaf room to expand.
Score the loaf uses small slashes, if desired.
****Pull the middle rack with the Dutch Oven on it out of the oven. Using the parchment wings, lift the tied pumpkin loaf (on the parchment paper) and carefully place it in the pot. Pull the lid off the top rack and place on the Dutch Oven. Push the rack into the oven.
Bake for 15 – 20 minutes with the lid on and another 15-20 minutes with the lid off. The loaf should be a rich golden brown all around and register 200 – 205 degrees F in the center of the loaf. It should sound hollow when thumped on the bottom.
****I used the parchment wings to lift the loaf out of the Dutch Oven. Transfer the loaf to a wire rack and let it cool for 1 hour before removing the strings.
To remove the strings, cut them with scissors and carefully pull them a little bit at a time. If you pull too fast, the string could leave residue. A small knife works well for scraping the string off as you go. ****I had no difficulty removing the twine.
After the string has been removed, let the loaf rest on the cooling rack until completely cool.
Repeat the process with the other loaf allowing the oven and baking pot to preheat to 450 degrees F. before baking.
I gave away my pumpkin shaped loaf (yes even with that horrid explosion spot). We kept the loaf for apple butter and peanut butter! Come on, I know you want to bake this.
Bread Experience is the host kitchen this month. If you want to bake along with us and receive your Buddy Badge, please send Cathy a photo and link by October 29th to be included in the roundup.
Send an email to breadexperience at gmail dotcom and include BBB October Submission in the subject. It’s time to get baking!
Saint Patrick’s Day or Spring this is the CELEBRATION BREAD to CHEER!!
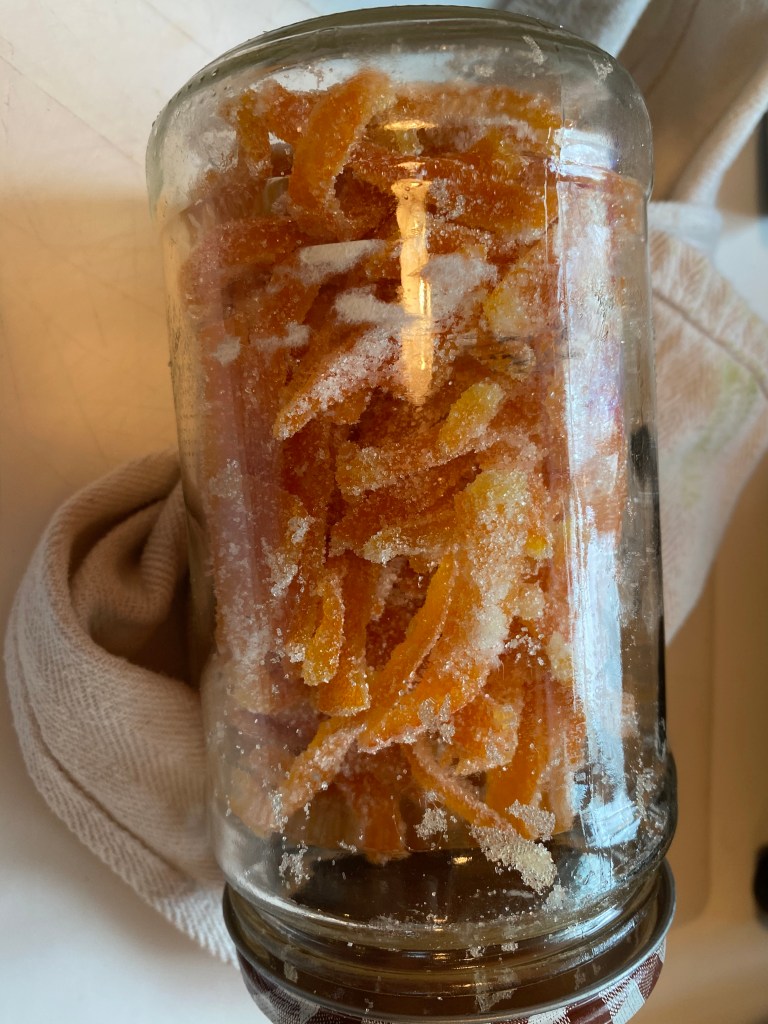
This is a naturally-leavened loaf made with matcha green tea powder and flavored with candied orange peel and orange blossom water. It doesn’t include any extra sweetener which neither Cathy nor I thought it needed. It is a beautiful green color before baking and becomes a lighter green after baking.
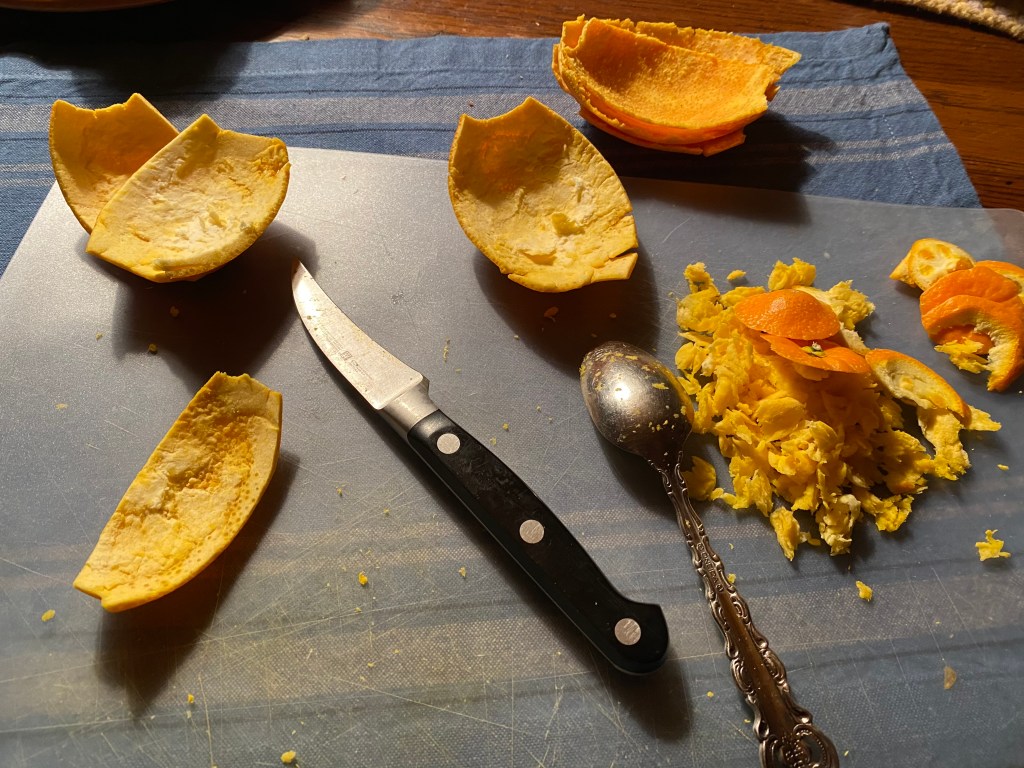
LEARNED: Again: homemade is better. DO NOT wear your favorite white while messing with matcha … unless you want it to be green which is fine for St Patrick’s Day. 150 grams of orange peel will probably make prettier loaves but with less orange sweetness. Allow the homemade orange peel to dry at least 24 hours or more. Plan ahead to made it several days in advance. I used Cathy candied orange peel process found here (https://www.breadexperience.com/making-candied-orange-peel/)
My first bake I used a total of 510 grams flours made up of 255 grams organic AP, 100 grams white whole wheat and 155 grams bread. My second bake I used 260 grams organic AP and 250 grams white whole wheat. While both bakes gave me dense loaves, I believe the bread flour bake gave me a slightly less dense loaf.
CANDIED ORANGE PEEL: When I was in high school, I remember my mother making candied grapefruit peel to give as Christmas gifts one year. Her comment was it was spectacular, certainly the most spectacular thing she had ever made and she would never do it again…and she didn’t. I will tell you I cursed most of the five hours it took for me to remove the pith from the rind. I followed Cathy’s candied orange peel recipe HERE. The orange peel I bought was dramatically fatter (contained lots of pith). It was bitter when tasted alone and much less sweet when baked in the bread. Still, the friend I gave a loaf of the second bake loved the bread. Would I do it again … maybe, it would depend on how gracious I was feeling. When I used the homemade orange peel, I baked with it the following morning. Kneaded in, it caused the dough to come apart and took considerable time to come back together.
Cathy admonished us not to cheat on the orange peel. Being the Babe I am of course I had to increase what was called for in the recipe. Yes I used 200 grams. The increased amount made it harder to incorporate it into the dough and probably caused a more rustic and rougher surface (less pretty) but I think the addition was worth the exponential increase in taste. The first bake I added the matcha with the salt. It took considerable kneading to get an even distribution. The second bake I added the matcha with the flour. I will add it to the flour from now on and have changed the directions to reflect that.
First Bake on left, 2nd Bake on right.
Green Tea and Orange Loaf
Recipe From: Cathy (breadexperience) Adapted from The Larousse Book of Bread by Eric Kayser Yield: 4 small loaves Levain 50 grams all-purpose flour 50 grams water 25 grams sourdough starter (I used 100% hydration starter)
Final Dough 500 grams all-purpose flour, plus more for dusting 250 – 300 grams water, divided 125, 125, 50 10 grams salt + 15-20 grams water 30 grams olive oil 25 grams orange flower water 10 grams (2 tsp) matcha tea powder 150 grams candied orange peel, chopped or finely diced
There are two ways to incorporate the starter in this bread. 1) Feed your sourdough starter the evening before you plan to bake, let it rest overnight at warm room temperature, then use 100 grams of the fed sourdough in your loaf. If you choose do use the fed starter without creating a levain, you may need less water. Cathy actually used more water with this method. 2) Create a levain. This method is presented below.
Levain
In the evening of the day before making the bread: Place the starter, flour and water in a small bowl. Mix with a wooden spoon until the flour is stirred in well. Cover the bowl with a plate, or bees wrap, and let it rest overnight in a warm place.
Final Dough
1. Pour 125 grams water, orange blossom water and olive oil over the levain. Mix completely to break up the levain.
2. In a large bowl, add the flour and matcha. Pour the levain/water mixture over the flour and mix to incorporate. Add the rest of the water, gradually, and as needed to fully hydrate the dough. I used the 300 grams.
Cover, and let the dough rest for 20-30 minutes, then sprinkle the salt over the top and dissolve it with 15 grams of warm water.
3. Cover, let rest for 30 minutes, then fold in the candied orange peel and knead the dough until it becomes smooth, and elastic. Add more water if the dough starts to tear. My dough tore horribly and required more kneading to come back together. Note: Cathy’s dough was sticky after adding the candied orange peel and almost too dry up until that point. My dough never seemed dry. Shape into a ball, cover, proof for 2 hours. Stretch and fold the dough after 1st hour. Let rest for final hour. It should increase in volume by the end of the final proof.
On left: very moist adding orange peel. On right: broken up after adding salt in 20 grams water 1st bake. Did better 2nd bake with just 10 grams water.
4. Remove the dough to a lightly dusted work surface. Divide the dough into 4 equal pieces, about 300 grams each. Cathy’s divided into 260 grams each. Shape into balls, cover with a dish towel and let rest for 15 minutes.
5. Roll the dough pieces between your hands to create tension, and form smooth and well-rounded boules. Place the loaves, seam-side down on a parchment-lined baking sheet. Cover with a damp cloth and let proof for 1 hour 15 minutes. I allowed mine to proof for 2 hours. I put the four loaves on parchment and covered them with a large stainless steel bowl that also then was used to cover them in the oven.
6. Preheat the oven to 450 degrees F. with a baking stone on the bottom shelf . Score the loaves in a crosshatch pattern (or the pattern of your choice). Transfer the loaves on the parchment to the preheated oven. Then place covering pan/bowl on top. Bake for 18 minutes. Mine took an additional 16 minutes to come to an internal temperature of 200°F. Whole grains take longer to bake. Don’t burn them. Remove from the oven and leave to cool on a wire rack.
Would you like to bake with us?
Bread Experience is the host kitchen for March, and would love for you to make this Green Tea and Orange Loaf with us! You’ll get your own Buddy Badge! Plus a delicious bread to enjoy.
Bread Submission Guidelines:
Just bake your version of this bread and post about it on your blog (by March 29th).
If you don’t have a blog, no worries, just post a photo in the Bread Baking Babes Facebook Group
Mention Bread Baking Babes with a link to the Kitchen of the Month, that’s – Cathy of Bread Experience.
Then send an email to breadexperience (at) gmail (dotcom) with BBB Green Tea and Orange Loaf, and Cathy will send you your Buddy badge to display on your blog.
If you make your own or buy the candied orange peel, I know you will enjoy this bread!! Go for it.
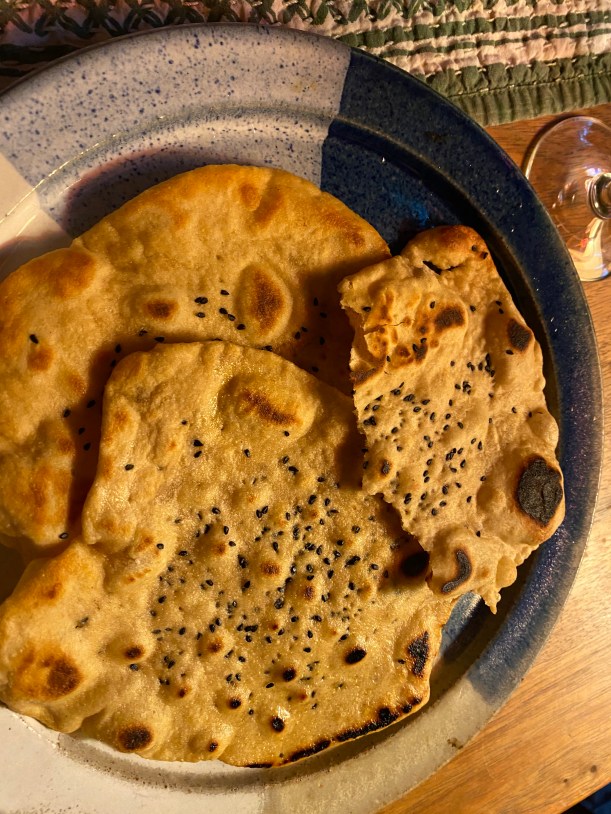
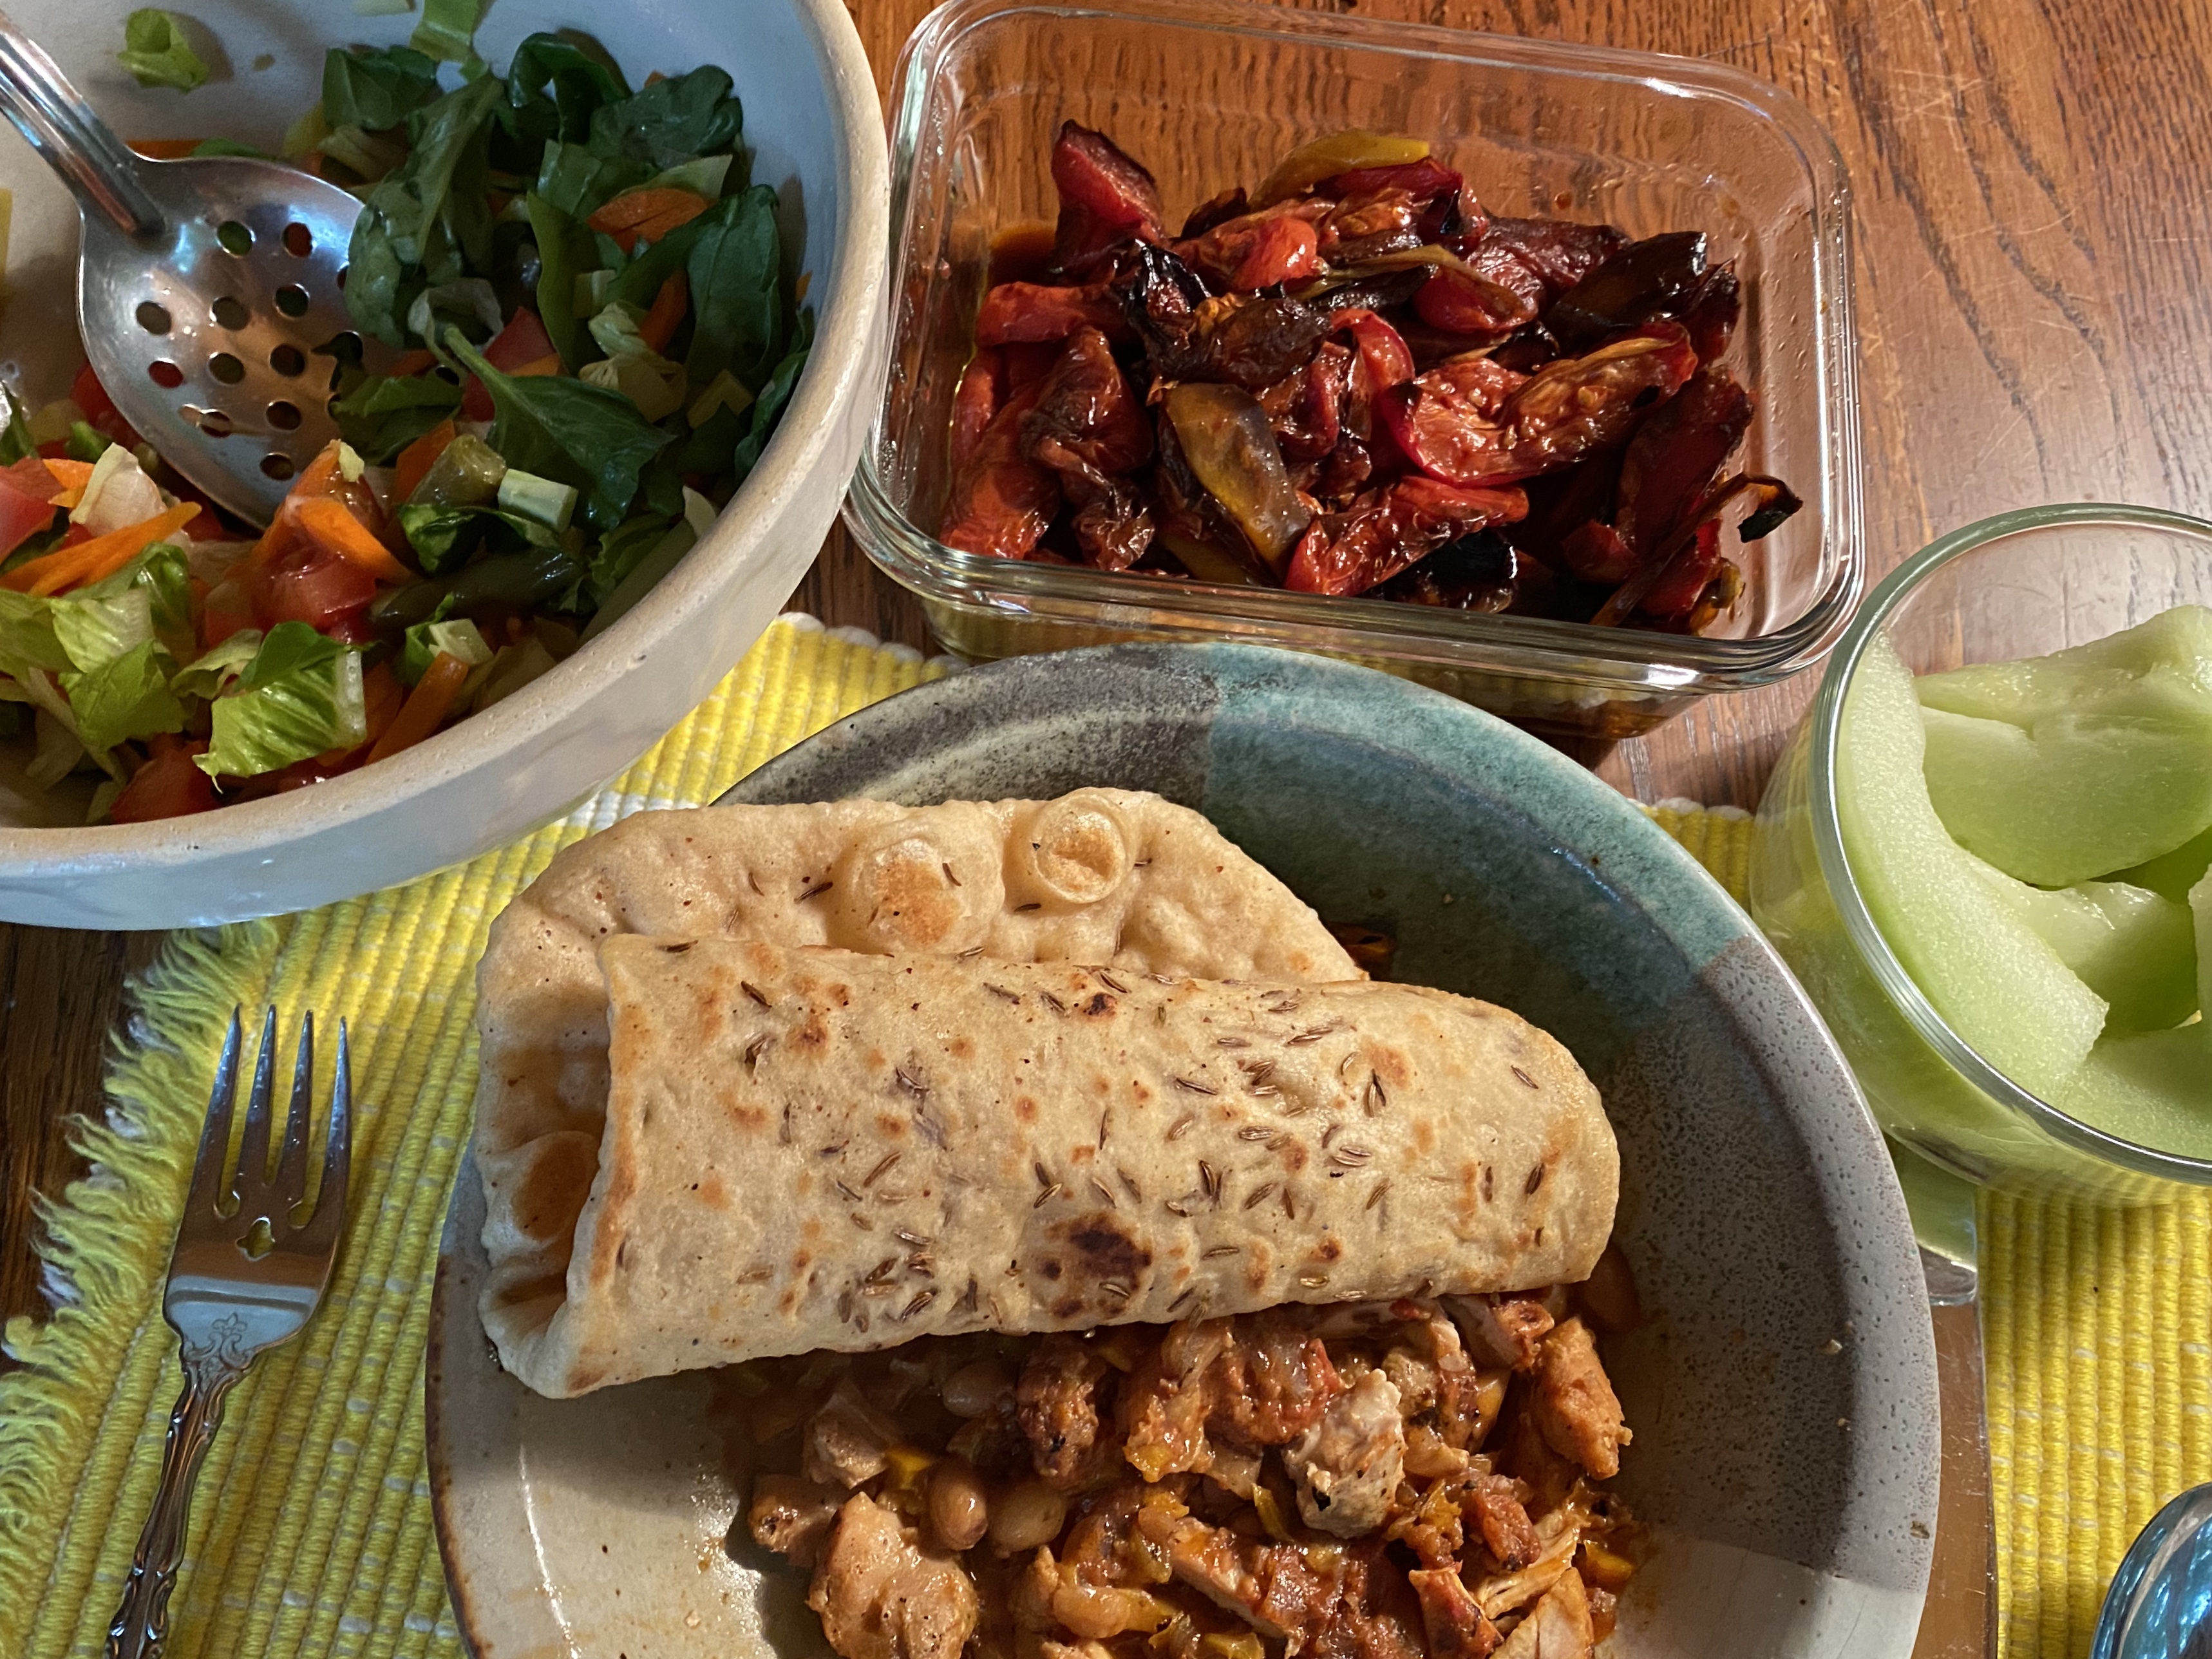
Really, who knew I didn’t understand I really love chutneys! Yes, I really know now I do enjoy at least Apruna’s chutney she had us make for this Indian flat bread Kulcha! Wow this was marvelous. OK, I will confess, I wasn’t expecting much from the chutney so the first time I made the Kulcha we had it with some wonderful chicken and it’s accompanying gravy. It was wonderful. Then I thought, OK, maybe since I have most of the ingredients I should give the chutney a try. The one ingredient I didn’t have the Tamarind; a search suggested lime juice as a substitute and perhaps in my lack of experience it worked for me. Aparna’s looks very liquid and she told us it should be liquid … but mine was thick and chunky, just like I like it. I made both the Green Mint-Coriander Chutney and the Sweet and Sour Tamarind Chutney. Both the Chutneys were terrific but the Green Mint-Coriander was gone the fastest. I will try to do the Kulcha again as I rolled mine very thin and didn’t get the puffy that most Babes did. I call this a success even though it’s not authentic … we really enjoyed!
Tradition says I should be round but dough most often has a mind of its own.
Aparna is our Kitchen of the Month so do check out her site for more authenticity than you’ll find here.
KULCHA (Flat Bread)
For the Khameer or Pre-Ferment :
1/2 tsp instant dry yeast
1 tsp sugar
1 cup flour – I used 1/2 cup white whole wheat + 1/2 cup all purpose
1 cup water
For Kulcha Dough :
All of the Khameer/ Pre-ferment
1/2 tsp instant dry yeast
1 1/2 cups flour – I used 1/2 cup white whole wheat + 1 cup all-purpose
2 tbsp plain yogurt
1/2 tsp salt
1 1/2 tbsp ghee (or soft unsalted butter)
More water, if needed for a soft dough
For the Topping :
Nigella seeds or black sesame seeds
Chopped fresh coriander leaves/ cilantro
Ghee or unsalted butter for cooking the Kulchas
METHOD :
For the Khameer/ Pre-ferment (previous night) :
Mix together the yeast, water, sugar and all-purpose flour till smooth in a big bowl. Cover and leave on the kitchen counter overnight to ferment.
For the Kulcha Dough (some time next morning) :
The Khameer/ pre-ferment should have risen well and will appear quite stringy. Mix in the other 1/2 tsp of yeast, all-purpose flour, yogurt, salt and a little water. Knead till you have a soft, sticky and loose dough. You don’t need a mixer for this. Your hand or a dough whisk is enough. This dough came together easily and was smooth.
Add the ghee or soft butter and knead once again till well incorporated. Shape into a round and leave in the bowl. Cover loosely and let it rise till almost double in volume. This should take between an hour and two.
Knead the dough lightly to de-gas it. Then divide into 6 equal portions. I divided my dough into 8 portions. Lightly flour your working surface, if required, and roll out each portion into a circle or oblong of less than 1/4 “ thickness. Sprinkle some Nigella seeds and dried fenugreek leaves or coriander leaves/ cilantro and lightly press into the rolled out dough.
Heat a griddle or flat pan and place the rolled dough on it. Sprinkle a little water on the sides of the griddle/ pan (not on the dough) and cover. Cook the flat bread for a minute or so. Now remove the cover and cook on the other side as well. If not serving immediately, cook till here and keep aside. When ready to serve proceed further with cooking in ghee or butter as follows.
Now I know I should have made the Matar/Chola (White Peas Salsa) … but I didn’t. That means I still have something to add to this and look forward to.
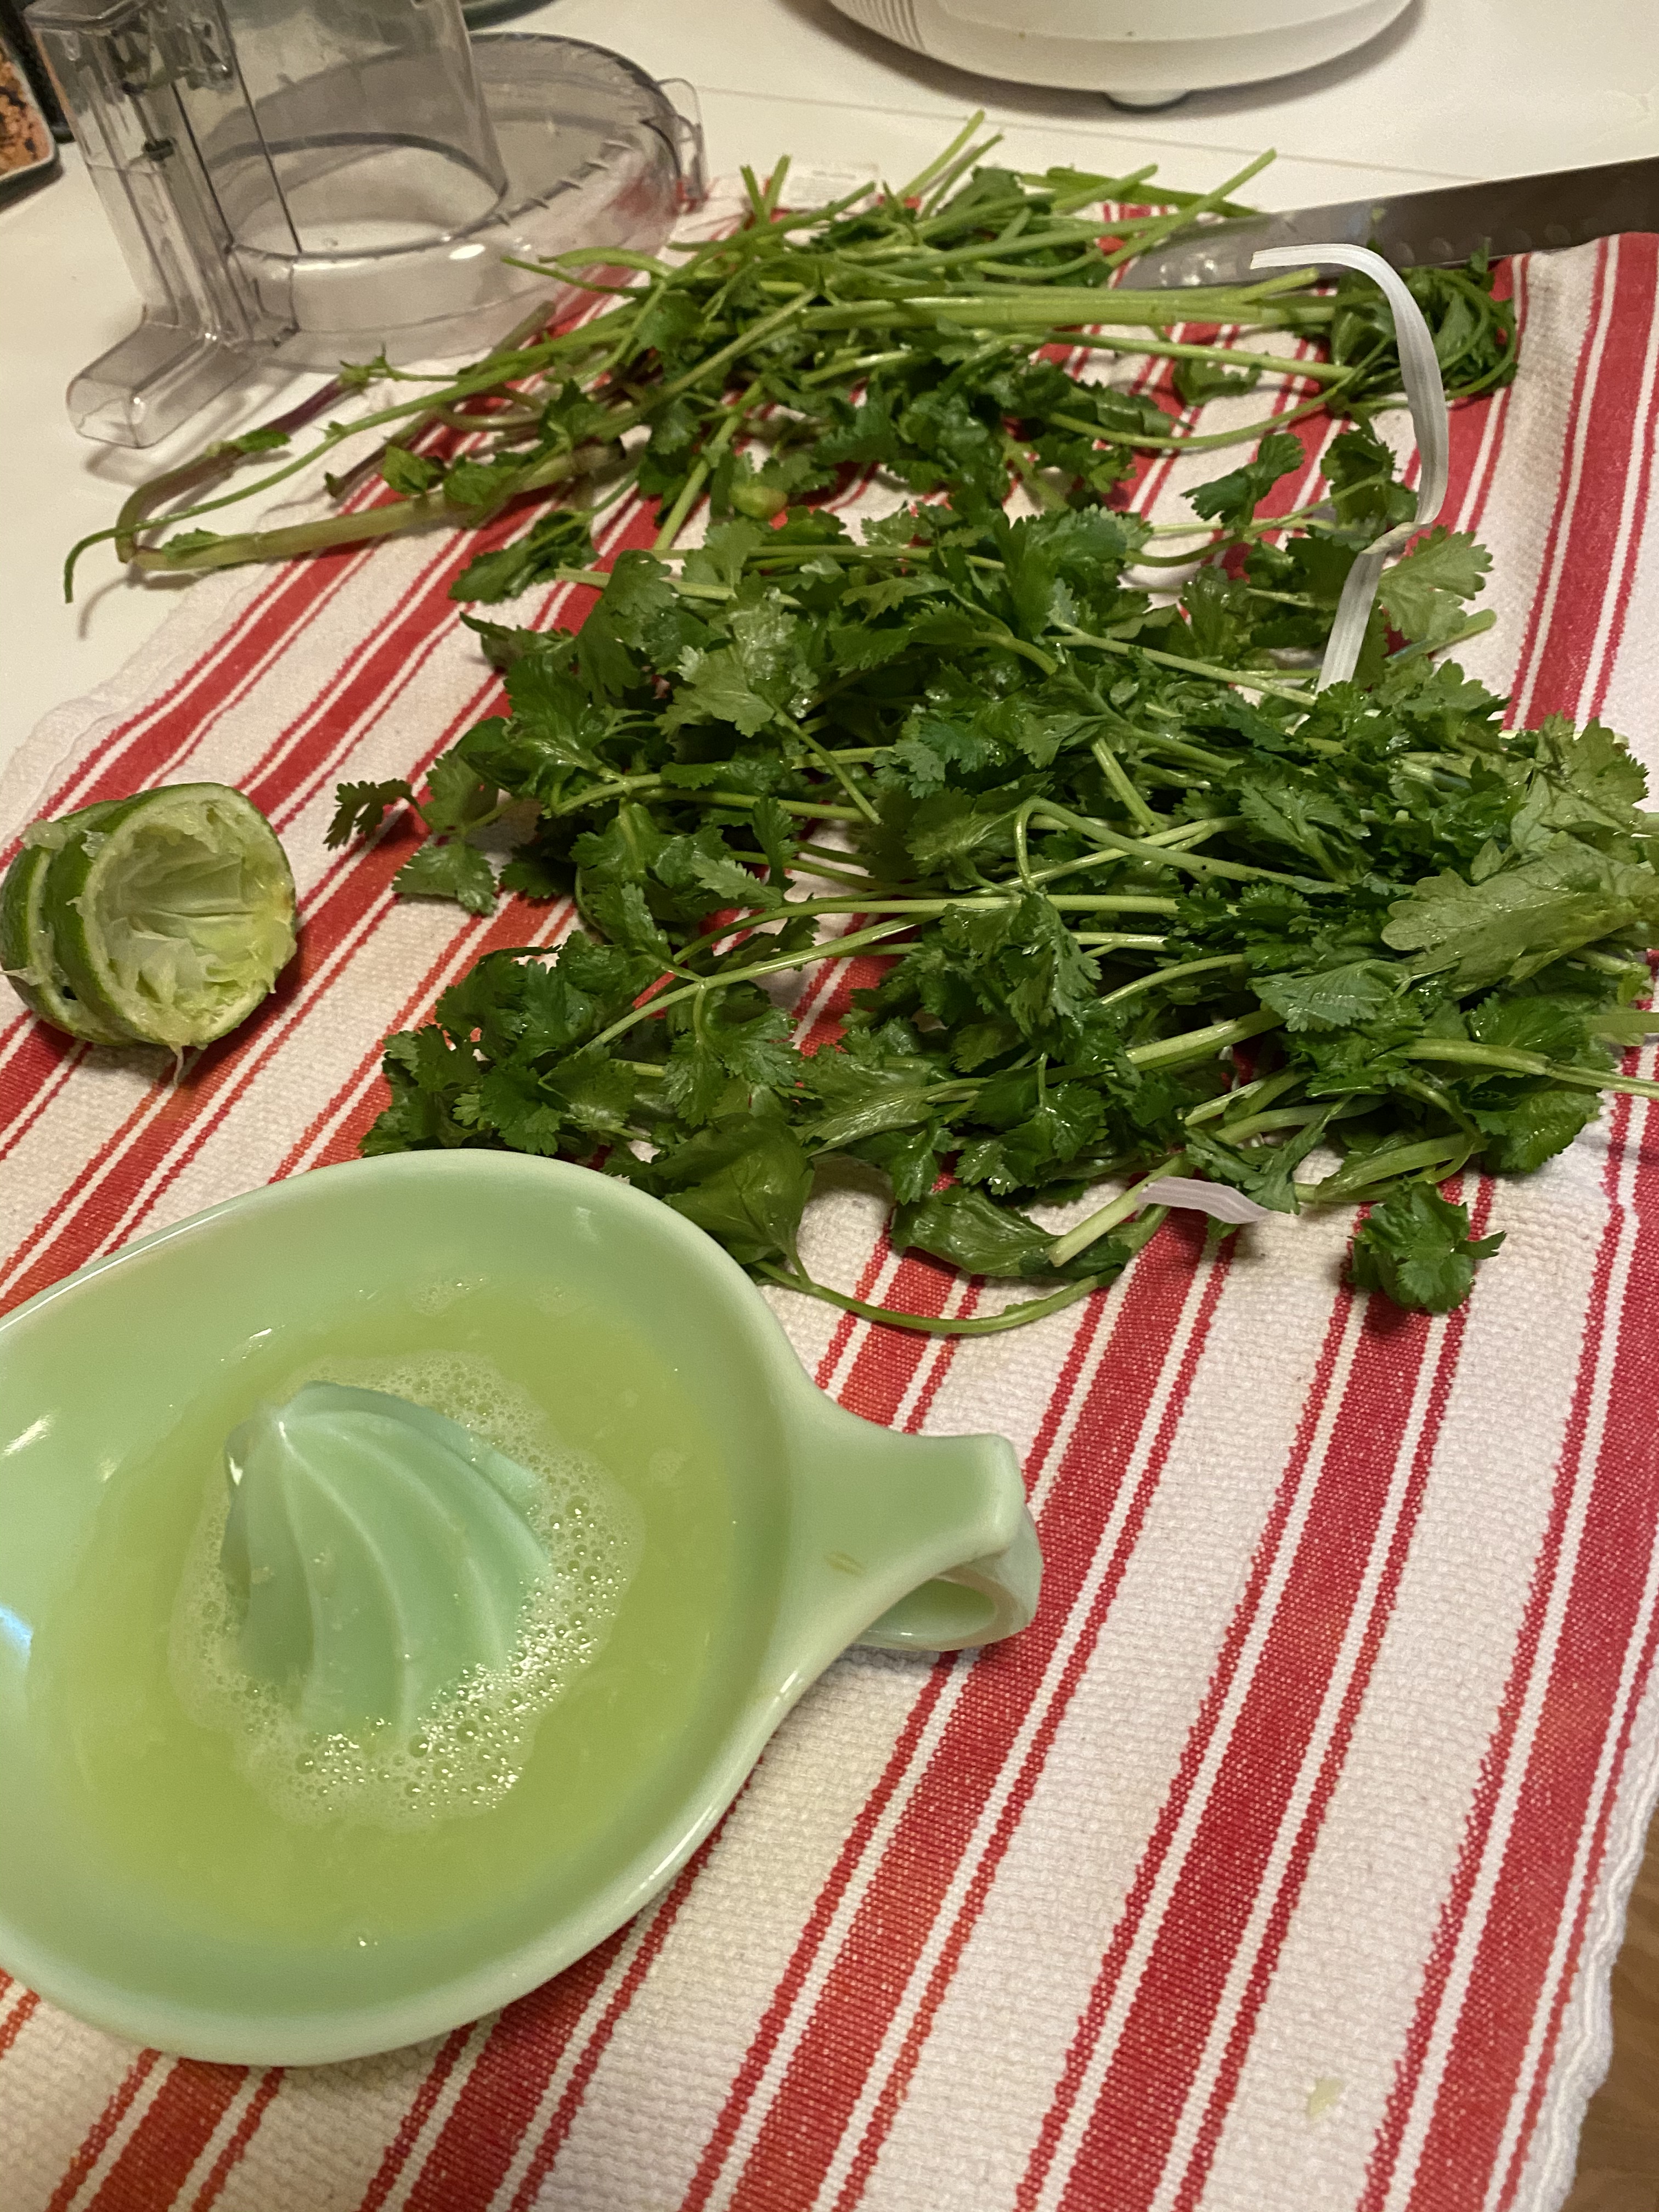
GREEN MINT-CORIANDER CHUTNEY
Grind together a handful of fresh coriander/ cilantro leaves and tender stems, equal amount of mint leaves, green chillies, salt and a dash of lime juice with very little water till smooth.
This chutney should be savoury, on the spicier side with a little tang and a bit watery in texture. Adjust all the ingredients to taste. This will keep in the fridge for a week.
SWEET & SOUR TAMARIND CHUTNEY
(Makes 1 medium jar)
INGREDIENTS :
1 cup tamarind pulp thick
3/4 – 1 cups powdered jaggery
1/2 cup dates loosely seedless , finely chopped packed
2 tbsps golden raisins, chopped
1 1/2 tsps chilli powder (or to taste)
1 tsp cumin powder
Salt or black salt to taste
METHOD :
Put the lime juice and sugar in a pan. Over medium heat, stir the mixture till the sugar (jaggery) dissolves. Now add all the remaining ingredients and cook till the chutney thickens a bit and takes on a shiny appearance. Allow to cool and use as needed. This chutney keeps in the fridge for a while.
The amounts of tamarind, jaggery, chilli powder and salt may be adjusted as required. This chutney should be sweet, sour and spicy.
I highly recommend both these chutneys even if you don’t have tamarind.
These are so good and really simple to put together. As you can see, we enjoyed these first with a chicken dinner before I made the chutneys. But, the chutney is the way I do them from now on.
Check out Aparna for the Matar/Chola Salsa, I know that is in my future. She’s made it look too good to miss.
We’d love for you to join us this month for our bake! No blog is necessary to participate, a picture will do. Just send a picture or your post of your finished flatbread to our host kitchen by the 30th of this month. New recipes are posted every month on the 16th. Check out our Facebook group to see the participants’ baking results during that time.
What makes it bread? Is it one or more ingredient? Is it how we use/eat it? Is there any one thing about bread that makes it bread? The Babes have danced around this question in various ways from time to time. Coffee cake? Does it qualify as bread because it uses yeast … because we eat it like bread … or because we eat it drinking coffee for breakfast? Does a quick bread using no yeast but baking soda qualify because it’s named bread? What qualifies bread to be bread?
Lien brought us to the kitchen table with this introduction and question and her answer to the question: This recipe was stuck in my head for a while. I guess the 12 hour baking time did that. Then I wondered is this a bread? No yeast, but baking powder?! No yeast can still make real bread, think flatbread, wraps and so on. But baking powder is linked to pastry in my brain. Things like banana bread (with baking powder/soda) is called a bread in English, but for me that’s a loaf cake and absolutely not a bread. So I let it sink in for a while to decide if it was bread worthy or not. It is not sweet, not eaten with sweet things, even if it is a breakfast item. And it’s function is a bread… I can see it like that, and so it is, and that’s what we’re baking. … It feels like an adventure…
What makes bread BREAD? Not sure I have the answer but this is bread by any qualifying test I can come up with. What do you think?
Jachnun ~ BBB
Serving: 9-12
500 g bread flour, 100 grams of the 500 white whole wheat
45 g date syrup, recipe called for 20 of honey
pinch of baking powder, generous
12 g fine salt
300 ml water to make spongy dough
60 grams butter, melted
*Zhug
1 teaspoon chili flakes, or 1 red fresh chili pepper (or 1 tsp chili flakes)
1 teaspoon black pepper, ground
1 teaspoon cumin seeds
½ teaspoon coriander, ground
4 medium garlic cloves
Pinch of cardamom, ground
Pinch of cloves, ground
½ teaspoon salt
30 g coriander leaves (or parsley if you dislike coriander)
Olive oil, enough to make a sauce-like consistency
Place all ingredients in a bowl and crush it to a sauce in a blender or with a stick blender.
Place the Zhug in a clean jar and refrigerate.
(Fridge shelf life about 2 weeks)
Serve with:
8 eggs, poached
1 large tomato (or 2 smaller ones)
1. DOUGH
Mix the flour, date syrup, baking powder, salt and water together to form a sticky wet dough and knead for a few minutes. Let it rest for 10 minutes to let the gluten relax. Next time: use at least half white whole wheat flour. I think using the bread flour probably gave this the gluten needed to give this dough needed stretch so I’ll stick with bread flour for at least 50%.
To develop gluten you now start to knead the dough for 5 minutes. Place it in a lightly greased bowl and give it a stretch and fold like this: Lift up the side of the dough and fold it over, turn the bowl and repeat this for about 7 or 8 times.
Cover with plastic and leave to rest at room temperature for 1 hour. Or leave your dough until evening.
2. PAN & OVEN
You can use a (ovenproof) cooking pan or springform (about 20 cm in diameter). Given an ill equipped kitchen, I used a skillet with lid.
Fold a long piece of parchment paper lengthwise and place it in the pan, so the ends hang over the rim of the pot.
Preheat the oven to 105ºC/225ºF and place a rack in the lowest position in your oven. I might try one notch up from the lowest position to see if it would reduce toughness on the bottom of the rolls OR I wonder if lining the bottom of the pan with bread would influence that.
I mixed my dough early in the morning and didn’t shape it until 6 in the evening.
3. SHAPING
Divide the dough in 6 more or less equal pieces, shape them into a ball and leave to rest 10 minutes before the stretching begins. I divided the dough into 6 pieces and rolled three that size. But the last 3 pieces I divided in half which gave me 6 smaller jachnun. I liked the smaller size best. Next time I will divide the dough to make 12 rolls.
To shape these rolls you have to stretch them using butter, oil or margarine. Butter, flavor … I used butter.
Grease your work surface, place one piece of dough on it, grease the top and start working to make it the thinnest possible, while greasing it constantly. It is best to do this by hand, other methods (rolling pin) do not give the thinness.
When the dough is very thin (preferably like fillo or strudel dough) fold 1/3 of one side over onto the dough, repeat with the other side (like a business letter). You now have a long strip, keep buttering/greasing the top, while you roll – starting at the narrow edge- the dough in a tight cylinder.
When I shaped the first roll, the video rolled in my head and I found myself patting the dough flat and lifting around the edges, stretching it out. I didn’t get the nearly perfect rectangle that she did in the video but the defects pretty much didn’t bother the final outcome.
4. Prepare for the oven
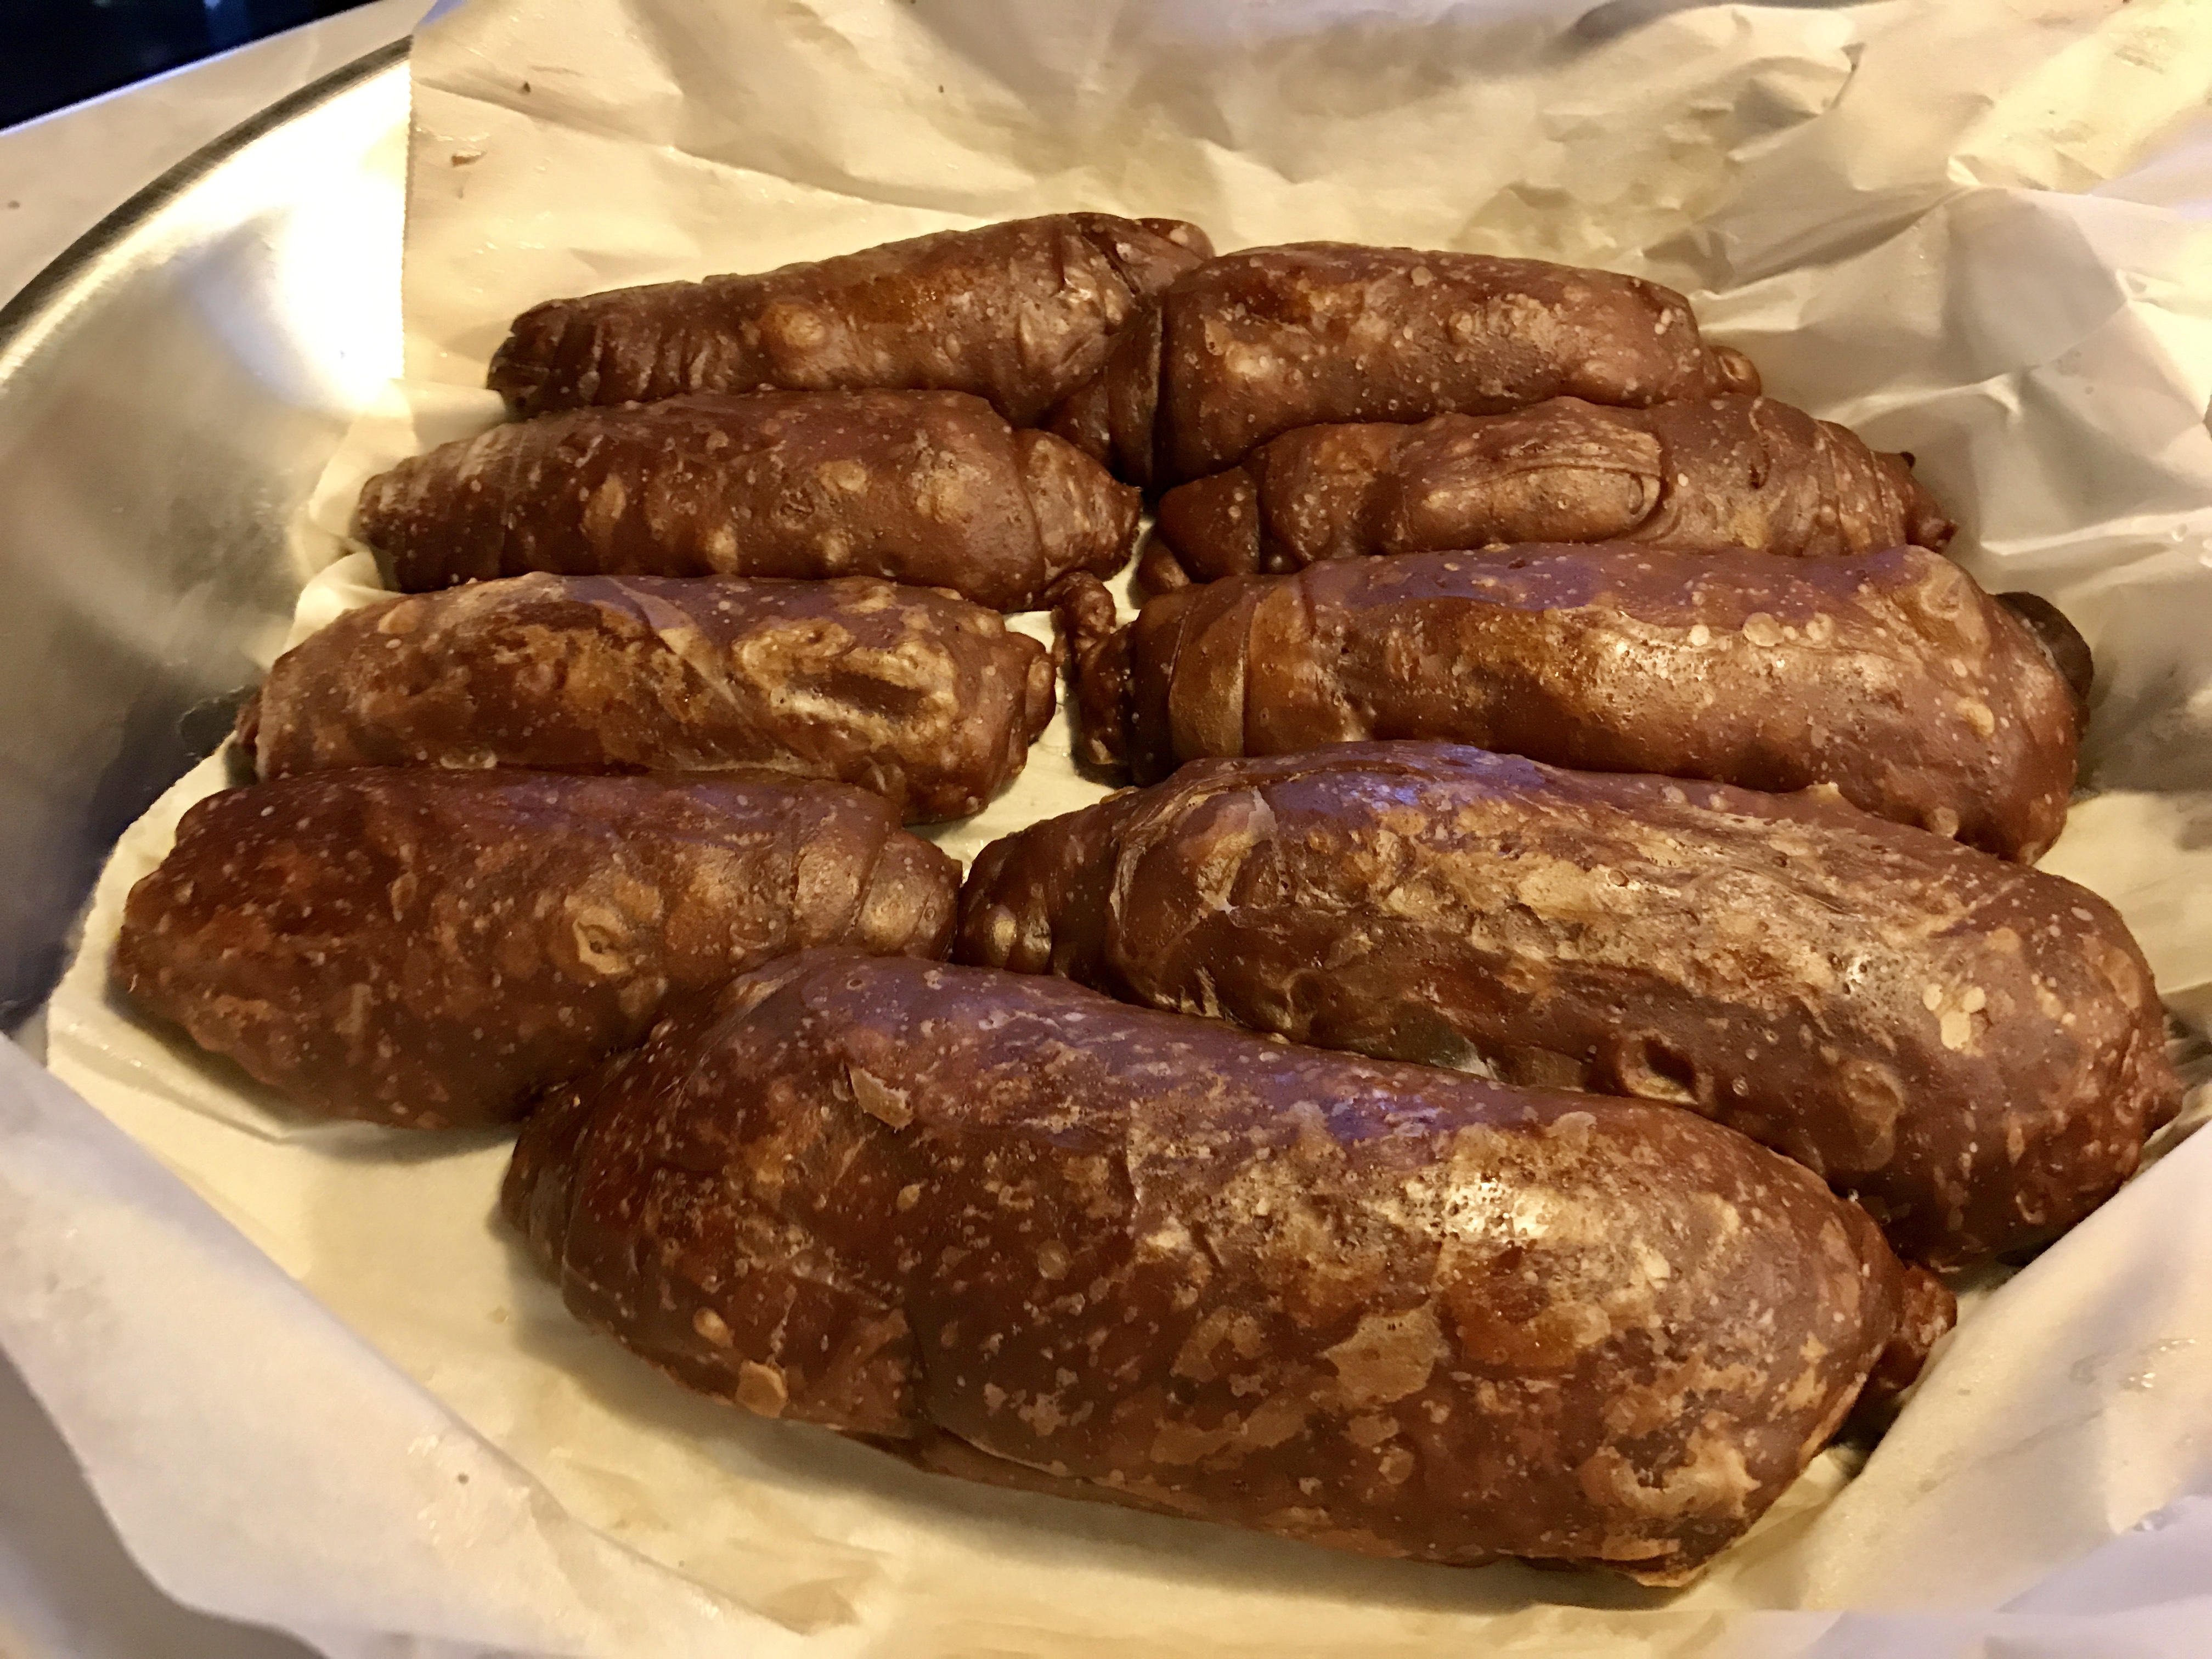
I placed my rolls in a single layer which allowed them all to color evenly and dark golden brown. NOTE: Would a layer of bread on the bottom of the pan prevent the hardness on the bottom of the rolls? Would just moving the oven rack from the very bottom rack up one would solve that issue?
Traditionally eggs are cooked in the pan with the rolls, I skipped that part but I did have one of the rolls warmed with a poached egg the second morning. It’s perfect breakfast.
Take a double layer of aluminum foil, cover the pot, securing the edges of the pan. Use a lid or a sheet pan to place on top of the foil. (or use a lid if available to keep it tight).
Place it on the rack in the oven and bake for 12 hours.
5. You should understand you have to plan the timing of this… or get up in the middle of the night.
Mixing the dough in the early morning, leaving it out on the counter during the day, shaping the rolls and putting them into the oven at about the same hour in the evening that you want to take them out in the morning worked beautifully for me. A twelve hour bake at 225 F worked perfectly.
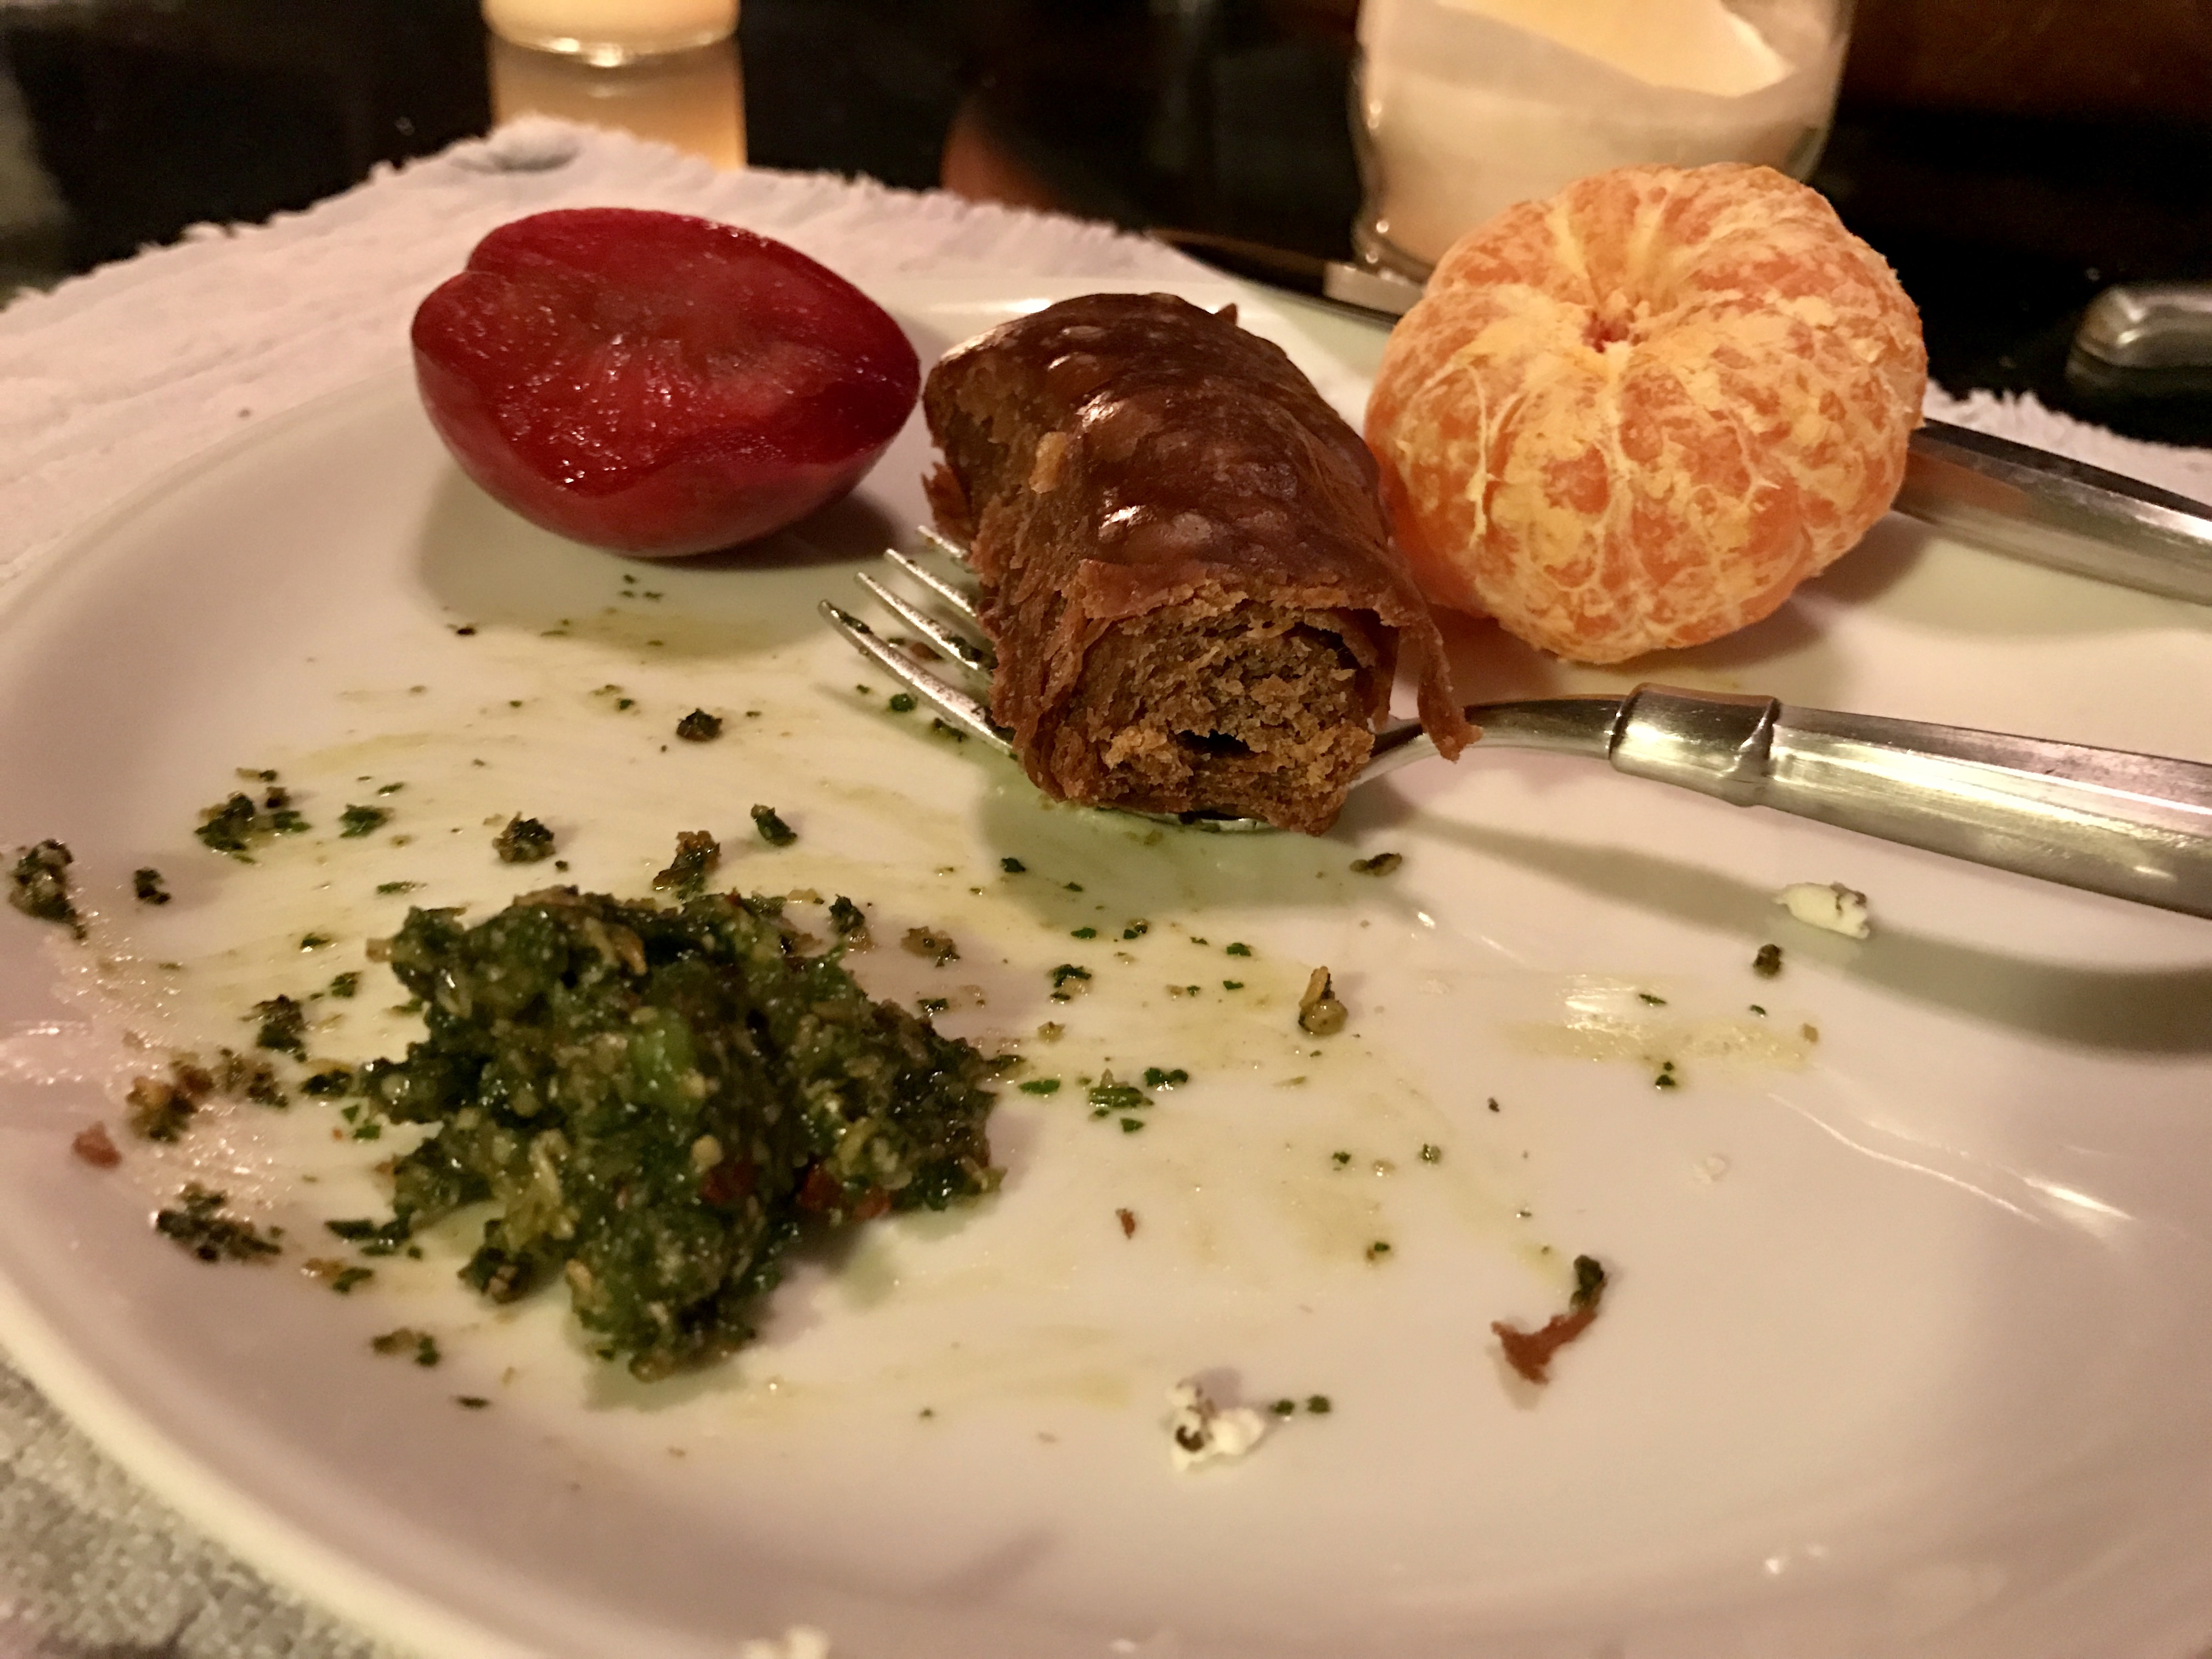
The next morning you take out the pan, place the jachnuns on a plate and serve it with eggs around them. Serve with grated tomato and Zhug (a spicy and hot dipping sauce) for breakfast. Reheat well.
I’ve marked this a laminated bread because of all the butter plastered on the dough and stretching it thin and folding and rolling AND because the aroma when I took this warm from the oven reminded me of croissants.
The book “Breaking breads” has a slightly different recipe for Jachnun. It calls for all purpose flour. My feeling is you’ll get better gluten development and crumb using bread flour but I did not try all purpose. Experience/intuition tells we this would traditionally have been bake using whole wheat flour and butter. I might try this with all white whole wheat just to see what it does, it would be better for me health wise but I wouldn’t want to lose the gluten the bread flour seems to add.
Cafe Liz has interesting points on Jachnun and is worth checking out as well.
And Zhug … don’t miss it. WOW glorious. Too strong for you, reduce the hot stuff and/or miss in a little goat cheese. Lien I will forever be grateful for this “bread”.
You can see the crumb here is very bread like … no yeast can be bread? Now go dip that in a poached egg will you? Well, it’s my idea of a little roll of heaven and it’s bread. So, yeast does not define BREAD. What defines bread as BREAD? I’ll keep baking…
Bake with us … help define BREAD … be a Bread Baking Buddy. It is an adventure bake. Wanna give it a go, be Brave and become our Bread Baking Buddy. Shape, bake, sleep, taste, take a picture, tell us about it and sent it to the Kitchen of the month (that’s me this time: notitievanlien(at)gmail(dot)com) subject: BBBread february. And I’ll send you the Bread Baking Buddy Badge in return, to add to your post if you like ánd I’ll add you to the BBB Round-up, which will be on around March first. Deadline 29th of this month. Have fun baking!