MyKitchenInHalfCups

Once Upon a time: Cooking … Baking … Traveling … Laughing …

Oo la la


12 Comments

BBB ~ Swedish Rye Bread

Bread Baking Babes gather round a kitchen table in Vienna this month but travel north for a Swedish Rye Bread.  Our kitchen of the month is Astrid from Paulchen’s Food Blog.  I do thank you for this one Astrid, we are loving it … again.  Yes, it’s so good, I’ve already baked it twice.
Oo la la

Oo la la

Swedish Rye Bread

Astrid adapted from Tassajara Bread Book by Edward Espe Brown
Orange zest: be sure to chop it to avoid long strings

Orange zest: be sure to chop it to avoid long strings

Zesty patterning

Zesty patterning

part one
3 cups lukewarm water
1 1/2 tablespoons dry yeast (2 packets)
1/3 cups honey
1 cup dry milk
grated peel of 2 oranges
2 teaspoons anise seeds
2 teaspoons caraway seeds
4 cups unbleached white flour
Pumpernickel or Medium Rye: half & half

Pumpernickel or Medium Rye: half & half

part two
4 teaspoons salt
1/4 cup oil
4 cups rye flour
4 tablespoons flax seed meal
1 cup whole wheat flour (for kneading) (mix sprouted wheat and white whole wheat flours)
(used maybe 1/2 cup of this while kneading)
Mix water(I juiced the oranges and replace that with an equal amount of the water) and honey. Whisk yeast, flour, dry milk, orange zest and seeds together.  I started with about 2 cups of the dry mix and added the liquid; then continued adding the flour mix a cup at a time. Stirring well after each addition. The recipe uses bread flour in step one so there’s going to be a lot of gluten development going on during this step.  The “dough” in this stage is of mud like consistency.  Angle the spoon and your bowl aiming for a circular top to bottom motion.  There is no kneading the dough right now but beating the dough with the spoon is going to develop gluten.  Be sure  to scrape the sides of the bowl from time to time.Beat well with a spoon (100 strokes).
Continue to beat until you have a smooth dough. Again pull your spoon under the dough and bring it up to the surface again in a circular mode. The batter will be getting more elastic while you are doing this as more and more air gets incorporated.Cover the bowl with a damp towel or shower cap and let rise in a warm place about 45 minutes.

Once rested dough; oil poured around the edge

Once rested dough; oil poured around the edge

Sprinkle on the salt and pour on the oil. Stir around the side of the bowl working carefully your way towards the center. Rotate your bowl a little with every stroke you do. Repeat until all of the salt and oil is incorporated.

Add remaining flour 1/2 cup at a time

Add remaining flour 1/2 cup at a time

Sprinkle the flax seed and the flour 1/2 a cup at a time onto the dough. Again fold it in while rotating your bowl.

When you can no longer continue to mix in the flour, the dough is ready to give it a good knead!
Plop your dough on your kneading board and scrap all remaining from the bowl onto the dough.  Keep in mind that your surface should be floured enough to prevent the dough from sticking to much on the board.

Flour your hands and the top of the dough. From the middle of your down stretch it away from you and then fold it back onto the remaining part of the dough. Continue to push down and forward.

Turn the dough a quarter turn. Again continue with the pushing and folding.

Turn, fold, push. Rock forward. Twist and fold as you rock back. Be careful not to stretch the dough too much and tear it. Add flour to the boards as needed.

How not to add too much flour: just dust your hands

How not to add too much flour: just dust your hands

Be mindful that you may not need that entire last cup of whole wheat or white whole wheat flour for kneading.  Don’t add more flour than needed.

While you continue with the kneading the dough will become more and more elastic, smooth and shiny.
When you are finished, place the dough in your lightly oiled bowl smooth side down, then turn it over so the dough ball is covered lightly with oil. This will prevent the dough from forming a crust on the top while rising.
Cover the bowl with a damp towel again and set aside to rise in a warm place. (50-60 minutes until doubled in size)

Start of the rise

Start of the rise

Punch down your dough with your fists steadily and firmly about 15-20 times.
Let rise again 40-50 minutes until doubled in size again.

Preheat your oven to 350°F.

End of rise: popping my top

End of rise: popping my top

Turn your dough onto the board again.
Form the dough into a ball. Cut the dough into two even pieces and form smaller balls again. Let rest for 5 minutes.

Two dough balls will be two loaves

Two dough balls will be two loaves

Knead the dough and fold it about 5 times, this gives the dough added spring. After the final push turn the dough a quarter turn.

Roll up the dough into a log shape. Seam at the bottom, flatten the top of the dough. Square the sides and ends. Turn the dough over and pinch the seams all the way.
Put the dough seam side down into your pan.

Push the dough to the edges of the pan

Push the dough to the edges of the pan

Press it down into the pan with your fingers; try to square it into the corners.
Cover and let rise again. This will take 20-25 minutes.

Slash

Rise, egg wash

Cut the top with 1/2 inch deep slits to allow the steam to escape.
You can brush with egg wash and sprinkle with poppy seeds or sesame.
Bake for about 50-60 minutes.  (My long skinny triple loaf pan took 50 minutes to reach 206° internal temp; the regular loaf pan took 65 minutes to reach 204°).

Take my temperature, let me cool to room temperature

Take my temperature, let me cool to room temperature

I am a firm believer that bread baking is not rocket science but I do find an instant read thermometer an invaluable tool in determining when a loaf is done.

That phrase:  cool completely.  That’s really super significant when baking rye bread.  Cool completely means let it cool to room temperature.  I just leave my thermometer in a loaf and check it IF I don’t just leave it over night to cool.  It takes way longer to cool when you’re smelling gorgeous hot bread baking and itching to cut into it.  Slice into a warm loaf of rye and you’ll be disappointed with a gummy interior.
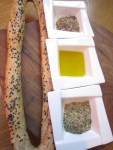
Since I baked this twice, we’ve enjoyed almost three loaves.  The fourth will be next.  Uuu, no I didn’t give any of these away.  Well, you know not everybody loves rye like we do, I wouldn’t want to give a loaf to someone who might not like rye … yes I guess I could have asked them if they liked rye but they might have said yes when they really didn’t mean it … OK so I just wanted this for myself, I admit it.
What did I do with it:
Just toast

Just toast

Shapes make for fun  

Shapes make for fun

Toast with egg in the basket ...  

Toast with egg in the basket ...

Yes, Rueben!  

Yes, Rueben!

This is far from what I would consider a difficult bread.  But it’s not the easiest bread either.  Still this is such a gorgeous flavored bread that I would really encourage you to bake it … especially if you enjoy rye because you see I’m probably not going to share mine with you 😉
You probably know the routine now:  Be a Buddy by baking, posting by the 28th of this month, send a photo, a short comment and a link to your blog (link not necessary if you don’t have a blog) and Kitchen Of the Month Astrid from Paulchen’s Food Blog will include you in the Buddy Round Up and send you a sharp looking Buddy Badge.Not only is she the BBB Kitchen of the Month, she’s also hosting Bread Baking Day so if you want to participate in that read her post here.
How many dips does a ring knead?


5 Comments

Savory Sesame Bread Rings with extras ~ Baking Through Flatbreads and Flavors

How many dips does a ring knead?

How many dips does a ring knead?

Ring o’round the rosie
Rope, rope ... make me a ring ...

Rope, rope ... make me a ring ...

A pocket o’full of posies

Ring, ring, ring around ...

Atishoo, Atishoo we have ka’kat
Seedy Ring

Seedy Ring

The globe spins in rings and we find our mad Baking Through Flatbreads & Flavors friends in the Middle East!  Oh, this is the Flavors referenced in the title.  Yes, indeedy.  Once again, I’m amazed at how the simple combination of yeast, water and flour comes together as “bread” and again is absolutely new, absolutely different and oh so absolutely fabulous.

Ring: before going seedy

Ring: before going seedy

Bread … This bread is a Ring of Magic!  It is my magic and this bread is a ring or loop if you want to be technical.  Define: Ring of Magic Please another ring please.  I took a loaf to one couple who’d been cooking

Dip me, dip me ...

Dip me, dip me ...

 chicken tetrazzini for two hours – wow their house smelled amazing.  About an hour later, he returned the spice blend bowls saying:  That was evil, really evil.  We ruined our dinner.  Just ate your bread.

Share with friends ...

Share with friends ...

This is just so simple to put together and so stunningly wonderful.  Kneading is easy and fast; it’s the perfect size dough ball for a beginner.

Savory Sesame Bread Rings ~ ka’kat ~ Israel

Join us ...

Join us ...

  • 1 teaspoon yeast
  • 340 grams water, warm
  • 3-4 cups bread and www flours
  • 3 tablespoons ground flax seeds
  • 1 teaspoon salt
  • 1 egg, whisked for egg wash
  • 4-5 teaspoons sesame seeds
  • accompaniments
  • Ground thyme & sesame Blend, p 208
  • Hazelnut Spice Blend, p 211
  • olive oil for dipping
1.  Whisk together 1 cup flour, salt and yeast.
Stir in warm water.
2.  Stir in flour a cup at a time.  I used a mix of flours: 1 cup bread, 1 cup white whole wheat, 1 cup sprouted wheat flour.  Extra bread flour for kneading.
3.  Knead for 8 minutes more or less: dough should finally feel smooth and elastic.
4.  Oil container to rise dough in and cover.
Allow to rise to double in volume: should take close to an hour.
5.  Deflate the dough and divide into four pieces.
6.  Roll each dough ball into a rope. The aim is to make the rope into a loop that will then fit the length of the sheet pan used to bake the bread.
7.  Place the ka’kat rings on the lightly oiled baking sheets.
Aim for a long oval shape with each loop and two loops should fit on one sheet pan.
Let rise for 20 to 30 minutes.
Pre-heat oven to 400°
8.  After the rise/rest, brush each loop with the egg wash and sprinkle with sesame seeds.
Bake 15 to 17 minutes.
Loaves should be nicely browned when done.
9.  Cool slightly before serving with olive oil and spice blends.
Which one ... each one!

Which one ... each one!

Servings/Yield: Servings: 4 large rings; 1 large ring will serve 2 hungry people or 4-6 as appetizers.

Flatbreads & Flavors: A Baker's Atlas by J Alford and N Duguid

Flatbreads & Flavors: A Baker's Atlas by J Alford and N Duguid

Source: FLatBreads & Flavors: A Baker’s Atlas by Jeffery Alford & Naomi Duguid

I LOVED the hazelnut blend – used 30 hazelnuts, lots more than the recipe called for 😉   Everybody very much enjoyed the thyme & sesame blend!  But the bread was excellent with just olive oil and that tiny pinch of salt.

Will update this with all my Baking Through Flatbreads & Flavors friends

Natashya

Elizabeth

Gretchen

Cathy


7 Comments

Lacy Coconut Milk-Pancakes & Coconut Chicken Curry ~ Baking Through Flatbreads & Flavors

For this leg of our travel through the baker’s atlas, we find ourselves mixing Chinese and Malaysia cooking.  The cultural mix is called Nyonyas/Baba.

Boo!

Stew, soup, chowder, chili … do they make you tear your hair out and want to trash your camera.  I love them all.  I have multiple books on each.  I have hundreds of recipes for them that we’re wild for.  I make them through every season.  Certainly the flavor and pedigree for many of the recipes is very blog worthy.  But, really now how can you wax eloquent on something that looks like dog food straight out of the can?

Soaked chiles

I absolutely loved cooking this chicken curry.  I started by soaking 4 dried red chiles and then pureeing them with shallots, ginger, garlic and a few macadamia nuts.

Chile paste fries with spices

Soaked Chilies and the puree … they make don’t make exciting photos, at least not with the camera in my hands.  Toasting the spices for the curry was heaven.  Toasted cinnamon stick, cloves, coriander seeds, and cumin seeds all get ground up in a mortar with pestle and finally turmeric is mixed in with the ground spices.  The Chilie puree is fried in a small amount of olive oil for several minutes and then the toasted ground spices added to that.

Swirl in the coconut milk

Finally the  chicken and part of the coconut milk are added to the rich sauce and allowed to simmer.  This is where the photos start to transform into less than appetizing enticing visuals.

Now the “bread” for this recipe is pancakes.  Not just ordinary pancakes although the ingredient list is simple and not to unlike ordinary pancakes or crepes:  white whole wheat flour, salt, coconut milk, a touch of oil and an egg.  What sets these apart and creates the challenge is that word “lacy”.  My first batch of lacy pancakes were created in ignorance – you know that old saying of a picture is worth a thousand words.

Not lacy, lacy pancakes.

Yes, ignorance.  I thought these were lacy.  Then Elizabeth put up this link and I was sunk.  Not only were the pictures of the prepared dish of the chicken and pancakes “pee-uck” (the unmentionable dog food) my “lacy” was not lacy. So try again I simply had to.  The dinner was very fine, we were both happy taste wise but I wanted lacy!  How nice to have just a little of the chicken left over!  Lacy, you will be mine …

Several days later, thinking bigger holes, thinner batter I tried again with the lacy.  I tried the tin can with bigger holes … lost half my batter through those bigger holes and got one large and I do mean large SOLID pancake.  Next I tried with a pancake gadget again only with thinner batter – I just added more coconut milk until I thought it would work better.

Now that's LACY! I'm happy with that

With just a little practice I got something much closer to LACY!  So I had a lacy pancake, now could I get something that might make you interested?  Remember I said I had leftover chicken curry.

Add Chicken Curry

Start with the pancake

Color, a veggie, interest, needs something more …

Tapas of Coconut Milk Chicken Curry on Lacy Lacy Pancake

Leftovers become an elegant appetizer for a little bites dinner!  Holy Moly now that seems like a little bit of genius.  As is so often the case with stews and soups, the next day this was even better!  Now, I just have to let my hair grow back.

My fellow bloggers cooking/baking their way through Flatbreads and Flavors:

Baking Soda
Elizabeth Astrid
Gretchen Noelle Heather @girlichef
Natashya Natashya
Soepkipje


15 Comments

BBB – Biscotti Picanti (Sicilian Spicy Rusks) – 4th Anniversary!

I enjoy people.  Does that surprise you?  I think most of the bloggers I enjoy reading, enjoy people.  People and food 😉 we enjoy.  I enjoy lots of people, lots of bloggers.  Sometimes we all run off into a corner all by ourselves.  Alone time, it’s good time, refuel time, sometimes.  I enjoy party time, lots of people, it’s connecting fun.  And then there is this small group of crazies who drop in and out of my kitchen, some with more regularity than others but I know I can drop in on them anytime and somebody will be there.  Over this last four years we’ve lost a Babe and added a couple.  We’ve shared that wild wild thing we call life with it’s joys, anxieties, big downs, big ups, tears, belly laughs.  We’ve grown (one less than others) together in all the right ways.

So Lien’s Biscotti Picanti is just the perfect choice of breads to celebrate our 4th Bread Baking Anniversary!  This is an easy and reasonably quickly put together bread that really is an addictive treat.  Don’t think to badly of me for suggesting another addiction for you, will you please.  I really hope you’ll bake along with us this month.  You probably know the routine now:  Be a Buddy by baking, posting by the 28th of this month, send a photo, a short comment and a link to your blog (link not necessary if you don’t have a blog) and Kitchen Of the Month (Lien in this case) will include you in the Buddy Round Up and send you a sharp looking Buddy Badge.  Toast us all Babes and Buddies with a Biscotti Picanti!

UPDATE: I forgot my manners.  A lovely lady, I have many of her books, graciously gave the Babes permission to use her recipe for this bread and I just breezed right by it.  When Lien told us she’d given us permission, I checked out her blog here and was in wonderment!   So I’m back to show you my red face and say I’m sorry.  Thanks for the really fabulous recipe Anissas, wonderful cookbooks, glorious stories about cooking and cultures and a truly inspiring blog!


Biscotti Picanti (Sicilian Spicy Rusks)

Recipe By: Lien adapted from “Savory Baking from the Mediterranean” – Anissa Helou and further adapted by MyKitchenInHalfCups

2 ¼ tsp active dry yeast (1 package = 7 grams)
60 ml warm water
1 ⅔ (± 225 g) cups KA white whole wheat flour (+ extra for kneading and shaping)

1 ⅔ (240 g) cups semolina flour

1/4 cups (25 g) ground aniseed
3 TBsp (28 g) white sesame seeds
2 TBsp ground flax seeds
1 teaspoon salt
1 teaspoon freshly ground black pepper
1/2 cup + 2 TBsp (150 ml/130 g) extra-virgin olive oil (+ extra for greasing the bowl)
1/4 cup (60 ml) red wine
115 ml water

Combine flours, aniseed, sesame seeds, ground flax seeds, yeast (recipe has yeast dissolved in water and added later, I goofed and added it early), salt and pepper in a large mixing bowl and make a well in the center. Add the olive oil in the well and rub into the flour with your fingertips until well incorporated.Add wine and 175 ml warm water en knead briefly to make a rough ball of dough. Knead this for another 3-5 minutes or so. Cover and let rest for 15 minutes. Knead for another 3 minutes until the dough is smooth and elastic. Shape into a ball and let rise in a lightly greased bowl, covered with greased plastic, for 1 hour in a warm place (or until doubled).

Divide the dough in 3 equal pieces and shape each piece into a loaf about 12”( 30 cm) long. Transfer the logs to a baking sheet lined with parchment paper and leaving at least 2 inches/5 cm between them so they can expand. Take a dough cutter (or sharp knife) and cut the loaves into 1 inch/2,5 cm thick slices (or if you prefer them thinner in 1″/1 cm slices). The dough cutter smashed the dough down, deflating it.  My sharpest knife had the same result.  Ultimately what worked best for me was using dental floss and cutting all the way through the log; pushing the ends slightly back together again.  Cover with a large plastic box and let the rise for about 45 minutes.Meanwhile preheat the oven to 500ºF/260ºC.

Bake the sliced loaves for 15 minutes, until golden.
Remove from the oven and reduce the temperature to 175ºF/80ºC. Separate the slices and turn so that they lie flat on the baking sheet. Return to the oven and bake for about 1 hour more, or until golden brown and completely hardened (if not totally hardened, return to the turned off oven to let them dry more).Transfer to a wire rack to cool. Serve at room temperature, or store in an airtight container for up to 3 weeks.
I know I have some big time learning to do here and hope to repair the broken links like to about me soon 😉  patience please.  In the mean time enjoy Spicy Rusks!


2 Comments

Pueblo Carne Adobado – Pueblo Chile-Bathed Pork ~ Southwest United States

Yes, I’m traveling with a blogging bunch using “Flatbreads & Flavors: A Baker’s Atlas” as our Travel Guide.  This trip took everybody to the American Southwest.  I joined this group just in time to get in on the first recipe and believe me I could gush and totally bore you out of your mind telling you how way fabulous this meal was and will be again.  I know that for a fact, except that I’ve never found my husband boring especially when he’s repeating things like “I can’t remember when I’ve eaten a better dinner.”  “That was really excellent.”  “You out did your self with that one.”  I could bore you but he never bores me.

I’d like to keep this simple but I don’t think I can.  Couple of things you should know.

This slideshow requires JavaScript.

  • This is not Tex-Mex, it is not Mexican.  This is Southwestern.
  • Southwester Cuisine:  Best characterized as fusion of rustic cooking from native people from New Mexico, Colorado, Utah, California and Mexico with a Spanish influence.  In Texas, we have Tex-Mex but it seems very far removed from the freshness and complexity of Southwestern Cuisine.
  • The Pepper details:  Chili refers to a thick stew.  Chile refers to the Peppers.
  • Even super hot peppers can be rendered cool.  A Pepper’s heat/spiciness is measured in Scoville Units.
  • “Dried red New Mexico chiles are not particularly hot, but they are full of flavor and give the sauce depth as well as a beautiful color.”  ~ “Flatbreads & Flavors: A Baker’s Atlas”

That last is really key to the success and taste of the Pork dish on this trip to the Southwest.

Pueblo Chile-Bathed Pork
Carne Adobado (marinated meat)
Adapted from: FLatBreads & Flavors: A Baker’s Atlas by Jeffery Alford & Naomi Duguid
Serving Size: 8

11 red New Mexico chiles (dried guajillos), stems removed

1 cup chicken broth

1/2 teaspoon salt

6 cloves garlic
1 tablespoon Mexican oregano, dried
3 tablespoons oil
additional: 1 cup chicken broth & 1/2 cup red wine
Directions:

Cut pork into cubes, place in shallow casserole.

Chile Sauce: In blender combine chiles with seeds, water, salt, garlic and oregano & blend to a smooth paste.

Pour sauce over pork cubes/bites mixing to coat.
Marinate in fridge 12 to 24 hours.

Reserve marinade.  I had to add 1/2 cup wine (oh the shame-red was open) and 1 cup chicken broth to give it some liquid character.  You really want more of this sauce!

Heat oil in skillet over med-high heat.
Brown meat in small batches.  As red as this sauce is, I could not really see that the meat brown.  It browned for about 7 minutes a batch.
Pour reserved marinade over meat and simmer an hour.

Serve with

Blue Corn Tortillas

Recipe By: FLatBreads & Flavors: A Baker’s Atlas by Jeffery Alford & Naomi Duguid
Yield: 12 tortillas – 5-6 inch diameter

Ingredients:

200 grams blue cornmeal
1 1/2  cups water, boiling
3/4  cup AP flour –  part white whole wheat

Directions:

Pour boiling water over blue corn meal, stirring well.  Allow to sit for 30 minutes thus hydrating the corn meal.

Stir in 1/2 cup AP flour to the corn meal and then turn all out onto counter.  Using remaining 1/4 cup of flour, knead the dough several minutes.

Dough will be soft but not strong.
Return the dough to bowl covering it – shower cap – and allow to rest.  I mixed these early in the morning and place disks flattened in covered casserole.

Divide dough into 8, 10 or 12 rounds depending upon how big you want your tortillas to be.
Flatten each round with well floured hands.

Heat a heavy – cast iron is ideal – skillet over medium high heat until hot.  No oil in the skillet.

The dough will be sticky so flour hands and counter when handling the dough and now pat between hands, finally using a rolling pin to even the thickness.

Cook each tortilla one minute on a side until brown flecks appear on both sides.

Remove from skillet and wrap in towel to keep moist and soft until all tortillas are cooked.

Notes:

recipe calls for no salt, Hopi Indians say salt covers up the flavor of the corn.  These were easy to do and they were good BUT the pork way outshines them.

 In the photo gallery above in addition to the pork and the tortilla you’ll see a wonderful pico de gallo salad topping avocado, a smoking’ chipotle slaw and a chipotle orange chocolate cake that completed  the meal.

Baking Through Flatbreads and Flavors:  Heather: GirlChef, Karen: BakeMyDay, Natashya: LivingInTheKitchenWithPuppies, Astrid: Paulchen’sFoodBlog, Gretchen: Provecho Peru, Soepkipje.


9 Comments

Whole Wheat Oatmeal Bread

Not the most oatmeal I've used but LOTS of whole wheat!

My tried and true Most Oatmeal Bread recipe was calling me but when I saw this one in Greg Patent’s A Baker’s Odyssey, it was time to bake.

Remember in school on test day, the teacher’s instructions were always to read the test directions before you start answering the questions.  You always did, didn’t you, read the directions, I mean?  Yes, well, then I’m sure you’ve learned by now to read a recipe from start to finish before you start gathering ingredients … AND  you always gather all the ingredients before you start mixing.  Yeah, well, me neither.  For some reason I did this time.

There’s nothing really odd with the ingredient list for this bread.  Gather the usual suspects, whole wheat and bread flours, salt, yeast, water and oat meal.  You might want some toasted wheat germ or some seeds or not to roll the dough in finally for some dress.  I added some ground flax seed to the dough but didn’t roll it in wheat germ or seeds.

What most surprised me about this bread, what was most unusual about this bread?  This bread is given a final rise and then placed in a COLD oven – no pre-heating – then the oven is set at 400°F and baked for 45 minutes or until the internal temperature reaches 200°F.  If the Bread Baking Babes hadn’t just baked the Cuban Bread last month, this would have been a real shock.  I did find it rather odd that now I’ve come up with two different breads that start baking in a cold oven.

This made for a wonderful, moist, tight crumbed oatmeal bread.  No fat, no sugar!  Great sandwich bread, wonderful toast.

This slideshow requires JavaScript.

Whole Wheat Oatmeal Loaves

Recipe By: Greg Patent: A Baker’s Odyssey: Celebrating Time-Honored Recipes From America’s Rich Immigrant Heritage adapted by me
Yield: 2 loaves

A Norwegian bread

SPONGE
3 cups white whole wheat flour
1 cup unbleached bread flour
1 1/3 cups (4 ounces) old-fashioned rolled oats
package (2 1/4 teaspoons) instant or active dry yeast
3 cups hot water (120° to 130°F)
FINAL DOUGH
1 tablespoon salt
2 cups white whole wheat flour + 1 cup bread flour

4 tablespoons ground flax seed

Untoasted wheat germ (optional)

1.  SPONGE: Mix hot water with oat meal.  I did this because I always buy Bob’s Red Mill thick rolled oats and thought it needed a little extra exposure to the hot water.  Whisk white whole wheat flour (recipe called for whole wheat), bread flour, and yeast; then mix into the oats and water mix.  Cover and allow to rise till about tripled in volume and bubbly.  Recipe said about 2 hours, mine only took 90 minutes.

2.  DOUGH:  Mix the salt into the sponge.  Stir about 2 to 2 1/2 cups of the whole wheat and bread flours into the sponge to make a sticky and slightly stiff dough.

3. Use the remaining 1/2 cup flour to knead the dough.

4.  Kneading may take 5 to 10 minutes: You are aiming for a smooth, elastic and slightly sticky dough.  Avoid adding any additional flour.  The oats are thirsty and will absorb moisture.

5.  Coat the dough with olive oil, place in bowl and cover.  Allow dough to double; mine took 55 minutes to double.  Recipe allowed 90 minutes.

6.  Spray two loaf pans (9x5x3 inch) with cooking spray.  Deflate the dough; divide in half for two loaves, shape each half into a loaf and place in pan.  Roll in toasted wheat germ or seeds if you like.  Place seam side down in greased loaf pans.  Spray the loaves with cooking oil.  Cover loosely with plastic – I use shower caps.  Allow to rise about an hour ( recipe called for 90 minutes); the rise should dome the loaf centers close to 2 inches above the pan rims.

DO NOT pre-heat the oven.

7.  REMOVE  the shower caps and turn the oven on to 400°F.  My loaves took 55 minutes to reach an internal temperature of 202°F.  Allow to cool completely before cutting – 3 to 4 hours.  This is really important when baking with heavy doughs containing lots of whole grains because of the moisture.  Cut this too early while still hot and it will likely disappoint and be gummy.

Bake for 45 minutes to 1 hour, until a loaf sounds hollow when thumped on the bottom. An instant-read thermometer inserted into the center of a loaf should register 200°F. If in doubt, err on the side of longer baking; if under-baked, the bread will have a doughy texture. When the loaves are fully baked, remove them from their pans and set them upright on a wire cooling rack. Cool completely, at least 3 to 4 hours, before slicing.

8.  One loaf has stayed fresh in a plastic bag at room temperature for three days … but it’s down to the heal so we’ll now use the one I put in a plastic bag in the refrigerator.

Gorn likes the ease of slicing it even very thin.  We’ve made lovely sandwiches of all kinds and great toast with it.


6 Comments

Starting Over Again

Once upon a time there was a great shaking in my world … and for reasons only understood in the secret world of Apple and Steve Jobs … my web site at dot Mac created using iWeb will vanish from the blogging world sometime in July of this year 2012.  Actually, that’s really just trying to be a dramatic sentence.  I think the crux of the thing is that Steve probably said “Others are doing a better job of blogging platforms and we have other things to do.”  At least, now that I’ve gotten over my great disappointment and given up being angry about the whole thing, that’s my story and I’m sticking to it.

Within hours of the first release of iWeb in 2006, I had entered the intoxicating  world of blogging.  It was exhilarating.  Within the first year, I lost my Mac’s hard drive and had to start all over, that’s why this is now starting over again.

Threes charm and I hope this one takes.

If you followed me at all before, you noted how I slowed to one post a month, the Bread Baking Babes.  Some of that slow down was due to being in the North Woods without much ability to connect to the internet and some of it was due to building a house but a big part of it was due to reluctance on my part to finally give up on iWeb and face up to the fact I had to try something new, a new platform.

I have some familiarity with Blogger but everybody recommended I try WordPress … so here I am.  I feel like the proverbial fish out of water.  When I was finally able to get my mind around the idea that when I started blogging, I knew almost nothing about it and I wasn’t polished then either.  That’s where I am now.  Just starting out, primitive.  I hope I can get this site a little more polished by next year and learn enough to be comfortable with it.

One of my goals will be to sort of “reissue” blog posts from my old MyKitchenInHalfCups.com site.  If I look forward to anything it’s being able to categorize posts!