

Cathy, Bread Experience, is our Kitchen of the Month and she has brought us a wonderful rye bread!


Cathy was super lucky to attend a conference and take a workshop with Stanley Ginsberg http://theryebaker.com/swiss-rye-ring/#more-335 ! I’ve had his book, the Rye Baker, for quite some time and just drool over the cover. Westphalian Pumpernickel. I think I’ve had this or something very close in Austria once and was instantly in love. What stops me from making this one … my stand mixer packed away in some box unidentifiable for the last 5 years. Basically I refuse to unpack anything more for the kitchen until I have cabinets. Cabinets maybe in the making this winter and would go in in the early Spring next year IF my latest cabinet maker comes through for me soon. The clutter now is just too much, anything more would put me over the edge.
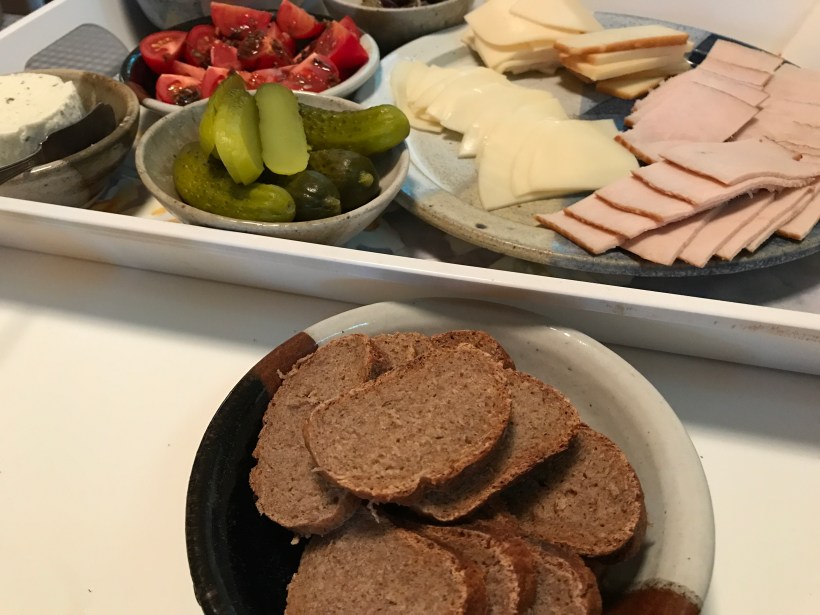
Straight off I’ll tell you Gorn & I are both Rye lovers. Here, I am always on the look out for the dark dense rye’s. When we’ve traveled in Europe, I always seek out the darkest ryes that I can find. Always flavorful and able to stand up to flavorful meats and cheeses, the tight crumb of rye breads makes them perfect for just about anything you can put between two slices.
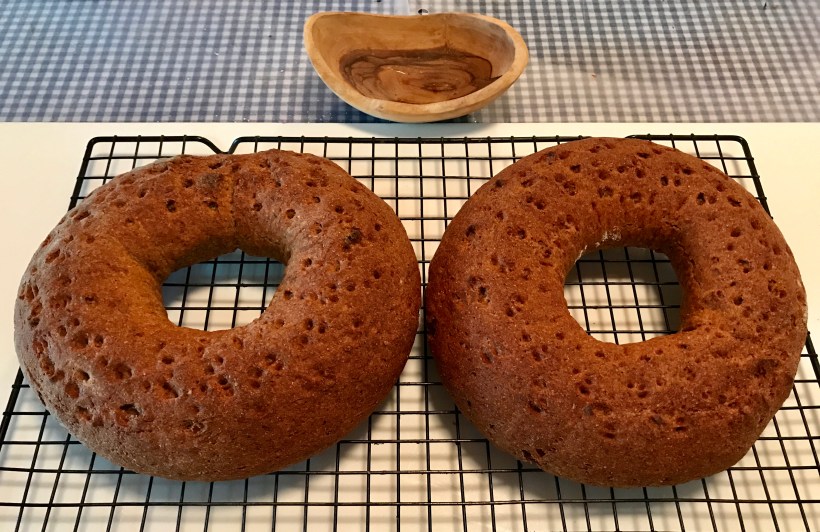
This Swiss Rye Ring is a tight crumb with a mild flavor that we’re going through very quickly. This recipe bakes into a glorious loaf that even without the traditional caraway seeds, shines with the true spicy rye flavor. The first ring loaf was gone in a day and a half. The second ring loaf I fear will be gone today. The only thing wrong that I found with this bread was I was unable to find any smoked salmon to serve with it. I feel cheated while enjoying every bite of this wonderful rye. Thanks for this one Cathy.
1. Rye Sponge Combine the sponge ingredients by hand into a stiff dough, cover and ferment at room temperature (70°F/21°C) until doubled in volume 10-12 hours or overnight.

2. Wheat Poolish Mix the poolish ingredients by hand, cover and refrigerate 10-12 hours or overnight.

3. Final Dough In the mixer, combine the final dough ingredients and use the dough hook at low (KA2) speed to mix into a stiff, slightly sticky dough that leaves the sides of the bowl and gathers around the hook, 6-8 minutes. This is one of those recipes that says use a stand mixer and I did not. I think it worked perfectly without the mixer by hand.

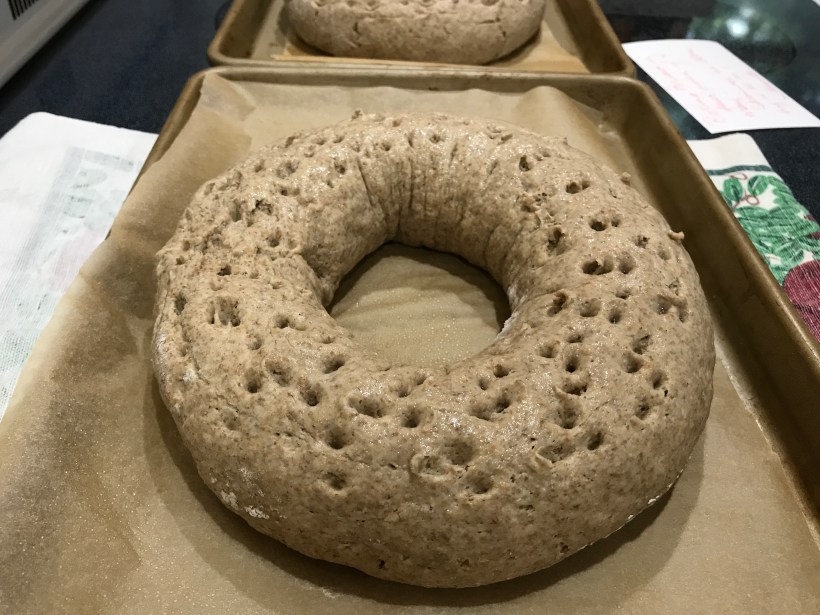
4. Turn the dough onto a lightly floured work surface and divide it into two pieces weighing about 26 oz./750 g each. Form each piece into an oblong about 18 inches/45 cm long and 2 inches/5 cm in diameter. Shape each into a ring, wetting the ends to seal, and place on a well-floured peel, if using a baking stone, or parchment-lined sheet pan.

5. Cover and proof at room temperature until the breads have visibly expanded and surface shows cracks or broken bubbles.
6. Preheat the oven to 480°F/250°C with the baking surface in the middle and a steam pan on a lower shelf. Dock the surface of each loaf thoroughly and evenly to a depth of at least ¼”/0.6 cm. with a fork, chopstick or docking wheel.
7. Bake with steam 15 minutes, then remove the steam pan, reduce the temperature to 410°F/210°C and bake until the loaves thump when tapped with a finger and the internal temperature is at least 198°F/92°C, about 30 minutes. Transfer to a rack and cool thoroughly before slicing.
8. RYE STARTER Mix the equal amounts (by weight) of organic rye flour and water.
Cover.
Allow to stand 24 hours at room temperature.
Dad Two – Seven:
Keep 70 grams of previous day’s culture and mix with equal amounts (by weight) of organic rye flour and water.

September 16, 2017 at 6:05 pm
Love the color you got, those are beautiful loaves!
September 16, 2017 at 9:56 pm
That spread looks amazing and I’m so impressed you used a dough docker!
September 17, 2017 at 11:58 am
I want it just like that – with cheese and sliced meats…. and red wine. Cabinets? Brings back memories of the good old days – cooking on a cooktop sitting on plywood between 2 saw horses. Yeah, I don’t miss that.
September 17, 2017 at 12:04 pm
I love my dough docker too, and it’s quick too 🙂 Well you got a dense bread, like rye mostly is, so that’s a good thing. My husband likes it like that too! The slices are nice and high too.
Pingback: Swiss Rye Ring
September 17, 2017 at 6:42 pm
Your Swiss rye rings look wonderful! Perfect shape and I really like the effect of the docking. My dough was too sticky to use the dough docker so I used a fork instead.
September 18, 2017 at 1:35 pm
They look gorgeous!! I love the colour. (I also love that you used a ruler.)
October 2, 2017 at 6:14 pm
You’ve captured the essence of this bread perfectly. The charcuterie board looks so tempting. i’m ready to dive in.