Some may speak of water under the bridge, I speak i of loaves out of the oven. In the last 18 years I’ve been baking bread with the Babes, I’ve taken many a loaf out of any number of ovens and I hope for many more to come. But today … Today marks 18 years of the Bread Baking Babes pulling amazing fresh bread from our ovens.
Happy Anniversary 18 Years Babes!!!

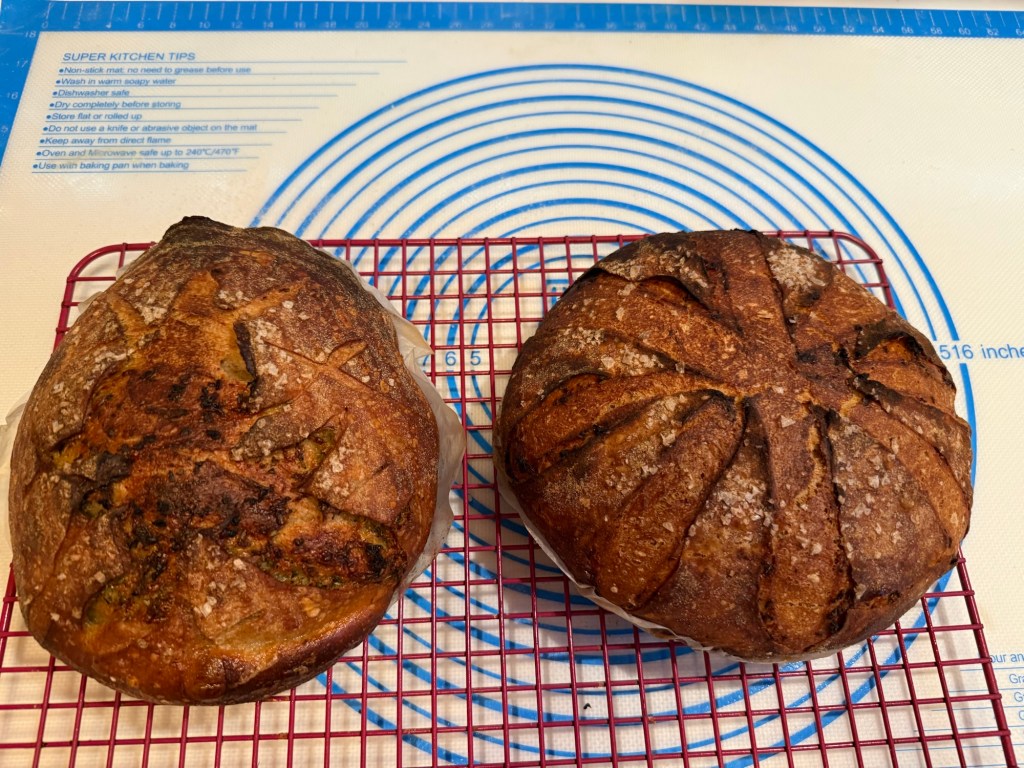
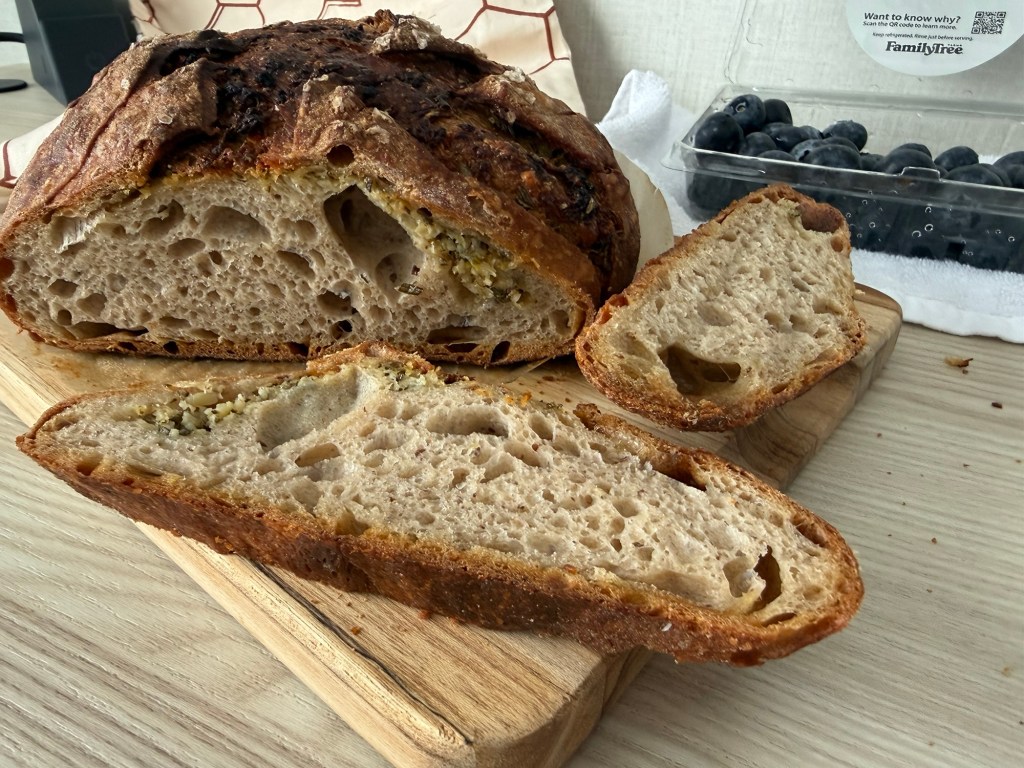
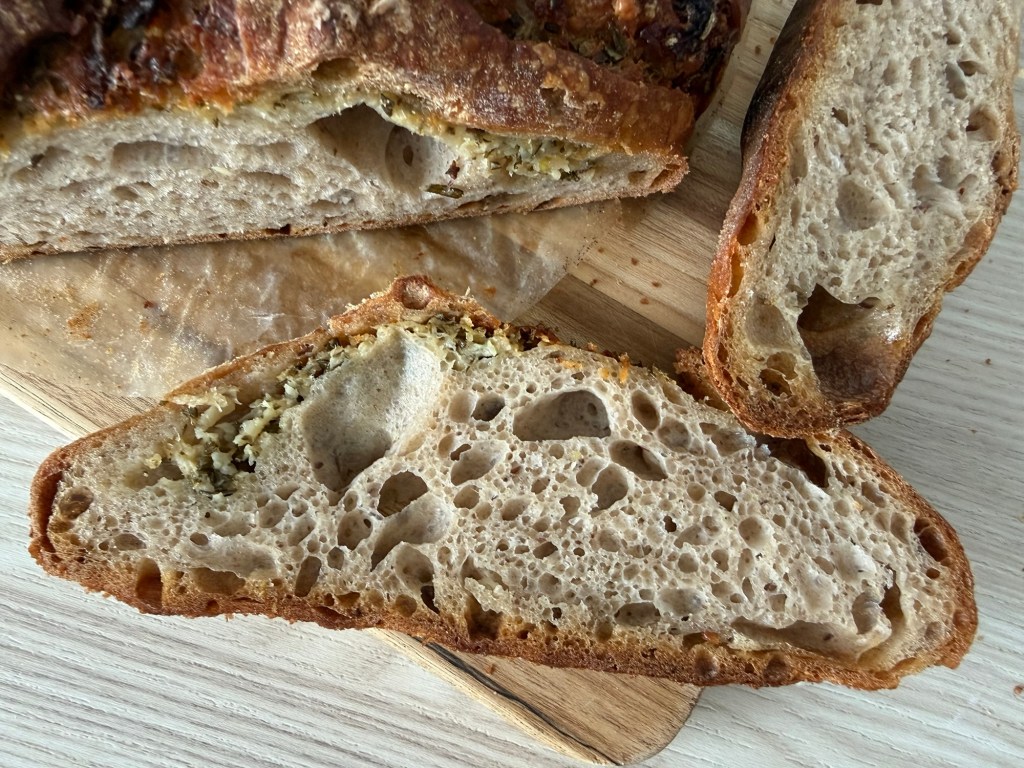
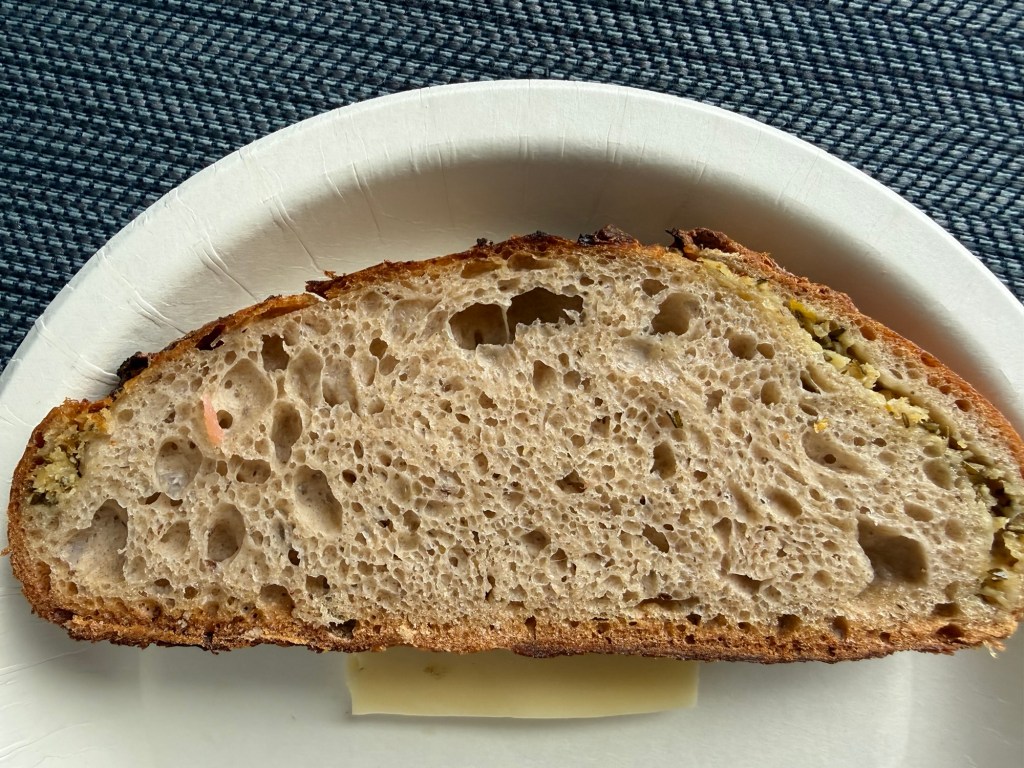
Many of our loaves have been beauties but this loaf … well this loaf is a doozy.
I first came across this recipe in the book “Richard Hart Bread”.
This is his introduction:
“This is a variation on the most famous bread made at Della Fattoria (in Petaluma, California), where I got my start as a baker. After you have been working at Della for a while, you are totally over this bread. They make bloody hundreds of them a week, and you need to chop a ton of rosemary on a daily basis. We never had enough, so we used to drive around town, nicking rosemary from everywhere and anywhere we could find it. I’m sure the poor bakers who are working there still have to do this. So this goes out to you rosemary choppers and the local gardeners wondering about your stunted rosemary bushes. But it is really here as a tribute to my original mentor, the lady who started my baking career, Kathleen Weber. I’ve made the dough formula my own, but the method I learned from Kathleen. This recipe uses a beautiful technique that adds a spoonful of a flavored oil to the dough. In final shaping, it is worked to the top of the crust, which makes the bread pop up into a crown.”
Well, when you read that, you really just have to go to the source. I already had Kathleen Weber’s Della Fattoria Bread in my library. Her introduction gives us a lovely story of how this bread came about.
“A request from Thomas Keller right after he reopened The French Laundry in 1995 got me into making pain de campagne. So I asked Thomas lots of questions. (How do you envision serving this bread? Do you like lots of crust? What shape would look best on your bread and butter plate?) In the end, I created the bread he was looking for. For Thomas, I shaped the dough into bâtards. Here we make both a bâtard and a boule.”
In her book, Weber created a base recipe and then gave numerous variations in shaping and flavoring. I think I’ve seen look-a-likes many times and always felt there was no way to get those fine looking tips of crust like show in both the above mentioned books. That is what most spooked me about trying this.
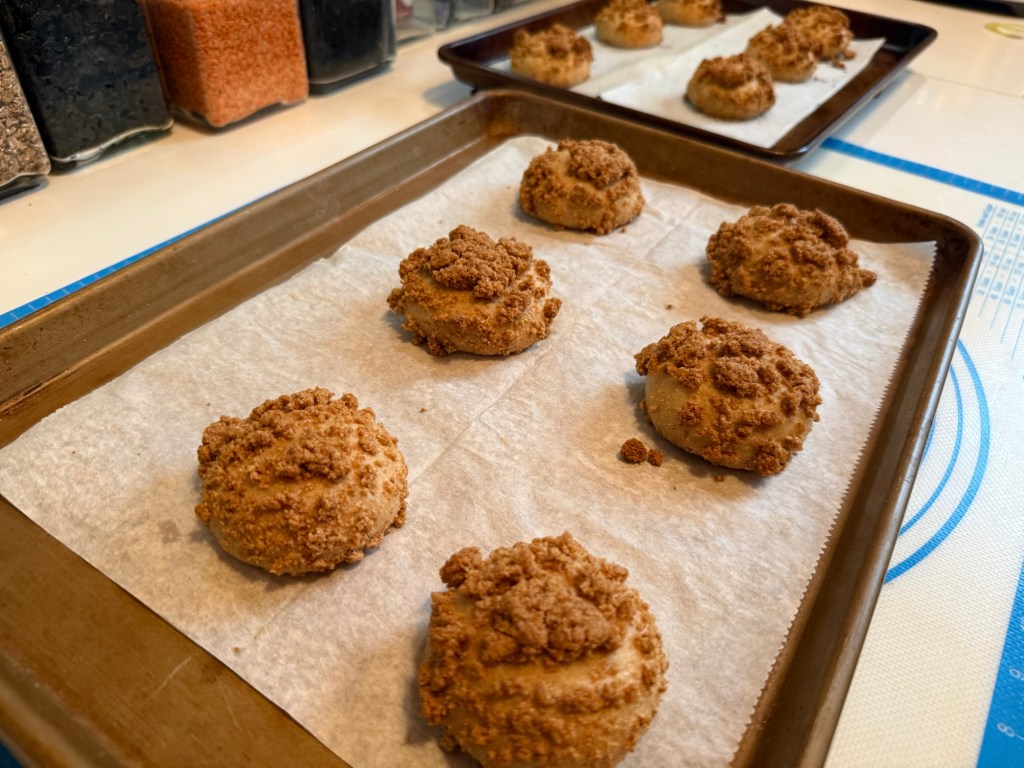
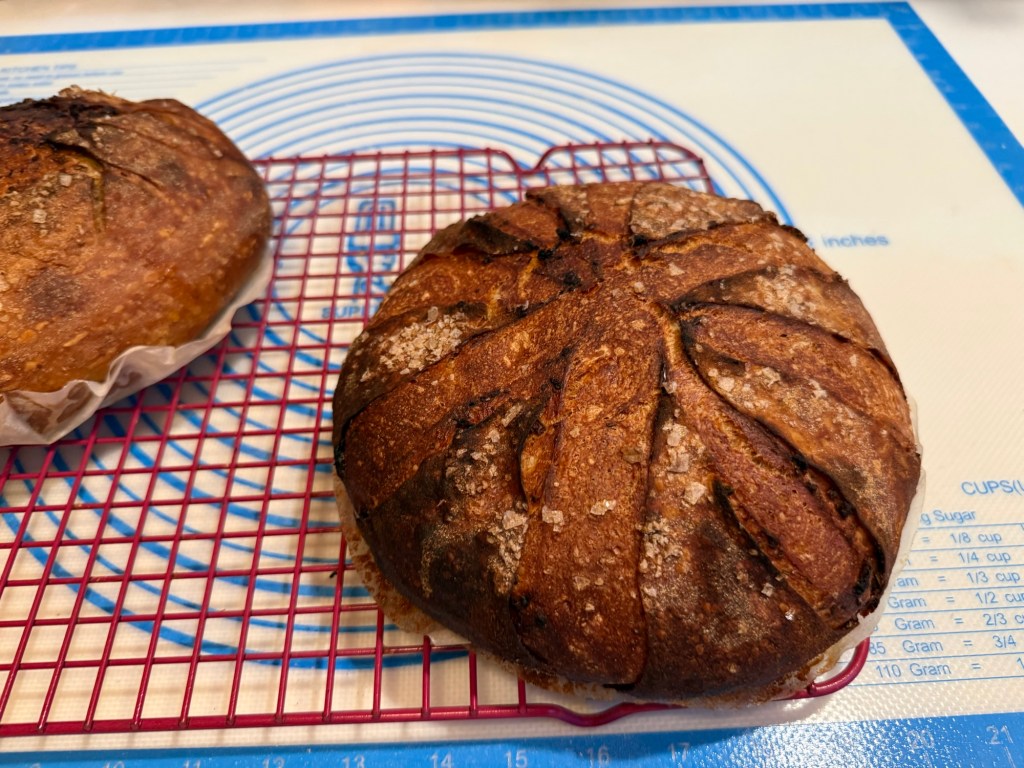
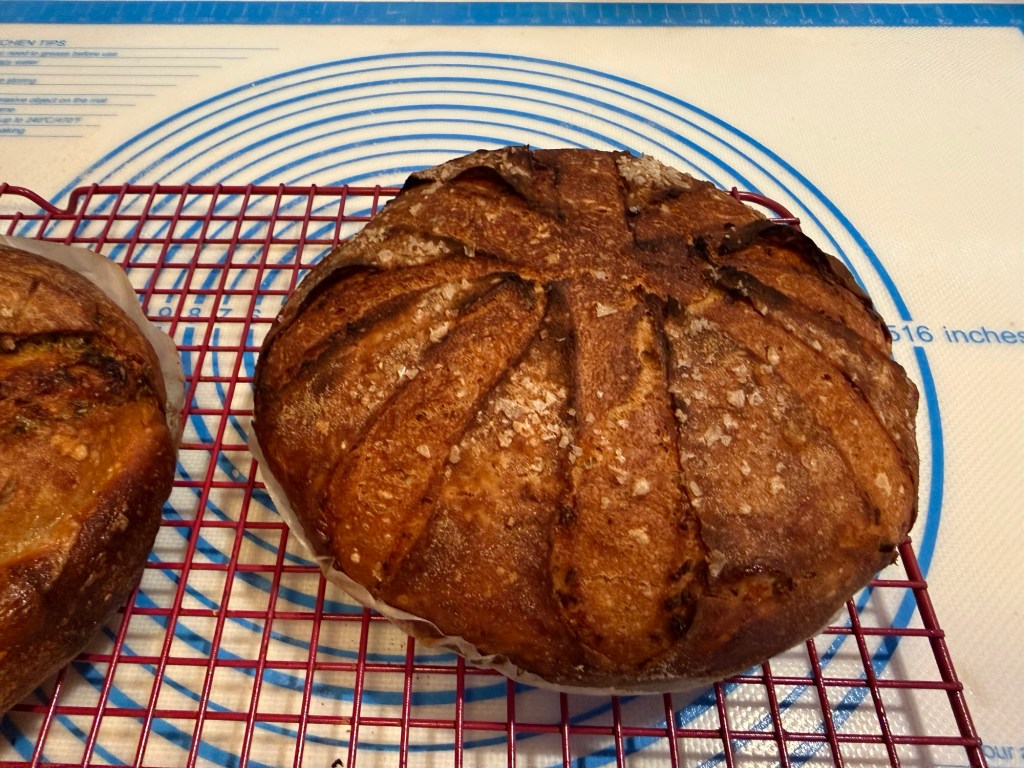
I look at this as not only a flavor opportunity but a shaping necessity. Feel free to flavor however you can imagine but do try the shaping technique because … it really does give perfect tips; the more cuts you make the more tips/points and more like a crown. I am in awe.
However, my ultimate flavoring for this bread is always going to be rosemary and garlic. It is unbeatable out of this world heavenly.
P A I N D E C A M P A G N E D O U G H
150 grams (I used my 50% rye flour) starter
126 g Water at 80°F/27°C
325 g All-purpose flour
181 g King Arthur golden wheat flour
1 Tbsp Fine King Arthur pink bread salt 19 g
**Put the starter in a bowl with flour & water and mix. This is going to be a very sticky dough so be prepared if you try mixing by hand. Mix on low speed for 2 minutes to combine. Use a dough scrapper to scrap to the bottom of the bowl leaving no dry flour.
** Cover and let rest for 20 minutes.
** Scrape down the sides of the bowl with the bowl scraper and add the salt. Fit the mixer with the dough hook and mix on low speed for 6 minutes. Using the bowl scraper, turn the dough back into the bowl.
** Cover and let sit for 30 minutes.
* For the first fold, wet your hands, then loosen the dough from the sides and bottom of the bowl and fold it underneath itself from left to right and then top to bottom. I found I could use water or olive oil on my hands and either worked equally well.
*Cover and let sit for 30 minutes.
** For the second fold, repeat as for the first fold. Cover and let sit for 30 minutes.
*** For the third and final fold, repeat the folding as before. Cover and let proof in a warm, draft-free spot until there is bubbling on the surface of the dough, 2 to 3 hours.
* Fold 1 **Fold 2 ***Fold 3
* The dough is ready to be pre-shaped and shaped as a Campagne Boule.
Weber’s recipe for the Lemon-Rosemary Boule:
1 tablespoons (8 grams/0.3 ounce) grated lemon zest, preferably from Meyer lemons
1 tablespoons (6 grams/0.2 ounce) chopped rosemary
About 3 tablespoons (40 grams/1.5 ounces) olive oil
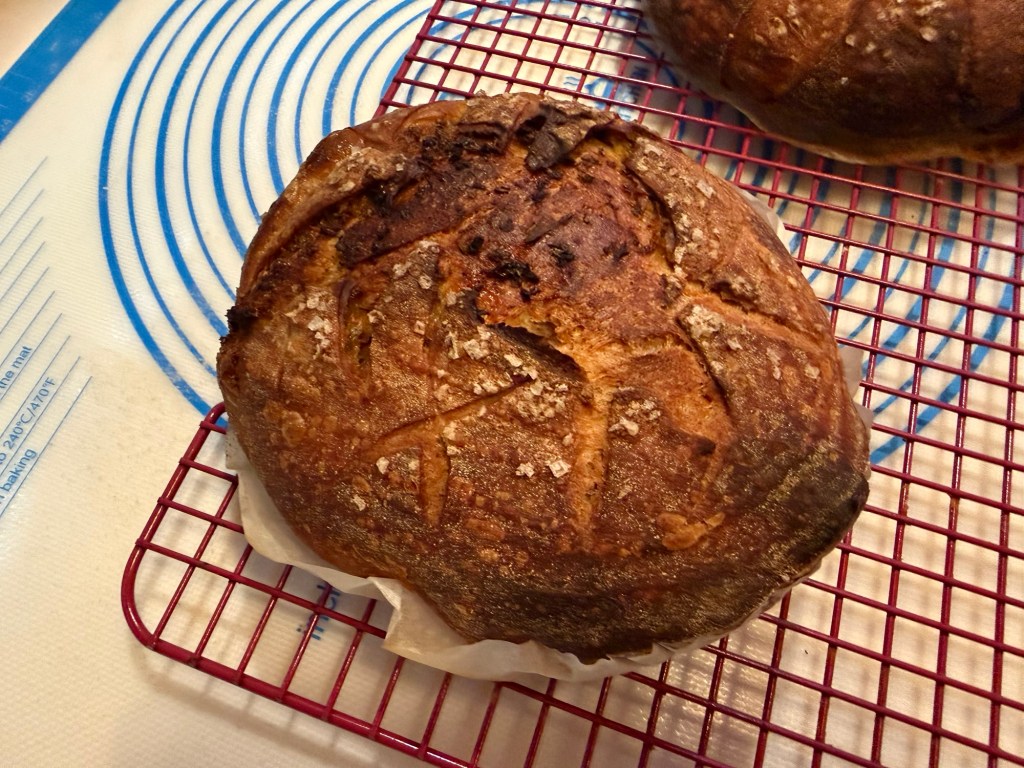
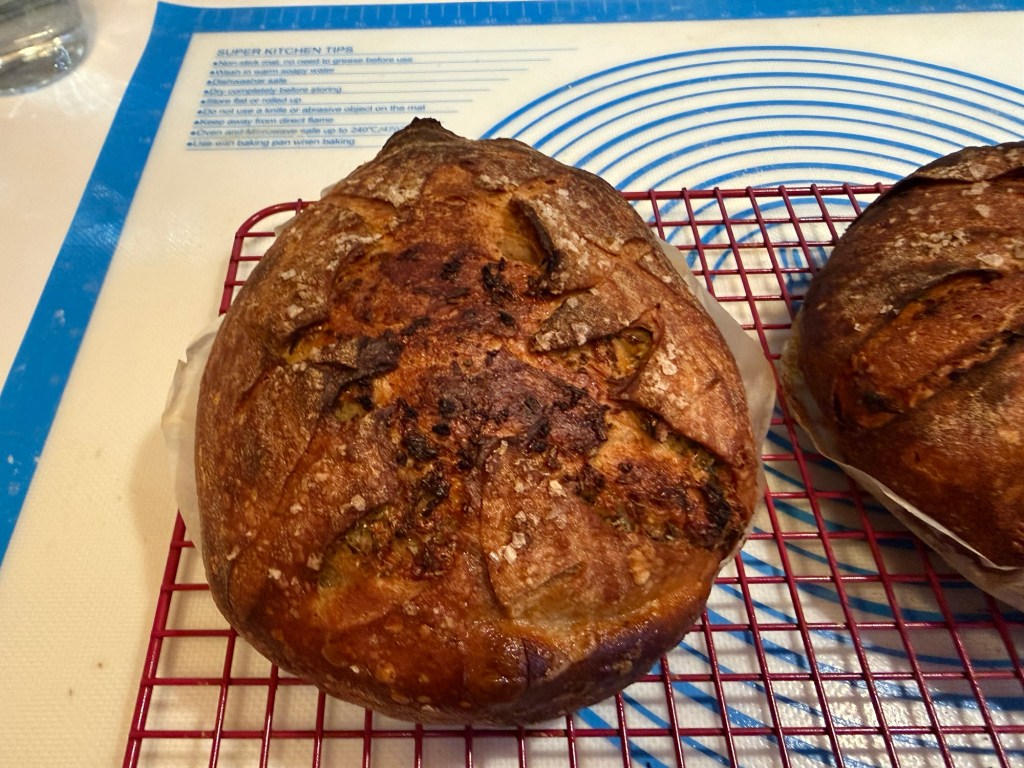
1 to 1.5 teaspoons (4 to 6 grams/1.4 to 2 ounces) coarse sea salt***I really missed the opportunity to salt the out side of my loaf … that will not happen again. **My second bake I got the salt on and it is marvelous.
I am not going to try to find Meyer lemons, I know it would be an exhausting energy search with a poor result. If I ever do the lemon it will be a regular lemon. Thinking about lemon, preserved lemon might make for an interesting flavoring.
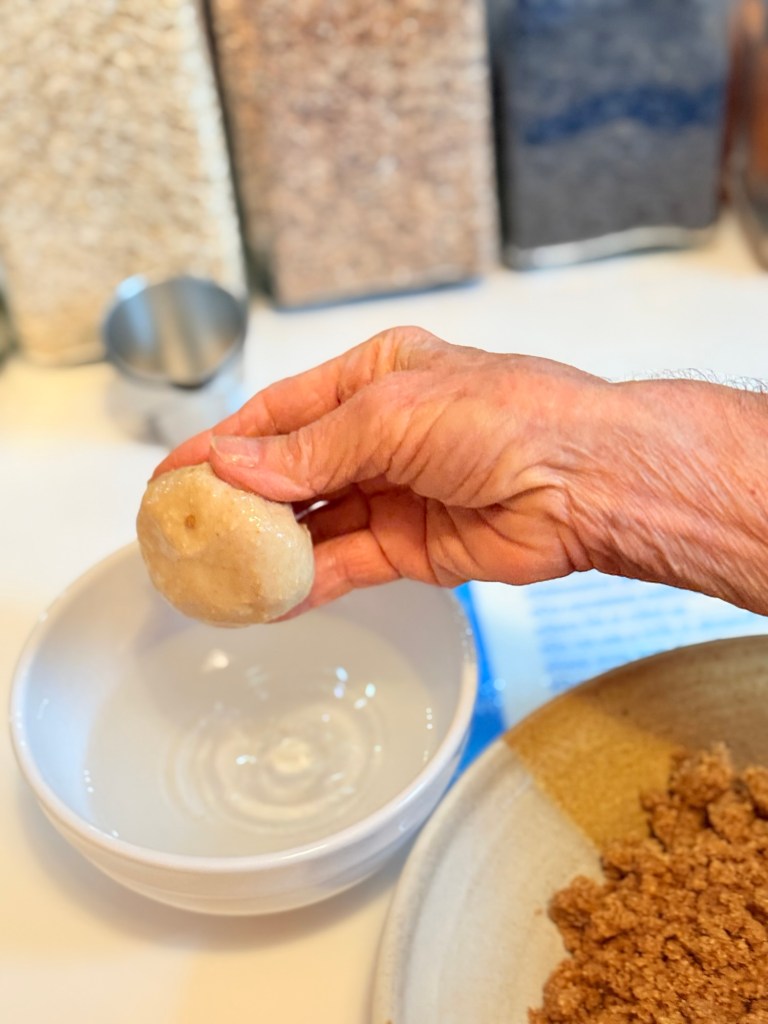
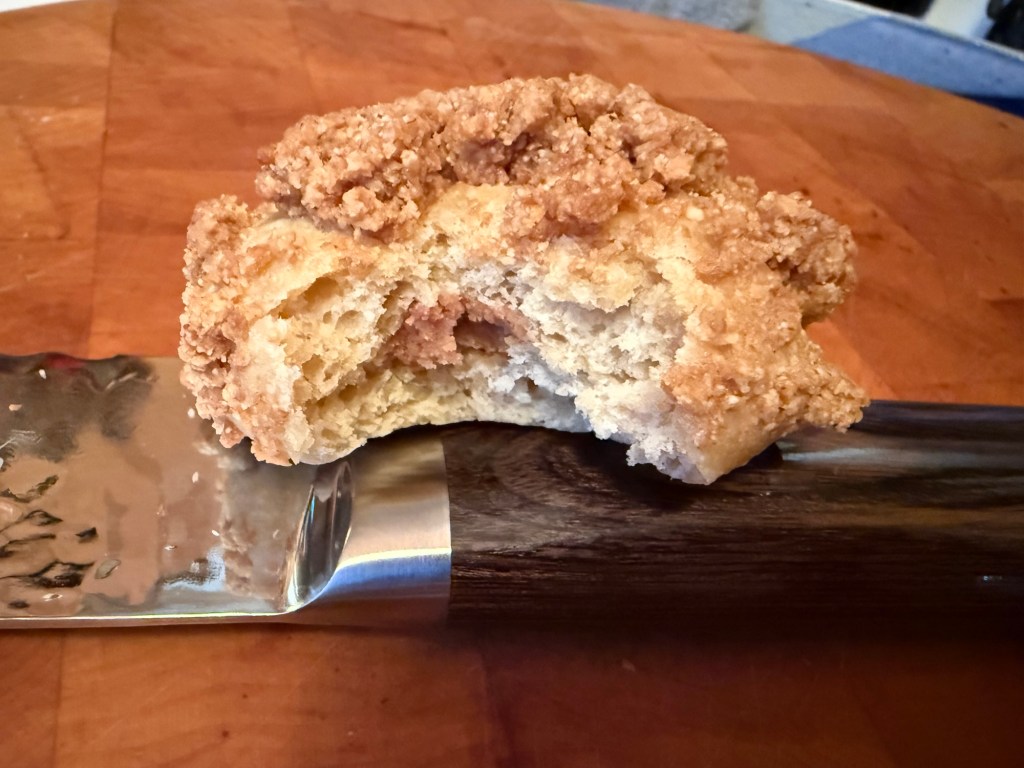
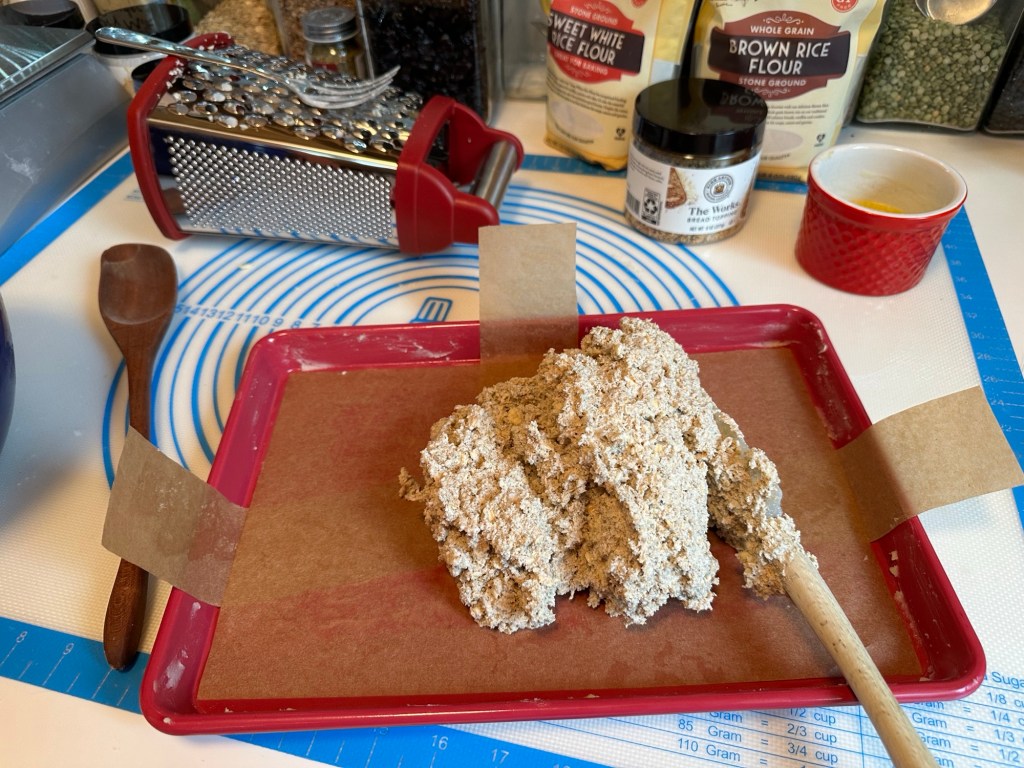
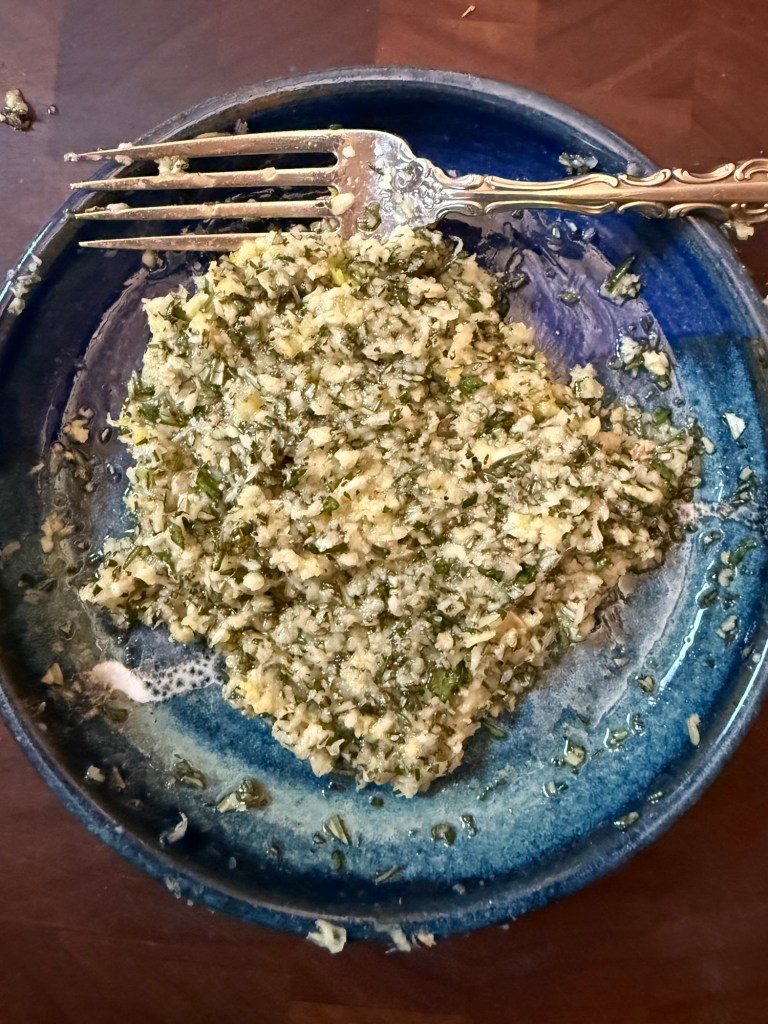
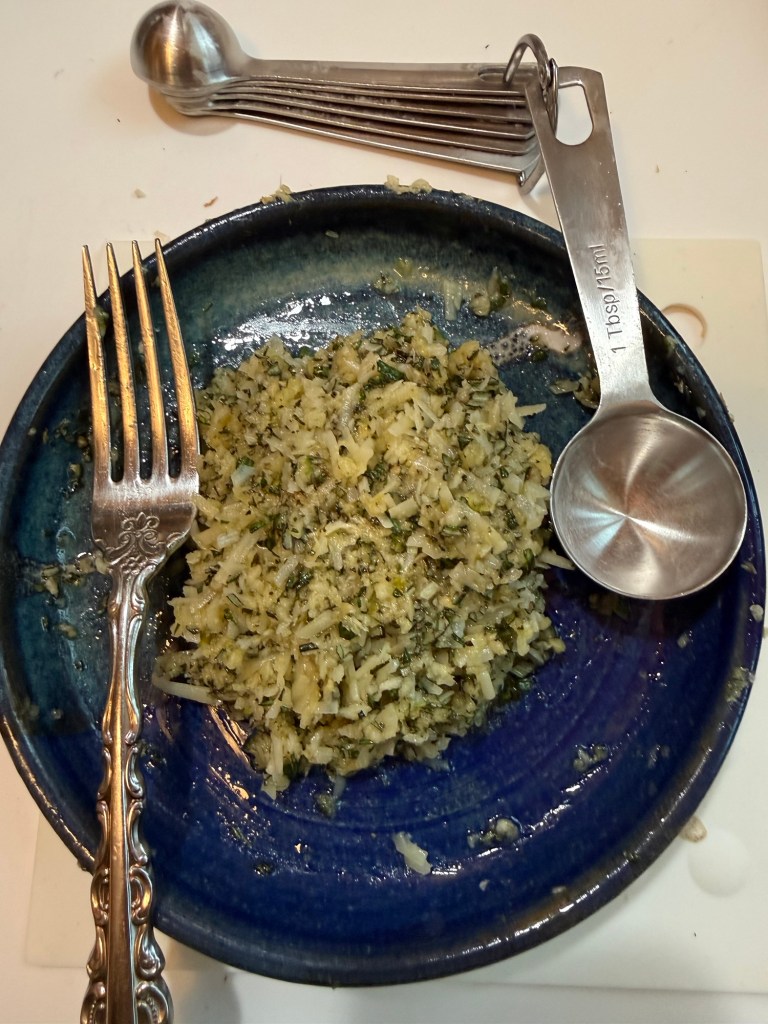
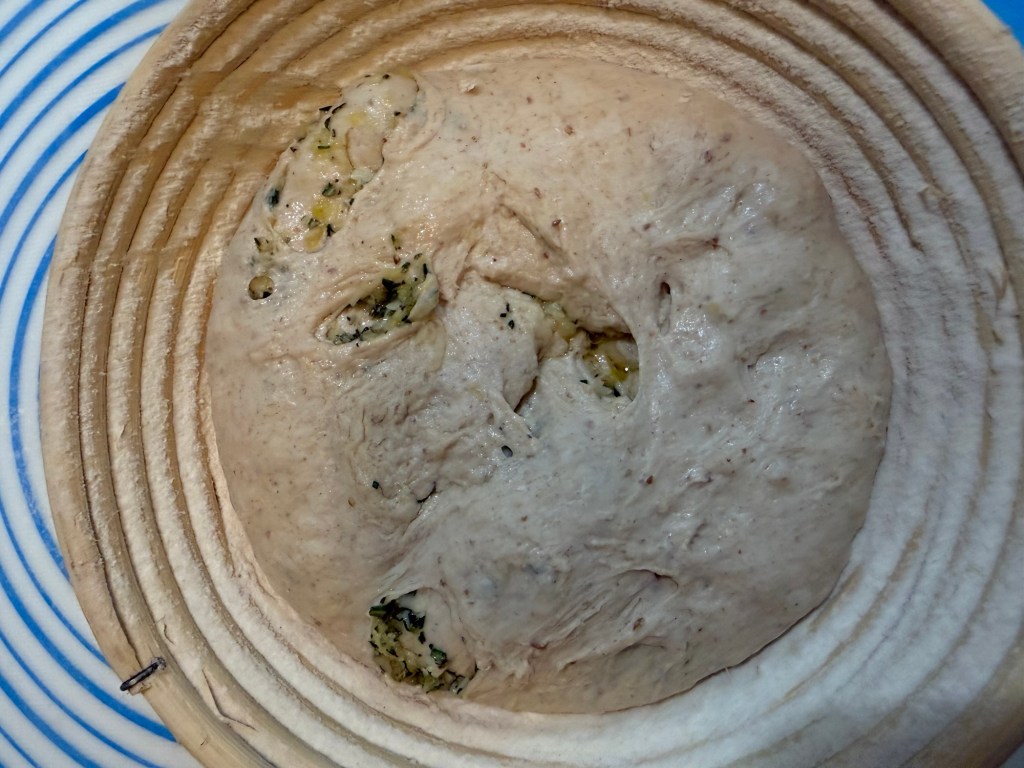
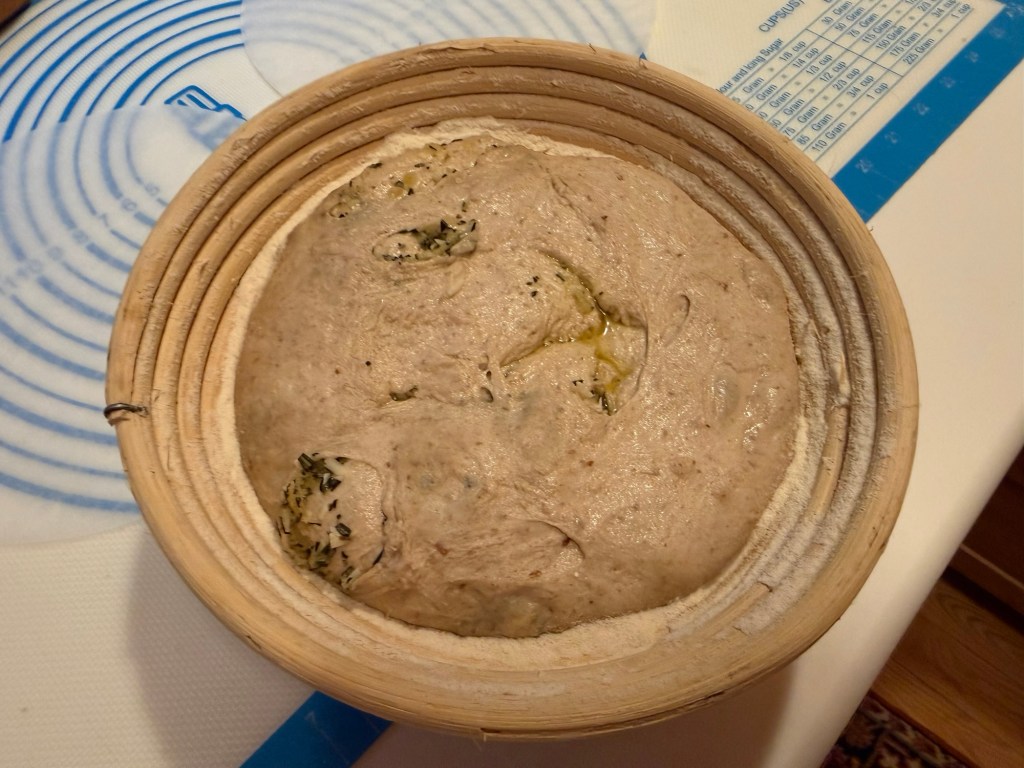
What I did use for my flavoring was dried rosemary (didn’t have fresh); 6 cloves crushed garlic cloves, and olive oil to make a paste. It was subtle but heavenly. I tried a little parmesan and almond flour with the aim being to thicken it just a little. I was pleased with the thickening I got from the almond flour but not taken with the Parmesan. The next bake my flavoring is going to be rosemary, fresh minced garlic, butter and olive oil.
**Combine your flavoring choice in a small bowl. Add enough olive oil to create a pesto-like slurry.
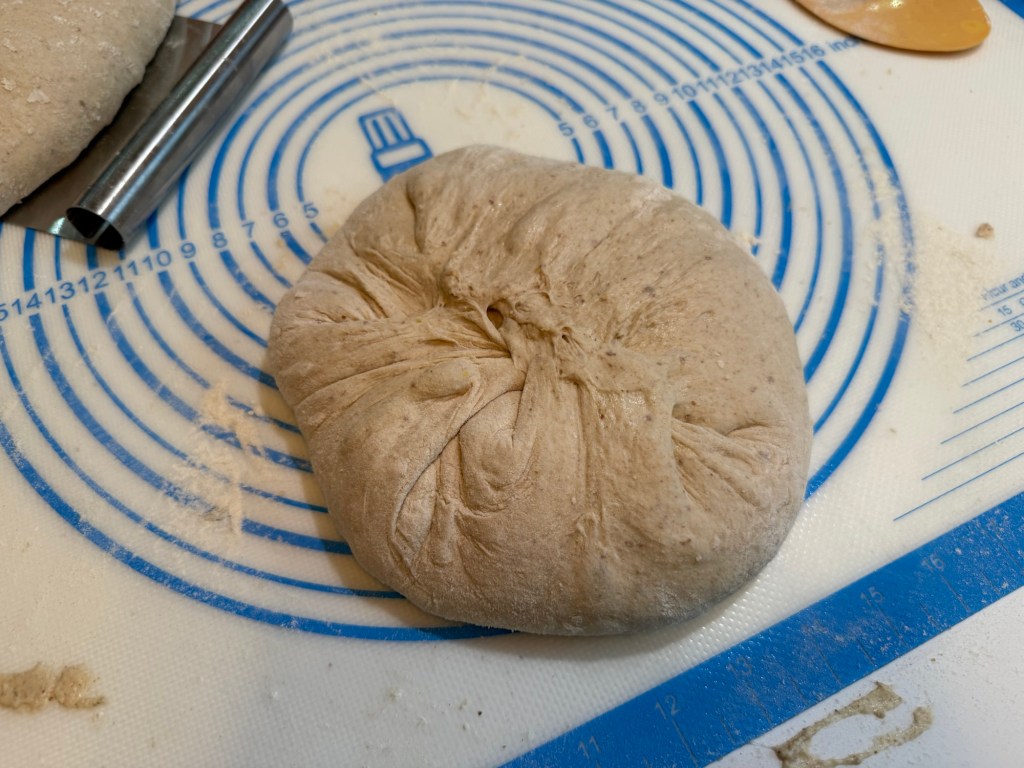
** After the 10-minute rest, turn the dough over and gently press into a 9- to 10-inch round.
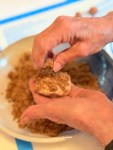
Dimple the top, make a well, and add the flavored olive oil mixture to the well. Fold the sides in, as when forming a boule, enclosing the mixture, then tighten the boule against the work surface until you just begin to see the rosemary mixture under the surface of the dough.

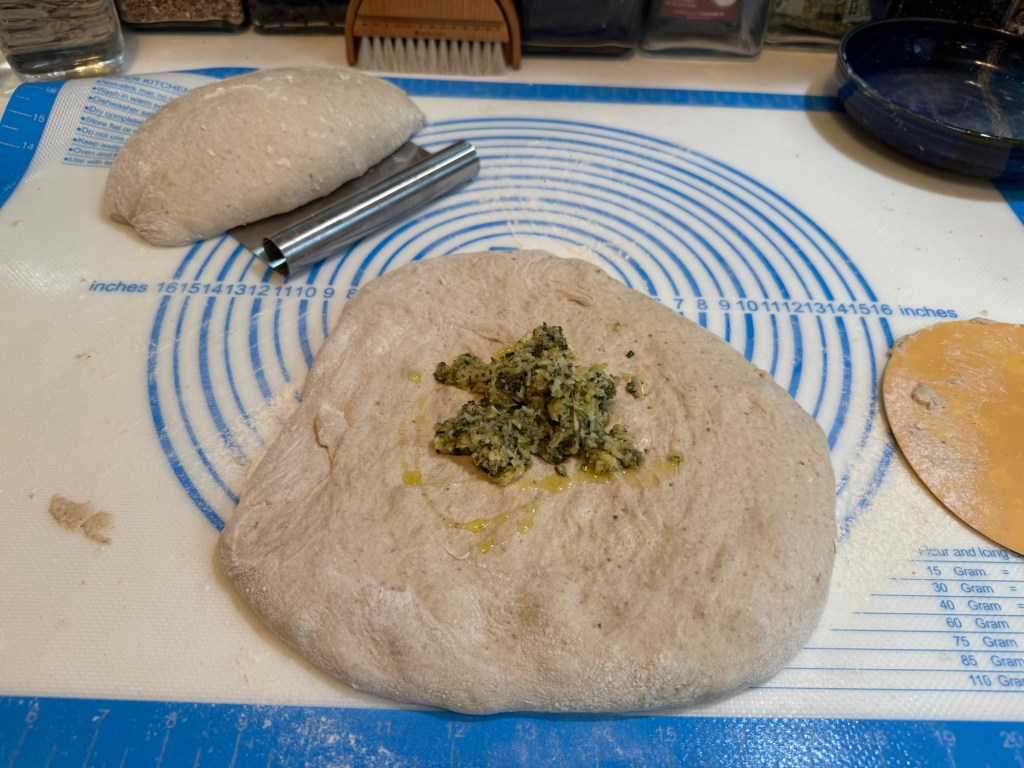
The video that the Richard Hart ‘Bread’ allows you to access is the best I have found to see what those words translate to in action. However, I will tell you I never saw the rosemary under my dough skin even though I feel I got an excellent look on the bread.
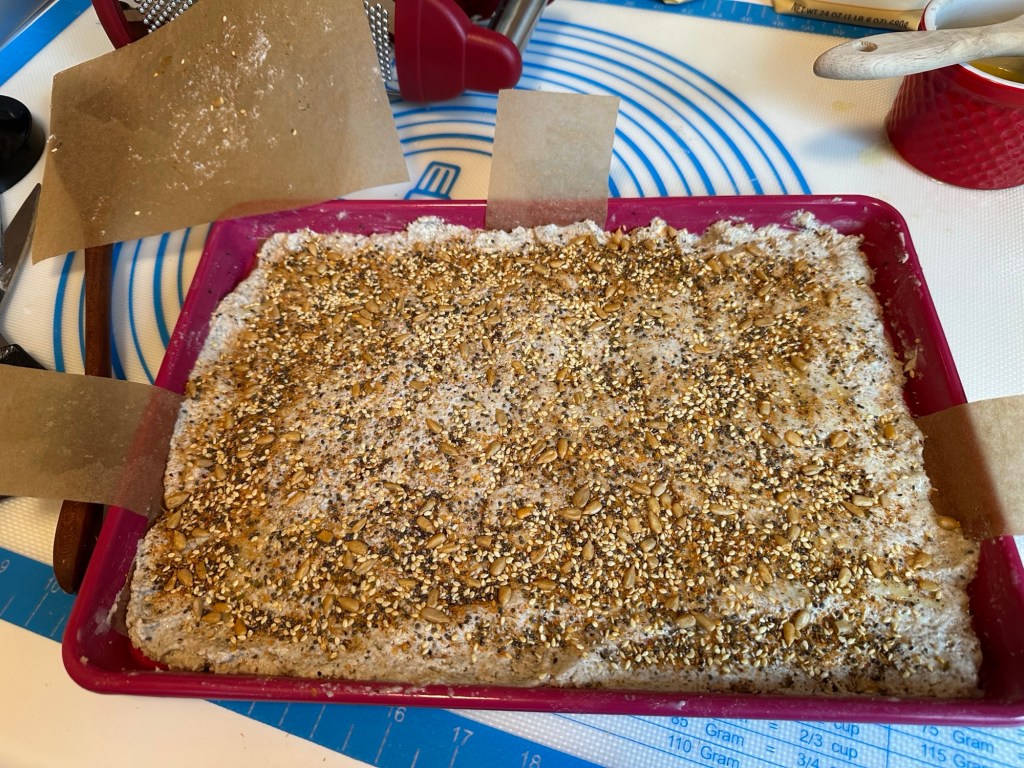
** Generously dust a 9-inch bread basket or linen-lined bowl with flour or a mixture of four and wheat bran. I always use rice flour; the wheat bran idea is intriguing and if it occurs to me some time I may try that.
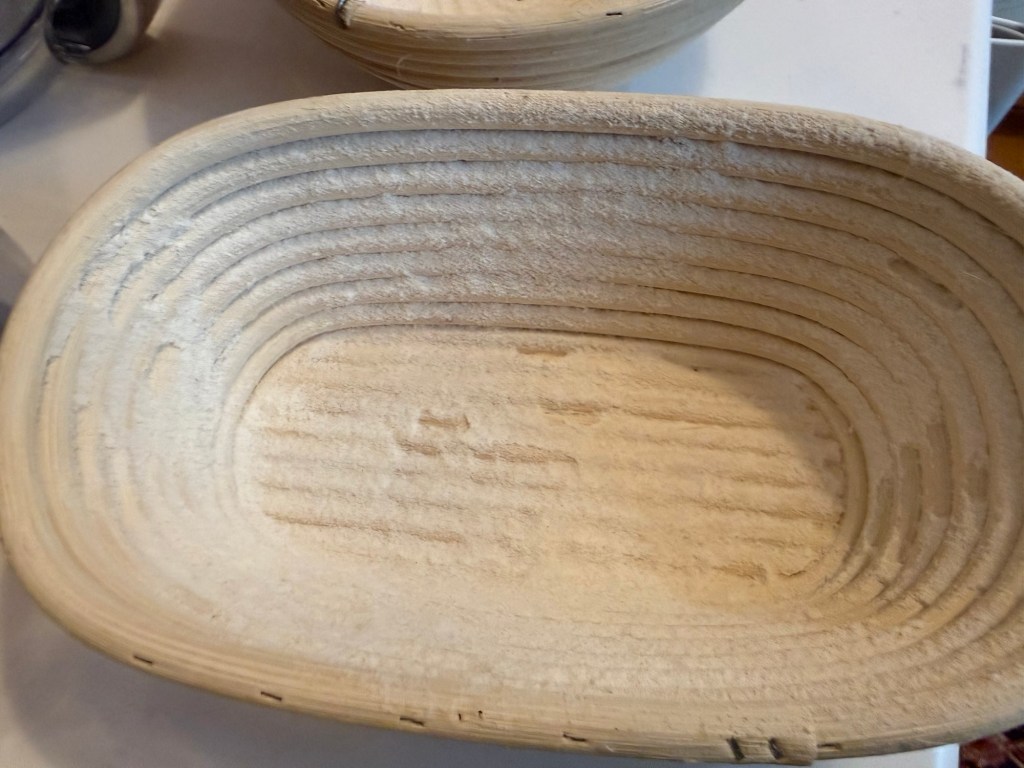
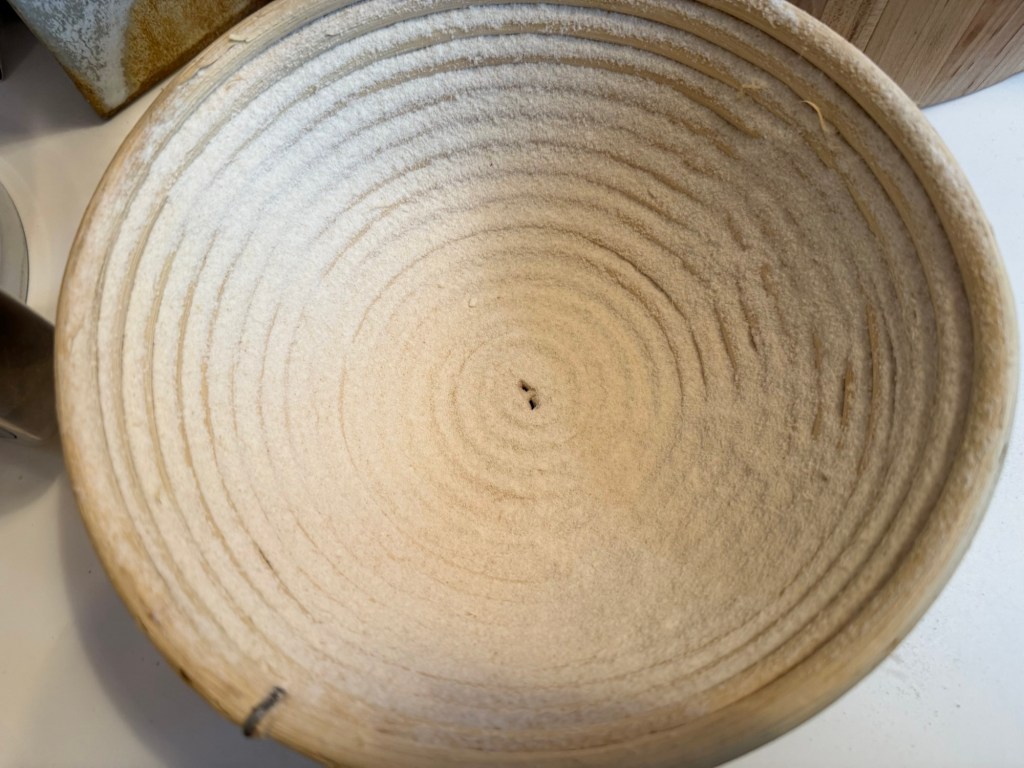
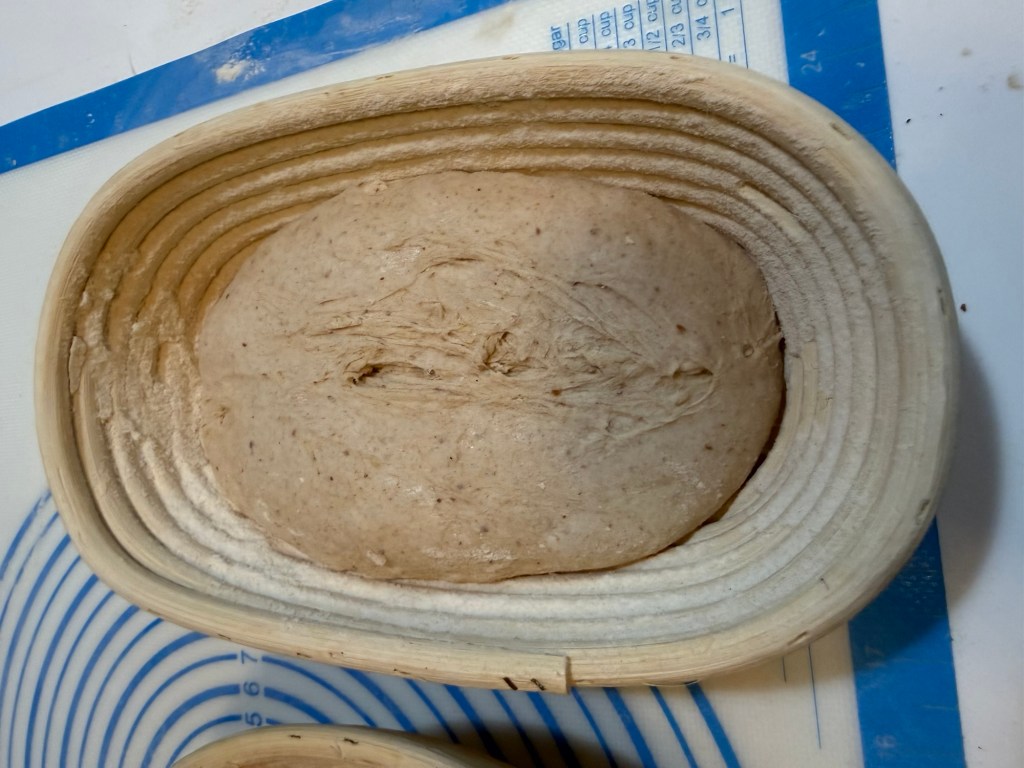
Final shape: Sprinkle rice flour into the bannetons and sprinkle a very light dusting of all-purpose flour over the tops of the loaves. Using your bench scraper, shimmy the dough into a round. Hold one hand over the center of the loaf, take your scraper in the other hand, and scrape evenly across the surface of the table toward the loaf, lifting it up and into the other hand. Put down the scraper and cradle the loaf in both hands. Now fold it inward and gently place it into the basket seam side up.
If it tries to fall back open, you can gently pinch it together at the top. That’s it. It’s safe and happy just the way it is. No need for aggressive shaping.
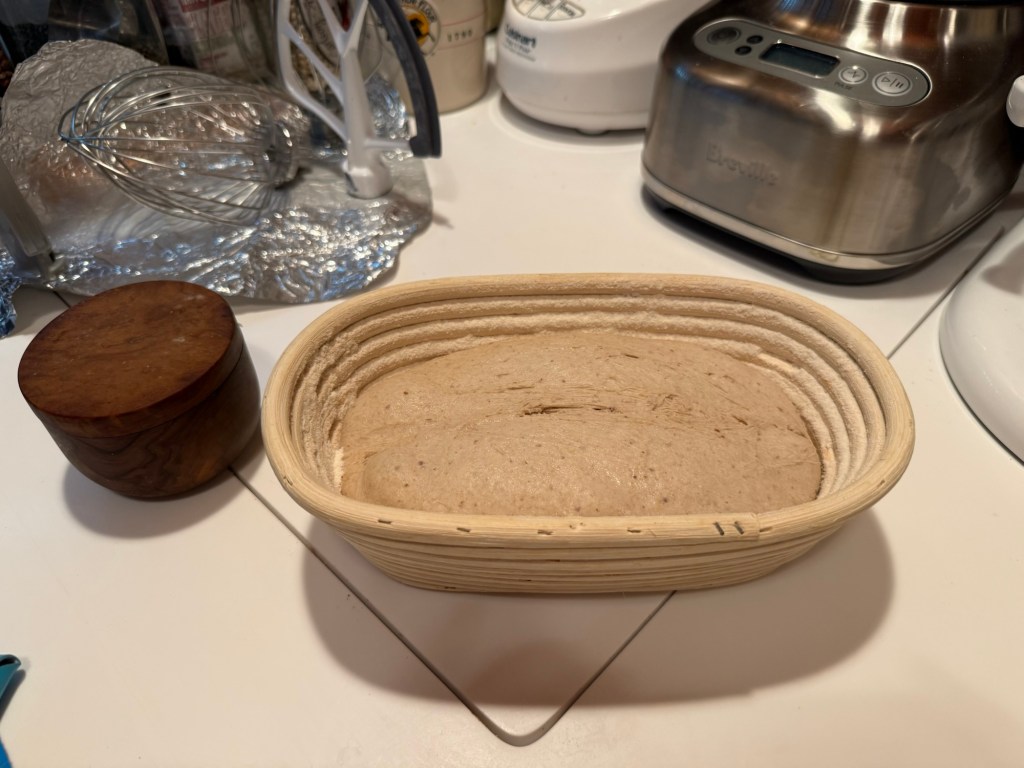
***** Cold retard: Lightly flour the loaves again. Leave them on the counter in your kitchen for 1-2 hours. I did not use a towel, I used my trusty shower cap to cover and placed the dough in the refrigerator and let the loaves sit overnight in the refrigerator, or up to 12 hours (at most 15 hours), to develop flavor. Then you will be ready for fresh bread in the morning.
Next morning, preheat the oven to 500°F/ 260°C for at least 1 hour, AND with the Dutch oven that you will be baking the bread in to get radiant hot. The Dutch oven will be an oven inside the oven. Put the lid on the top shelf and the bottom of the Dutch oven in the middle.
Once the Dutch oven is preheated, I usually place it on the oven door covered with two folded in half t-towels, but be careful: it’s radiant hot. Use heavy-duty oven mitts or a few layers of dry tea towels when handling it. Or you can take it out and place it on a sturdy, heatproof surface. I prefer not to move it too far from the hot oven. These vessels are designed to hold their heat, so don’t panic or rush; you have time.
When the oven and Dutch oven are fully preheated, take the dough out of the refrigerator, turn it seam side down, and score it. I mist the top with water and sprinkle the sea salt over the top.
Scoring: I made four slashes, you may chose to do fewer. I suppose if you chose to make just one loaf with all the dough you could do more slashes. That would be an over the top crown. The loaf/loaves is/are now ready for the super hot Dutch oven.
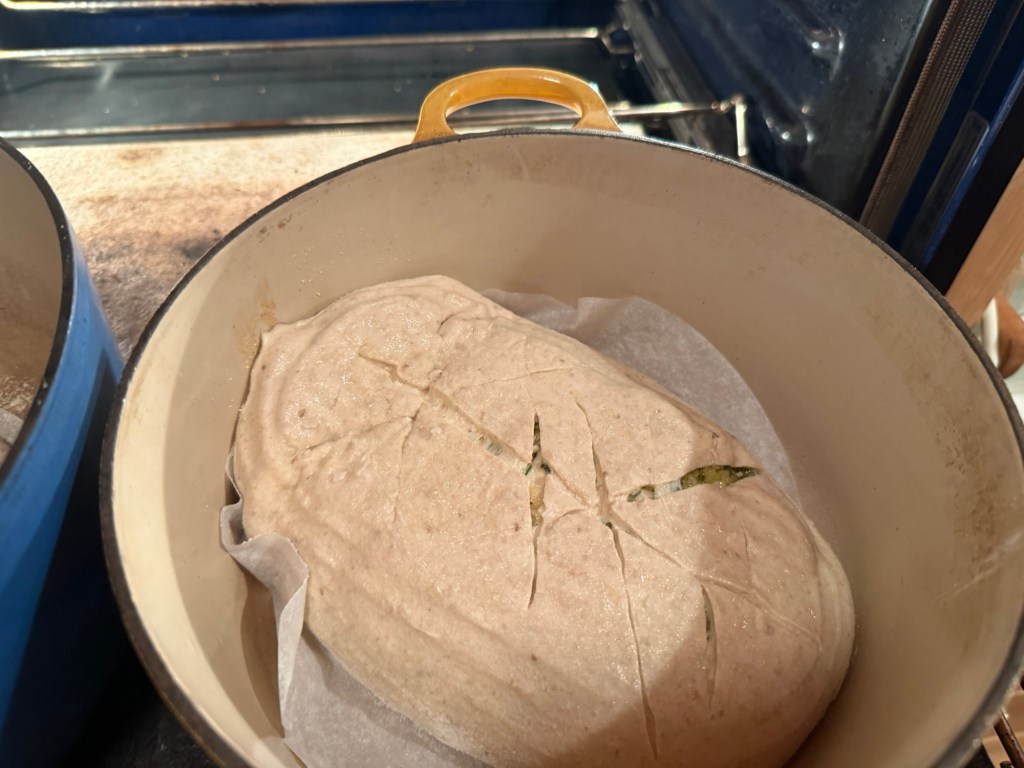
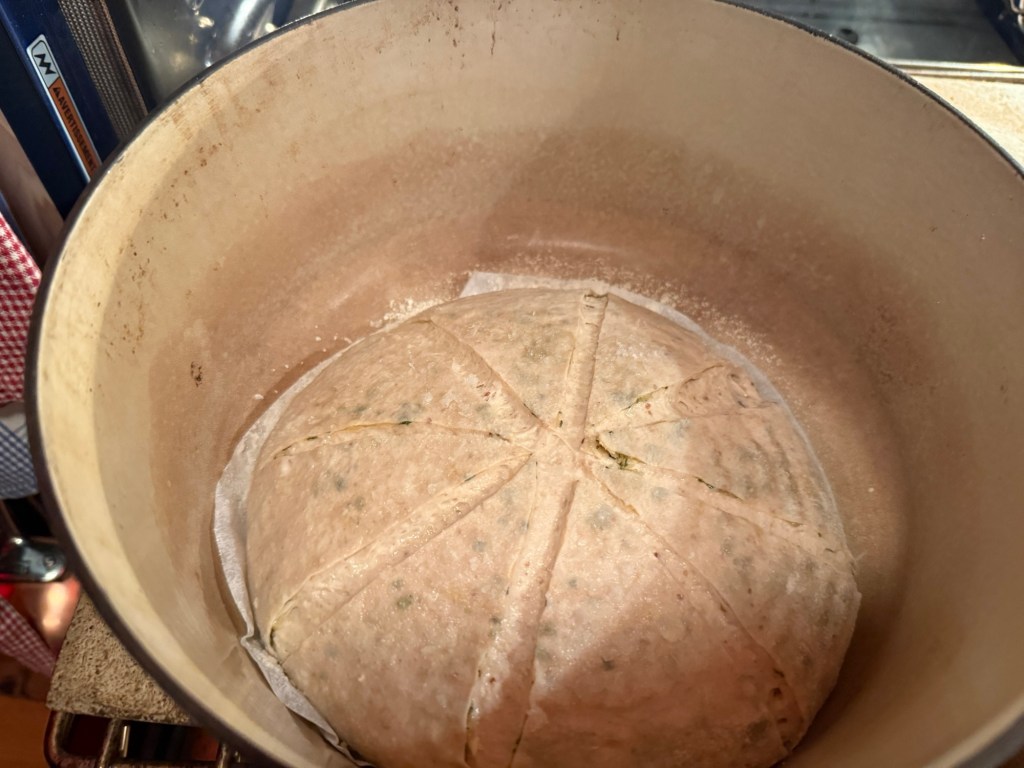
Use those heavy-duty oven mitts. Take the bottom of the Dutch oven out of the oven, drop the scored dough round into the Dutch oven, put the lid back on and place all back in the hot oven..
Bake the loaf: With Dutch oven back inside your oven, reduce the temperature to 450°F/ 230°C, and set a timer for 20 minutes. As your bread bakes, water will escape from the dough. Baking the bread in the closed environment of your Dutch oven ensures that those water vapors are trapped, steaming the bread in the process and allowing the loaf to rise fully.
After 20 minutes, that steam will have done its job. Remove the inverted pot, so the loaf is directly exposed to the oven’s heat. Set the timer for 20 more minutes and let the loaf finish baking. I baked my two loaves together. Generally speaking I bake my loaves to between 198 and 205° F internal temperature at which point I consider them baked. Since I used more whole grain than the recipe called for I baked my loaves another 15 minutes.

Depending upon how caramelized you want your crust, you decide when to pull it out because you are in charge not the recipe and not the oven.
You should let the loaf cool on a cooling rack before cutting it open unless you like a gummy shiny crumb, give it at least an hour. My rule is when the internal temperature has reached whatever my room temperature is, it’s ready to slice.
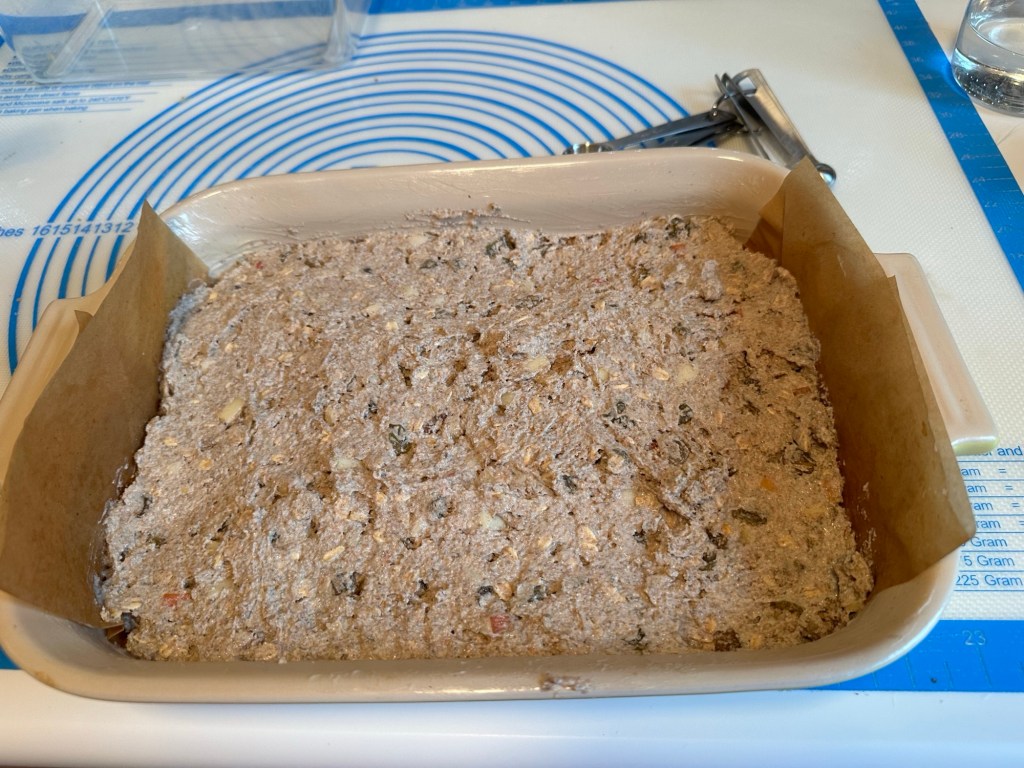
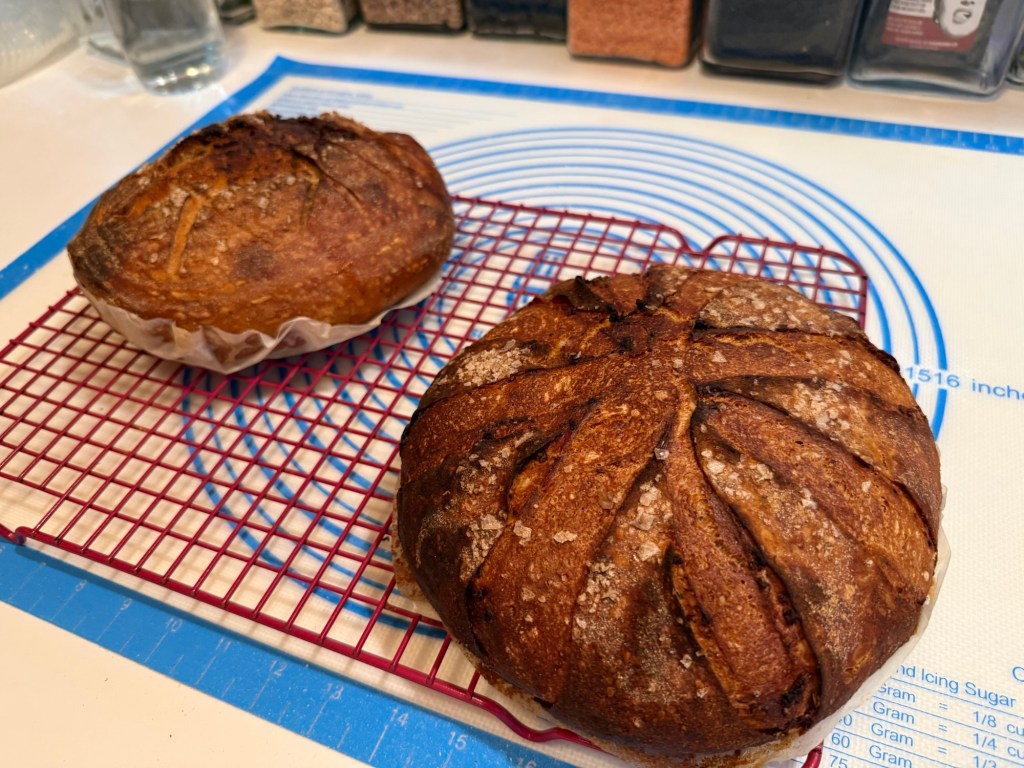
My total weight was 692 grams which I divided into two balls one slightly larger than the other because my bannetons where not equal.
My oval/rectangular loaf did not come out with nice points. I believe if I had more carefully thought through scoring and done it as below:
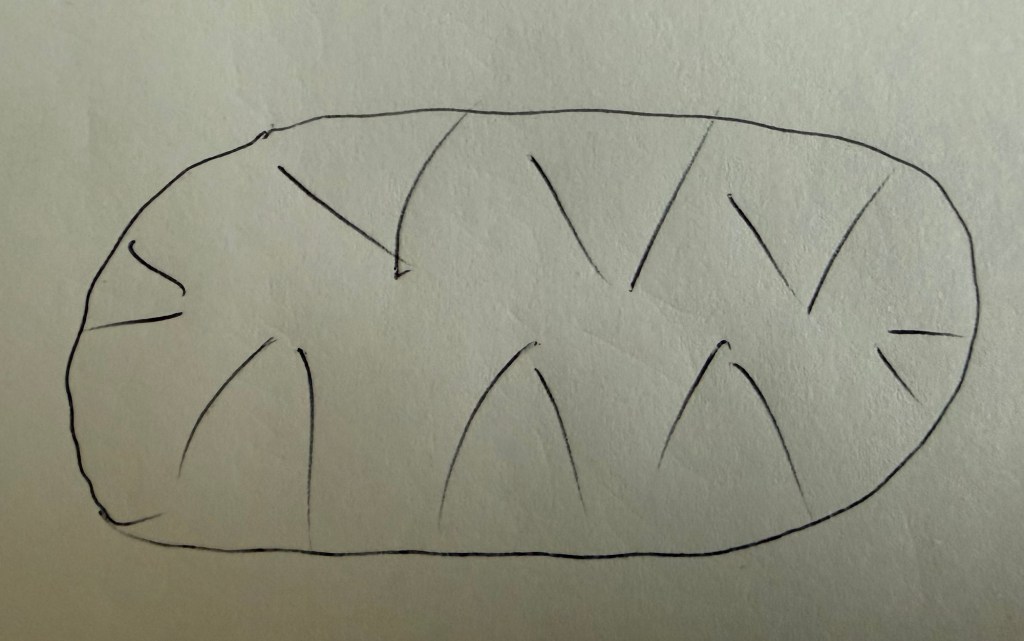
I might have gotten a much better result.
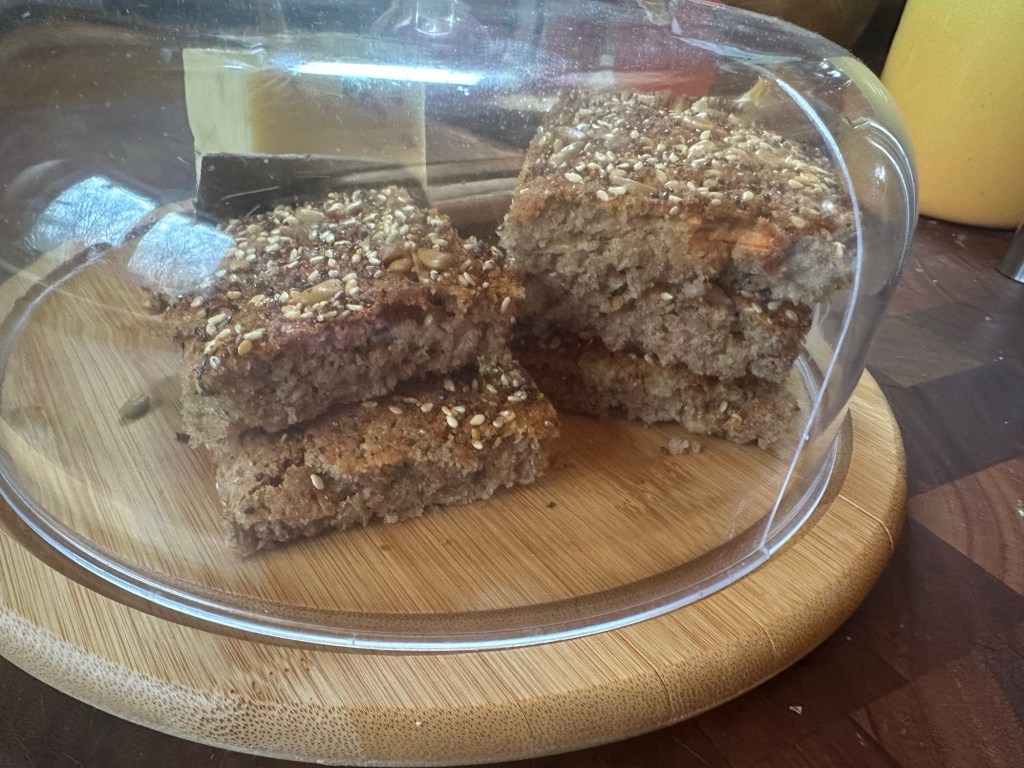
This is truly a marvelous loaf and I know it will be on my table many times in future … like in two weeks for a special occasion.

Happy Baking to all and to all the aroma of fresh bread from the oven.
MyKitchenInHalfCups

And the Bread Baking Babes are:
- Blog from OUR Kitchen – Elizabeth
- Judy’s Gross Eats – Judy
- My Diverse Kitchen – Aparna
- Bread Experience – Cathy
- Thyme for Cooking – Katie
- My Kitchen in Half Cups – Tanna
- Feeding My Enthusiasms – Elle
- Karen’s Kitchen Stories – Karen