Let me tell you, satellite internet is not wonderful. Well, at least the one we have here in the north woods isn’t. When the wind blows, it rains, it snows, and sometimes it’s just beautiful outside … our satellite doesn’t really care … it just randomly takes a rest. That’s what is’s done for the last three days and that’s my excuse for being so late. The only thing I miss about the big city is the high speed internet.
Karen is our Kitchen of the Month. Thank You Karen for the BBB’s very first bread recipe without yeast! Aloo Paratha has long been on my list for baking and we loved these. Shamelessly easy to make. Filling them is only limited by your imagination. Serve as a little bite with wine. Serve as a light lunch. Serve with the evening soup. Be traditional, serve with a warming curry.
BBB Aloo Paratha
Recipe By: Karen of BakeMyDay from how to cook everything by Mark Bittman”
2 cups white whole wheat flour
1 cup sprouted wheat flour
salt
1 teaspoon ajwain* dried thyme, or ground cumin
3/4 cup water
2 tablespoons grapeseed oil, like grapeseed or corn, plus more for brushing the breads
1.1/2 lb. starchy potatoes, peeled and cut in half
1 jalapeño or other fresh hot chile, seeded and minced or more to taste
2 teaspoons ground coriander
freshly ground pepper
juice of 1/2 small lemon
1 clove garlic pressed
3/4 teaspoon smoked paprika
melted butter
*ajwain comes from carom seeds which look like celery but taste like very strong, slightly coarse thyme
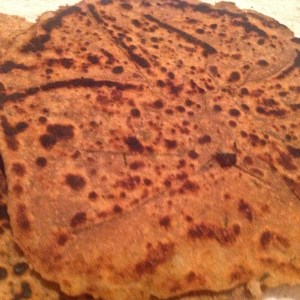
They look like the real Aloo Paratha! done in a skillet.
1. Combine the flours with 1 teaspoon salt and the thyme in a food processor. OK, let’s stop right there. I have a food processor, yes I do. I even gave in and went to the friend’s hanger where he’s kindly allowing us to store a lot of boxes while we try to put in a kitchen and get a storage shed built. Gorn even located said food processor and I unpacked it … or most of it. It seems the critical piece that makes the electrical contact was left out … hopefully packed in another box that will one day be unpacked … but that was not yesterday nor today. I’m reasoning that even today there are a huge number of cooks in India making paratha and even today a huge number are making paratha without the aid of a food processor … SOOOOOOOO like a good Daring Baker (thank you Lisa) and good Bread Baking Babe that I am I forged ahead mixing the dough by hand and even though it took slightly longer than 30-45 seconds (5 minutes actually) I did end up with a dough slightly sticky to the touch and continued on.


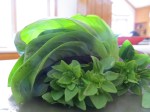
2. Put the potatoes in a large saucepan and add water to cover and a large pinch of salt. Sorry, we have to stop right here again … I don’t have a stove top upstairs in our “kitchen” yet and I just wasn’t willing to run outside in the rain to use the stove downstairs … so I baked the potato, I suppose I could have steamed them in the microwave but I baked them. Oh, and all that green … I added a nice handful of spinach. Turn the heat to high, bring to a boil, and adjust the heat so the mixture simmers steadily; cook until the potatoes are tender, 15 to 20 minutes, then drain. Mash the potatoes along with half (all) the chile, the coriander, a large pinch of salt, some pepper, and the lemon juice; taste and adjust the seasoning (you may prefer more chile; sometimes aloo paratha are quite hot).

Divide

Pull up the sides to make a purse and then flatten, roll thin.

Panni Aloo Paratha
India + Italy


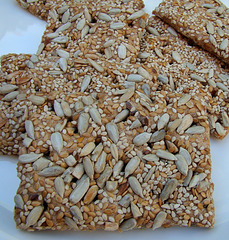
![crunchy-crackers_328_thumb[2]](https://my-kitchen-in-half-cups.com/wp-content/uploads/2013/10/crunchy-crackers_328_thumb2.jpg?w=300&h=270)