I figure the first question here is: What is your secret/individual/unique way to eat peanut butter? The almost universal answer is probably: on a spoon straight out of the jar … and yes I certainly have enjoyed my share of peanut butter that way. But from a very long time ago, 65 years ago, my favorite peanut butter sandwich has always been open face peanut and mayo. In the last year that has morphed into bacon hot chili jam, peanut butter and mayo on toast.
Happy chaos!
One should never worry about pronunciation when bread is this easy to put in the oven and brings smiles when someone takes a first bite.
All together now.
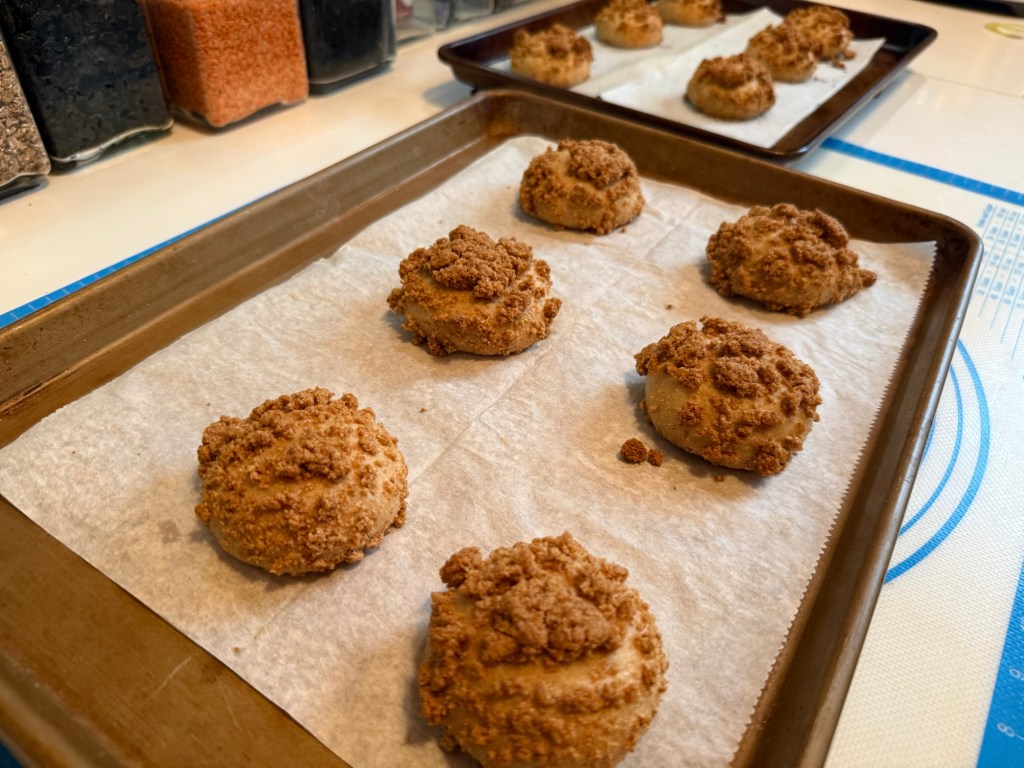
Aparna is our Kitchen of the Month and she will have the full recipe on her site. True to the Babe Code, she gave us lots of room to play with this recipe. Recipes on offering: Aparna adapted this recipe; make it with SourDough; make it NoKnead; Google the title and you can find any number of variations. Filling? Don’t be silly, sweet red bean maybe the traditional but in true Babe Fashion please use your imagination, I certainly did.
For something of a demo on applying the streusel check out this video. BUT what ever you do DO NOT MISS OUT ON THE STREUSEL! This is a winning topping. I have some left in the refrigerator and know I will find another fantastic way to use it.
Change? Fiddle with a recipe? Well of course. In the STREUSEL I replaced cornstarch with oat bran (my theory was oat bran will make it more crumbly, I think it did). I cut any place the recipe called for any kind of sweetener by 5 to 15 grams. To make the DOUGH, I used 140 g white whole wheat flour + 100 g AP flour to replace 238 g AP flour. FILLING I totally ignored any amounts and mixed some canned red beans, peanut butter, bacon hot chili jam and coconut flour to a consistency I could roll into balls.
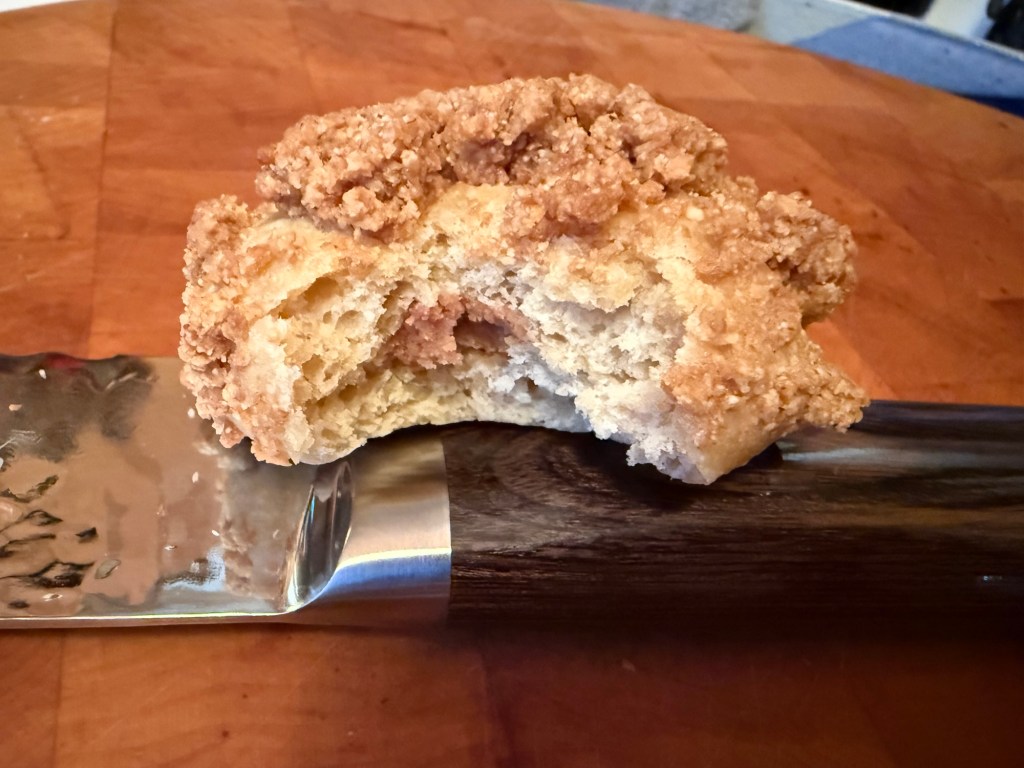
Take a bite … and Smile!!
It’s not really about the filling, it’s all about that streusel topping. Go for it. Bake with us if you dare! Put your own touch on it and Smile!
Going fast …
We would love for you to bake along with us this month and try out these crispy topped rolls. Check out our Facebook group to see the participants’ baking results. If you would like to post your results with a Buddy badge on a blog, let us know in the comments or on the Facebook page.
Long ago and far away, I dreamed a dream … of a Sourdough Croissant Loaf … can there be such a thing?
Leave it to a Babe, in this case it is Cathy of Bread Experience who tuned us onto this one and is Kitchen of the Month.
Did I get any croissant effect? Um, well. You can always count of something unique if you’re coming to a Babe’s Bread Baking Kitchen Table.
Cast Iron bread loaf pan … is that butter?
Yes, dear friends that was butter that baked out of the loaf baked in the special French cast iron loaf pan. I divided Cathy’s recipe and baked one loaf for a friend in a cast iron casserole pan with lid.
Both loaves rose in baskets.
And I put both loaves into the fridge for a slow overnight rise covering them with a shower cap.
Butter baked out of only the one.The casserole pan: NO butter.Kept it frozen until I folded into the dough.I grated frozen butter.With butter folded in and dough now ready to shape.After resting overnight in fridge, turned out of baskets, scored and ready for the preheated pans and oven. You do want to preheat the pans and lids. You will note the special French pan comes with a mesh liner which makes it easy to drop into the super hot cast iron pan and I used a parchment round to drop the other loaf into the casserole cast iron pan.French special cast iron loaf pan.Cast iron casserole pan.Both loaves: Super crust!
I got two beautiful loaves I was very happy to share one with a friend.
Did I get croissant effect?Not so much.Did I care? Not so much! and I think fairly close to what Cathy’s looks like. Just do not compare me with Kelly’s A Messy Kitchen!
Even though so much butter leaked out of the one loaf, they both shared the croissant butter flavor and especially when toasted, the croissant flavor. Why did the one leak and not the other? Was it the liner? OR Was the special French pan so much heavier and so required longer preheating to reach the same heat as the other? OR Was it hotter because it was heavier and absorbed more heat than the casserole cast iron pan? I will try some alternative baking but didn’t have time for this bake.
How much did I change Cathy’s recipe? It’s pretty much a given that a Babe must! So yes I did but all I did was use 50% sprouted rye and 50% bread.
Bake it. There will be no regrets! This is just fabulously tasty!!!
Bake on …
And check out the other Babes bakes as well. I know each will be beautiful and as always Babe unique.
Oatmeal … how do I love you … let me count the ways … #1: Burger Buns
I do love oatmeal.
Super Bun!
Elizabeth – yes that Elizabeth of blog from our kitchen, has given the Babes our June bread, Oatmeal Burger Buns, and let me tell you, this is one not to miss that will be the star of your summer grill … and since I can attest that it works great in the oven and on the indoor grill, the star of your winter indoor grill as well. In fewer words, this is a star keeper. I suggest you check out all the Babes, because we all have our ways with the same recipe.
For my part – my way: in place of Elizabeth’s whole wheat starter, I used 200 grams of my refreshed the night before excited rye starter, in place of all purpose flour, 100 grams sprouted spelt, 20 grams bread flour and 130 grams white whole wheat, I added 20 grams of ground flax seed. I topped the buns with King Arthur’s Everything Babel Topping. I did use the added dry yeast, not sure why. For the ultimate ‘my way’ I added 50 grams of slow cooker caramelized onions! I highly recommend the caramelized onions!
Here’s where I added those caramelized onions!Heirloom Tomatoes.On my stove, top grill.Where’s my burger? Amazing crosshatch!
I think because I added those caramelized onions and all the liquid, my dough required more flour. Because I used whole grain flours, my buns required an extra 15 minutes (30 minute total) in the oven.
Let me count the ways after that first burger: #2 used for avocado toast, then #3 topped with Dishoom’s House Black Daal (page 215 from Dishoom: From Bombay with Love by Shamir Thakrar, Kari Thakrar and Naved Nasir – WOW of a Daal), next #4 topped with mushrooms & spinach, and finally #5 topped with black beans and broccoli!
My notes.
If you bake this we’d love to hear about it. I can just about guarantee you won’t be disappointed and more than likely it will become your routine bun.
Aparna, our kitchen of the month, you may have thought it was hard to find a bread we haven’t baked but honestly even though this little group has been baking for these many years and it does seem like we’ve baked just a huge number of breads, every month I marvel that wow it’s just water yeast flour, the same ingredients as last month BUT it’s just never the same and it NEVER gets boring. Thank you so very much for this introduction to this our 14th anniversary bread.
300 gm mozzarella sliced (thinner slices will work best)
400 gm Ricotta
BREADCRUMB LAYER :
Some chopped scallions
4 to 6 slices of BEEKEEPER’S PAIN DE MIE
100 gm grated Parmesan cheese
50 grams walnuts
Salt to taste
Red chilli flakes or crushed pepper to taste
1 tsp dried oregano
Also two very well oiled round 23cm trays
HOW TO MAKE IT :
Make the Poolish by mixing together in a medium sized bowl the flour, dry yeast, and water until a sticky dough is obtained. Add more water if necessary to achieve this. Cover loosely with a plastic film and leave to rise for about 2 hours. The polish should be somewhat bubbly and have doubled in size.
I mixed the dough by hand. Mix together the flours, water (more or less as required), oil and the poolish. The dough will be sticky. Add the salt and knead till it is soft, very pliable and smooth. Shape it into a round and place it in a bowl greased with olive oil. Cover the bowl loosely and leave it to rise till double in volume. Mine took about 2 and a half hours.
Cook the onions. While the dough is rising, get the toppings ready. Heat the oil in a pan and add the sliced onions. Sprinkle a little salt and cook the onions on low to medium heat until they turn translucent and soft. Do not brown or caramelized them. Take the pan off heat and let them cool to room temperature.
Prepare the breadcrumb mixture. Run the bread slices (with or without crusts) in a food processor to make the crumbs. Put the breadcrumbs in a bowl. Mix together with the oil, salt, red chilli flakes (or crushed pepper) chopped scallions/ spring onions, oregano and grated cheese. The texture should be of loose but moist crumbs.
Once the dough has risen, gently knead to deflate it. Divide it into two equal portions. Press out each portion into a roughly 9-inch circle (or oval) using your fingers. ****Since Aparna and I both seem to think the topping is the show of this bread, next time I will bake mine in a 10 inch or larger pan and make more topping to cover the larger surface area. If the dough feels sticky, oil your fingers lightly. Place in the oiled trays. I used a pie dish. Let the dough rise again, for about an hour till almost double in thickness and quite puffy.
Top with anchovy (maybe one day I’ll try anchovy but not this time), then the cooked onions. Next comes the Ricotta and a hard cheese (I used Parmesan ). Make sure to cover the surface of the dough evenly. Finish layering by spreading the breadcrumb mixture on the top.
Bake the Sfincione at 250C (480F) on the bottom shelf of the oven for about 10 to 12 minutes. The underneath of the bread should become golden and crisp. Then move the pan to the middle shelf of the oven and bake for another 10 minutes or so, until it is crisp and golden brown on the top as well. Remove from the oven and let it cool.
Next time I will use parchment on the bottom so there will be no issue of sticking AND if the bottom seems too moist, I can take it out of the pan and return it to the oven rack for 2 to 5 minutes for crisper texture.
Cut and serve. Leftovers can be refrigerated for up to 2 days. Hahaha. I did give one loaf away but the other loaf we very quickly took care of.
HAPPY ANNIVERSARY TO ALL BABES, PAST, PRESENT AND FUTURE.
We know you’ll want to make Sfincione Bagherese too!
To receive a Bread Baking Buddy Badge to display on your site: make the topped flatbread in the next couple of weeks and post about them (we love to see how your bread turns out AND hear what you think about it – what you didn’t like and/or what you liked) before the 28 February 2022. If you do not have a blog, no problem; you can also post your picture(s) to Flickr (or any other photo sharing site) and record your thoughts about the bread there. Please remember to contact the Kitchen of the Month to say that your post is up.
For complete details about this month’s recipe, the BBB and how to become a BBBuddy, please read:
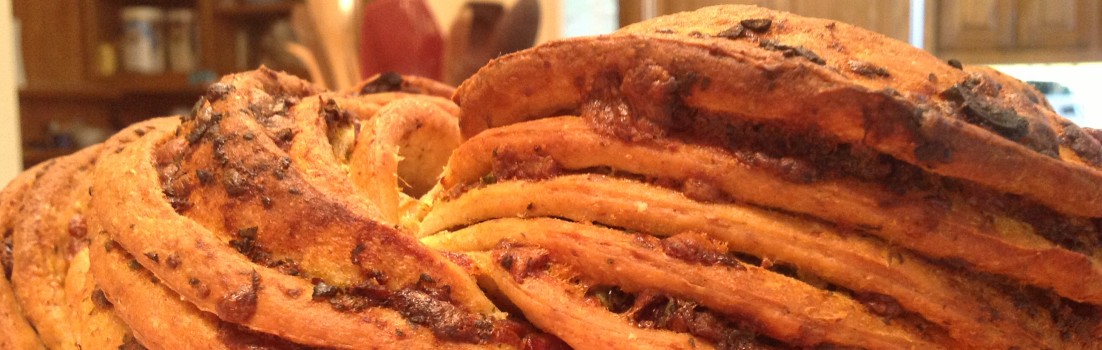
When I first saw the post for January’s Babe bread, I thought here’s a simple easy fun bake perfect for after the holiday crazy actions. A small stuffed roll perfect for just about anytime, anyplace and any occasion. Our host kitchen, FeedingMyEnthusiasms, has a good story on finding this bread you should find fun.
A quick read through the recipe and … Pepperoni…ha, I’m in!
My next reading brought me up short. I left the following on the blog: Ye gad, I’m just looking at that 3/4 cup of sugar! Really with pepperoni?! Sounds terribly sweet. How much sugar does this need? What amount of sugar will change the texture here? Adding this much sugar to something that seems savory is REALLY foreign to me. I get the feeling this is a very Americanized food, we just add sugar to everything.
Simple and easy … Then there was a long discussion of what if you don’t want meat!! That how I happen to have the sautéed mushroom with pepperoni spices idea. VERY good.
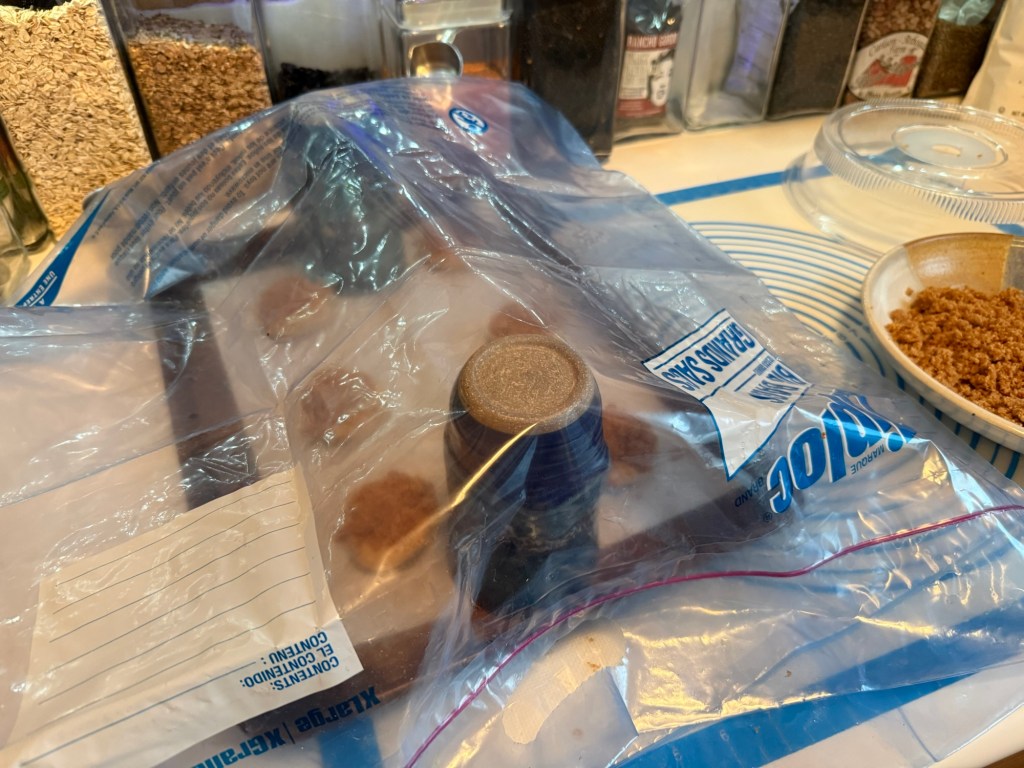
Holy Batman! I made them. Did I follow the recipe? Better than I thought I had on initial inspection but I divided the ingredients in half and only added 20 grams of sugar … and when the dough just wouldn’t come together – fully 3/4 of a cup of flour was not going to incorporate – I threw in the rye sourdough throw out from the night before. I threw that in and it was perfect. This took a full 90 minutes to double. We were having our “pod” friends (pod being like minded fully vaccinated friends) for pepperoni pizza dinner. SOOOO for filling I used pepperoni seasoned baby Bella mushrooms sliced, there were 4 half slices of cooked bacon added to the mushrooms … then there were two dough balls left when I ran out of mushrooms and bacon, perhaps there was a slice or two of cheese as well. The last two dough balls: one I filled with pepperoni and one I filled with ……..see below. These were seriously good 😊!!! They were a terrific appetizer for hungry boys before pizza!
Do we ever know bread? Probably not, just like can you ever have enough bread books? Probably not.
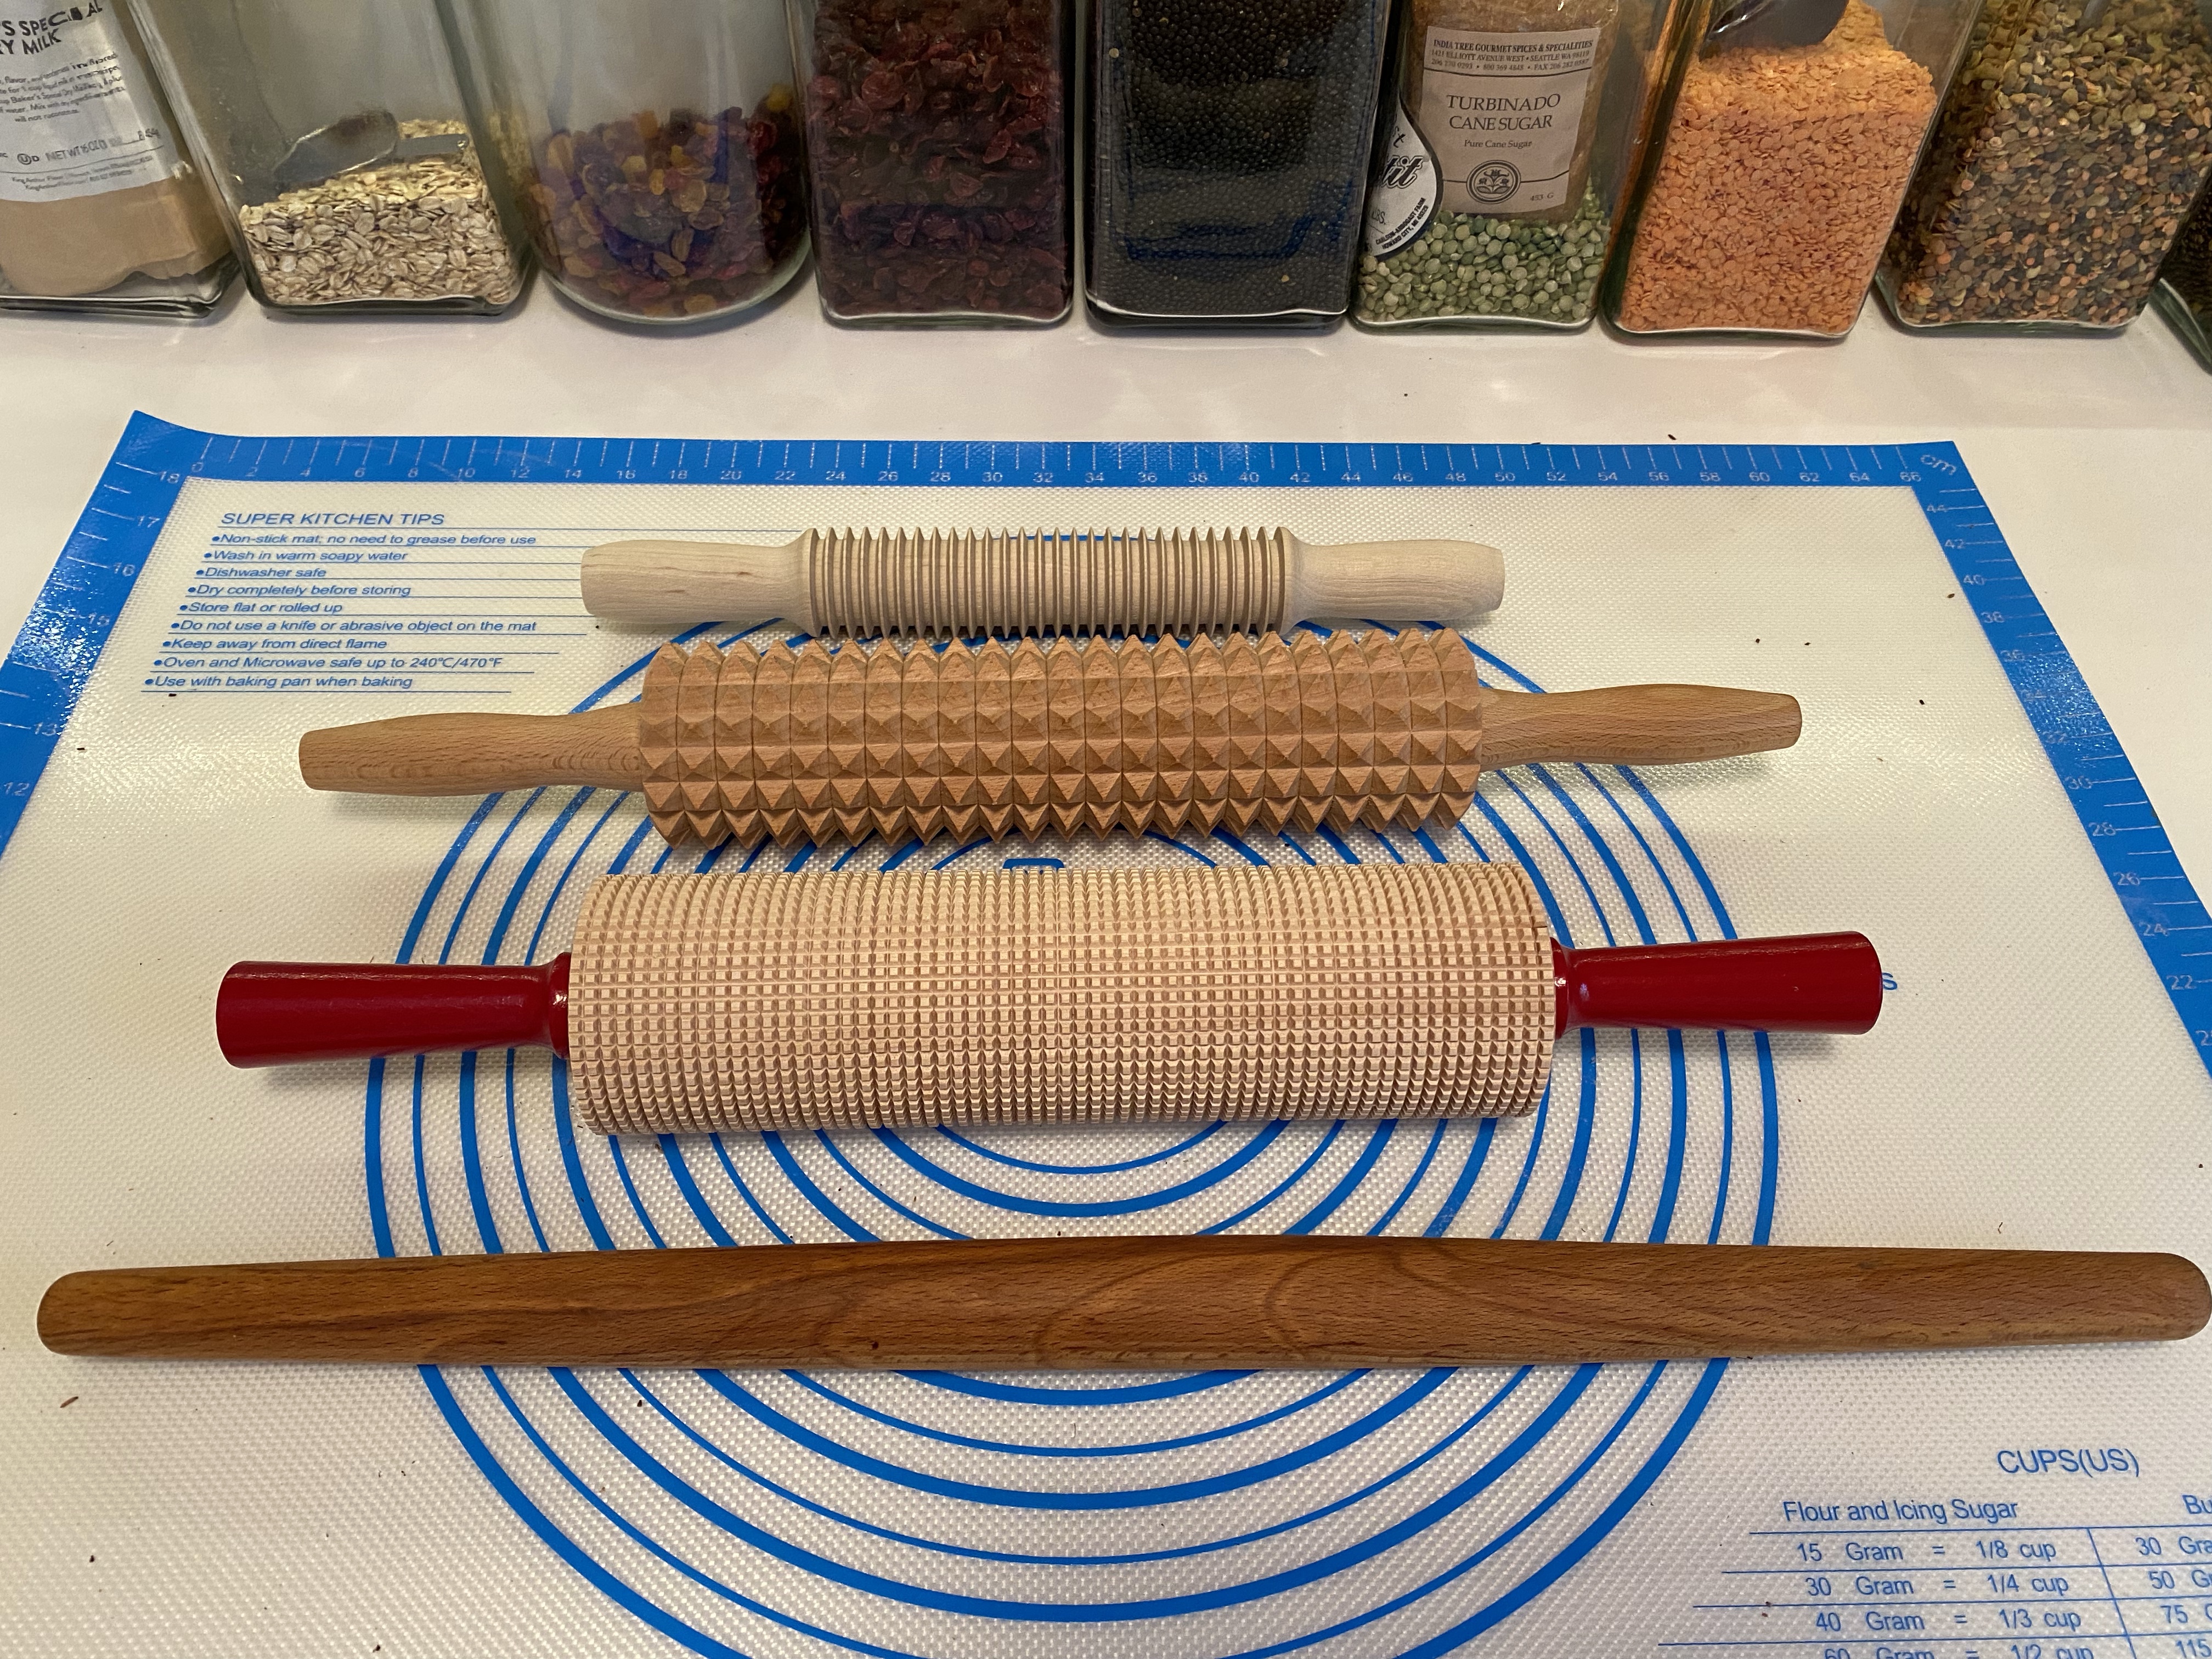
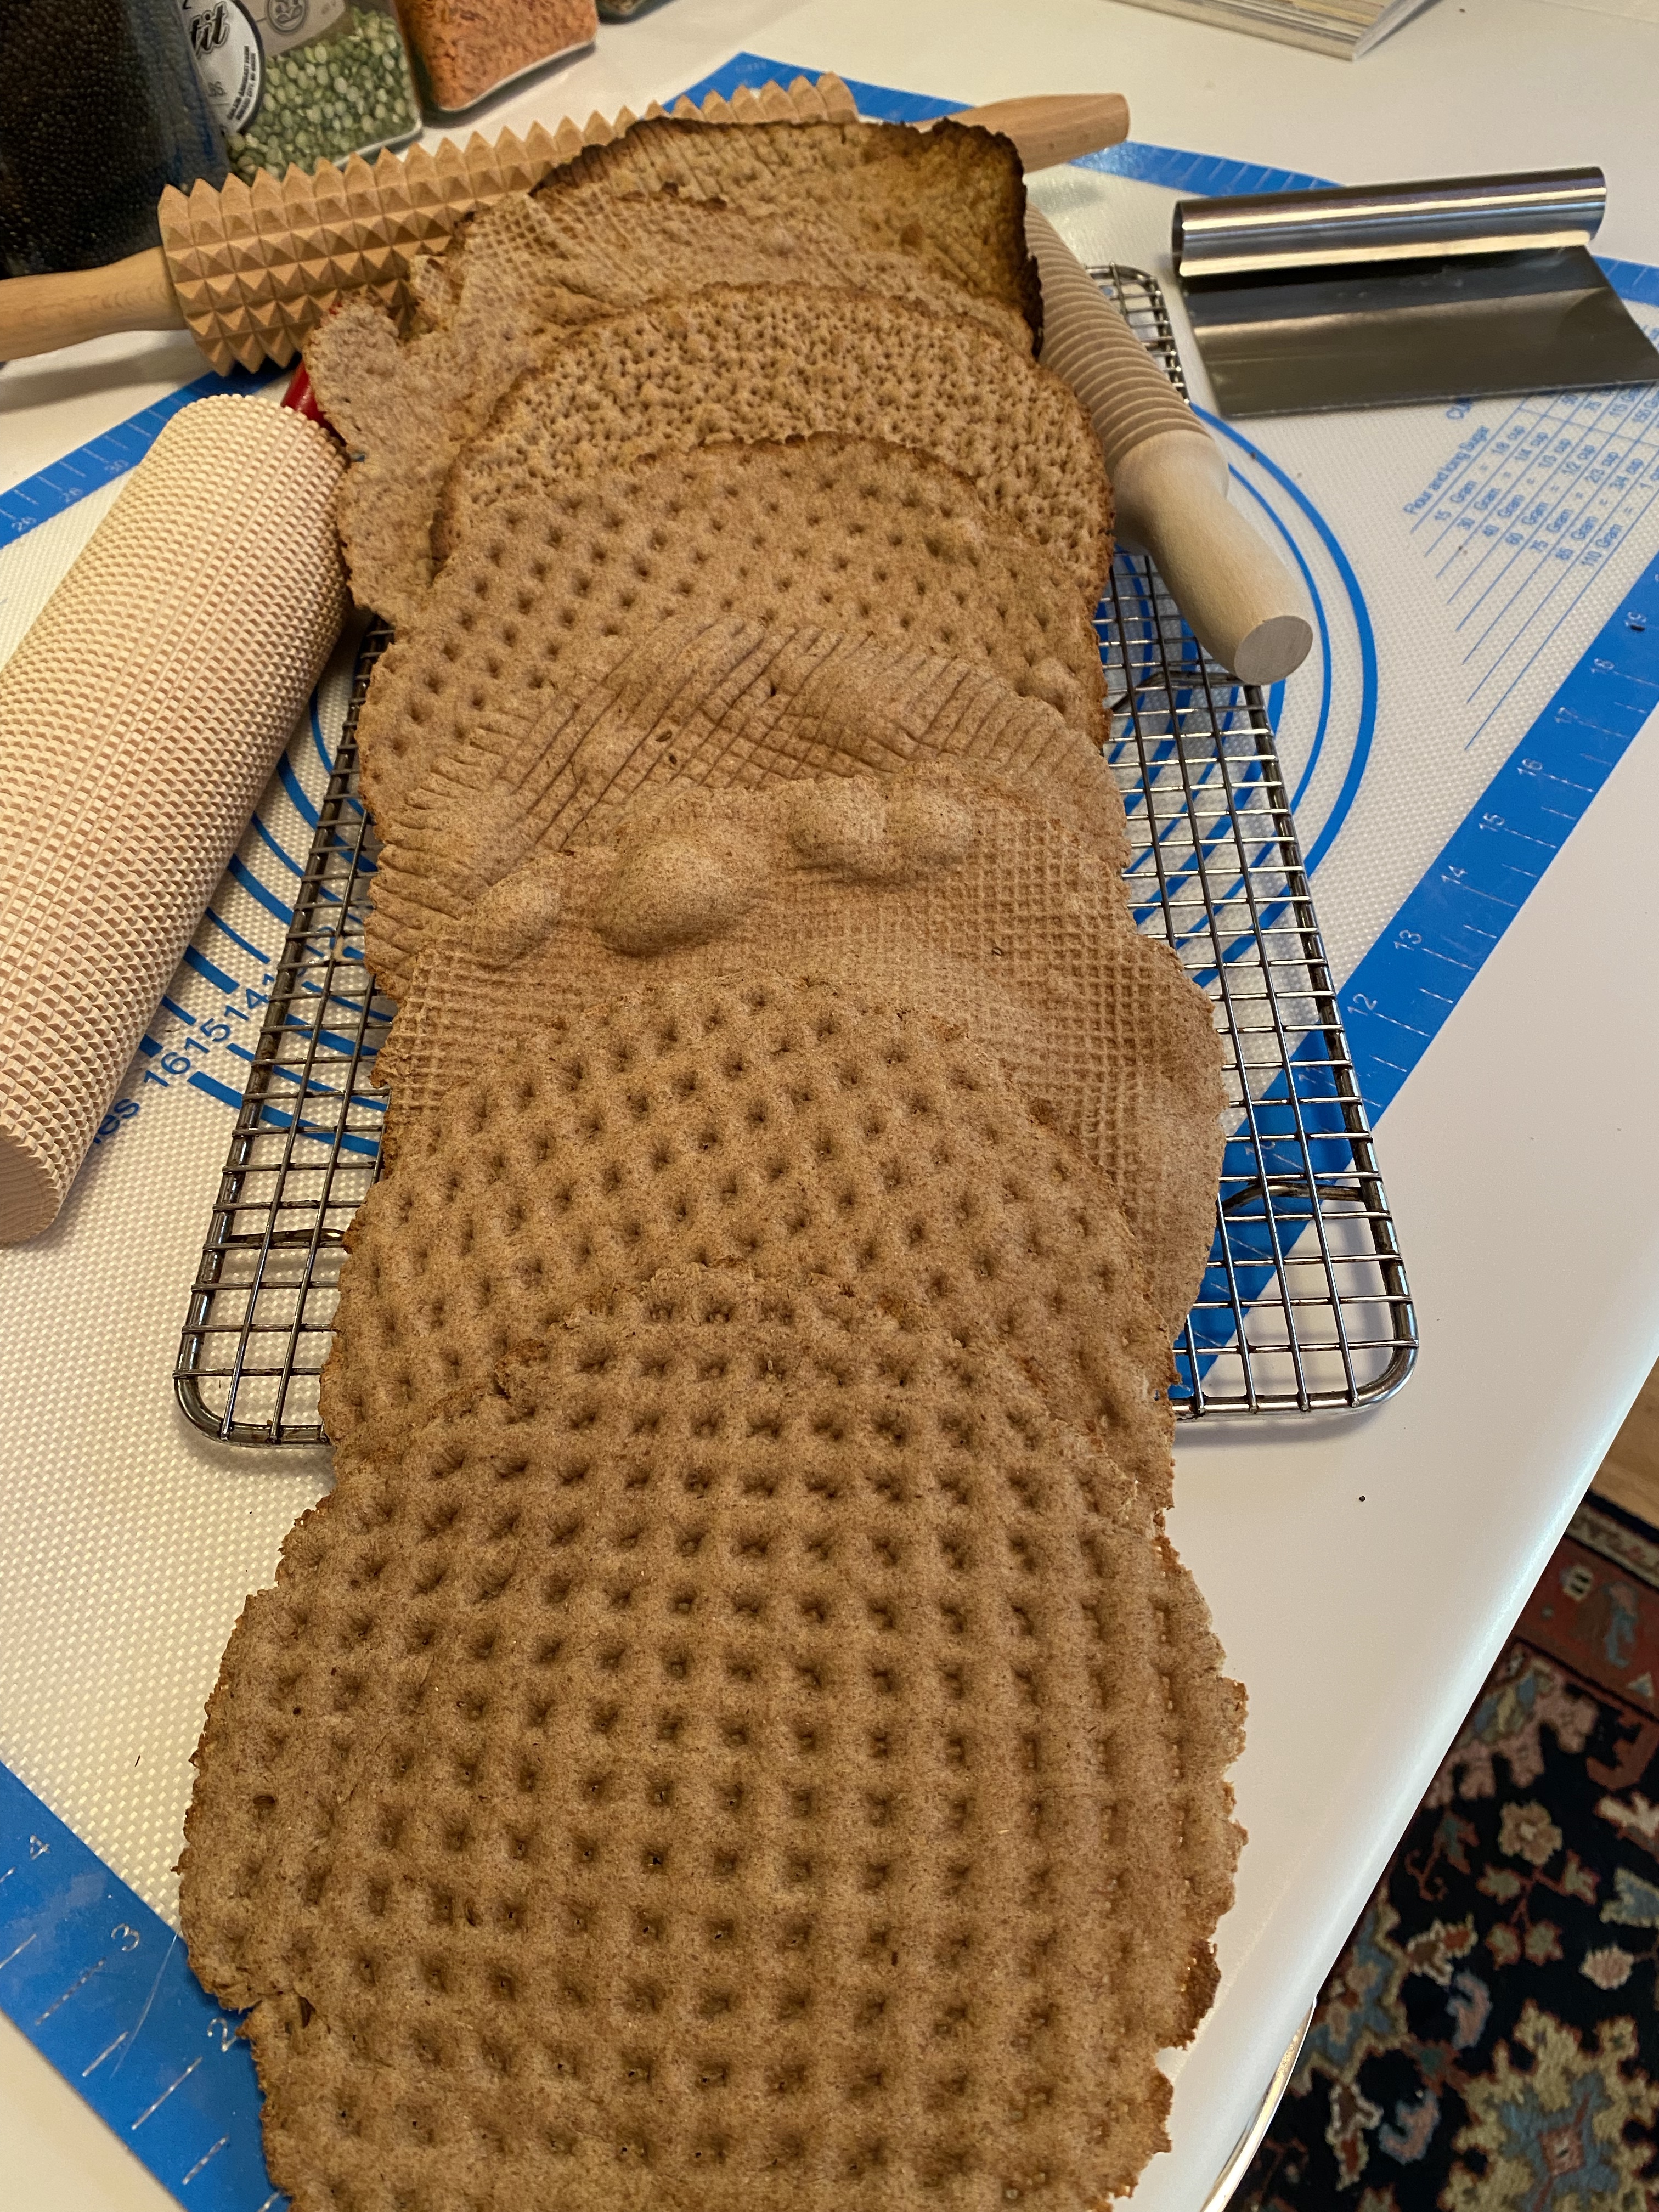
Unbeknownst to me, I’ve had a kuskavel in my rolling pin drawer for any number of years. Didn’t know it’s name. Didn’t know what it’s specialty was. Don’t remember where I came upon it. I just thought it was fun looking and might work on crackers which I tried once. Don’t really remember how that turned out.
This is the Kuskavel. See what I mean about fun looking.
Kelly from MessyKitchen is our host Kitchen of the Month and the bread she brought us is delightful! Flatbread from Sweden. Sounds simple and yes it is. It is one of those simple breads that is so much more than it’s simplicity. Check out Kelly’s site for all the background on this bread!
Before baking powder there was deer horn salt aka baker’s ammonia. And about that deer horn salt aka baker’s ammonia, yes you can get it from Amazon, and yes it really is ammonia, and yes it really smells like ammonia and yes it really SMELLS. BUT somehow it bakes away. I baked this first with baking powder and then took some really deep breaths (not over the baker’s ammonia) after Kelly assured me I would not smell it after baking and gutted it up and baked the recipe using the deer horn salt aka Baker’s ammonia. I could not discern any appreciable difference in texture or bake between the two.
1 g (¼ tsp) deer horn salt (baker’s ammonia), dissolved in water (you can use baking powder instead)
6 g yeast
8 g sea salt
25 g honey
20 g butter
235g milk (dairy or non dairy works fine)
1 teaspoon caraway, crushed in a mortar/pestle)
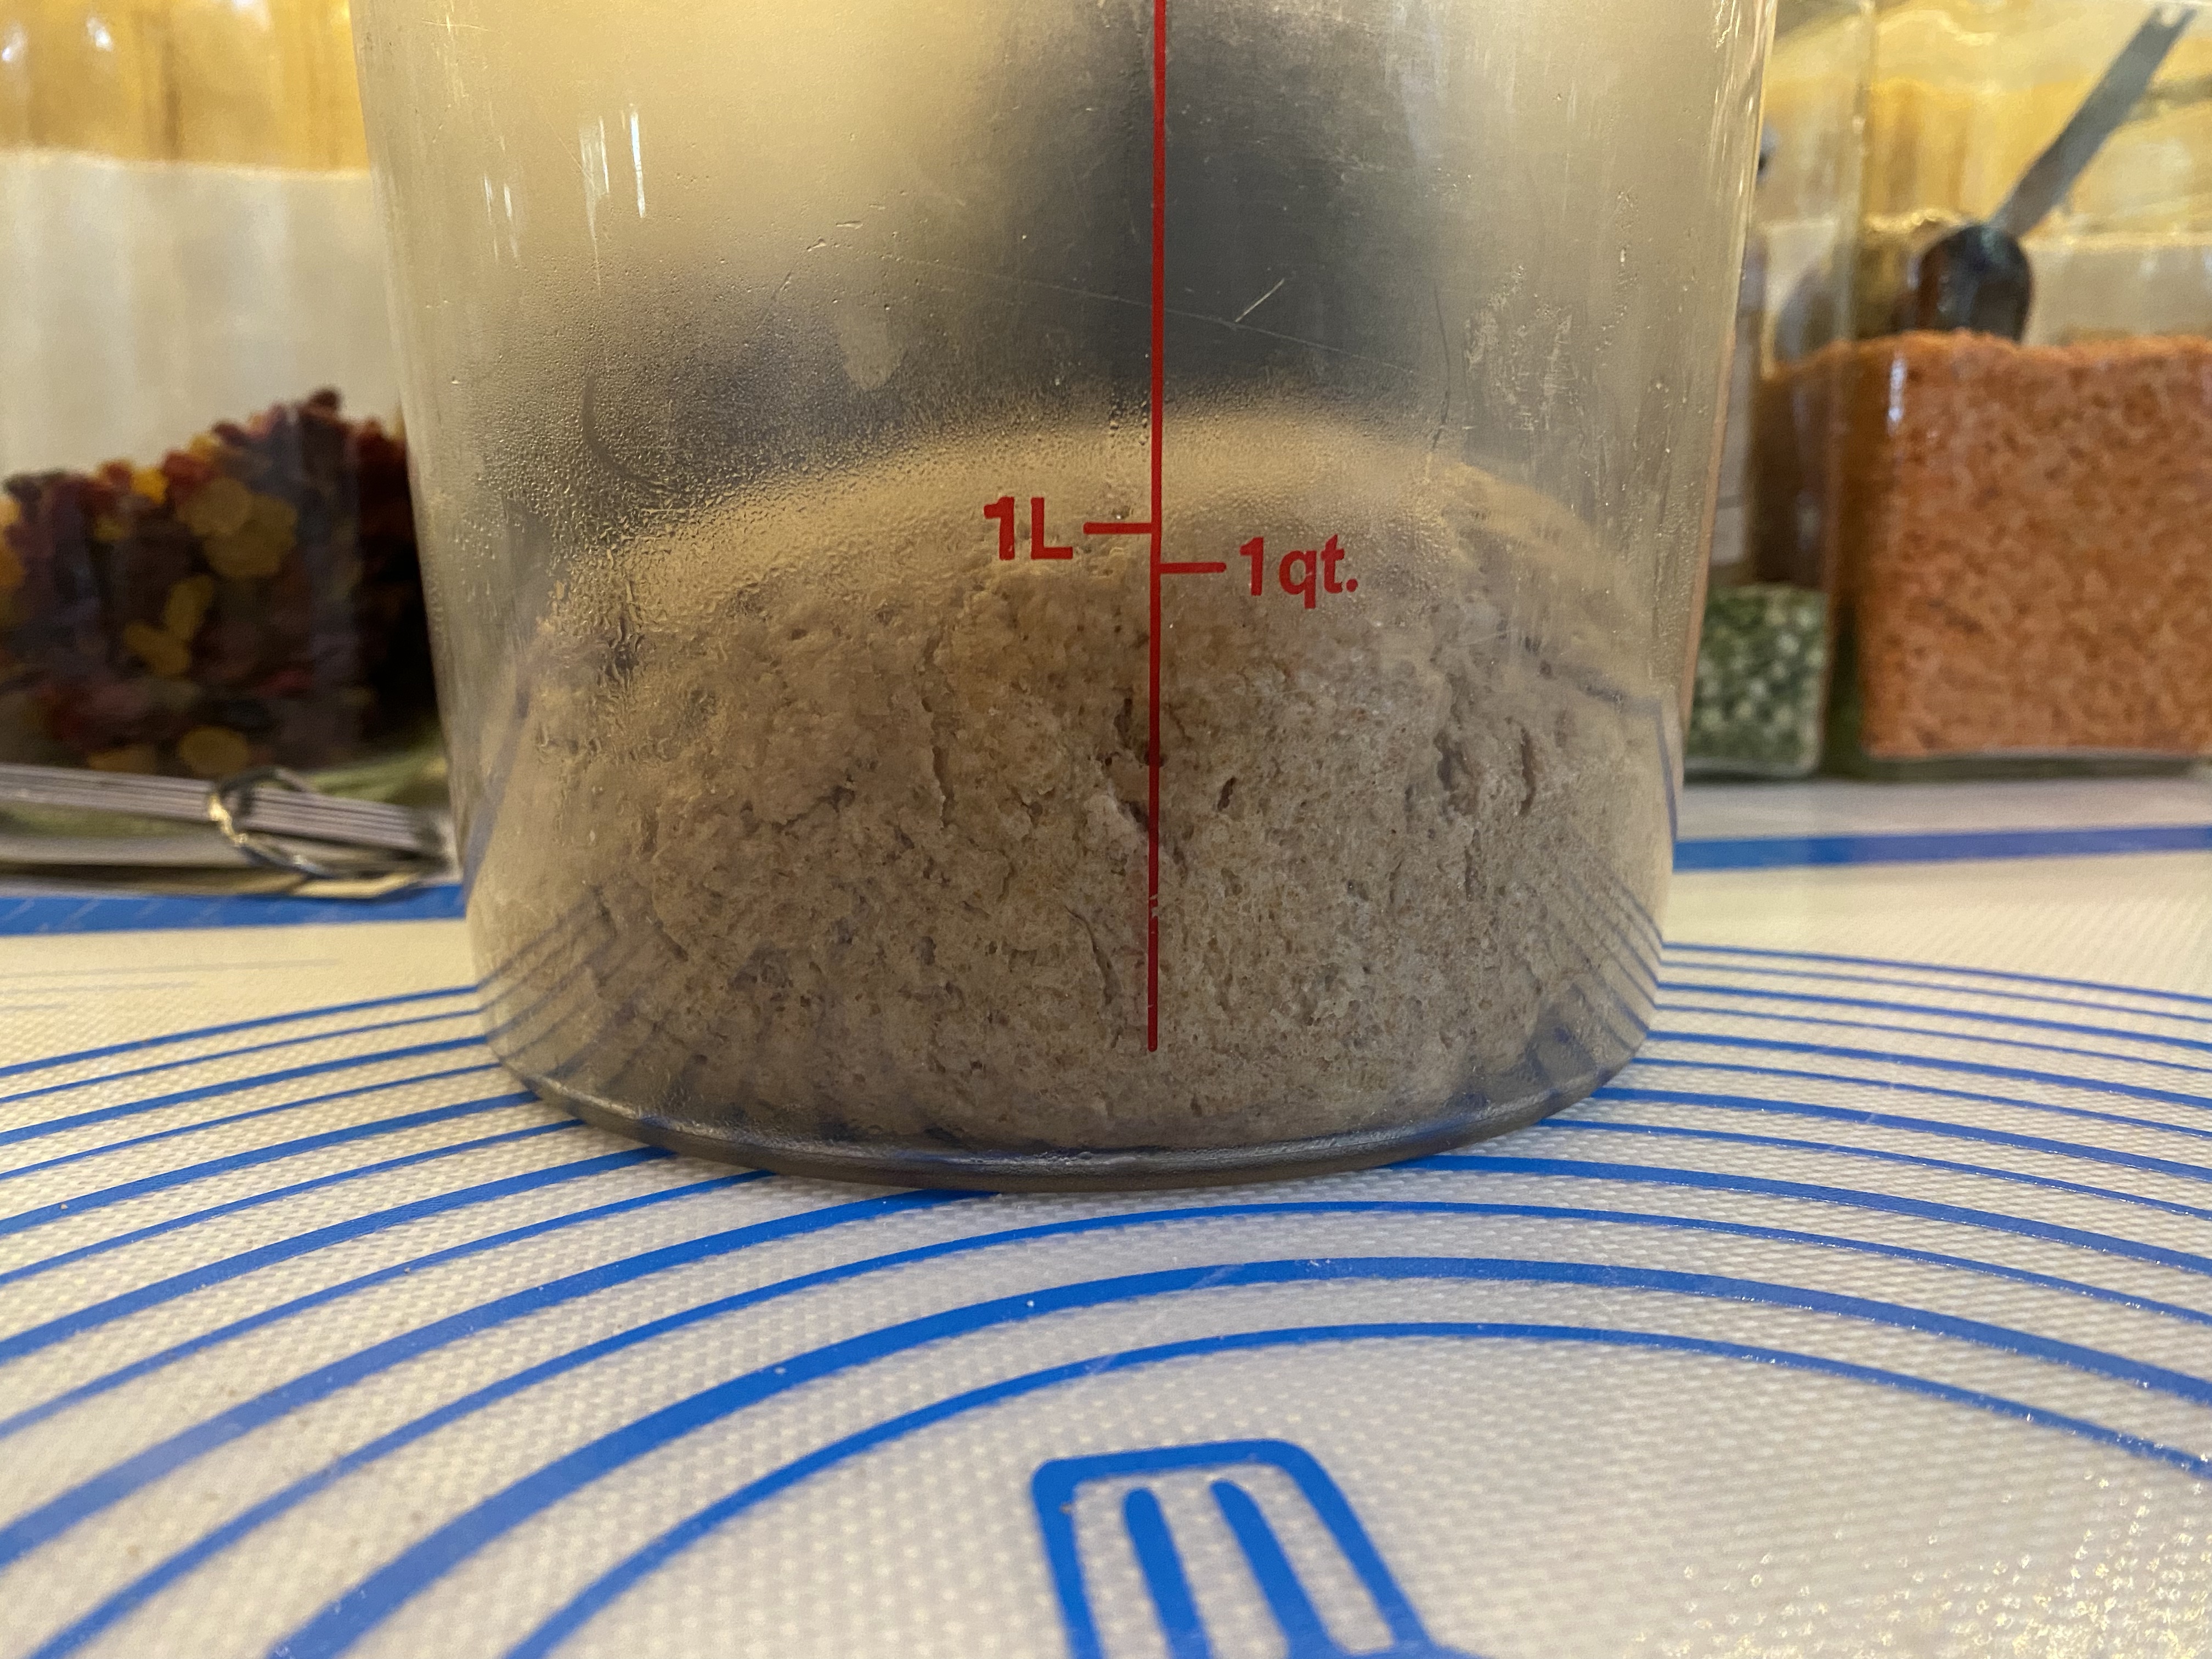
I kneaded a very stiff dough for 15 minutes. I probably added 10-20 grams water while kneading. Let rise for 6 hours at room temperature and knock back and briefly knead twice in the first two hours. (The dough can also be chilled overnight.)
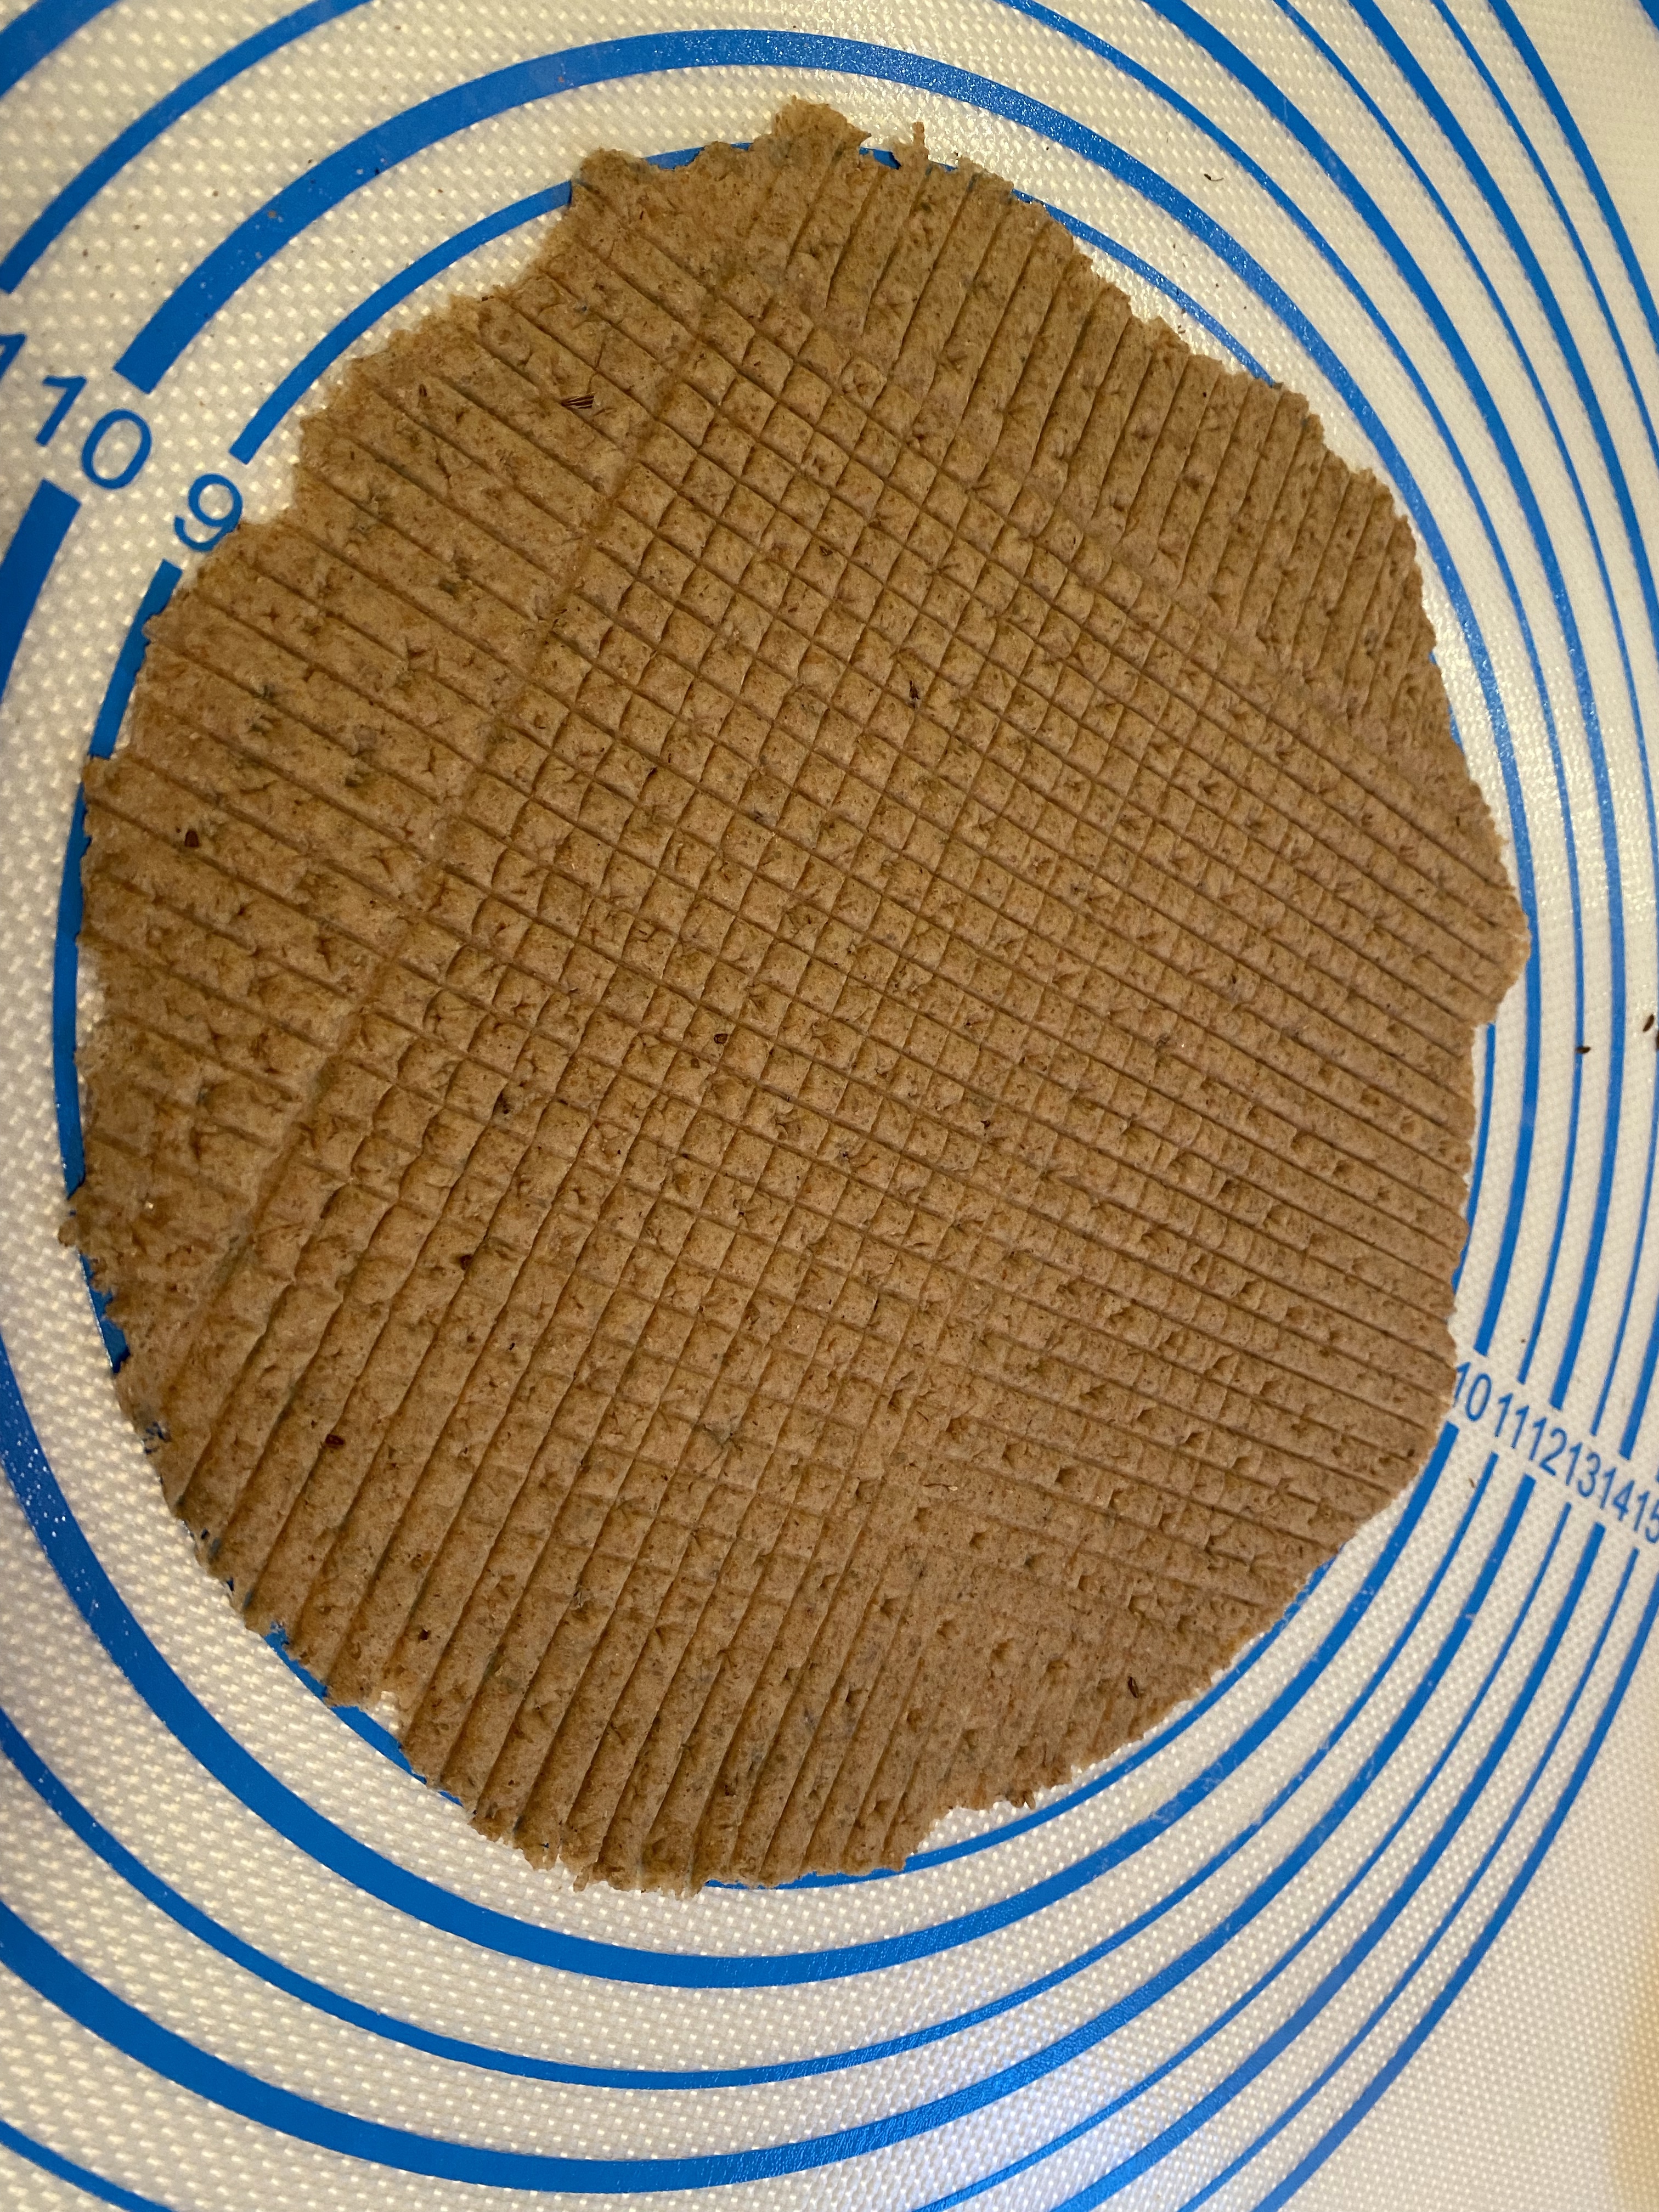
Cut off 85 – 95 gram portions and shape into round balls. Flour lightly and let rise briefly, about 20 minutes. Roll out round dough circles to about 25cm or 9in with a notched or regular rolling pin. Dock well if using a flat rolling pin. If using a grooved pin, follow with the notched pin.
Preheat the oven to the highest possible temperature (500° worked best for my oven & stone. 525° seemed too hot) and ideally place the flatbread directly on a baking stone or steel and bake them into golden, soft flatbread. Bake for 3-4 minutes each. Mine took 4 minutes.
I did play with the flours in this recipe. My first bake was as Kelly wrote it. My second bake I took 100 grams from the whole wheat and make it rye. I used caraway seeds in both those bakes. We enjoyed both and I really couldn’t discern any difference between them. My third bake yesterday I tried 162 grams whole grain barley. The dough never really rose anything like the first two batches. While the dough came together, it remained crumbly throughout the entire process and was even very difficult to get onto the baking stone without cracking and breaking pieces off. In an effort to prevent breaking apart I didn’t roll it so thin and it did a little better.
Haven’t tried any of the barley flatbread yet but we’ll be taking it on a short road trip today and I’ll report back later.
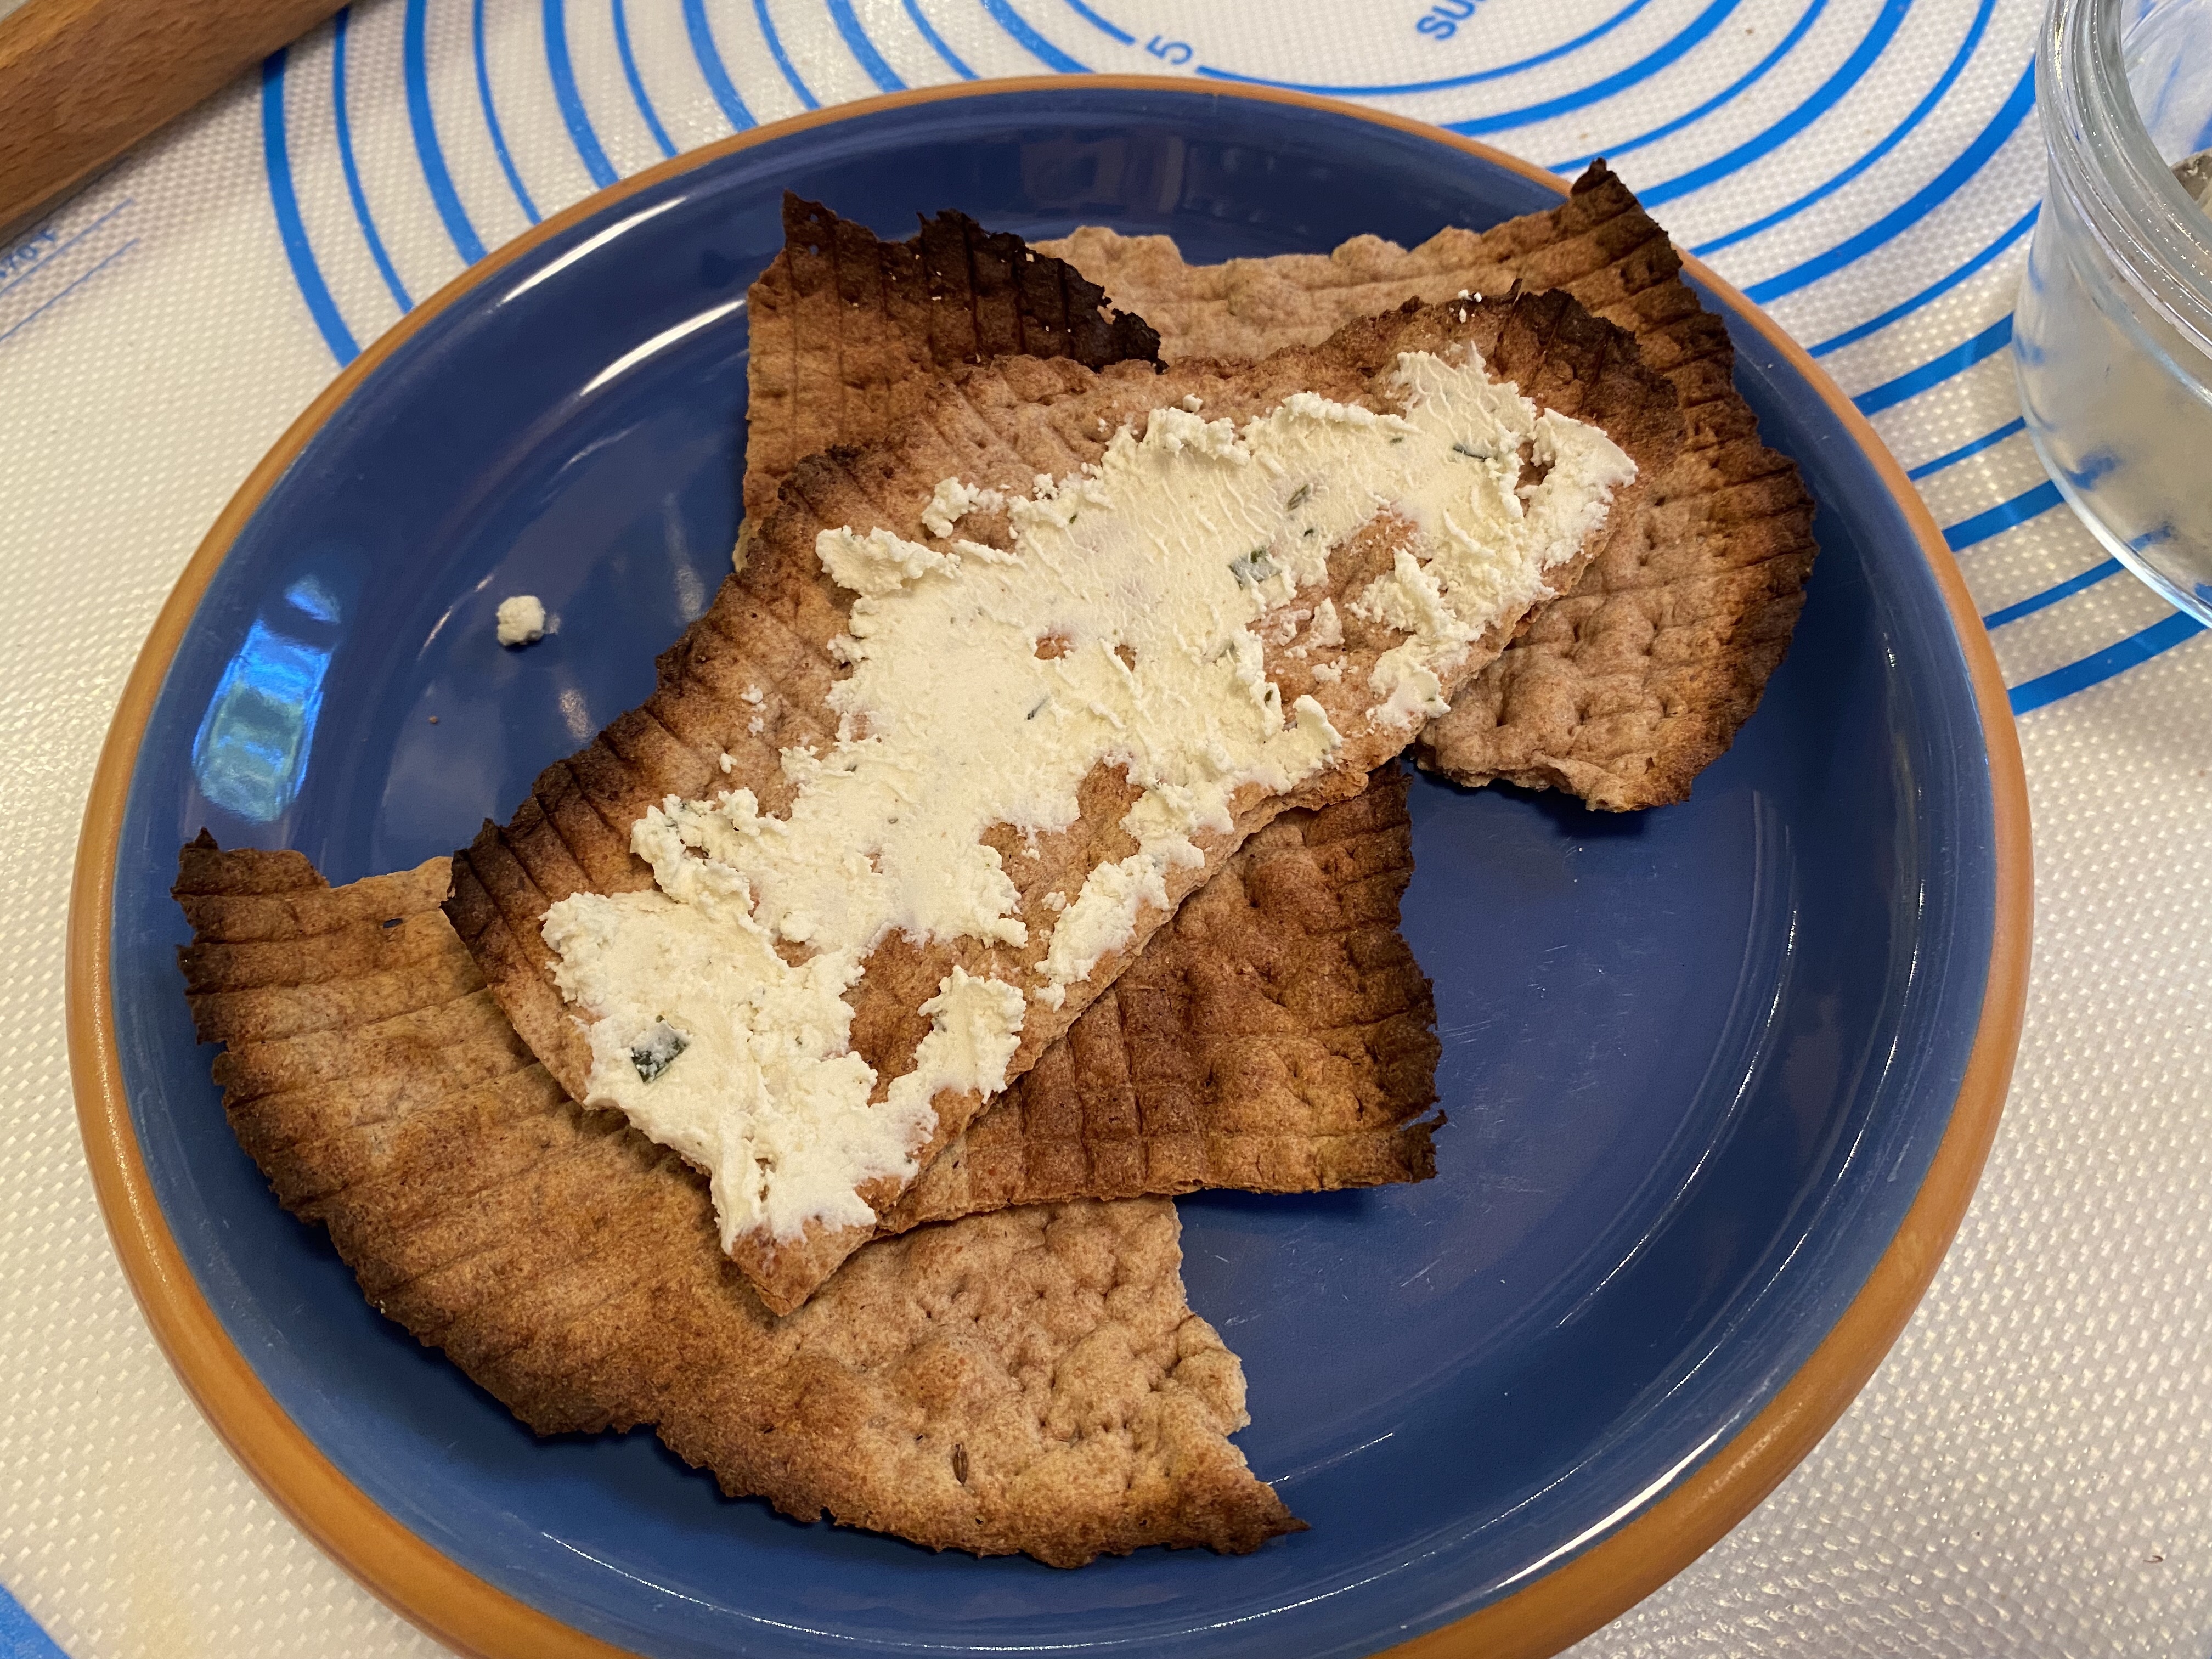
I hope you’ll bake this one with us. Now that days are probably somewhat busy these flat breads are easy and throughly entertaining and engaging! As Kelly says: Hällakakor can be frozen and then reheated straight out of the freezer on a flat toaster, toaster oven, or hot pan. They should refresh well and taste like they were freshly baked out of the oven. They are lovely with butter and jam or syrup, or with mascarpone and jam. They are just as good with an herbed cheese spread or to sop up stew or curry. We would love for you to try out this flat bread with us this month and share how you used it! New recipes are posted every month on the 16th. Check out our Facebook group to see the participants’ baking results during that time.
Do you love the crisp fall air, leaf raking, fresh apples, pumpkin and spices? I’m ready for the air to be cooler and cinnamon is always welcome in my kitchen! Pumpkin has never been my very favorite but in this bread it is perfect. This is the bread of fall. Totally my new favorite with fresh home made apple butter. How can you beat that? OK, well maybe put peanut butter AND apple butter on a slice of this. Yes, maybe that would be even better.
32 grams whole grain rye or other whole grain flour
¾ tsp. / 6 grams fine sea salt
1-2 Tbsp. / 7-14 grams pumpkin pie spice or other spice of choice
200 grams pumpkin puree
2-3 Tbsp. / 40-60 grams maple syrup or honey (I used 40 grams of maple syrup)
Extra flour or water as needed
*Using yeast instead of sourdough.
To make a yeast version, add 1/8 teaspoon of dried yeast to the Pâte fermentée and an additional teaspoon in the final dough and omit the sourdough starter.
First Day: Make the Pâte fermentée
In a large bowl, whisk together the flours and salt. To keep from dirtying another container, make a well in the center and add the starter. Pour the water in gradually and mix using a large wooden spoon or Danish dough whisk until everything comes together to form a smooth ball.
Adjust the water or flour as necessary to make a dough that isn’t too sticky or stiff. Knead the dough until it is soft and pliable and tacky but not sticky, about 4 to 6 minutes.
Cover the bowl with plastic wrap or a kitchen towel, and ferment at room temperature for 1 hour or longer. The dough should swell to about 1 ½ times its original size.
Remove the dough from the bowl and degas it by kneading it gently. Return the dough to the bowl and cover tightly with plastic wrap. Place in the refrigerator overnight or up to 3 days. Or freeze in an airtight freezer bag for up to 3 months.
Next Morning/Afternoon: Make the Final Dough/Bake Bread
The next day, remove the Pâte fermentée from the refrigerator. Cut it into 10 – 12 small pieces using a bench knife or serrated knife. Place the pieces in the bowl of a stand mixer and allow them to warm up for about 1 hour.
In a separate bowl, whisk together the flours, pumpkin pie spice, and salt.
Add the pumpkin puree, maple syrup or honey, if using, to the Pâte fermentée and mix on low speed to break up the pieces. Gradually add in the dry ingredients and continue mixing on low speed until everything comes together to form a coarse ball. Add extra water if necessary to form a soft and pliable dough. ***In retrospect, next time I would add 30-60 grams of water.
Mix on medium speed using the dough hook and adjust with flour if necessary to make a soft, pliable dough that is tacky but not sticky.
Transfer the dough to a clean large bowl and cover with plastic wrap or a kitchen towel.
Let the dough ferment at room temperature for 2 hours. Stretch and fold the dough after the 1st hour, then let it rest the final hour.
Remove the dough to a work surface dusted with flour. Divide the dough into two pieces and shape roughly into rounds. Let them rest on the counter for 15 minutes.
Shape the pieces into tighter boules, and place in lined banneton proofing baskets, between the folds of a heavily floured baker’s couche, or on cornmeal-dusted parchment paper. Let them proof 2 hours or until 1 ½ times their original size.
Proceed to baking or cold ferment the loaves overnight
After the loaves have proofed in the baskets at warm room temperature, proceed to baking, or cover the baskets tightly with plastic wrap and place in the refrigerator overnight to cold ferment.
About 45 minutes before you plan to bake the loaves, place a Dutch Oven or other baking pot on the middle lower rack of the oven and the lid on the upper rack and preheat the baker to 450 degrees F.
While the oven is preheating, cut a piece of parchment paper to fit the bottom of your baker. **** My parchment round was to fit the Dutch Oven with wings.
What has wings and flies in & out of a scorching hot 🥵 Dutch Oven?
Cut four 30-inch pieces of food-safe twine. ****I poured olive oil in the bottom of a ramekin, coiled the twine to fit and soaked the twine in the oil. Place the oiled strings crisscrossed on the parchment. It should look like a pie divided into 8 wedges.
If you cold-fermented the loaves overnight, remove one loaf from the refrigerator at this point.
Invert one of the boules from the proofing basket onto the parchment paper. Center it on top of the string. Tie the strings on top being careful not to pull too tightly to give the loaf room to expand.
Score the loaf uses small slashes, if desired.
****Pull the middle rack with the Dutch Oven on it out of the oven. Using the parchment wings, lift the tied pumpkin loaf (on the parchment paper) and carefully place it in the pot. Pull the lid off the top rack and place on the Dutch Oven. Push the rack into the oven.
Bake for 15 – 20 minutes with the lid on and another 15-20 minutes with the lid off. The loaf should be a rich golden brown all around and register 200 – 205 degrees F in the center of the loaf. It should sound hollow when thumped on the bottom.
****I used the parchment wings to lift the loaf out of the Dutch Oven. Transfer the loaf to a wire rack and let it cool for 1 hour before removing the strings.
To remove the strings, cut them with scissors and carefully pull them a little bit at a time. If you pull too fast, the string could leave residue. A small knife works well for scraping the string off as you go. ****I had no difficulty removing the twine.
After the string has been removed, let the loaf rest on the cooling rack until completely cool.
Repeat the process with the other loaf allowing the oven and baking pot to preheat to 450 degrees F. before baking.
I gave away my pumpkin shaped loaf (yes even with that horrid explosion spot). We kept the loaf for apple butter and peanut butter! Come on, I know you want to bake this.
Bread Experience is the host kitchen this month. If you want to bake along with us and receive your Buddy Badge, please send Cathy a photo and link by October 29th to be included in the roundup.
Send an email to breadexperience at gmail dotcom and include BBB October Submission in the subject. It’s time to get baking!
Raise your glasses to increasing vaccine availability and toasted oats!
YES! Thank You Elizabeth ( blogfromourkitchen) out Kitchen of the Month! (You should know that every month, Elizabeth is the Babe who does the graphic magic to create our unique logo for each bread.) This is certainly a winner in our virus snow bound abode.
Toast these oats in a skillet not the oven! YES!! Oh and I do appreciate you have to stand totally at attention at the stove to avoid catastrophe but you have to keep an eye on the oven as well and the stove top for me took all of 5 minutes 30 seconds.
Toasted Oats Bread ~ BBB
Leavener
60 grams whole wheat flour
60 grams water
40 grams starter from the fridge (about 30 grams)
Oats
100 grams rolled oats, toasted
110 grams boiling water
Actual Dough
100 grams 100% organic whole wheat flour
400 grams unbleached all-purpose flour
5 grams wheat germ
5 grams rye chops
8 grams diastatic malt
325 grams water
all of the leavener from above,
10 grams salt + 25 grams water
all of the rolled oats mixture from above
Topping (optional)
A rough looking dough.
Rolled oats
Leavener:In the evening of the day before making the bread: Put the starter, flour and water into a smallish bowl. Mix with a wooden spoon until the flour is stirred in well. I used a bread whisk. Cover the bowl with a plate (I use a shower cap) and set aside overnight in the oven with only the light turned on. Unless it is ridiculously hot in the kitchen. In that case, leave the oven light turned off.
Prepare the Oats: Pour rolled oats into a dry cast iron frying pan and place it over medium high heat, stirring with a wooden spoon from time to time. It takes about about 7 minutes to toast the oats. (They smell wonderful!) (Previously when I’ve toasted oats I’ve done it in the oven. Toasting them in a skillet, gives you much more control and resulted in a uniform darkening color and much better flavor enhancement. Henceforth, I will be toasting in a skillet.) Transfer the toasted oats into a medium-sized bowl and pour boiling water over top. Cover with a plate and leave overnight in the oven with the leavener.
Mix the doughIn the morning of the day you will be making the bread: When a small forkful of the leavener floats in a small bowl of room temperature water (I have never tried this), you can go ahead and mix the dough: Sift the whole wheat flour into a large mixing bowl, reserving the bran for after shaping.I did not do the sifting. Add all-purpose flour, wheat germ, malted wheat chops (I thought I didn’t have malted wheat chops, turns out I did, used rye chops and some diastatic malt), and 325 water to the sifted whole wheat flour. Stir with a wooden spoon. (Again I used my bread whisk) Set aside for a moment.
Weigh the salt and 25 grams water, whisking it together in a small bowl. Set this bowl aside in the oven with only the light turned on.
Add the leavener to the large bowl. Use a dough whisk or wooden spoon to mix these ingredients together to make a rough dough. Cover the bowl with a plate (or shower cap) and leave on the counter for about 30 minutes.
Adding the salt: Pour the salt mixture over the dough.
Kneading: Use one of your hands to squish the salt and water into the dough; use the other hand to steady the bowl – this way you always have a clean hand. At first the dough might be a bit messy and seem like it’s coming apart. Persevere. Suddenly, it will seem more like dough than a horrible separated glop. Keep folding it over onto itself until it is relatively smooth. Cover with a plate and leave to rest for about 30 minutes.
Adding the oats and first stretching and folding: Add the oats overtop. (First time I baked this, I had already added the oats. Since the first time I toasted oats in the oven, the color was altogether different. Ultimately, I don’t think the timing of adding the oats made much difference.) Turn the bowl as you fold and re-fold the dough into the center, to distribute the oats. Cover the bowl with a plate and leave on the counter (or if the kitchen is cool like ours in winter and spring, into the oven with only the light turned on).
Continuing to stretch and fold: Repeat the folding step about 3 times in all at 30 minute intervals. After the final time of folding, leave the covered bowl in a draft free area until the dough has almost doubled.
Pre-shaping:Scatter a dusting of all-purpose flour on the board and gently place the dough on the flour. Fold the dough over in half, gently patting off any extra flour that might be there. Turn the dough a quarter turn and fold in half again. Continue turning and folding in half until the dough is shaped in a ball. Leave it seam side down on the board and cover with a large overturned mixing bowl (or a tea towel) and let rest for about 30 minutes.
Prepare the brotform: Liberally coat the insides of a brot-form with rice flour.
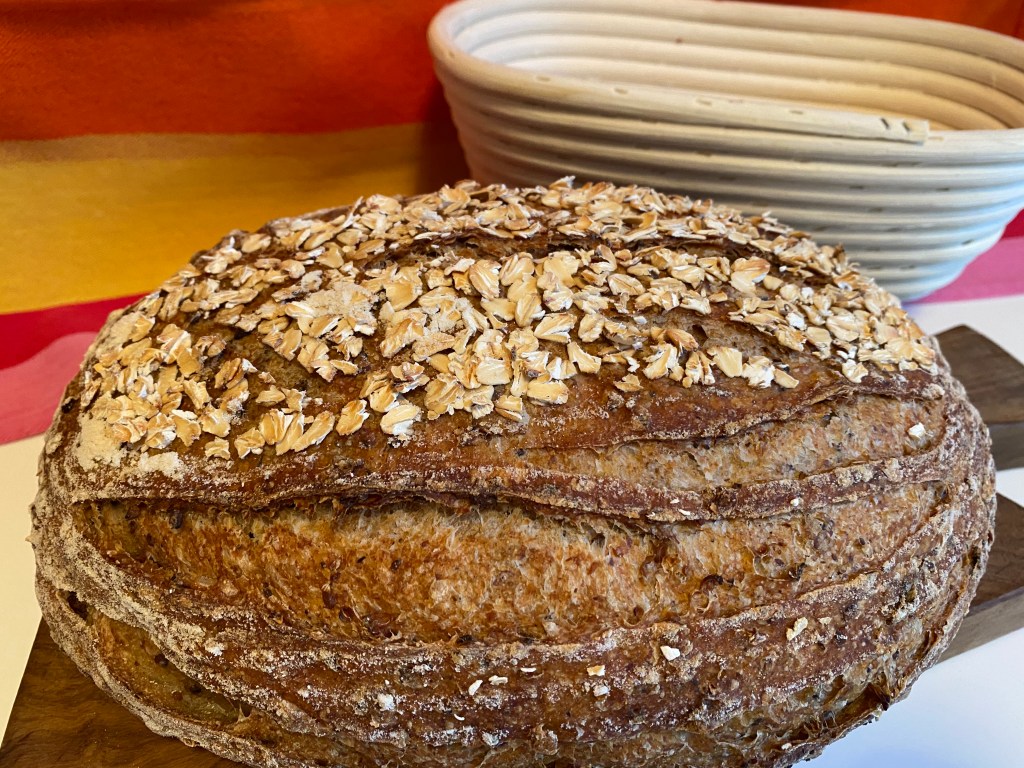
Shaping and adding optional topping: Scatter a very light dusting of flour on top of the round. Gently press down with the palms of your hands to create a disc that is about 4 centimeters deep. Carefully turn the disc over. Without breaking the skin on the bottom, use the dough scraper to fold the dough in half. Turn the dough a quarter turn and continue folding until a ball is created. Leave it seam side down and use the sides of the dough scraper to tighten the dough ball further. Once it has been tightened, wet your hands and rub them gently over the top. Scatter quick oats overtop. Now carefully put the shaped loaf seam-side UP into the brotform. Scatter the reserved bran evenly onto the seam area. Cover with the tea towel or an overturned mixing bowl and let sit for an hour or so to allow the loaf to almost double. “Almost” is the key here….
Preheating the oven: To know when it’s time to bake, run your index finger under water and gently but firmly press it on the side of the bread. If the dough springs back immediately, recover the bread and leave it on the counter for another 15 minutes of so. If the dough gradually returns back after being pressed, leave the bread on the counter. Put a baking stone on a lower shelf of the oven. Place a cast-iron combo cooker (or lidded casserole dish) on the middle shelf and preheat the oven to hot (we set ours to 450°F). (I opted for an oval brotform, without a cast iron oval large enough to bake it in, I baked the loaf on parchment paper, pushed it onto the hot baking stone in the oven and covered it with a very large stainless bowl.)
Scoring: When the oven is thoroughly preheated about fifteen minutes later, transfer the round into the hot shallow pan of the combo-cooker. I adapted scoring to the oval shape I had. Using a lame, sharp knife, or scissors, score the bread in the pattern you like.
Baking: Bake for 30 minutes with the lid on. After 30 minutes, remove the lid and, without stopping to stare in amazement at the amazing oven spring … actually I could not help but at least momentarily stare in amazement at the oven spring, close the oven door to continue baking for another 30 minutes, until the crust is a lovely dark golden brown and the bread sounds hollow when knuckle-rapped on the bottom. (Internal temperature probe showed 204°F.)
Cooling: When the bread has finished baking, remove it from the oven and allow it to cool on a footed rack before slicing and eating; the bread is still cooking internally when first removed from the oven! If you wish to serve warm bread (of course you do), reheat it after it has cooled completely: To reheat any uncut bread, turn the oven to 400°F for 5 minutes or so. Turn the oven OFF. Put the bread into the hot oven for about ten minutes. This will rejuvenate the crust and warm the crumb perfectly.
Yes, this does look like an involved recipe. Yes, there are a number of steps. Yes, because it looks long, it looks difficult. The actuality is the single steps are spread out over time but are simple to execute with long stretches where you do whatever you like and a single step takes only a short bit time.
Do those short steps get you to a worthwhile goal … what a very foolish question, My answer is an emphatic YES!!! We would love to hear your answer:
I believe you should and will want to make toasted oats bread too! To receive a Baking Buddy Badge to display on your site, post about your toasted oats adventure in the next couple of weeks (we love to see how your bread turns out AND hear what you think about it – what you didn’t like and/or what you liked) before the 29 January 2021.
» Remember to include your name and a link to your post
» Please type “BBB January 2021 bread” in the subject heading
Now about next month…This little group started in February 2008 that means that next month we’ve been around … It’s our Anniversary! And for the first time ever I’m giving you a hint for next month’s bread. We’ll be playing around with…
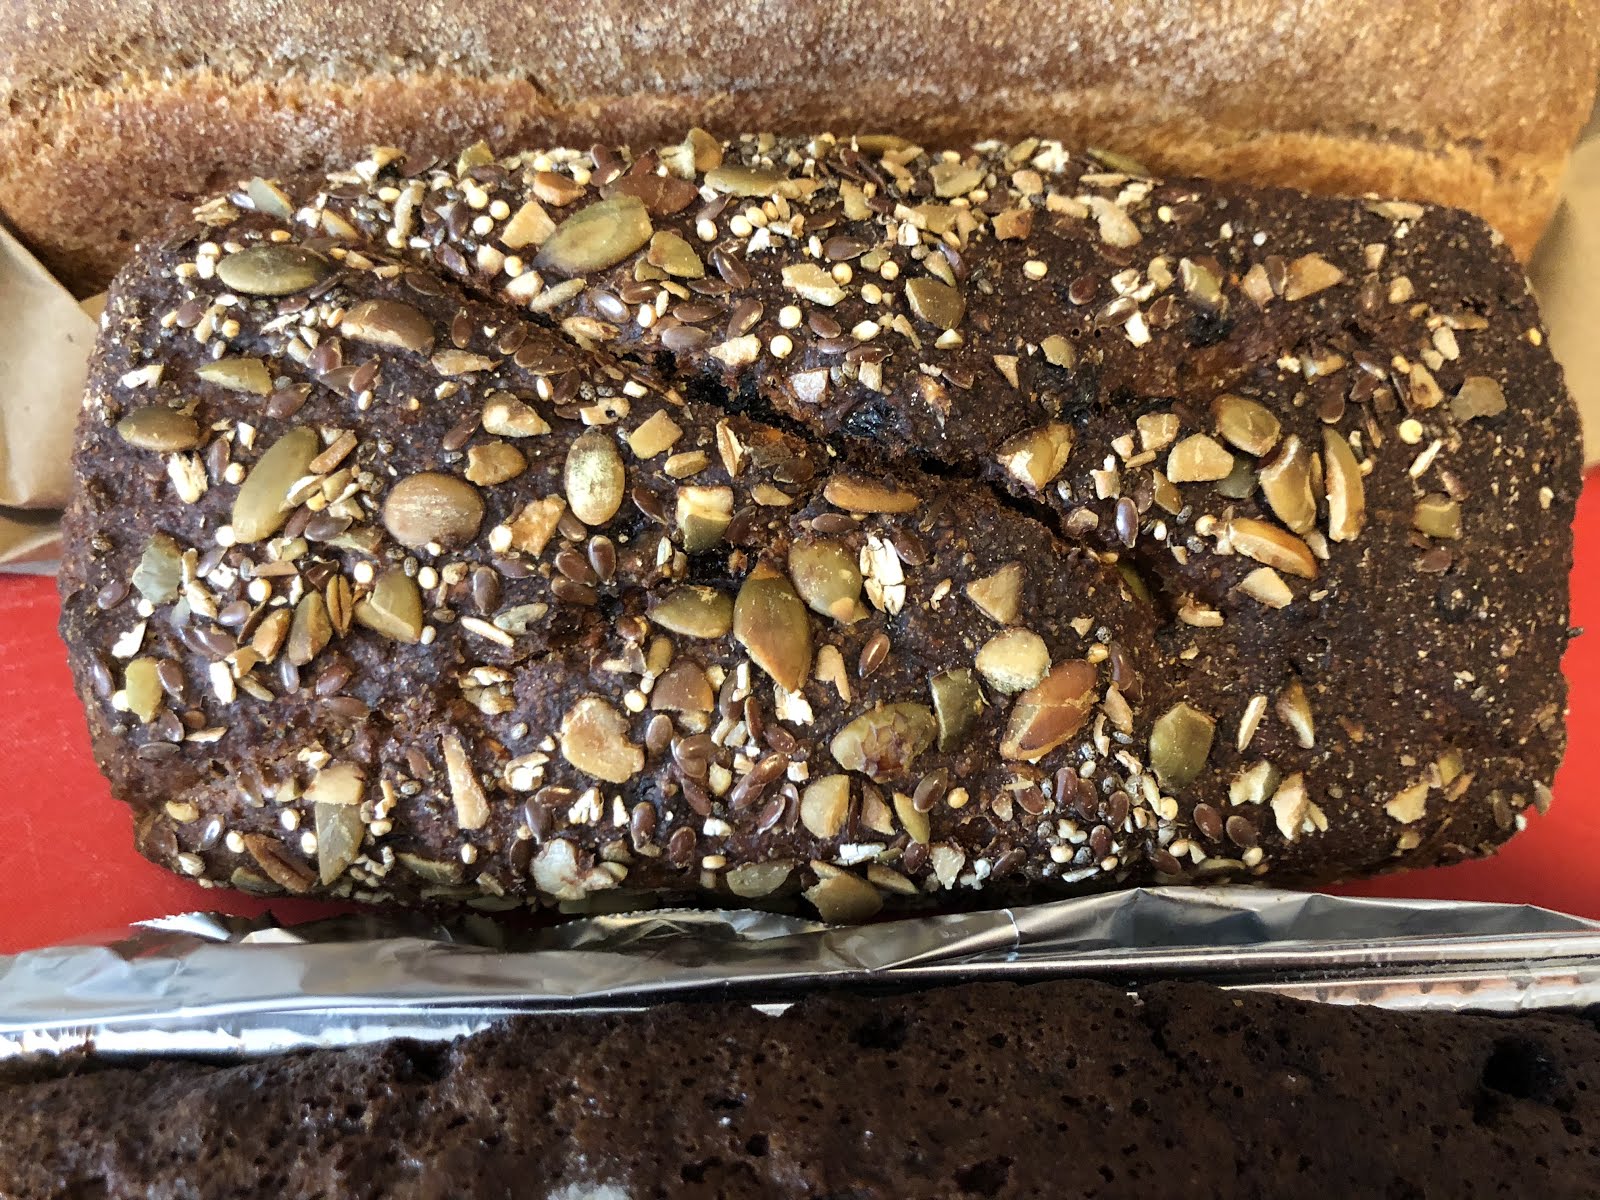
Several years ago, maybe you remember, I was lucky enough to travel the short distance from Seattle to the King Arthur Flour Baking School in Skagit Valley, Washington for 4 days of baking with whole grains. The day before my class started Martin Philip had been doing a workshop for several days with professional bakers. He had left behind several, no make that many of his Powerbrot loaves. I don’t remember just how many I allowed myself to take before I felt too ashamed to take more but the number must have been over 6. Powerbrot is heavy with whole grains and rye. It is a heavenly loaf; absolutely perfect for breakfast and certainly with morning coffee and afternoon tea.
But that is not to be the June Babe Bread. Just a short time ago in the mists of all this virus fun, I was talking with a friend who really loves rye, so I baked a great rye loaf which they did enjoy. My friend came up with TP and bleach which I hadn’t been able to come up with so my next thought was I need a totally different bread experience to share. In surfing around King Arthur’s web site, I came across this recipe. Which I baked…and I was blown away by. I mean me the original whole grain baker who shuns very much white flour. Now truth be told I did fiddle with the recipe and it did end up with some small amount of whole wheat in it but for me it is ridiculously white.
My adaptation: 13X5 pullman pan – one loaf – 200 grams white whole wheat flour, my substitution 500 grams King Arthur Unbleached All-Purpose Flour 25 grams wheat bran, my addition 2 1/2 teaspoons salt 1 1/2 teaspoons instant yeast 227 grams (227g) lukewarm water 1/2 cup (113g) milk, at room temperature 3 tablespoons (64g) honey 7 tablespoons (99g) unsalted butter, at room temperatureI followed the directions on the web page. OK. That recipe made a big loaf, that recipe is for the large 13X5 pullman pan. To bake this for my friend and then again for us, I wanted to be able to bake this in my smaller pullman 9X5 pan. At some point it occurred to me to look at Martin Philip’s Breaking Bread to see if he had a recipe there. HaHa this is one he created for his bid for the 2016 Coupe du Monde de la Boulangerie. The recipe in the book uses a biga – bingo, got to be even better than the straight dough recipe on the web site. Alass, the recipe in the book also was for two loaves. HaHa, a simple call to the Baker’s hot line and I had the simple answer to my problem. “Just divide every ingredient in half and it will fit into the smaller pullman”! I bake a loaf. I gave it to my friend – in a wild spy like pass off where we kept social distance, wore masks, I put the loaf onto her towel in the trunk of her car, backed off and then she wrapped it and drove away. Next morning, 7:30AM, I mean I’m still in bed, I get this gushing crazy phone call about the most wildly incredible bread and then dramatic photos.
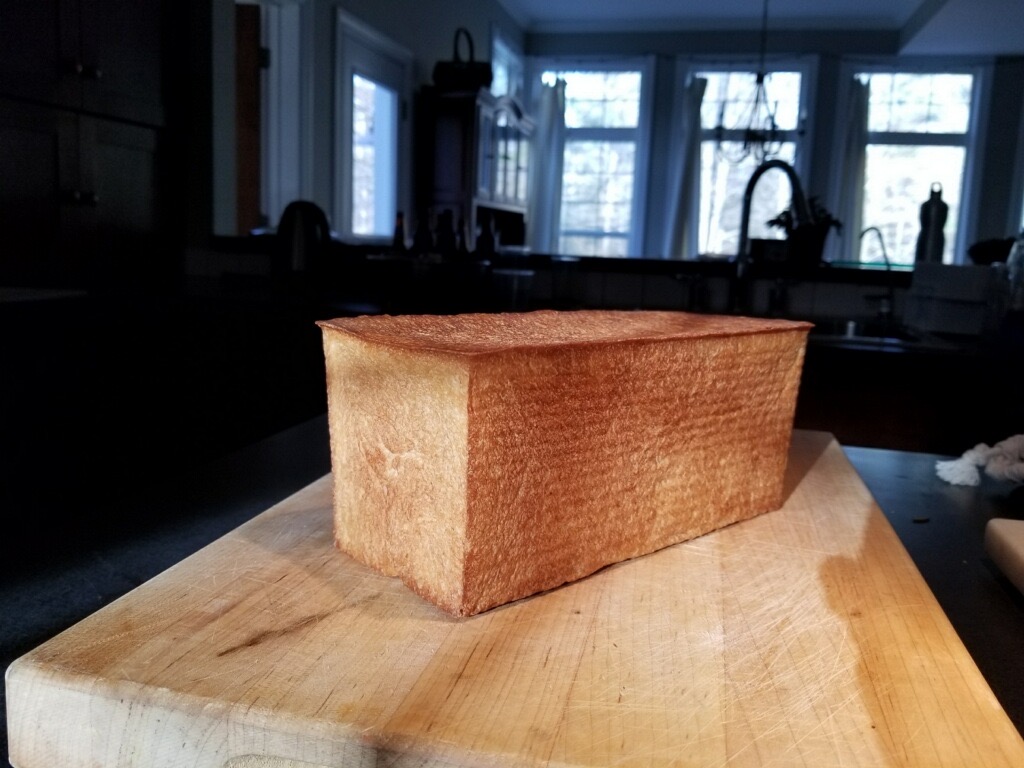
Photo by Friend Mary J.
Photo by Friend Mary J.
We all need white bread from time to time…or at least mostly white bread. You will note I do add a little white whole wheat here. And I will also tell you, I am going to be baking some altered iteration of this recipe to do it with a biga next week.
Below you will find mostly the recipe from the book, I simply divided it in half for my friend. I oddly had durum flour BUT King Arthur said bread flour is a good substitute and that’s what I’ll be using now as my durum is gone. We are Babes: feel free to bake from the book recipe, the web site recipe or the whole wheat recipe from the website.
I’m excited as always on the 16th of the month to see where the Babes take this recipe and expect Babe Variety to showcase an amazing bread. For me, a major draw of this bread was the honey … but I can tell you already a number of the Babe’s went strong for the tea and lavender. I’ve ordered lavender as I know I must give that one a try.
Photo by Friend Mary J.
Bee Keeper’s Pain de Mie
Adapted from Breaking Bread by Martin Philip
Martin Philip’s book Breaking Bread: A Baker’s Journey Home in 75 Recipes has some of the best reading I’ve seen in years and maybe ever.
Ingredients: below are the measurements from the book; you must divide if you want only one smaller loaf.
Breaking Bread – two 9X5 pullman pans ******** TOTAL AMOUNTS USED IN BIGA + FINAL DOUGH 410 grams durum flour 410 grams AP flour352 grams water172 grams wildflower tea (lavender) 17 grams salt, fine16 grams yeast123 grams butter
******** BIGA******** 410 grams AP flour(I used white whole wheat here) 246 grams water pinch yeast ******** WILDFLOWER LAVENDER TEA********170 grams milk35 grams honey, subtracted 57 grams sugar, increased honey4 grams lavender 2 grams chamomile flowers******** FINAL DOUGH FORMULA********172 grams wildflower tea656 grams Biga (all above)106 grams water410 grams Durum flour or Bread flour123 grams butter17 grams salt, fine16 grams yeast Directions:
DAY ONE – BIGA Combine the flour and yeast in a large mixing bowl. Add tepid water (75-80°. Mix briefly, then knead until a smooth dough forms. Cover and set at room temperature for 12 to 16 hours.
WILDFLOWER LAVENDER TEA ~ I have not used the chamomile and lavender. One day I will make it with lavender. Combine milk, honey in a small pot. Over low heat, warm the mixture so the honey mixes into the milk. When there are small bubbles around the edges add the chamomile and lavender if using. Turn off the heat. Cover and allow to set at room temperature 12 to16 hours. Strain before using. Warm the tea to 80° when ready to use.
DAY TWO FINAL DOUGH Ending desired dough temperature: 80°.Combine strained Tea, all the BIGA and the water.Mix until the biga is broken up.Add very soft butter, flour, salt and yeast.Stir until the dough forms a shaggy mass.Resist the urge to add more flour. BULK FERMENTATION Cover and allow to rise for about 90 minutes. FOLDFold after 30 and 60 minutes; then leave untouched until divide.
DIVIDE AND PRESHAPEDivide the dough into 2 pieces which will weight approximately 750 grams each.Preshape as tubes. Cover and rest 15 minutes. SHAPEButter or spray two loaf pans or two 9×5 inch pullman pans.Shape as pan loaves.With the long side facing you, fold the bottom third of the dough up to the center and the top third over (like a business letter). Fold the dough in half lengthwise, and seal the edges with the heel of your hand.Place in pans seam side down. Press dough into pans to evenly fill to all corners. PROOFFor loaf pans: Cover and proof until dough is about 1 to 1.5 inches above top of pan: about 60 – 90 minutes.For pullman pans: Place the dough seam-down into the pan, and press it evenly into the corners. Put the lid on the pan and close all but an inch or so in order to monitor the loaf as it rises. Allow the dough to rise until it’s just below the lip of the pan, 60 to 90 minutes.
Towards the end of the rising time, preheat the oven to 425°F.
BAKE Close the pan lid completely, and put the pan in the oven.
Pullman pan with lid on. I love this pan.
Bake the bread for 20 then remove the lid and bake for an additional 5-10 minutes. The loaf should be a deep golden brown on all sides.
Remove the loaf from the oven and, after 5 minutes, turn it out onto a rack to cool completely. Do not allow to cool in the pan as that will result in a soggy crust.
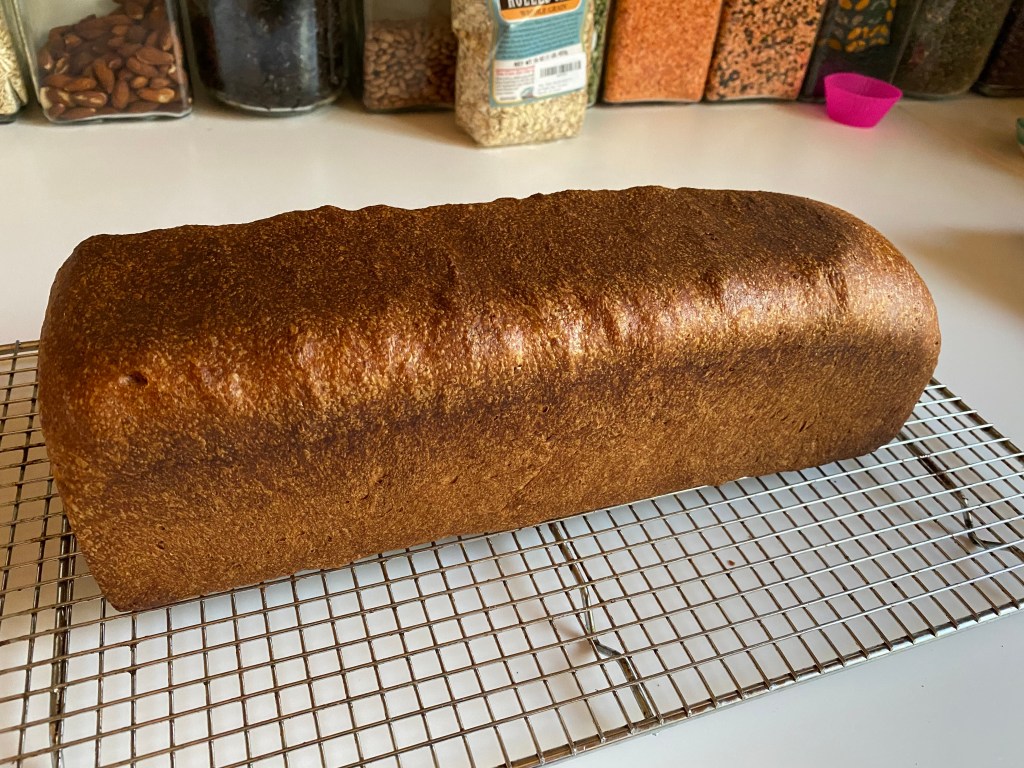
Don’t have a pullman pan; it makes a beautiful regular loaf!
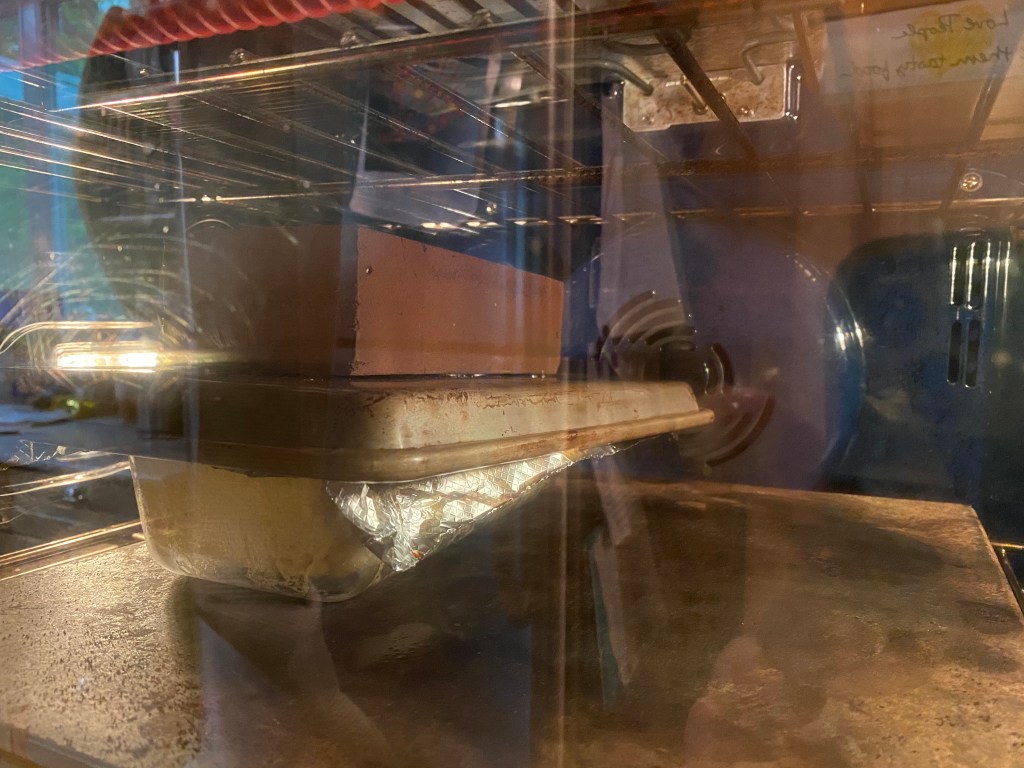
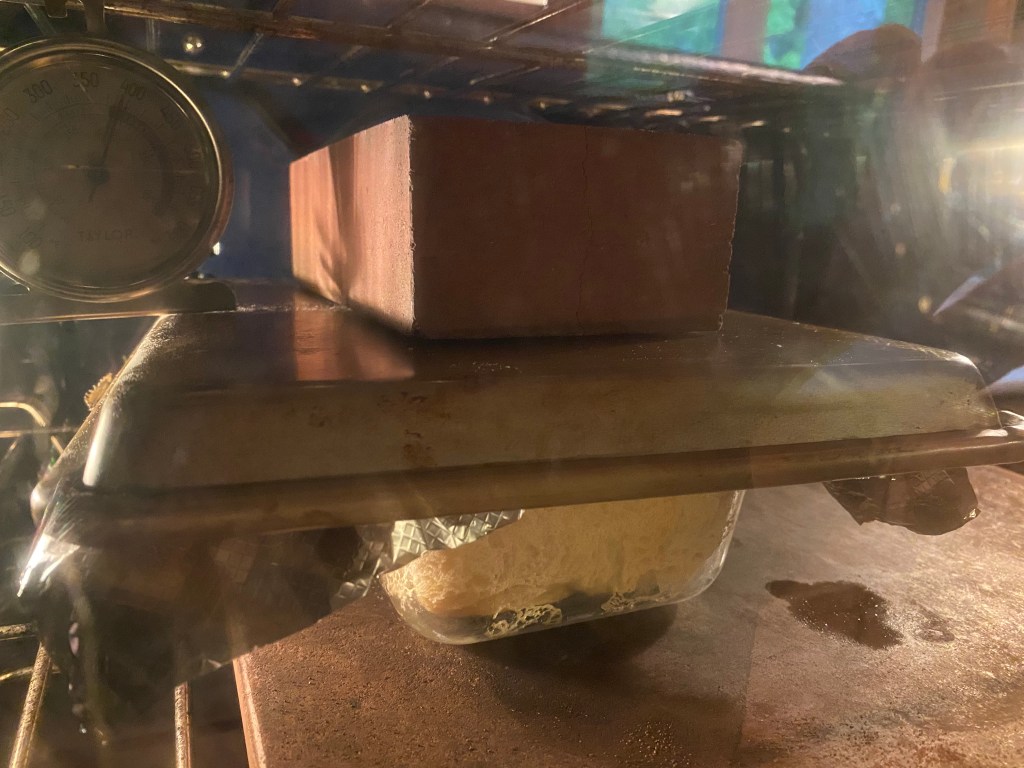
Or try oiled foil top loaf, sheet pan
and a brick or something weighty…
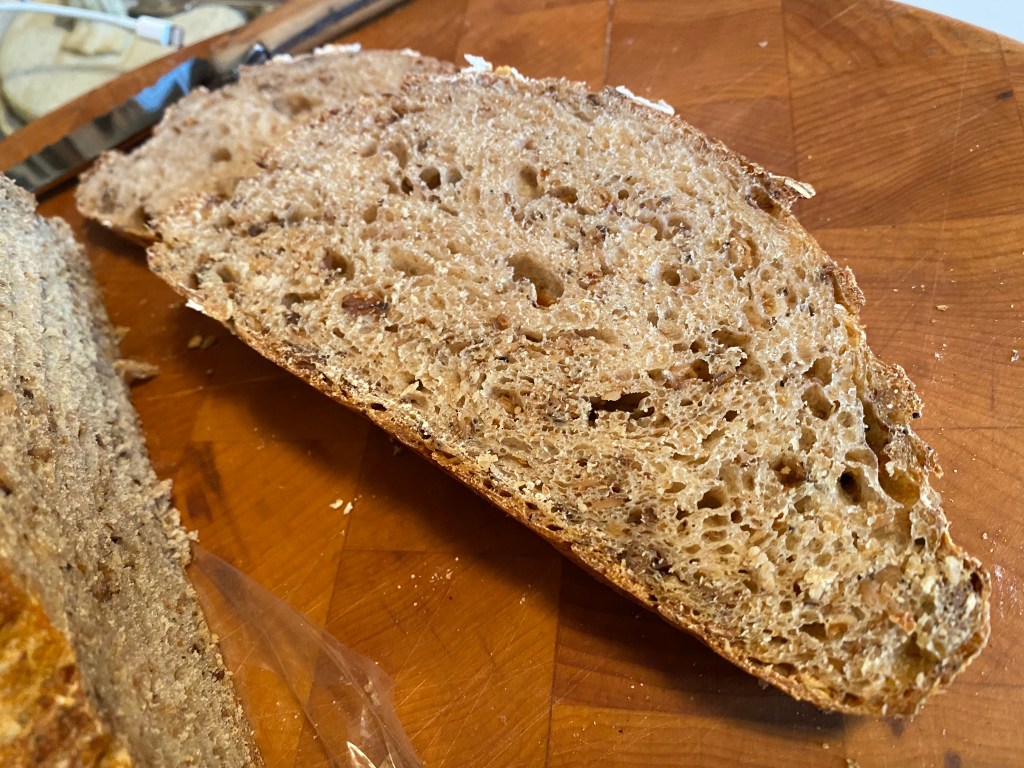
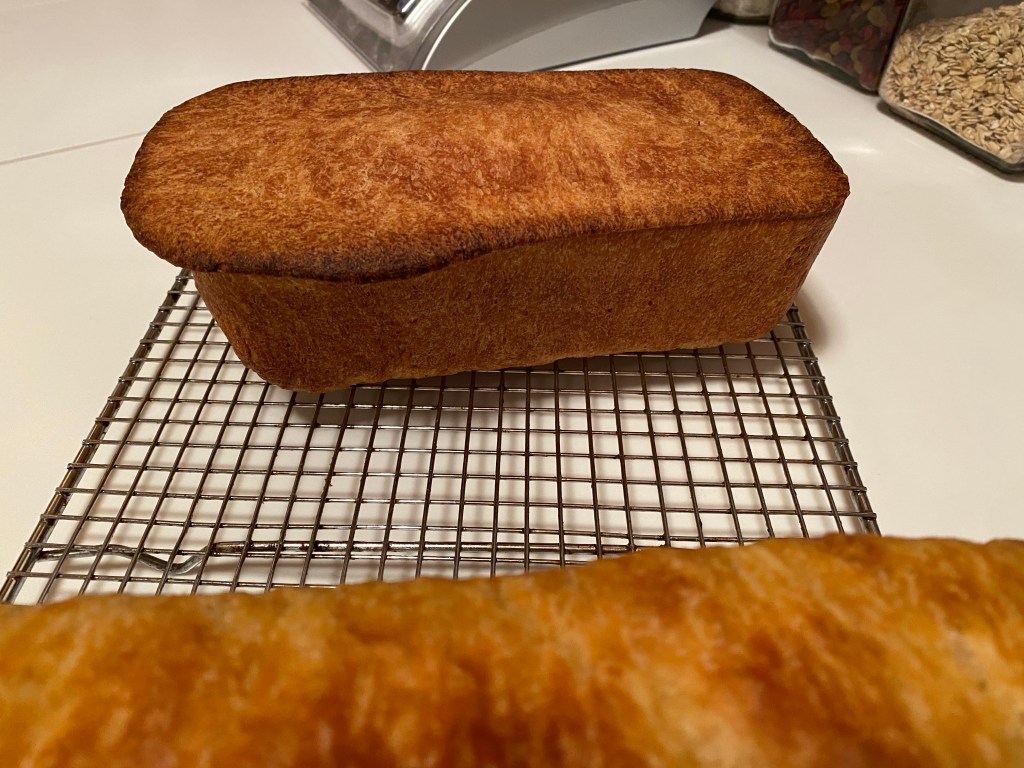
You may find one brick allows the dough to slip out one end, It’s still a stellar loaf!The Crumb …
Notes:
This loaf is inspired by a recipe that King Arthur Flour head baker Martin Philip created for his bid for the 2016 Coupe du Monde de la Boulangerie. Its mild, sweet honey flavor and soft and tender crumb yield slices that are ideally suited for grilled cheese — or any other sandwich, for that matter.
Cut everything in half for the smaller pullman pan. The recipe in the book is for two smaller pullman or loaf pans. I really hope everybody enjoys this one. Gorn is wild for it. I’m wishing I could bake the whole wheat version for my grandkids and win them to whole wheat but that will have to wait for … a vaccine?
How can you not give this one a try, it is beyond compare. If you do bake this, we would love to hear which recipe and/how you made it your own. Just drop me an email – comments my kitchen at mac dot com – and I’ll put you in the round up here after the 1st of July and send you a shiny badge. Please use BBB Buddy w Bee Keeper’s Pain De Mie as the subject line.
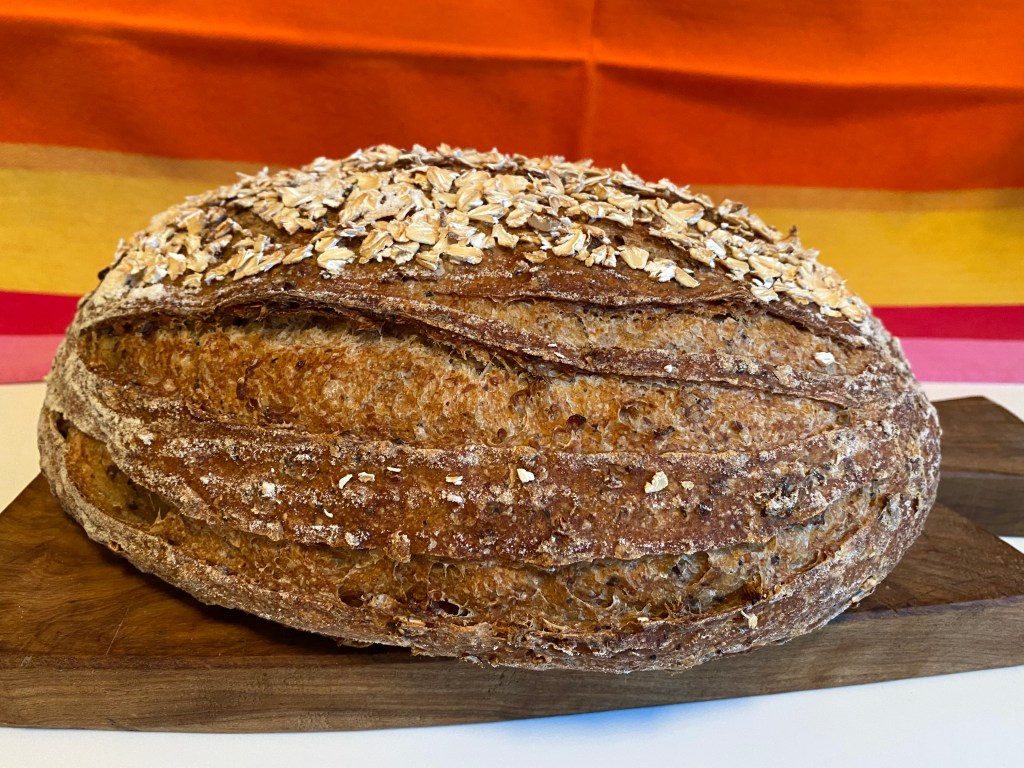
This is a special bread for a special time. I felt it was the perfect time to risk baking in my grandmother’s Hall’s China/Jewel Tea Autumn leaves casserole dish. Back in the 1920’s Hall’s China located in East Liverpool, Ohio teamed up with Jewel Tea to produce promotional items. I think the first was a tea pot (makes sense, it’s a tea company) but it was very popular and became a full line of dishes. My grandmother had a full set with service for at least 24 place settings. When I was growing up those plates and dishes were always on the table. My mom was one of seven siblings and there were eleven grandchildren. Most years there was at least once when everyone of those immediate family were present and sat down to meals. Often there were friends invited. Many of those dishes were broken over the years but I was the lucky one to get this casserole, the tea pot and some other pieces. Until this bread, I’d never had the courage to put this into the oven but somehow thinking this survived the Great Depression, I felt it proper it should survive the Coronavirus.
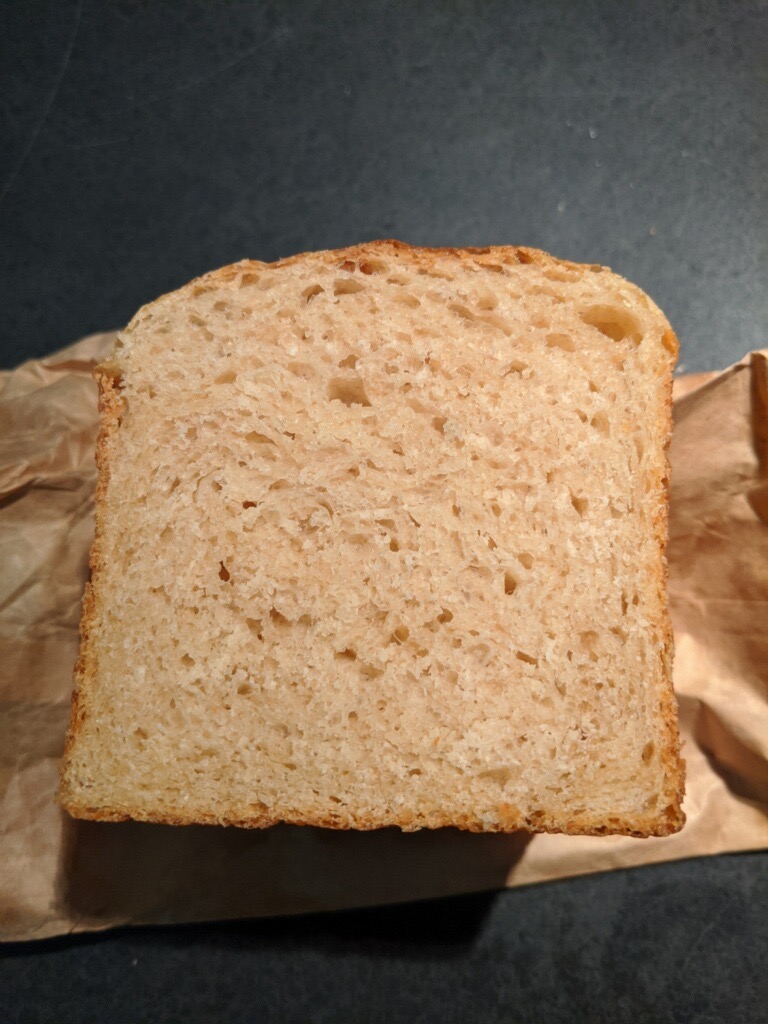
This is a special bread. As old fashion and old world as this recipe is maybe, I can assure you it will appeal today! All the grains are a delight. It’s touched with just the perfect level of sweetness. Makes lovely turkey with cranberry sandwiches and totally perfect toast. AND is very good with just butter. I may have to bake it again soon because I know it would be a perfectly lovely peanut butter and jelly.
I got carried away with the slashing and ended up with probably twice as many called for traditionally; but I’m happy with it.
1. *The method is the same for sourdough except you would add the sourdough with the wet ingredients and give it a longer ferment.
2. In a large bowl, whisk together the dry ingredients, including salt.
3. In a separate container, mix together the sourdough starter, the water, honey, and oil. Pour the wet ingredients over the dry ingredients and mix until thorough combined. Knead until smooth and elastic.
4. Cover. Let rise 1 hour; perform stretch and fold; then let rise an additional hour. Perform the ripe test. I left mine for a total of 3 hours.
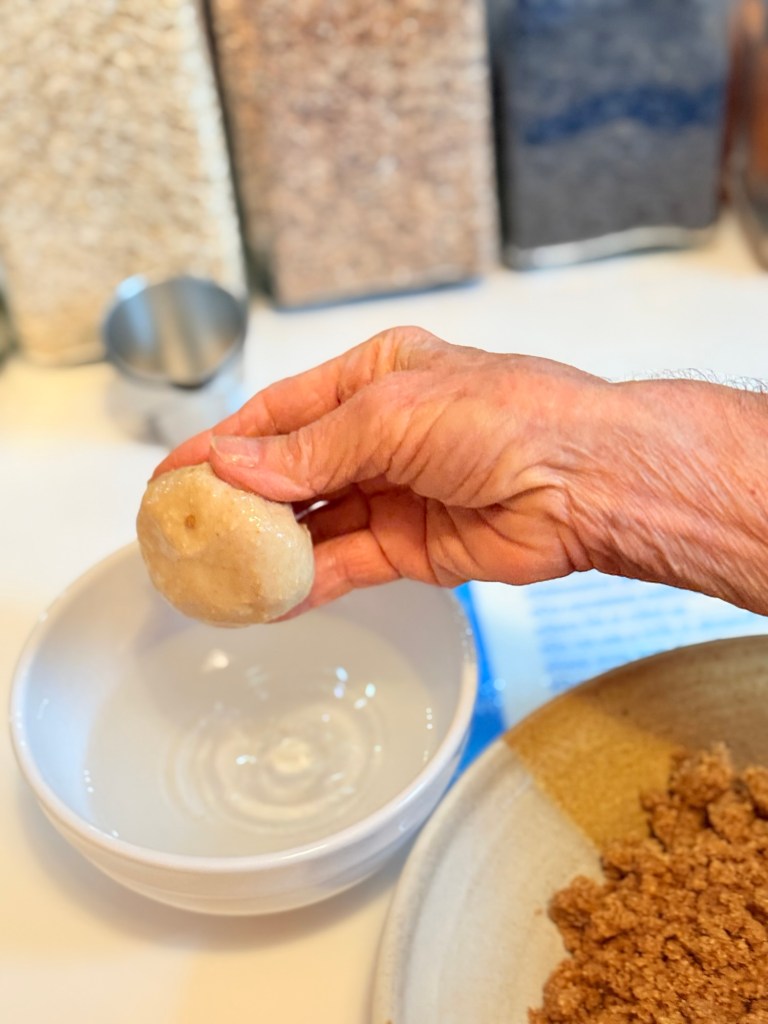
5. Turn dough onto lightly floured surface; punch down to remove air bubbles. Cut off 1/3 piece of dough. Cover the dough balls with a bowl and let dough relax for 15 minutes.
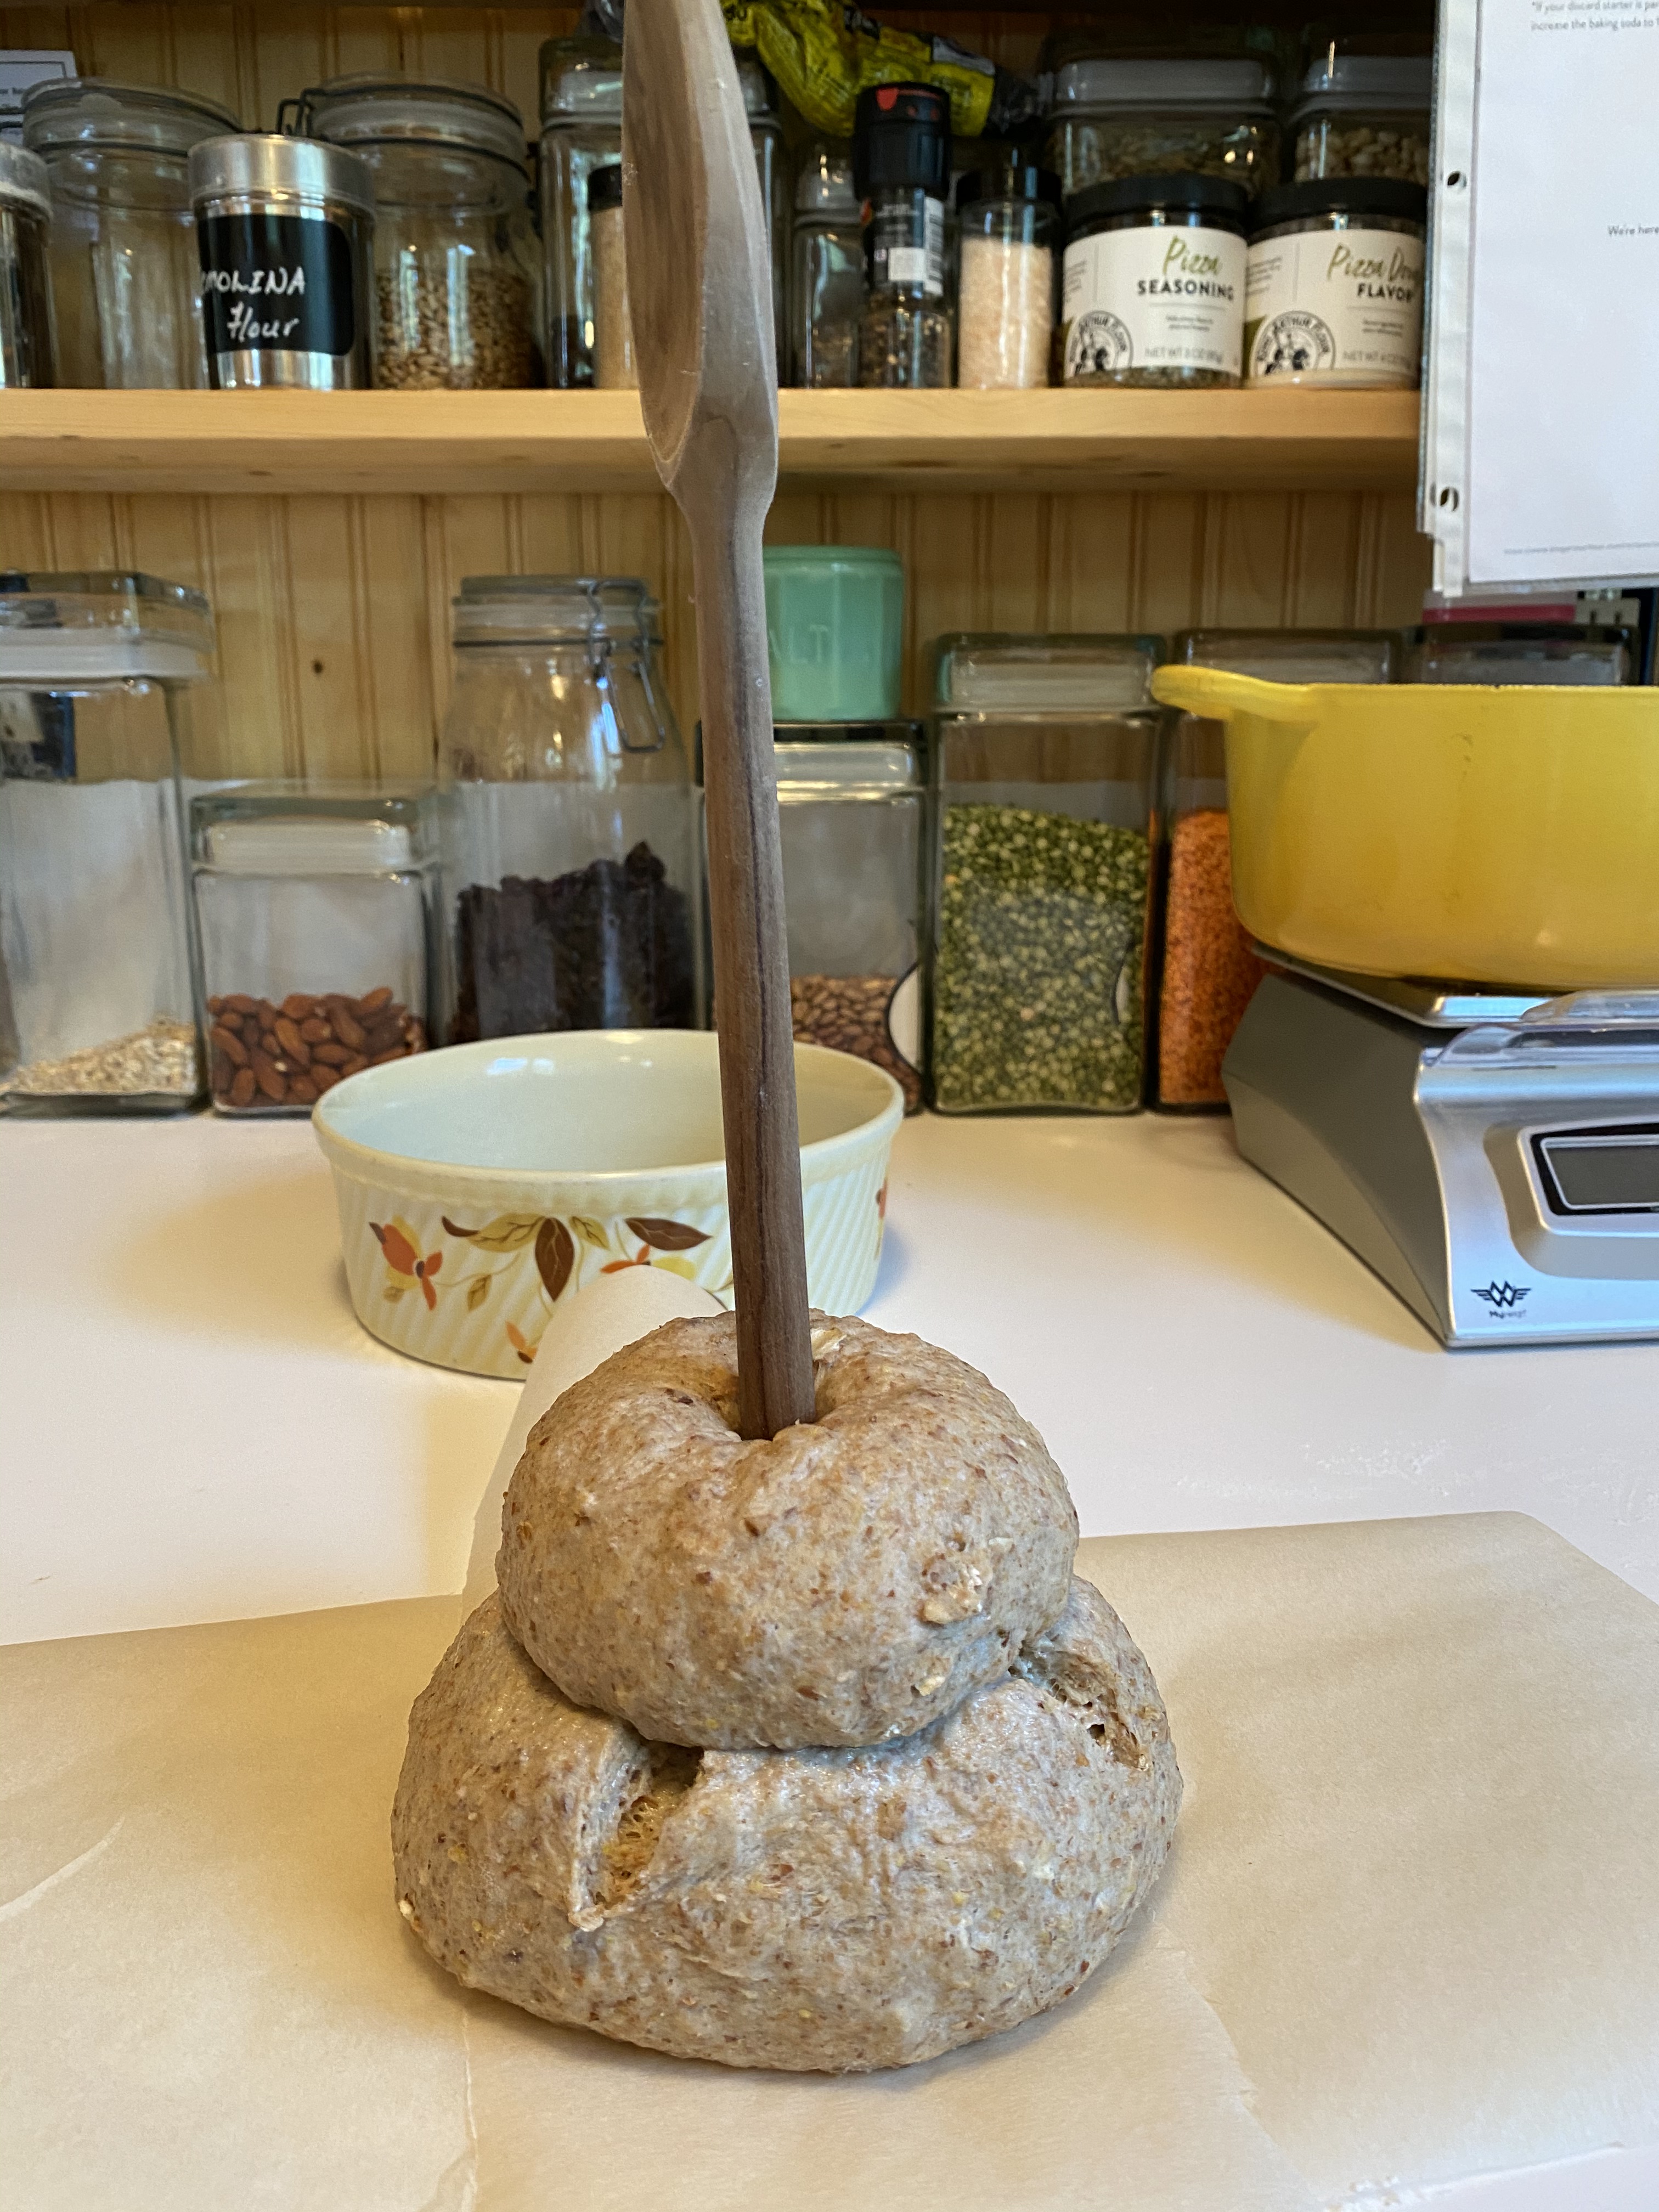
6. Shape each section into a round ball. Place larger ball in greased 2 ½ -quart casserole or soufflé dish. Using a sharp knife or lame, cut a cross, about 1 ½ inches across, in the top of the larger piece of dough.
7. Brush the surface with water and then place the smaller piece of dough on top. Press through the center of both pieces of dough using the handle of a wooden spoon or your finger.
8. Cover; let rise until indentation remains after lightly touching dough.
9. Just before baking, stick handle of wooden spoon or finger into hole again. And, using a sharp knife or lame, make 8 long slashes around the top and 12 smaller slashes around the bottom of the loaf.
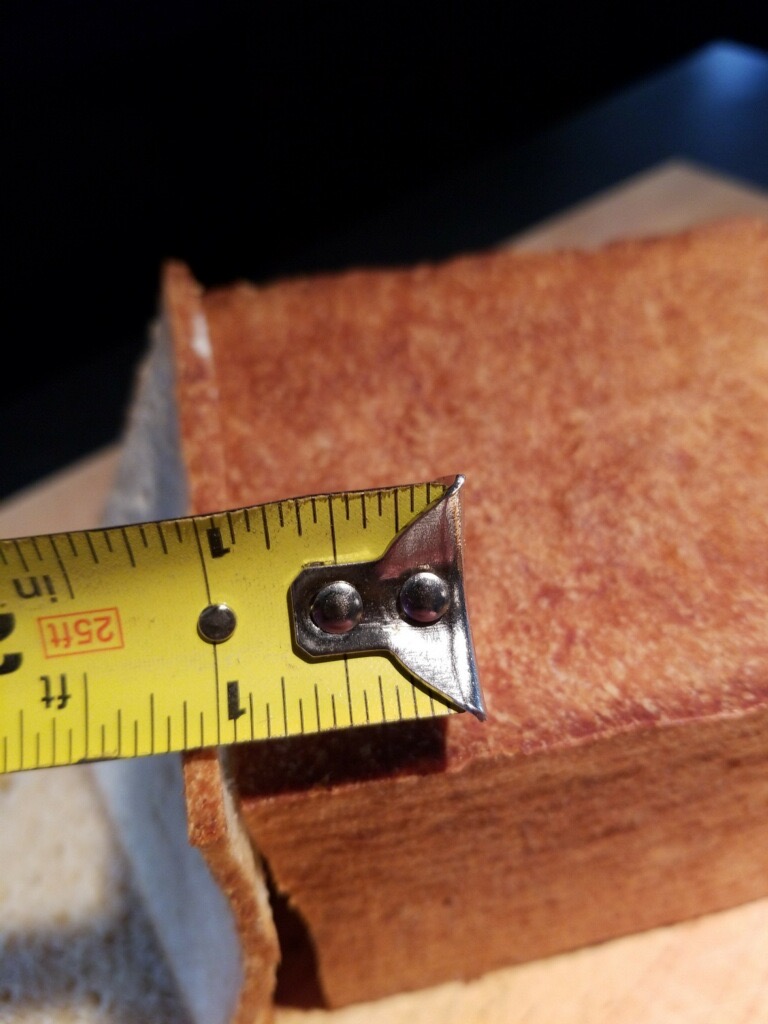
10. Bake in preheated 375°F oven 35 to 40 minutes. Mine took 45 minutes to reach an internal temperature of 202°. Remove from dish; cool on rack.
For straight yeast recipe, check out Cathy’s web site.
Would you like to bake with us?
Cathy is the Kitchen of the Month and would love for you to join us. This loaf is really easy and tastes great!
Bread Submission Guidelines:
Just bake your version of this Cottage Loaf and post about it on your blog (by May 30th).
If you don’t have a blog, no worries, just post a photo in the Bread Baking Babes Facebook Group
Mention Bread Baking Babes with a link to the Kitchen of the Month, that’s – Cathy of Bread Experience.
Then send an email to breadexperience (at) gmail (dotcom) with BBB Early American Cottage Loaf in the subject line, and I will send you your Buddy badge to display on your blog.


