MyKitchenInHalfCups

Once Upon a time: Cooking … Baking … Traveling … Laughing …


10 Comments

Soboro Ppang(Korean Peanut Streusel Bread) Peanut Streusel Rolls … Peanut Butter Streusel Rolls … Oh fiddle sticks just call it Peanut Butter Smiles Rolls

I figure the first question here is: What is your secret/individual/unique way to eat peanut butter? The almost universal answer is probably: on a spoon straight out of the jar … and yes I certainly have enjoyed my share of peanut butter that way. But from a very long time ago, 65 years ago, my favorite peanut butter sandwich has always been open face peanut and mayo. In the last year that has morphed into bacon hot chili jam, peanut butter and mayo on toast.

Happy chaos!

One should never worry about pronunciation when bread is this easy to put in the oven and brings smiles when someone takes a first bite.

All together now.

Aparna is our Kitchen of the Month and she will have the full recipe on her site. True to the Babe Code, she gave us lots of room to play with this recipe. Recipes on offering: Aparna adapted this recipe; make it with SourDough; make it NoKnead; Google the title and you can find any number of variations. Filling? Don’t be silly, sweet red bean maybe the traditional but in true Babe Fashion please use your imagination, I certainly did.

For something of a demo on applying the streusel check out this video. BUT what ever you do DO NOT MISS OUT ON THE STREUSEL! This is a winning topping. I have some left in the refrigerator and know I will find another fantastic way to use it.

Change? Fiddle with a recipe? Well of course. In the STREUSEL I replaced cornstarch with oat bran (my theory was oat bran will make it more crumbly, I think it did). I cut any place the recipe called for any kind of sweetener by 5 to 15 grams. To make the DOUGH, I used 140 g white whole wheat flour + 100 g AP flour to replace 238 g AP flour. FILLING I totally ignored any amounts and mixed some canned red beans, peanut butter, bacon hot chili jam and coconut flour to a consistency I could roll into balls.

Take a bite … and Smile!!

It’s not really about the filling, it’s all about that streusel topping. Go for it. Bake with us if you dare! Put your own touch on it and Smile!

Going fast …

We would love for you to bake along with us this month and try out these crispy topped rolls.  Check out our Facebook group to see the participants’ baking results.  If you would like to post your results with a Buddy badge on a blog, let us know in the comments or on the Facebook page.

And the Babes are:


11 Comments

BBB ~ Oatmeal Buns ~ sort of sourdough

Oatmeal … how do I love you … let me count the ways … #1: Burger Buns

I do love oatmeal.

Super Bun!

Elizabeth – yes that Elizabeth of blog from our kitchen, has given the Babes our June bread, Oatmeal Burger Buns, and let me tell you, this is one not to miss that will be the star of your summer grill … and since I can attest that it works great in the oven and on the indoor grill, the star of your winter indoor grill as well. In fewer words, this is a star keeper. I suggest you check out all the Babes, because we all have our ways with the same recipe.

For my part – my way: in place of Elizabeth’s whole wheat starter, I used 200 grams of my refreshed the night before excited rye starter, in place of all purpose flour, 100 grams sprouted spelt, 20 grams bread flour and 130 grams white whole wheat, I added 20 grams of ground flax seed. I topped the buns with King Arthur’s Everything Babel Topping. I did use the added dry yeast, not sure why. For the ultimate ‘my way’ I added 50 grams of slow cooker caramelized onions! I highly recommend the caramelized onions!

I think because I added those caramelized onions and all the liquid, my dough required more flour. Because I used whole grain flours, my buns required an extra 15 minutes (30 minute total) in the oven.

Let me count the ways after that first burger: #2 used for avocado toast, then #3 topped with Dishoom’s House Black Daal (page 215 from Dishoom: From Bombay with Love by Shamir Thakrar, Kari Thakrar and Naved Nasir – WOW of a Daal), next #4 topped with mushrooms & spinach, and finally #5 topped with black beans and broccoli!

If you bake this we’d love to hear about it. I can just about guarantee you won’t be disappointed and more than likely it will become your routine bun.


9 Comments

BBB ~ Sfincione Bagharese

Aparna, our kitchen of the month, you may have thought it was hard to find a bread we haven’t baked but honestly even though this little group has been baking for these many years and it does seem like we’ve baked just a huge number of breads, every month I marvel that wow it’s just water yeast flour, the same ingredients as last month BUT it’s just never the same and it NEVER gets boring. Thank you so very much for this introduction to this our 14th anniversary bread.

Check out Aparna’s post on this bread at My Diverse Kitchen.com.https://www.mydiversekitchen.com/sfincione-bagharese

From Aparna’s site you can travel to all the other Babes who baked this bread.

SFINCIONE BAGHARESE

(Partly adapted from here)

POOLISH:

150 g white whole wheat

150 ml water

1 tsp dry active yeast

DOUGH :

All the Poolish from above

150 gm AP flour

250 gm semolina flour

300 ml water (more or less)

30 ml olive oil

15 gm salt

ONION LAYER :

5 medium sized onions (one a red onion)

30 ml olive oil

Salt to taste

CHEESE LAYER :

300 gm mozzarella sliced (thinner slices will work best)

400 gm Ricotta

BREADCRUMB LAYER :

Some chopped scallions 

4 to 6 slices of BEEKEEPER’S PAIN DE MIE

100 gm grated Parmesan cheese

50 grams walnuts

Salt to taste

Red chilli flakes or crushed pepper to taste

1 tsp dried oregano

Also two very well oiled round 23cm trays

HOW TO MAKE IT :

Make the Poolish by mixing together in a medium sized bowl the flour, dry yeast, and water until a sticky dough is obtained. Add more water if necessary to achieve this. Cover loosely with a plastic film and leave to rise for about 2 hours. The polish should be somewhat bubbly and have doubled in size.

I mixed the dough by hand. Mix together the flours, water (more or less as required), oil and the poolish. The dough will be sticky. Add the salt and knead till it is soft, very pliable and smooth. Shape it into a round and place it in a bowl greased with olive oil. Cover the bowl loosely and leave it to rise till double in volume. Mine took about 2 and a half hours.

Cook the onions. While the dough is rising, get the toppings ready. Heat the oil in a pan and add the sliced onions. Sprinkle a little salt and cook the onions on low to medium heat until they turn translucent and soft. Do not brown or caramelized them. Take the pan off heat and let them cool to room temperature.

Prepare the breadcrumb mixture. Run the bread slices (with or without crusts) in a food processor to make the crumbs. Put the breadcrumbs in a bowl. Mix together with the oil, salt, red chilli flakes (or crushed pepper) chopped scallions/ spring onions, oregano and grated cheese. The texture should be of loose but moist crumbs.

Once the dough has risen, gently knead to deflate it. Divide it into two equal portions. Press out each portion into a roughly 9-inch circle (or oval) using your fingers. ****Since Aparna and I both seem to think the topping is the show of this bread, next time I will bake mine in a 10 inch or larger pan and make more topping to cover the larger surface area.  If the dough feels sticky, oil your fingers lightly. Place in the oiled trays. I used a pie dish. Let the dough rise again, for about an hour till almost double in thickness and quite puffy.

Top with anchovy (maybe one day I’ll try anchovy but not this time), then the cooked onions. Next comes the Ricotta and a hard cheese (I used Parmesan ). Make sure to cover the surface of the dough evenly. Finish layering by spreading the breadcrumb mixture on the top.

Bake the Sfincione at 250C (480F) on the bottom shelf of the oven for about 10 to 12 minutes. The underneath of the bread should become golden and crisp. Then move the pan to the middle shelf of the oven and bake for another 10 minutes or so, until it is crisp and golden brown on the top as well. Remove from the oven and let it cool.  

Next time I will use parchment on the bottom so there will be no issue of sticking AND if the bottom seems too moist, I can take it out of the pan and return it to the oven rack for 2 to 5 minutes for crisper texture.

Cut and serve. Leftovers can be refrigerated for up to 2 days.  Hahaha. I did give one loaf away but the other loaf we very quickly took care of. 

HAPPY ANNIVERSARY TO ALL BABES, PAST, PRESENT AND FUTURE.

We know you’ll want to make Sfincione Bagherese too! 

To receive a Bread Baking Buddy Badge to display on your site: make the topped flatbread in the next couple of weeks and post about them (we love to see how your bread turns out AND hear what you think about it – what you didn’t like and/or what you liked) before the 28 February 2022. If you do not have a blog, no problem; you can also post your picture(s) to Flickr (or any other photo sharing site) and record your thoughts about the bread there. Please remember to contact the Kitchen of the Month to say that your post is up.

For complete details about this month’s recipe, the BBB and how to become a BBBuddy, please read:


17 Comments

BBB ~ Pepperoni Rolls

When I first saw the post for January’s Babe bread, I thought here’s a simple easy fun bake perfect for after the holiday crazy actions. A small stuffed roll perfect for just about anytime, anyplace and any occasion.  Our host kitchen, FeedingMyEnthusiasms, has a good story on finding this bread you should find fun.

A quick read through the recipe and … Pepperoni…ha, I’m in!

My next reading brought me up short. I left the following on the blog: Ye gad, I’m just looking at that 3/4 cup of sugar! Really with pepperoni?! Sounds terribly sweet. How much sugar does this need? What amount of sugar will change the texture here? Adding this much sugar to something that seems savory is REALLY foreign to me. I get the feeling this is a very Americanized food, we just add sugar to everything.

Simple and easy … Then there was a long discussion of what if you don’t want meat!! That how I happen to have the sautéed mushroom with pepperoni spices idea. VERY good.

Holy Batman! I made them. Did I follow the recipe? Better than I thought I had on initial inspection but I divided the ingredients in half and only added 20 grams of sugar … and when the dough just wouldn’t come together – fully 3/4 of a cup of flour was not going to incorporate – I threw  in the rye sourdough throw out from the night before. I threw that in and it was perfect. This took a full 90 minutes to double.  We were having our “pod” friends (pod being like minded fully vaccinated friends) for pepperoni pizza dinner. SOOOO for filling I used pepperoni seasoned baby Bella mushrooms sliced, there were 4 half slices of cooked bacon added to the mushrooms … then there were two dough balls left when I ran out of mushrooms and bacon, perhaps there was a slice or two of cheese as well.  The last two dough balls: one I filled with pepperoni and one I filled with ……..see below.
These were seriously good 😊!!!  They were a terrific appetizer for hungry boys before pizza! 

Continue reading


9 Comments

Cruffins ~ BBB ~ July 2021

What you may ask is a Cruffin? Since the Babes are Baking Cruffins this month, that would be a fair question. In simplest terms a cruffin might be a cross between a croissant and a muffin but it is neither a croissant nor a muffin. Mostly what you need to know about a Cruffin is: they are insanely beautiful and taste marvelous! That’s really what a Cruffin is BUT if you want to know more details check out Aparna’s post at My Diverse Kitchen.

I think these should be named oatmeal mushrooms.

There is an art to writing a recipe BUT there is an art to reading a recipe as well and clearly I am woefully lacking in reading skills. Perhaps my math is just as lacking. The recipe Aparna gave us clearly stated “this recipe makes 8 cruffins” … I ended up with 17. Can’t read, can’t count.

My cruffins are dark – I used half white whole wheat with half regular AP flour and brown sugar – and I’m ok with that. I will admit the BBB’s who bake with white flour got a gorgeous gourmet picture perfect golden cruffins. I’ll settle for the subtle caramel flavor I get with the brown sugar.

Cruffins

Recipe by Aparna from My Diverse Kitchen

This recipe makes 8 Cruffins (see it said it right there)

For the Dough :

25 grams brown sugar (this was just sweet enough for us)

1 1/4 tsp dry yeast

100 grams white whole wheat flour

101 grams white AP flour

50 gm unsalted butter, chilled

1/4 tsp salt

183 oat milk (did not use any water but used all oat milk)

For Lamination :

120 gm unsalted butter, at room temperature

To Decorate/ Serve :

Speculaas spice/Cinnamon sugar

DIRECTIONS :

I add the dry yeast directly to the flour with other ingredients.

 In a medium bowl mix together the flour, yeast, sugar, salt and chilled butter cut into small pieces. Add milk and knead into a soft and elastic dough that comes away from the side of the bowl. The dough should not be sticky. Add a little more milk or flour, as required to achieve this consistency of dough. I found I needed at least half cup more of regular AP flour to obtain a soft supple dough that was not sticky.

Shape the dough into a ball and transfer it to an oiled bowl, turning the dough to coat it well. Cover and let the dough rise till double in volume. This should take between an hour to two depending on ambient temperature. Mine took about an hour and 45 minutes.

In the meanwhile prepare your baking pan and keep aside. Butter and very lightly flour the cavities of your muffin or popover tray.

Dust your working surface lightly with flour and turn the dough out. Lightly knead to deflate the dough. Divide into four equal pieces. Roll out each piece to a 60x20cm (24X7 inches) sized piece. The dough sheet will be very thin. If you have a pasta machine you can use that as it is easier to roll out thin sheets with it. I cut the dough into two pieces (60cm x 40cm each) and cut into 4 pieces after buttering each.

Spread about 30 to 38 gm butter (I started with 150 grams of butter and had 50 left) of soft butter over each rolled out piece of dough. I sprinkled half with cinnamon sugar and the other half with speculaas spice. Cut each piece into half, lengthwise, creating two thin strips.

Roll one thin strip into a tight roll. Place this at the edge of the second strip and continue rolling till you have one thick roll. This will give your cruffins more layers.

Cut roll in half lengthwise. Roll each half, like a circle (cinnamon roll style)with the cut layers side showing the outside. Make sure to tuck both ends under so it doesn’t open up on baking. Place the roll in the prepared muffin or popover pan.

Repeat with all the dough pieces. Cover the pan with a kitchen towel and allow to rise for about 45 minutes. The rolls should look puffy and have risen to almost the edge of the cavities.

Bake the cruffins at 190C (375F) for about 30 minutes or till golden brown and done. My smaller size baked in about 24 minutes. Turn them out onto a rack and let them cool. I skipped toppings and thought they were just perfectly delicate and sweet enough. Serve warm with coffee or tea.

My Cruffin were small (17 instead of 8) and more brown than golden but still insanely beautiful and marvelous tasting with coffee in the morning, hot tea in the late afternoon, coffee in the morning, hot tea in the late afternoon … oh gosh, it’s time to bake again as I know you will want to do. I want these again with my morning coffee … and my late afternoon tea!

Coffee or tea?

And I do thank you just very much for cruffins Aparna!


8 Comments

BBB ~ Chelsea Bun Valentine

Chelsea Bun Valentine
LOF54gPWS1+o5aWQVjHCjg

I can’t imagine where eleven years have come and gone baking bread after bread with Babes. Somehow, here we are on our eleventh anniversary.  Simple, complex, straight or sour dough, I never tire of flour and yeast. I never seem to see a bread coming either. Although there are breads I have sort of in a reserve place that I think the Babes must bake one day. One that comes to mind is salt rising bread. I’ve tired it twice and it’s good but not for the faint of heart.
Recently I got hooked on The Great British Baking Show. Obsession doesn’t come close to how much I was watching. And when it came to the breads, I watched many of them over again immediately. In late December, I watched one where they baked Chelsea Bun Christmas Trees. It some how caught me that the bread and the bun were basic but the shape and the filling should be the challenge that suited a February Valentine. I had some really fancy ideas in the beginning but when it came to execution, simple took over and Gorn was won with a very simple heart … I think it had something to do with the some what cherry pie like filling I came up with.  Cherries will win him over any day, even in a bun.

Ordinarily I would have added walnuts to buns but I was with grandkids and was told they wouldn’t eat them.
GNGAfLi%RsmyFrtLObg
Find the Original Recipe here.
Serving Size: 15

Dough
400 grams bread flour, plus extra for dusting
400 grams white whole wheat flour
1 tablespoon salt
15 grams sachet fast-acting yeast
400 ml milk
60 grams unsalted butter, plus extra for greasing
2 free-range eggs
Filling
You make it up!

5MXLtQmkQBm7YoomspYXNg

“I won’t eat raisins” “There are no raisins” “Cherries”

Place the flour into a large mixing bowl, add the salt to one side and the yeast to the other side.  (That’s how the cutie Paul Hollywood does it.)

Warm the milk and butter in a small saucepan until the butter is melted and the mixture is lukewarm.

Pour into the flour mixture, add the eggs and stir thoroughly until the contents of the bowl come together as a soft dough. The dough will be sticky.

Tip the dough onto a lightly floured work surface and knead well for 5 minutes, until the dough is smooth and elastic. Alternatively this can be done in a stand mixer using a dough hook. I found this to be an easy dough to do by hand.

Place the dough into an oiled bowl and leave to rise, covered with a shower cap, for one hour or until doubled in size.

Mix the filling. I used a cherry preserve that was cherry pie like filling and added some dried cherries to that.  I also sprinkled my dough with some brown sugar for that extra.

Tip the dough out onto a lightly floured work surface. Roll out dough into a rectangle about 20in x 14in.

Tack down the long side of the dough rectangle nearest to you by pressing it down onto the work surface with your thumb. Brush all over with the melted butter. Then spread the your filling over the dough leaving a 2cm boarder. Roll the opposite long side of the dough towards you quite tightly, until the roll is complete and tight. Trim the ends to neaten.

With a sharp knife cut into 15 thick rounds – about 1.5in.

Line a very large baking tray or use the grill tray from your oven with baking parchment.

Arrange rolls on the prepared tray, cut side up, in heart shape: I just drew a heart on parchment paper and filled it in. You want the buns to be close enough so that when they rise further and then bake; they will bake with their sides touching. They can then be pulled apart and you get a lovely soft edge.

Cover loosely and let rise for 30 – 45 minutes.

Preheat oven to 350F.

When the buns are ready, put them in the oven and bake for 20-25 minutes until golden-brown.

Check after 15 minutes or so and cover the buns with foil if they are getting too brown. Mine needed no foil.

Remove the buns from the oven and let them cool slightly before transferring them from the tin to a cooling rack.

Melt the additional preserves in a small saucepan with a splash of water until smooth. Brush the jam over the buns to glaze and allow to cool.


It’s sort of a heart … it went fast enough that the shape didn’t really matter.

Valentine’s Day maybe over but there’s always desire for sweet hearts and bread. Be a buddy, bake a heart overflowing with love, we’d love to see what you’d fill your heart with on top of all that love. I know the Babes will change things up, so don’t miss all their hearts.  Send me your post with photo before February 28, I’ll do a round-up post and add you in as well as send you a cool Buddy badge.


6 Comments

BBB ~ Bialys

I first saw Bialys in London.  I don’t know why but Bialys have never really called my name.  Bagels I always found interesting; because they have an involved process that makes them a challenge perhaps.  I haven’t really avoided Bialys but for whatever reason, I’ve never burned to bake them either.  Now that I’ve baked them, I know I’ll be baking them again.  The are really simple to bake and every time Gorn puts one in his mouth it’s “These are really good.”

Our host kitchen this month is Judy of Judy’s Gross Eats.  Thank you for getting me to finally bake Bialys!

This recipe made 15 for me.  We’ve had them plain, Gorn put jam one one, I put cream cheese and jalepeno jelly on one, we put hamburgers on two, toasted two and topped them poached eggs and finally peanut butter.  They are just good.  I have to bake them again to try the bagel traditional lox on them!

Bialys
Recipe By: Judy(Gross Eats) inspired by The Hot Bread Kitchen: Artisanal Baking from Around the World.
Yield: 16
Recipe #1 from Elizabeth Faulkner
Filling
1 tablespoon olive oil
1 teaspoon poppy seeds
1/2 teaspoon kosher salt
1/2 onion minced, per bialy
Dough
17 ounces bread flour
9 1/2 ounces all-purpose flour (white whole wheat)
30 grams flax meal
1 tablespoon kosher salt
2 teaspoons sugar, omitted
4 ounces starter or poolish*
1/2 teaspoon active dry yeast
2 ounces warm water
14 1/2 ounces cold water

Directions:

1. I fear I played really loose with this recipe.  No starter for me …
I simply combined all dough ingredients together except the salt.
Mixed.
Knead for 6 minutes.
Add salt and knead for another 2 minutes or until dispersed.

2. Set aside to rise for 2 hours.
Ah, I put it in the fridge overnight …

3. Roll into a log on a flour dusted surface. Scale out dough at 3 ounces a ball (about 16 bialys total) Mine were more like 3.5 ounces.
Press each out to shape without overworking and leaving 1″ lip around edge.
Proof dough balls (allow to rise again) in warm spot covered with a clean dish towel for an hour or until soft and airy.

IMG_0977
4. Sauté onions in 1 tablespoon olive oil until light caramel in color but at higher heat.

Without a stove top, I caramelized my onions in a crock pot.  Works like a charm.

5. Make center depression in each one and fill with the filling.  I used a scant teaspoon of onion.

IMG_0982
Sprinkle bialys lightly with poppy seeds and salt.  I looked high and low but no poppy seeds here.
Bake at 450 degree oven, preferably on a pizza stone, for about 12-15 minutes.  Mine took 17 minutes.

This slideshow requires JavaScript.

Bake’m Be a Buddy.  Make some bialys and share your experience and photos by emailing Judy a link to your blog or, if you don’t have a blog, email Judy a photo and a brief description.  Send to jahunt22 [at] gmail [dot] com by July 29.  Once you have posted, Judy will send you a Buddy Badge for baking along with us.  Expect a roundup of all of the BBBuddies posts a few days after the close of submissions.


7 Comments

Lien’s Bran Bread ~ BBB

BBB Bran Bread ~ 100% Whole Wheat

Recipe From Lien: from the sisters Margherita and Valeria Simili

Yield: 2 loaves or 1 pullman

While this is a tricky bread to explain; it is an easy bread to enjoy.  Lien’s goal with this bread, I think, was a super healthy bread that tasted really good.  I think she succeeded exceedingly well.  There is a lot of bran in this bread and you really never really think “bran” while you’re eating it.
I believe I did a number of very small things wrong that together left me feeling this loaf missed something, missed a spark and yet we both of us kept going for another slice.  The loaf was gone in three days.  This loaf had great texture and very good crust.  I short changed on raisins and nuts, use more next time.  I very often cut down and often eliminate sugar, I think perhaps this was the spark that I missed; use some sweetening next time.

Would I make this again … I’ve got my ingredients ready to mix a starter tonight.

STARTER FOR SLOW RISE
250 grams whole wheat flour
450 grams water
75 grams wheat bran
2 pinches active dry yeast
DOUGH
110 grams whole wheat flour
150 grams whole sprouted wheat flour
20 grams rye flour
160 grams water, used water raisins soaked in

30 grams honey (omited first baking** must add next baking)
2 grams active dry yeast
30 grams butter
9 grams salt
50 grams instant skim milk powder
1 tablespoon diastatic malt flour
75 grams walnuts (next time make at least 100 grams)
75 grams raisins (next time make at least 100 grams)

Directions:

1. STARTER:  Mix white whole wheat, wheat bran and yeast with water.  Cover and let sit over night.  (Elizabeth used crushed malted rye berries also; I wish I’d had some.Next time: try some rye flour, rye flakes or malted something.)

IMG_0858

Starter after the overnight rise.

2. NEXT MORNING: Soak dried fruit in water.  My initial call was to use cranberries but Gorn wanted raisins (98% of the time).  I should have used at least 100 grams of either.  Another time I might use apricots.

Mix starter and all dough ingredients – holding back walnuts and dried fruit.  I used the water I soaked the raisins in – why throw away flavor?

3. KNEAD not really.  I mixed and let it sit about 20 minutes.  I added a little more flour and it still didn’t really knead.  I wasn’t willing to add more flour, in retrospect I probably should have because it never reached kneading consistency.

4. Turn the dough out on a lightly floured surface and press or roll it out flat in a big oval. Add nuts and/or raisins over the dough, fold the dough in two, press or roll out again and sprinkle on the remaining nuts/raisins. Roll the dough (jelly roll style).

5. Heavily butter pullman pan and sprinkle liberally with walnut crumbs.

6. I rolled the dough roll into my pullman pan.  Sprayed the top with water and put the pan cover on sliding it closed short of half an inch.

IMG_0866

7. 45 minutes later I had a really nice rise.

8. Preheat your oven to 200ºC (400ºF).
9. Make slashes in the dough (maybe if I’d added more flour).  Check the temperature of the bread (95ºC/200ºF) to be sure it is cooked.
Baked uncovered 50 minutes.  Internal temp at 201 when taken out of oven.
Take the loaves out and leave to cool completely on a wire rack.

There is no bitterness in this bread so often associated with all whole wheat breads.  I never felt like I was being made to eat this bread because it was good for me; this is easy eating bread.

IMG_0872
GOOD EATING.
IMG_0883
Do you see the big smily face upper right?  He’s telling you to get into the kitchen and Bake!
It would be great if you could join this challenge, how much bran can you add to still make good edible bread?  Get your bag of bran, knead, post and let us know how it went. And join us as a Bread Baking Buddy, send your results and what you thought of this to the Kitchen of the Month (that’s Lien this time!) type BBB Brab Bread as subject to notitievanlien(at)gmail(dot) com and you’ll be sent a Bread Baking Buddy Badge that you can add to your blogpost if you like. Deadline the 29th of June. Take on the challenge and let’s bake!


10 Comments

BBB Rolls ~ NOT Cinnamon Rolls

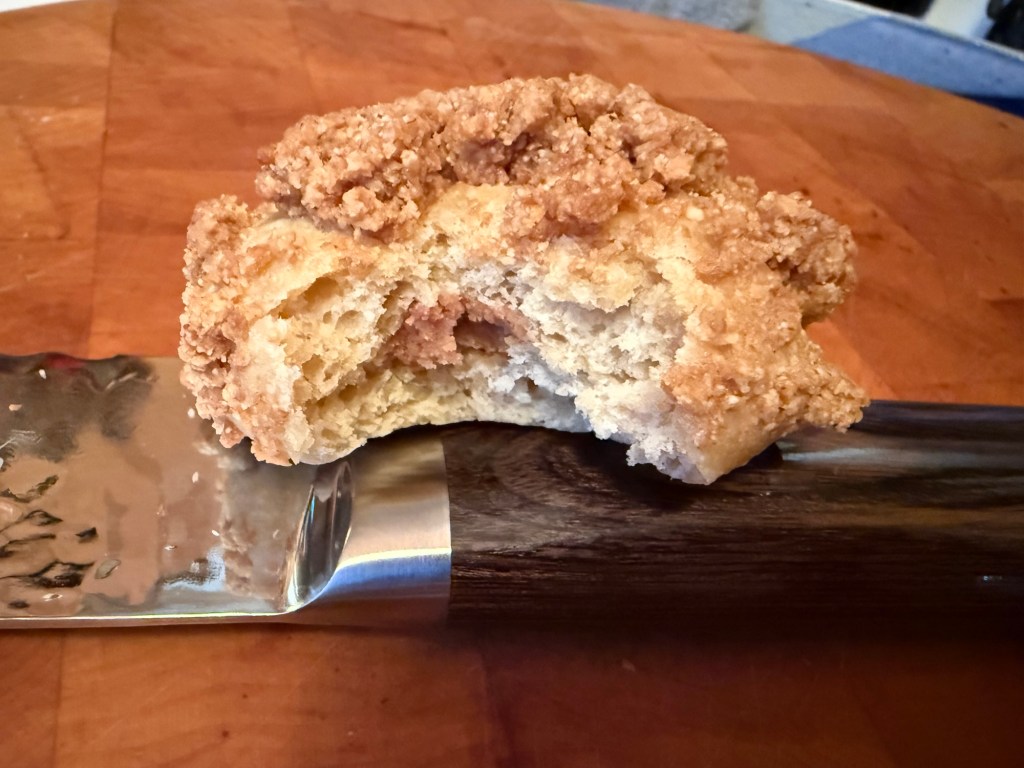
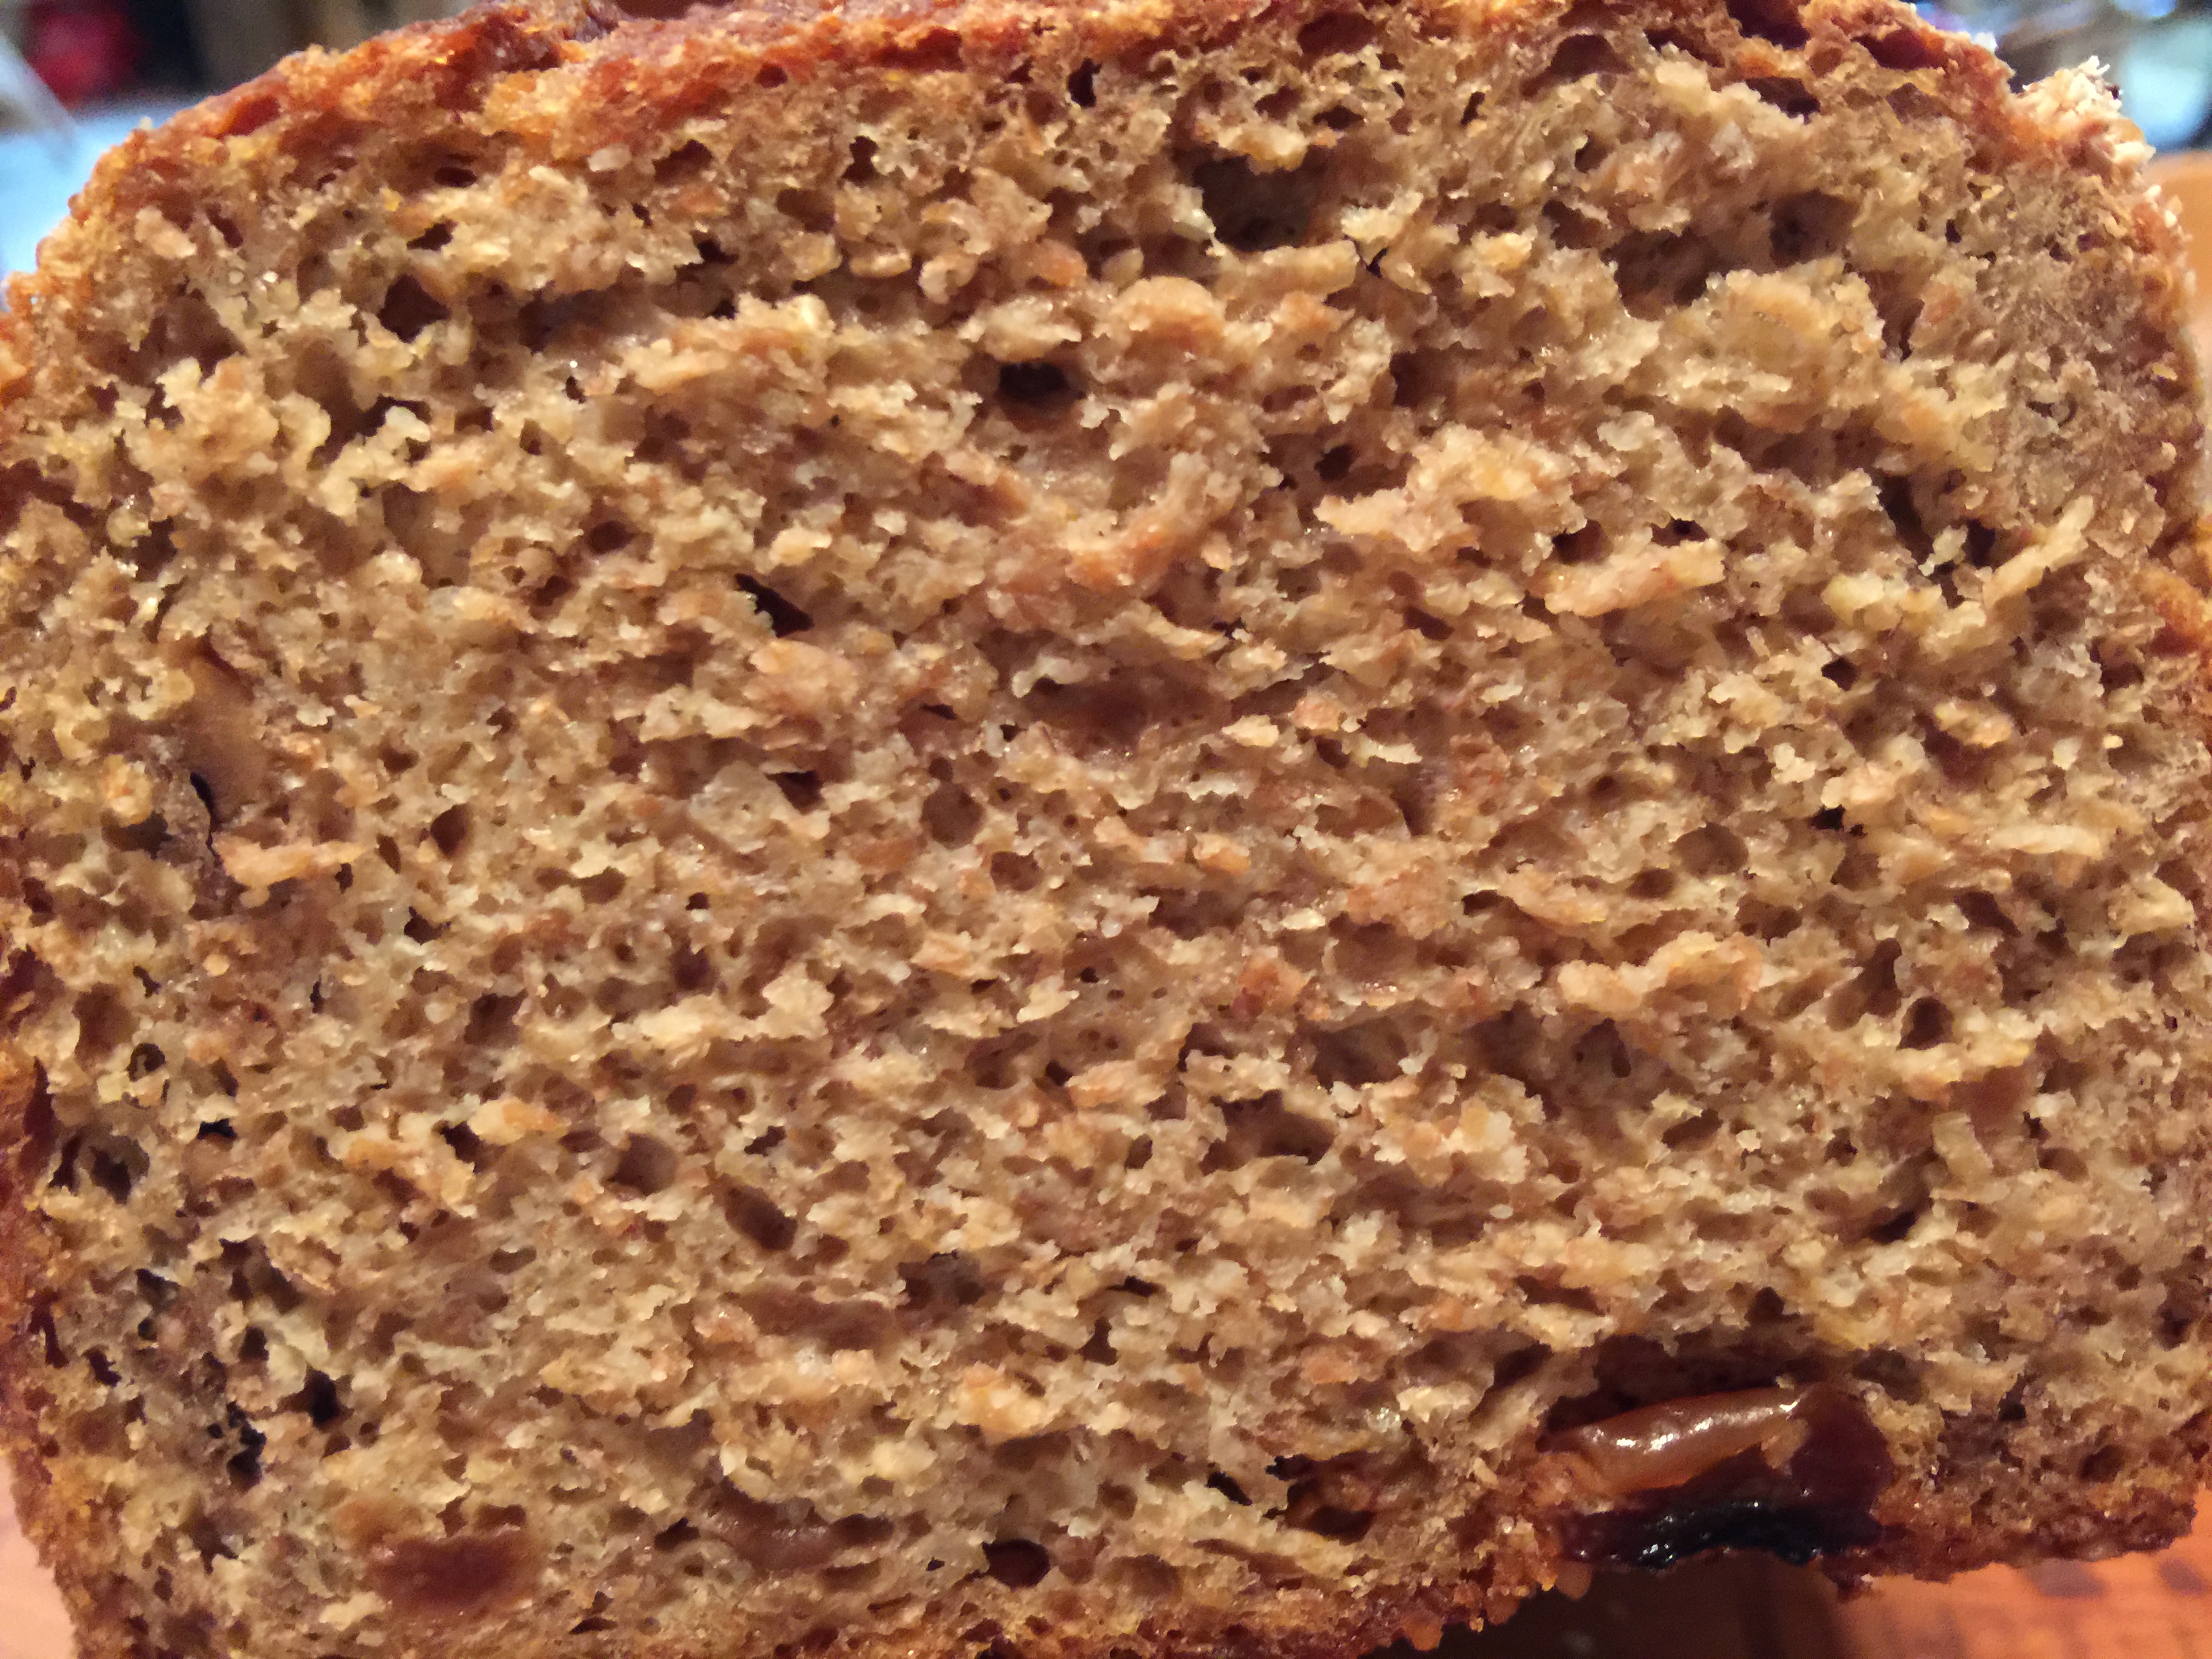
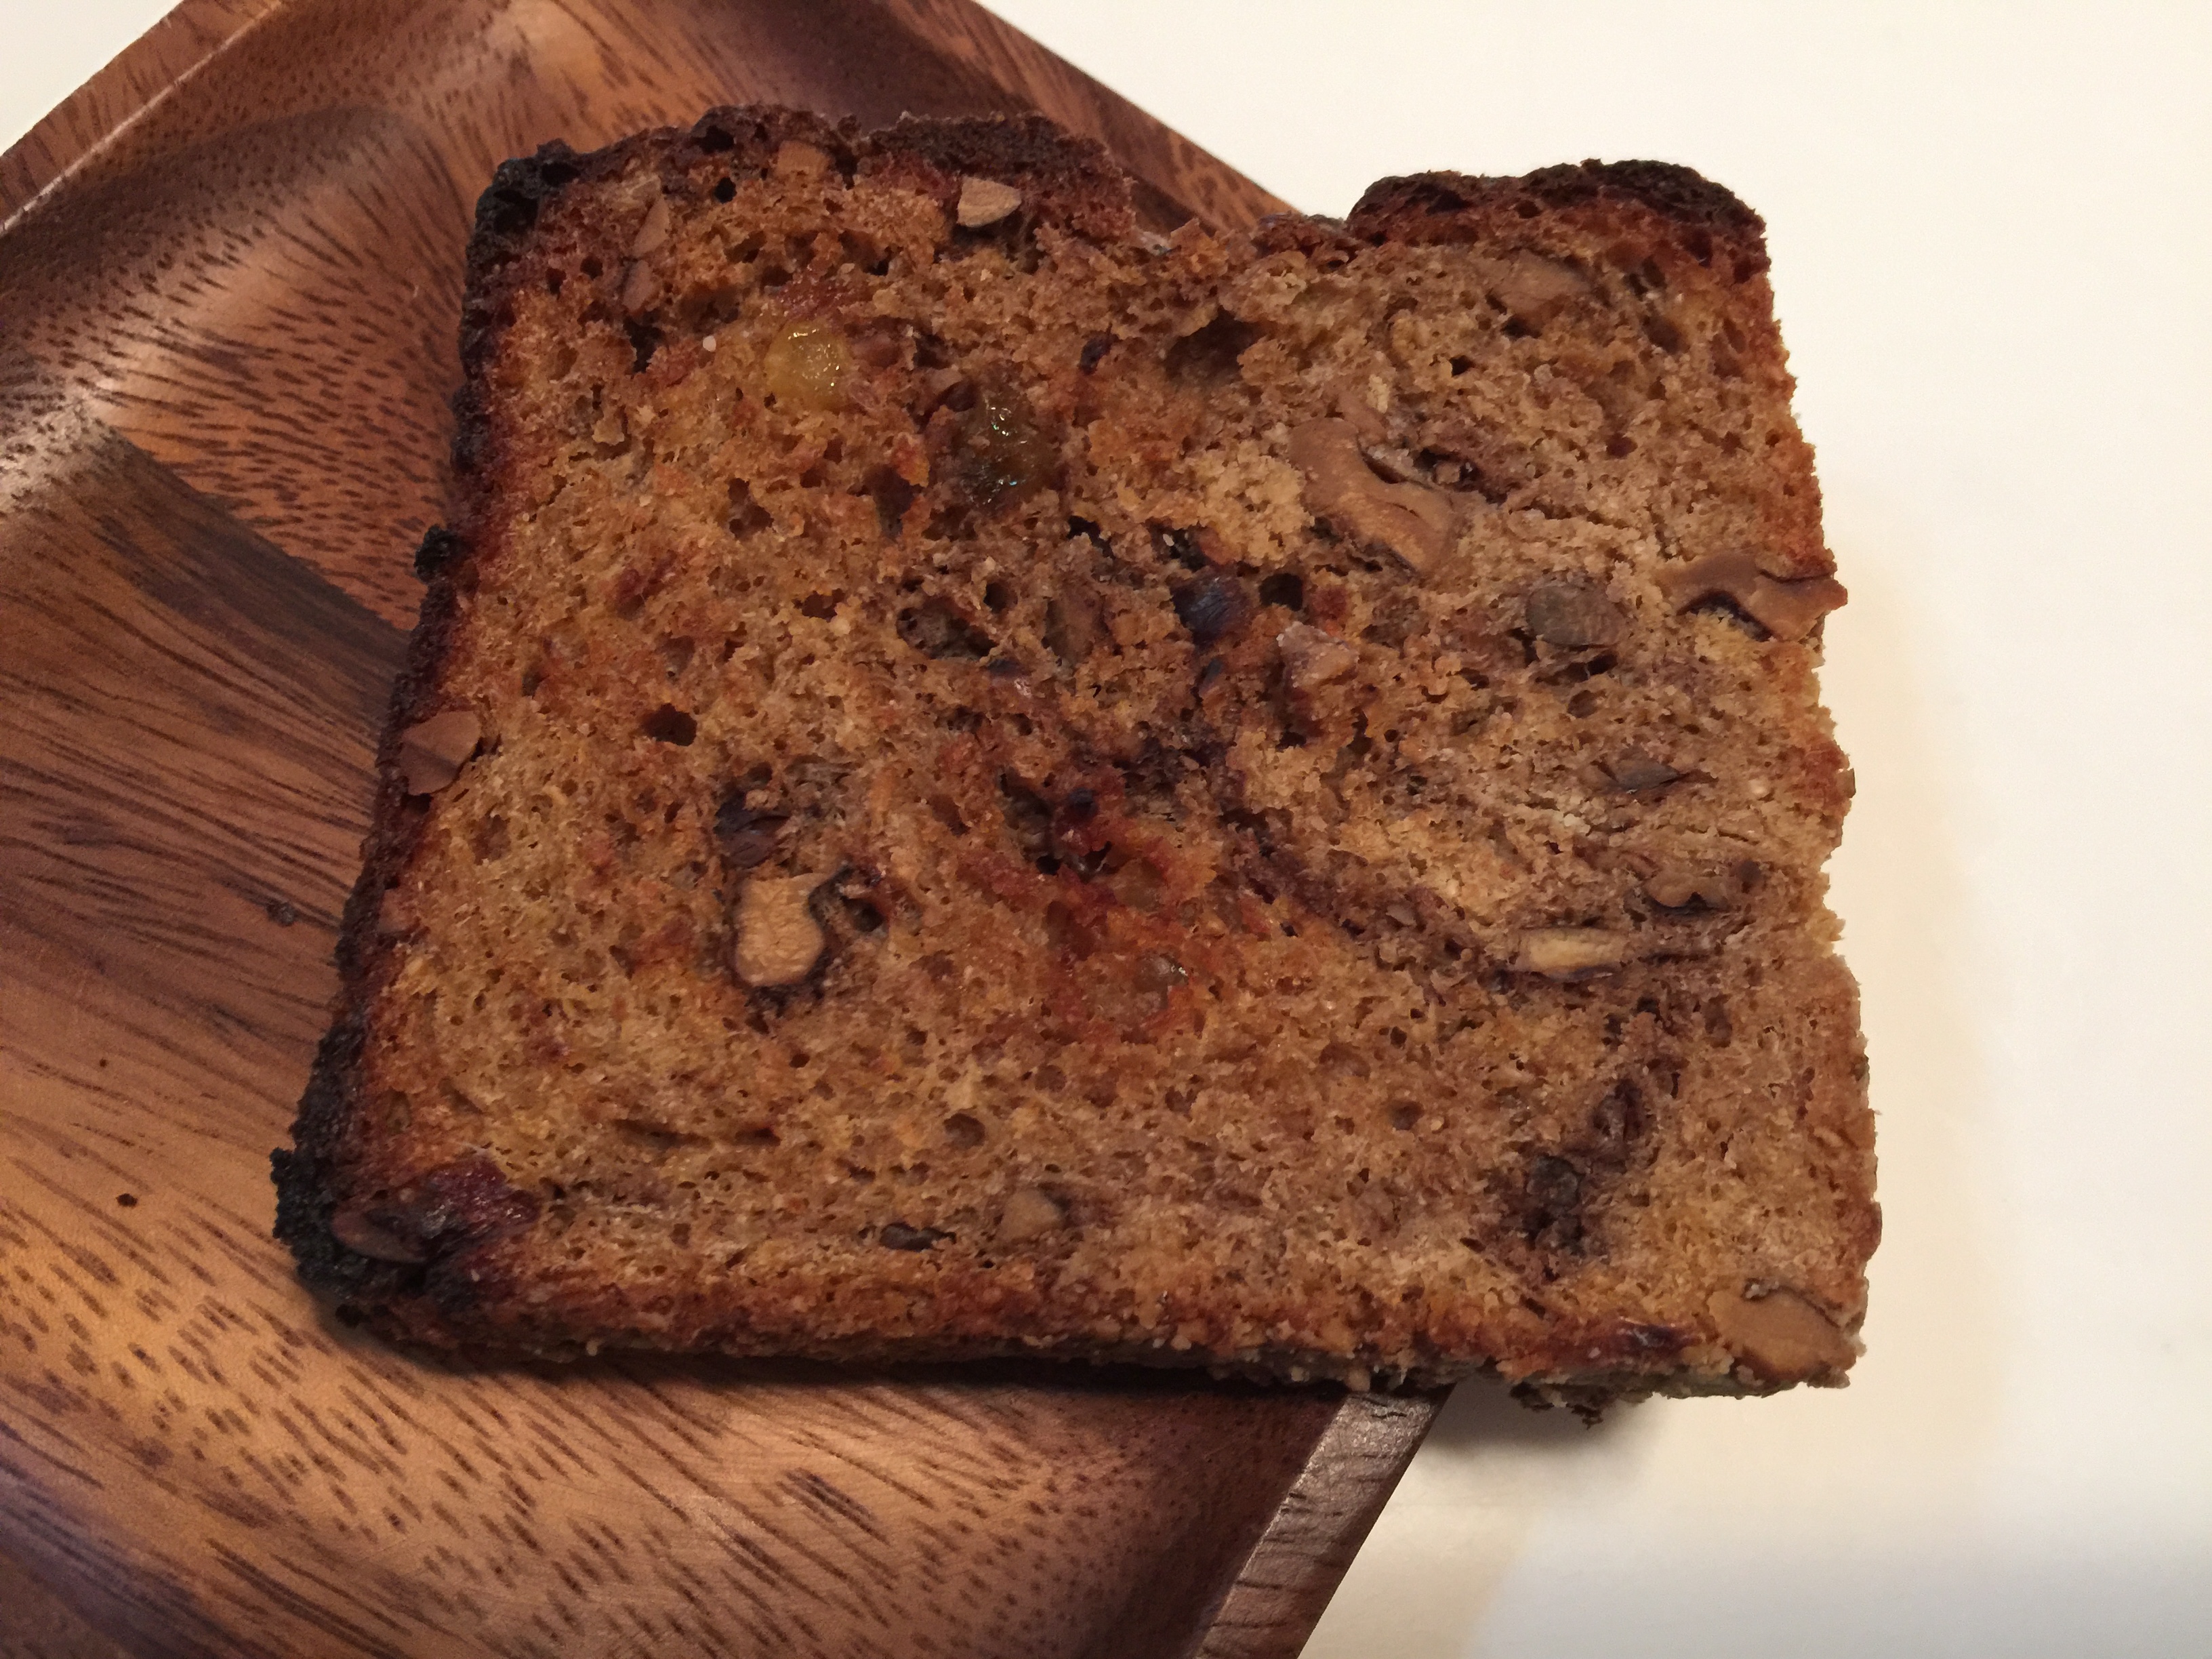
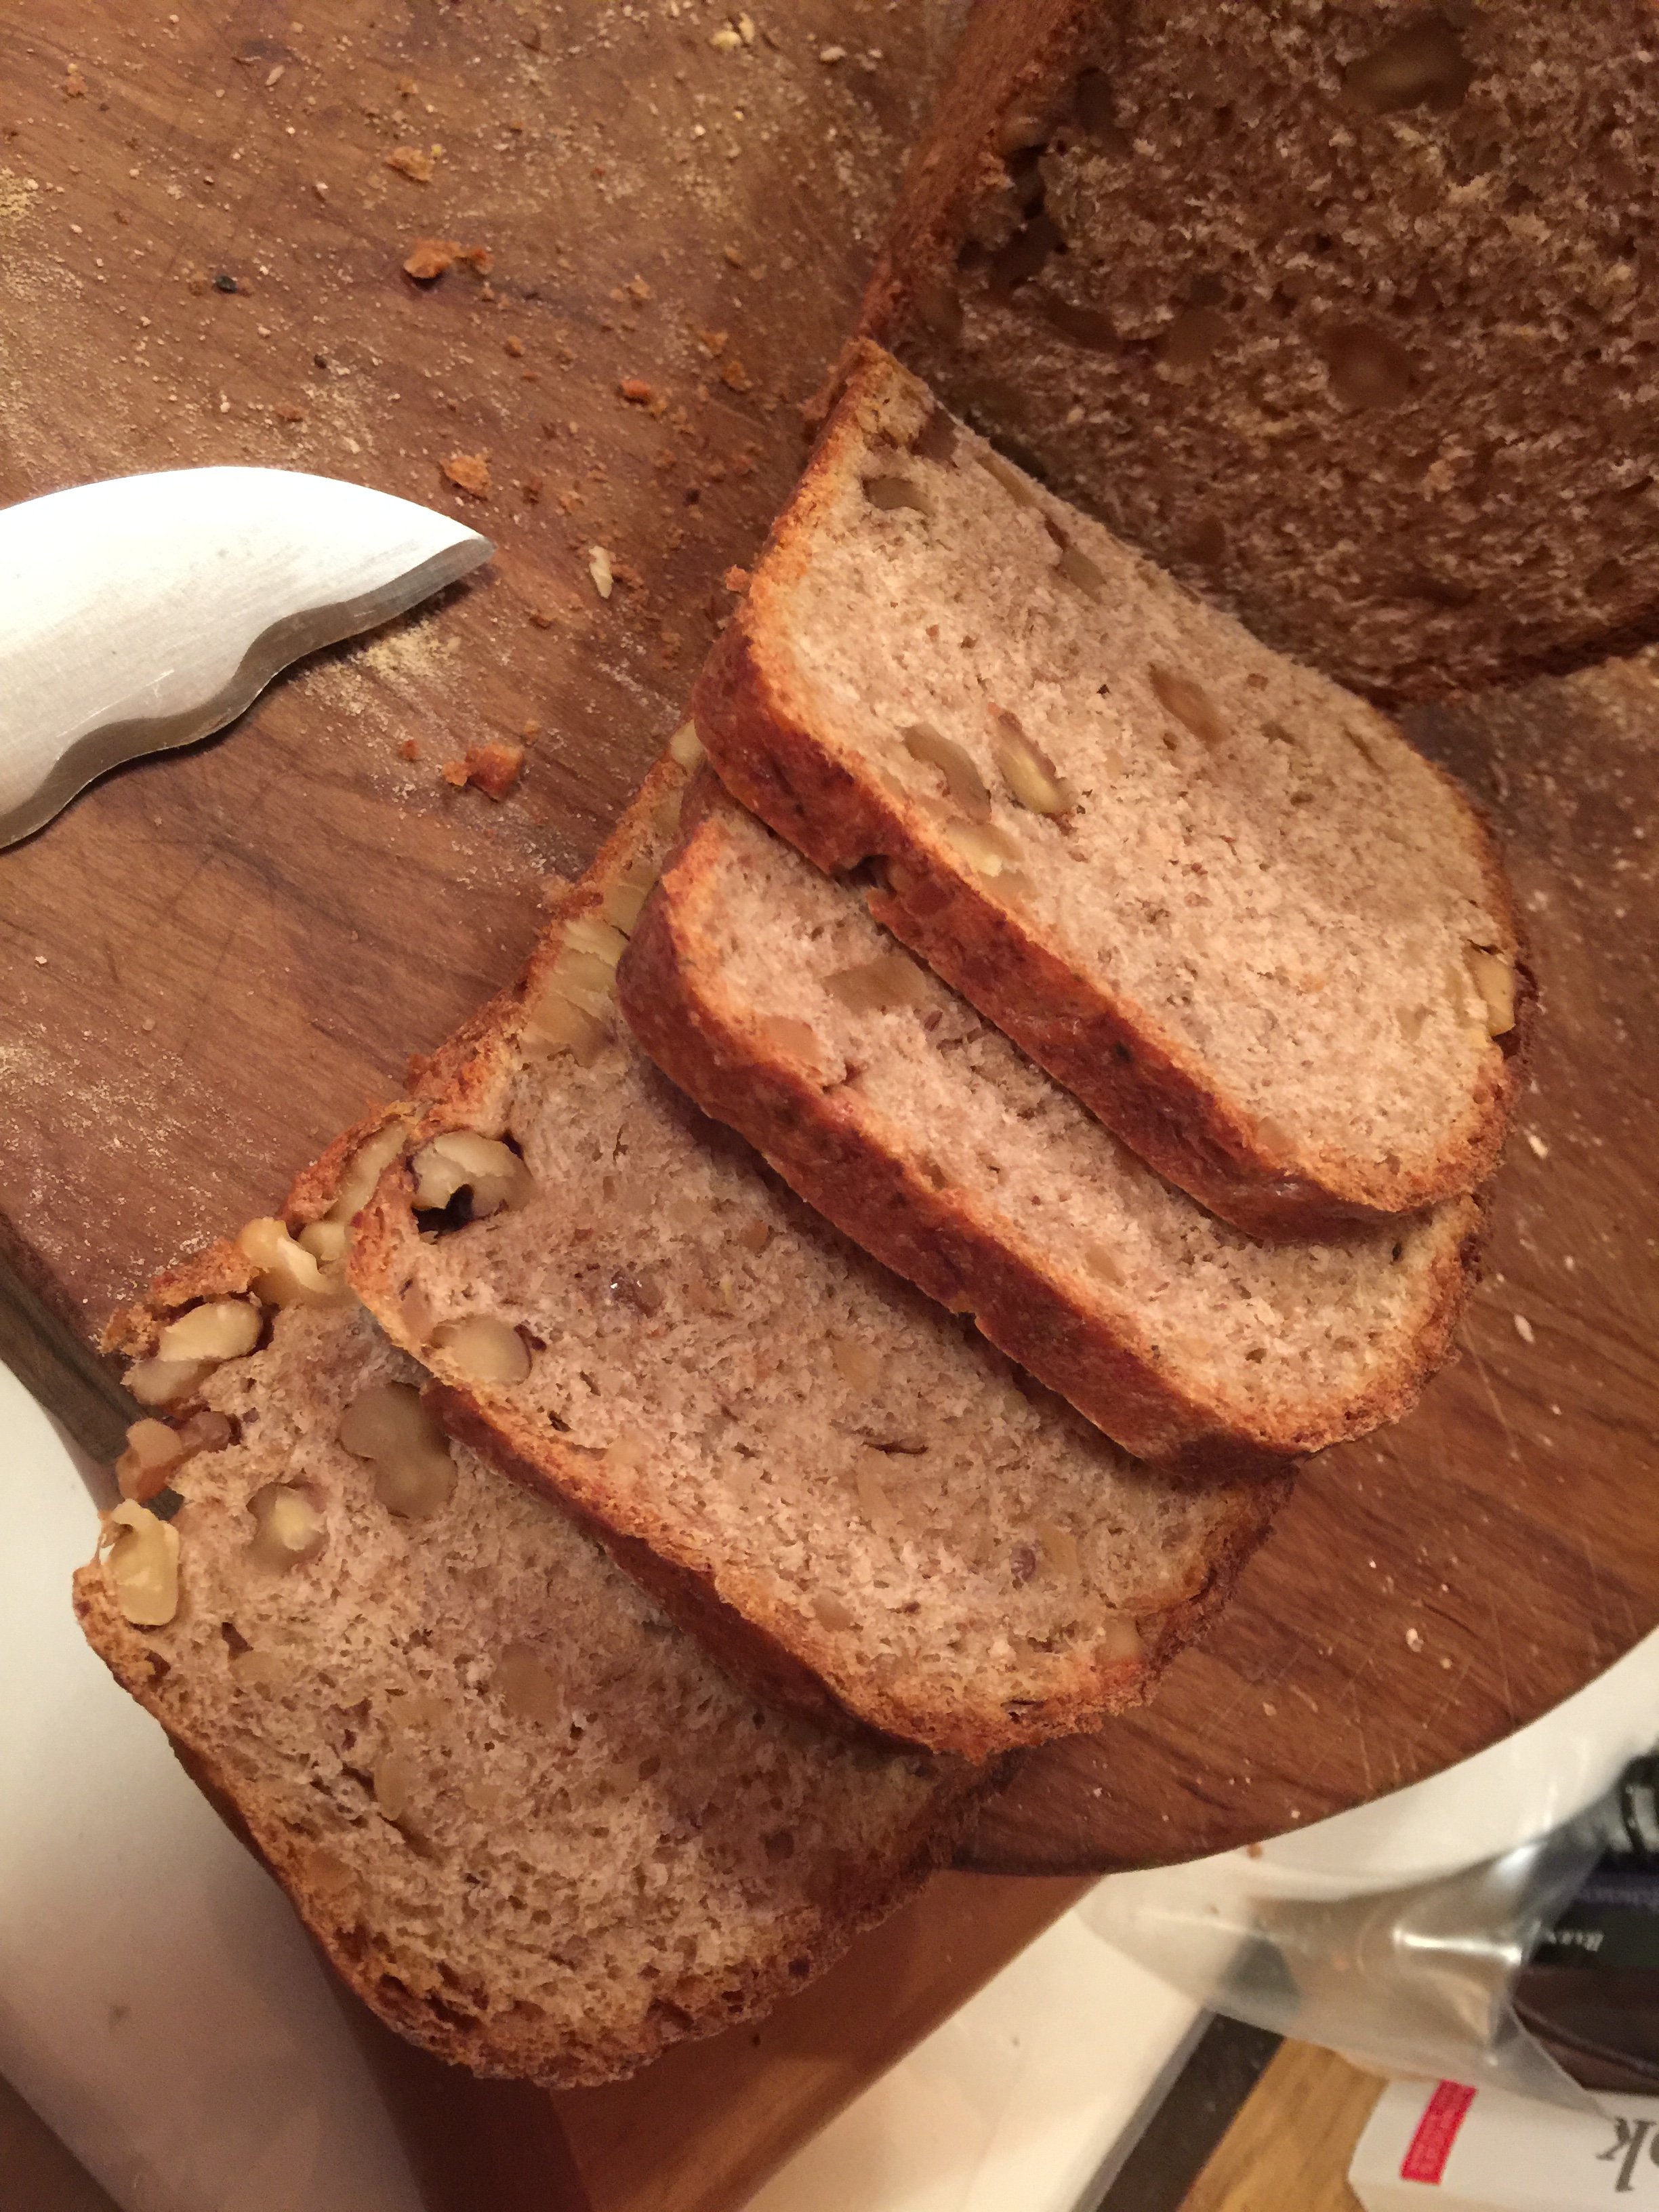
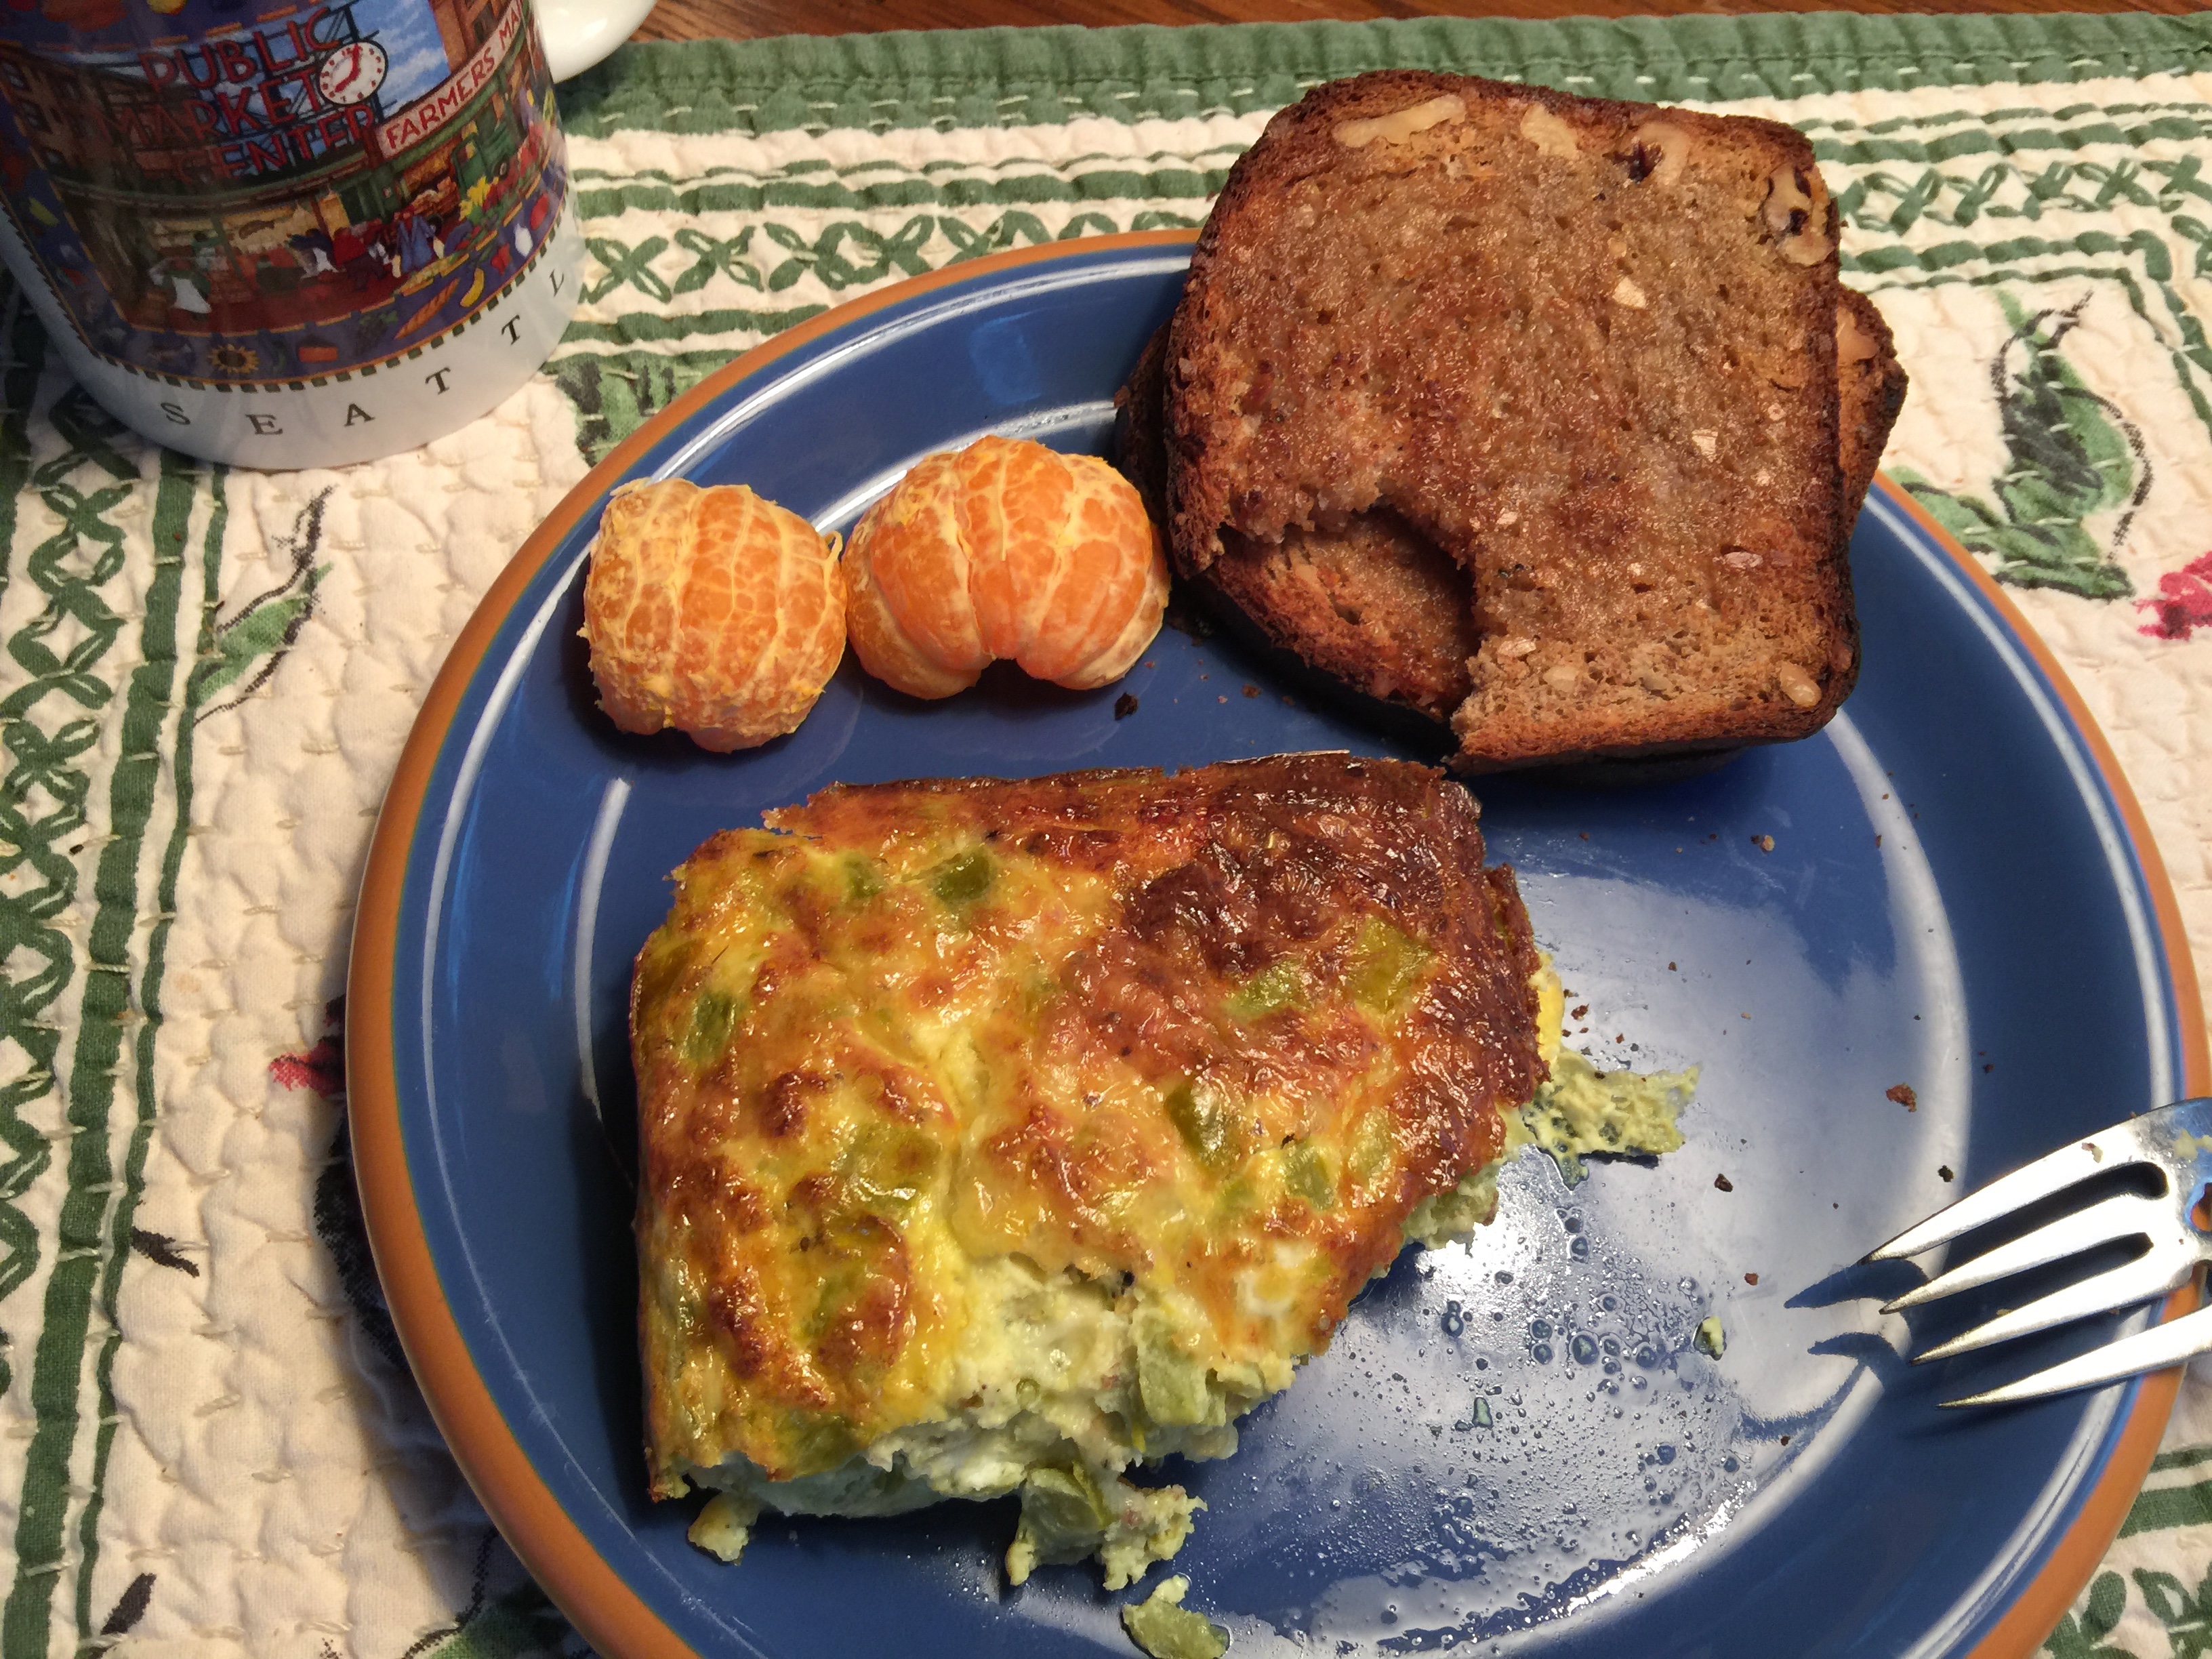
What can I say … They are angel light even using white whole wheat flour.  They are marvelous but then they had a fabulous breakfast filling, which included bacon.  Maybe the rest of the filling ingredients weren’t traditional breakfast fare but they were great for our breakfast yesterday and today.

The part that I don’t get is the yield/serving size.  This was my biggest mistake.  I divided by 2 and only made half the recipe.  I still got 19 rolls … ah, well, when I have guests, I’ll certainly make the full recipe and then bake a fresh batch the next two mornings.  Because I always tend to want to share, I may make the full recipe when it’s just the two of us anyway and share parts of each baking.

BBB logo april 2016

BBB Wacky Rolls and NOT Cinnamon Rolls
Babe Kitchen of the Month: Karen of BakeMyDay
Serving Size: 21
Yield: 21 rolls

480 ml [2 cups] milk
120 ml [1/2 cup] butter
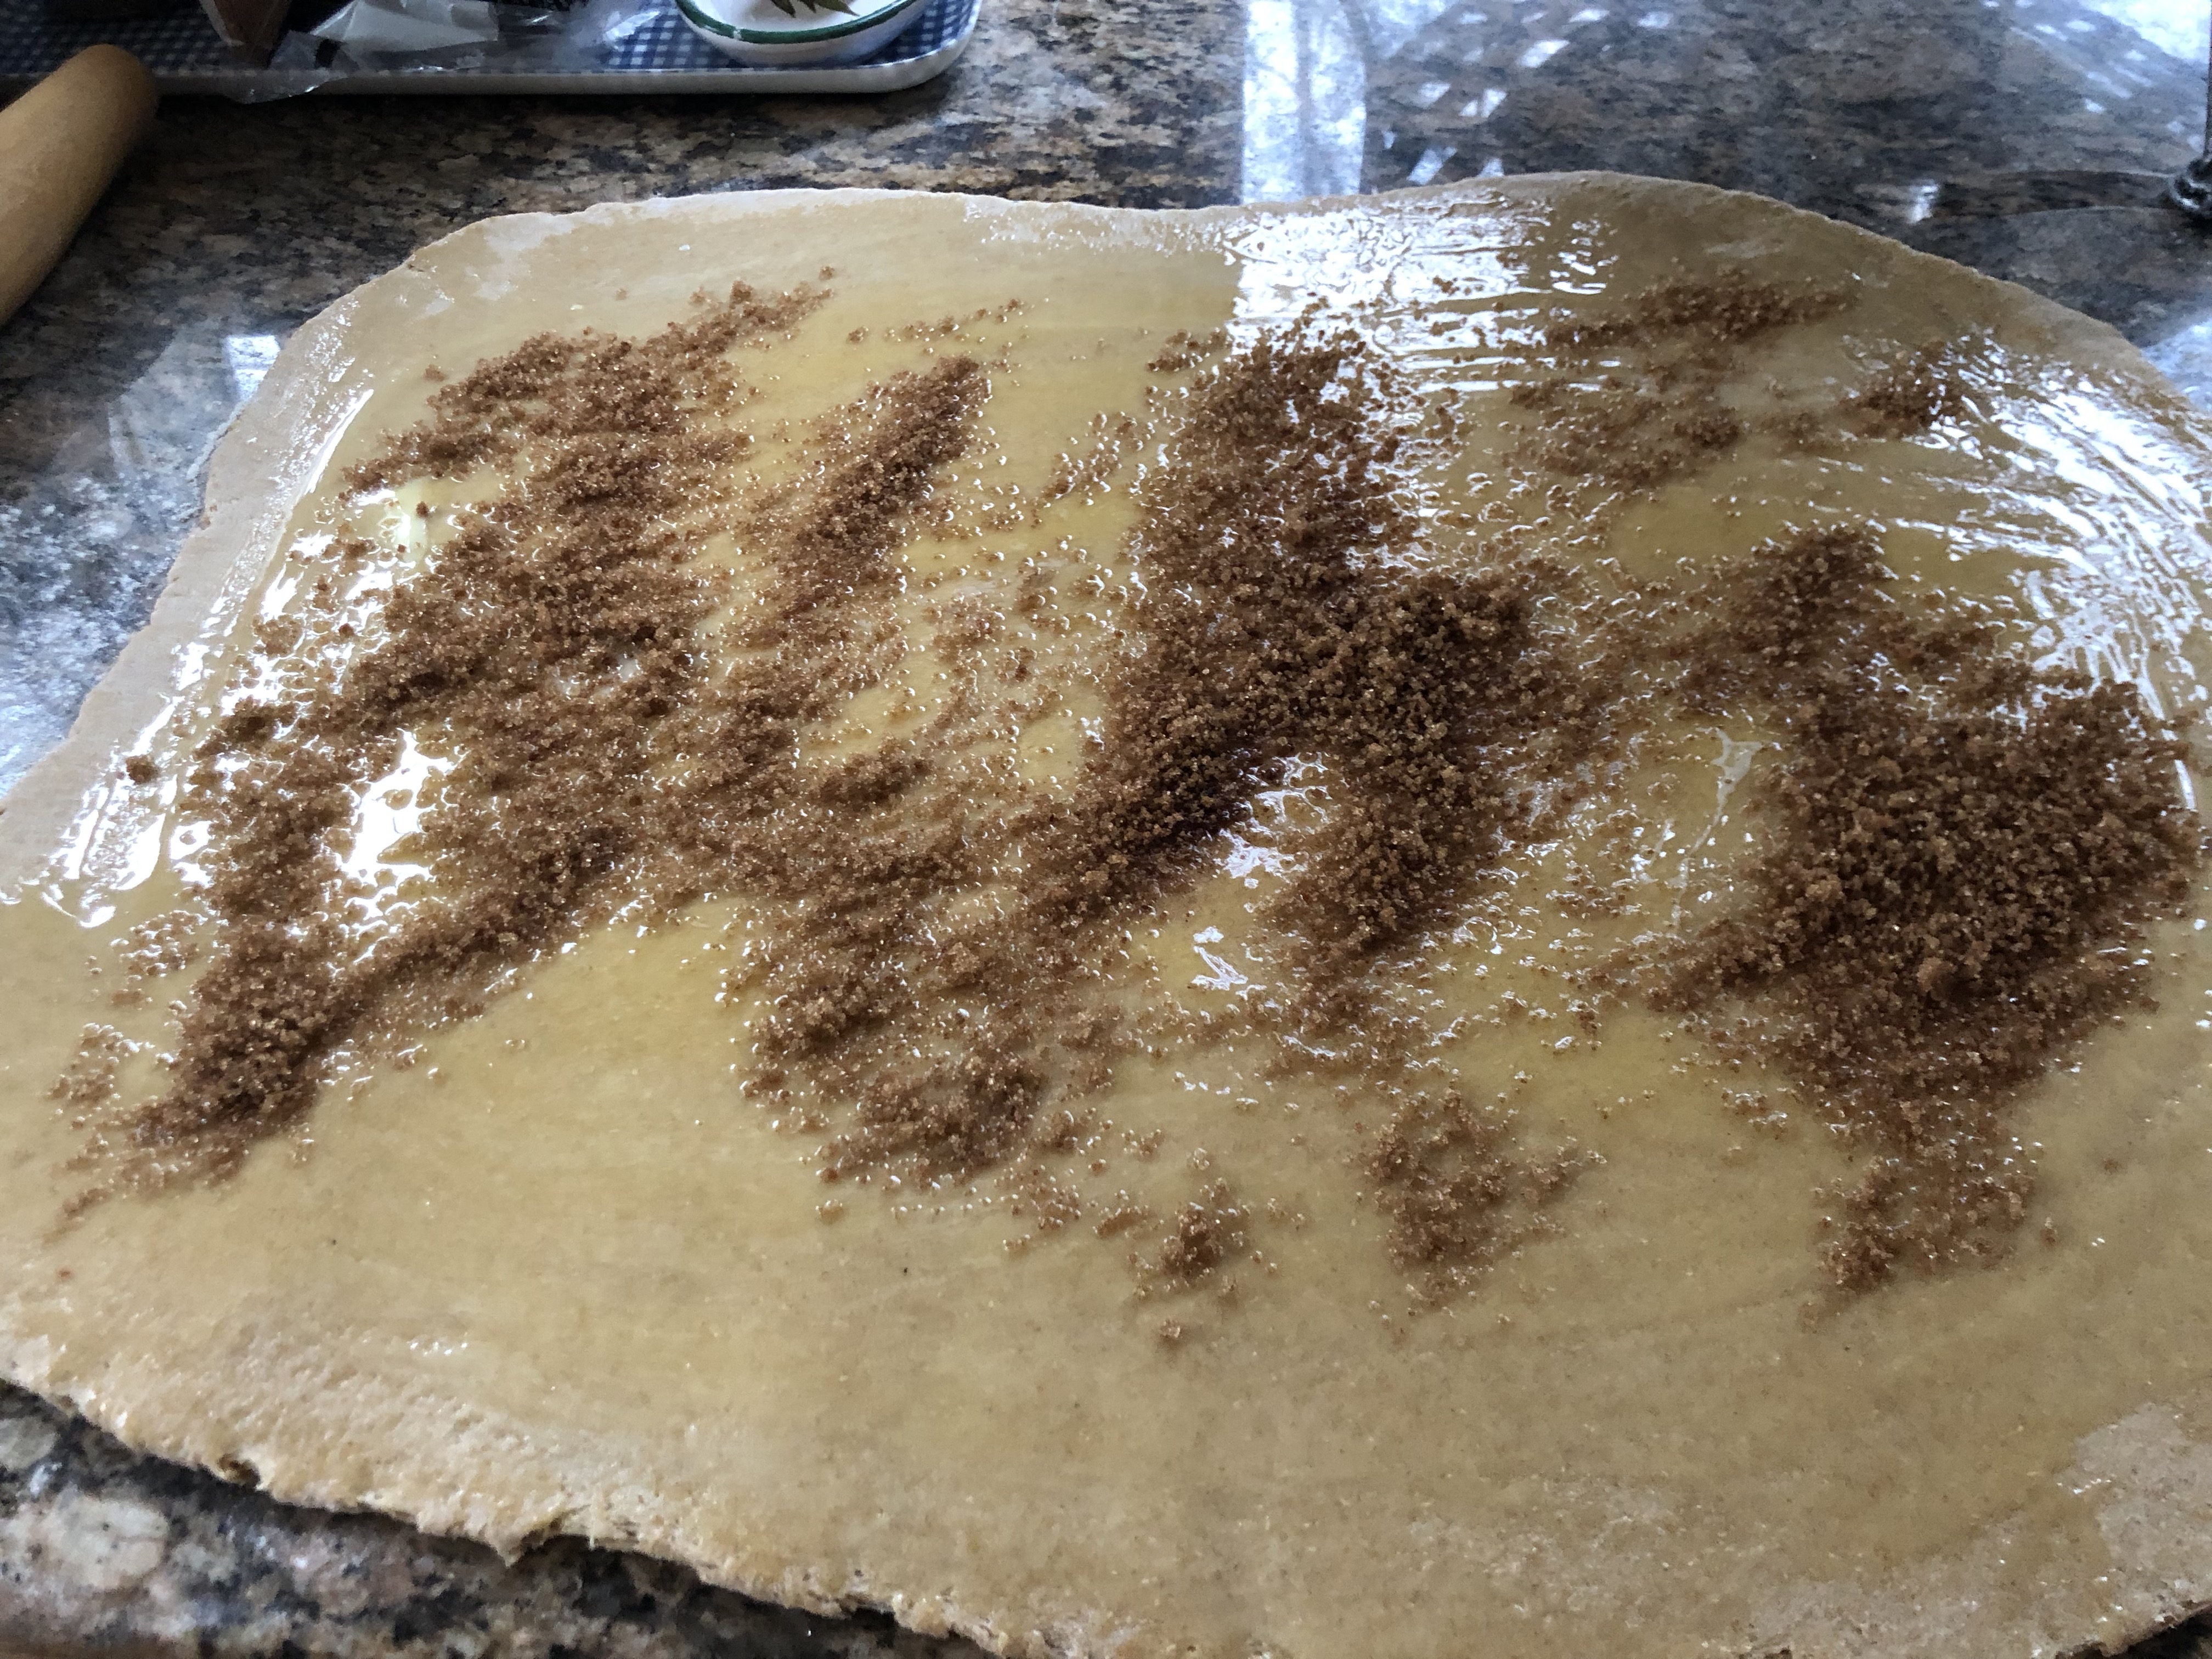
30 grams brown sugar (my modification)
2 – 2.5 teaspoon yeast
520 grams [4 cups] KA white whole wheat flour
45 grams ground flax seed
65 grams [1/2 cup] AP flour (extra, reserve to add later)
1/2 teaspoon heaping baking powder
1/2 teaspoon scant baking soda
1/2 tablespoon salt
melted butter
190 gr [1 cup] sugar, I omitted

1. Oven: 375F / 190 C

2. Room temperature milk, butter, brown sugar and yeast in a bowl.
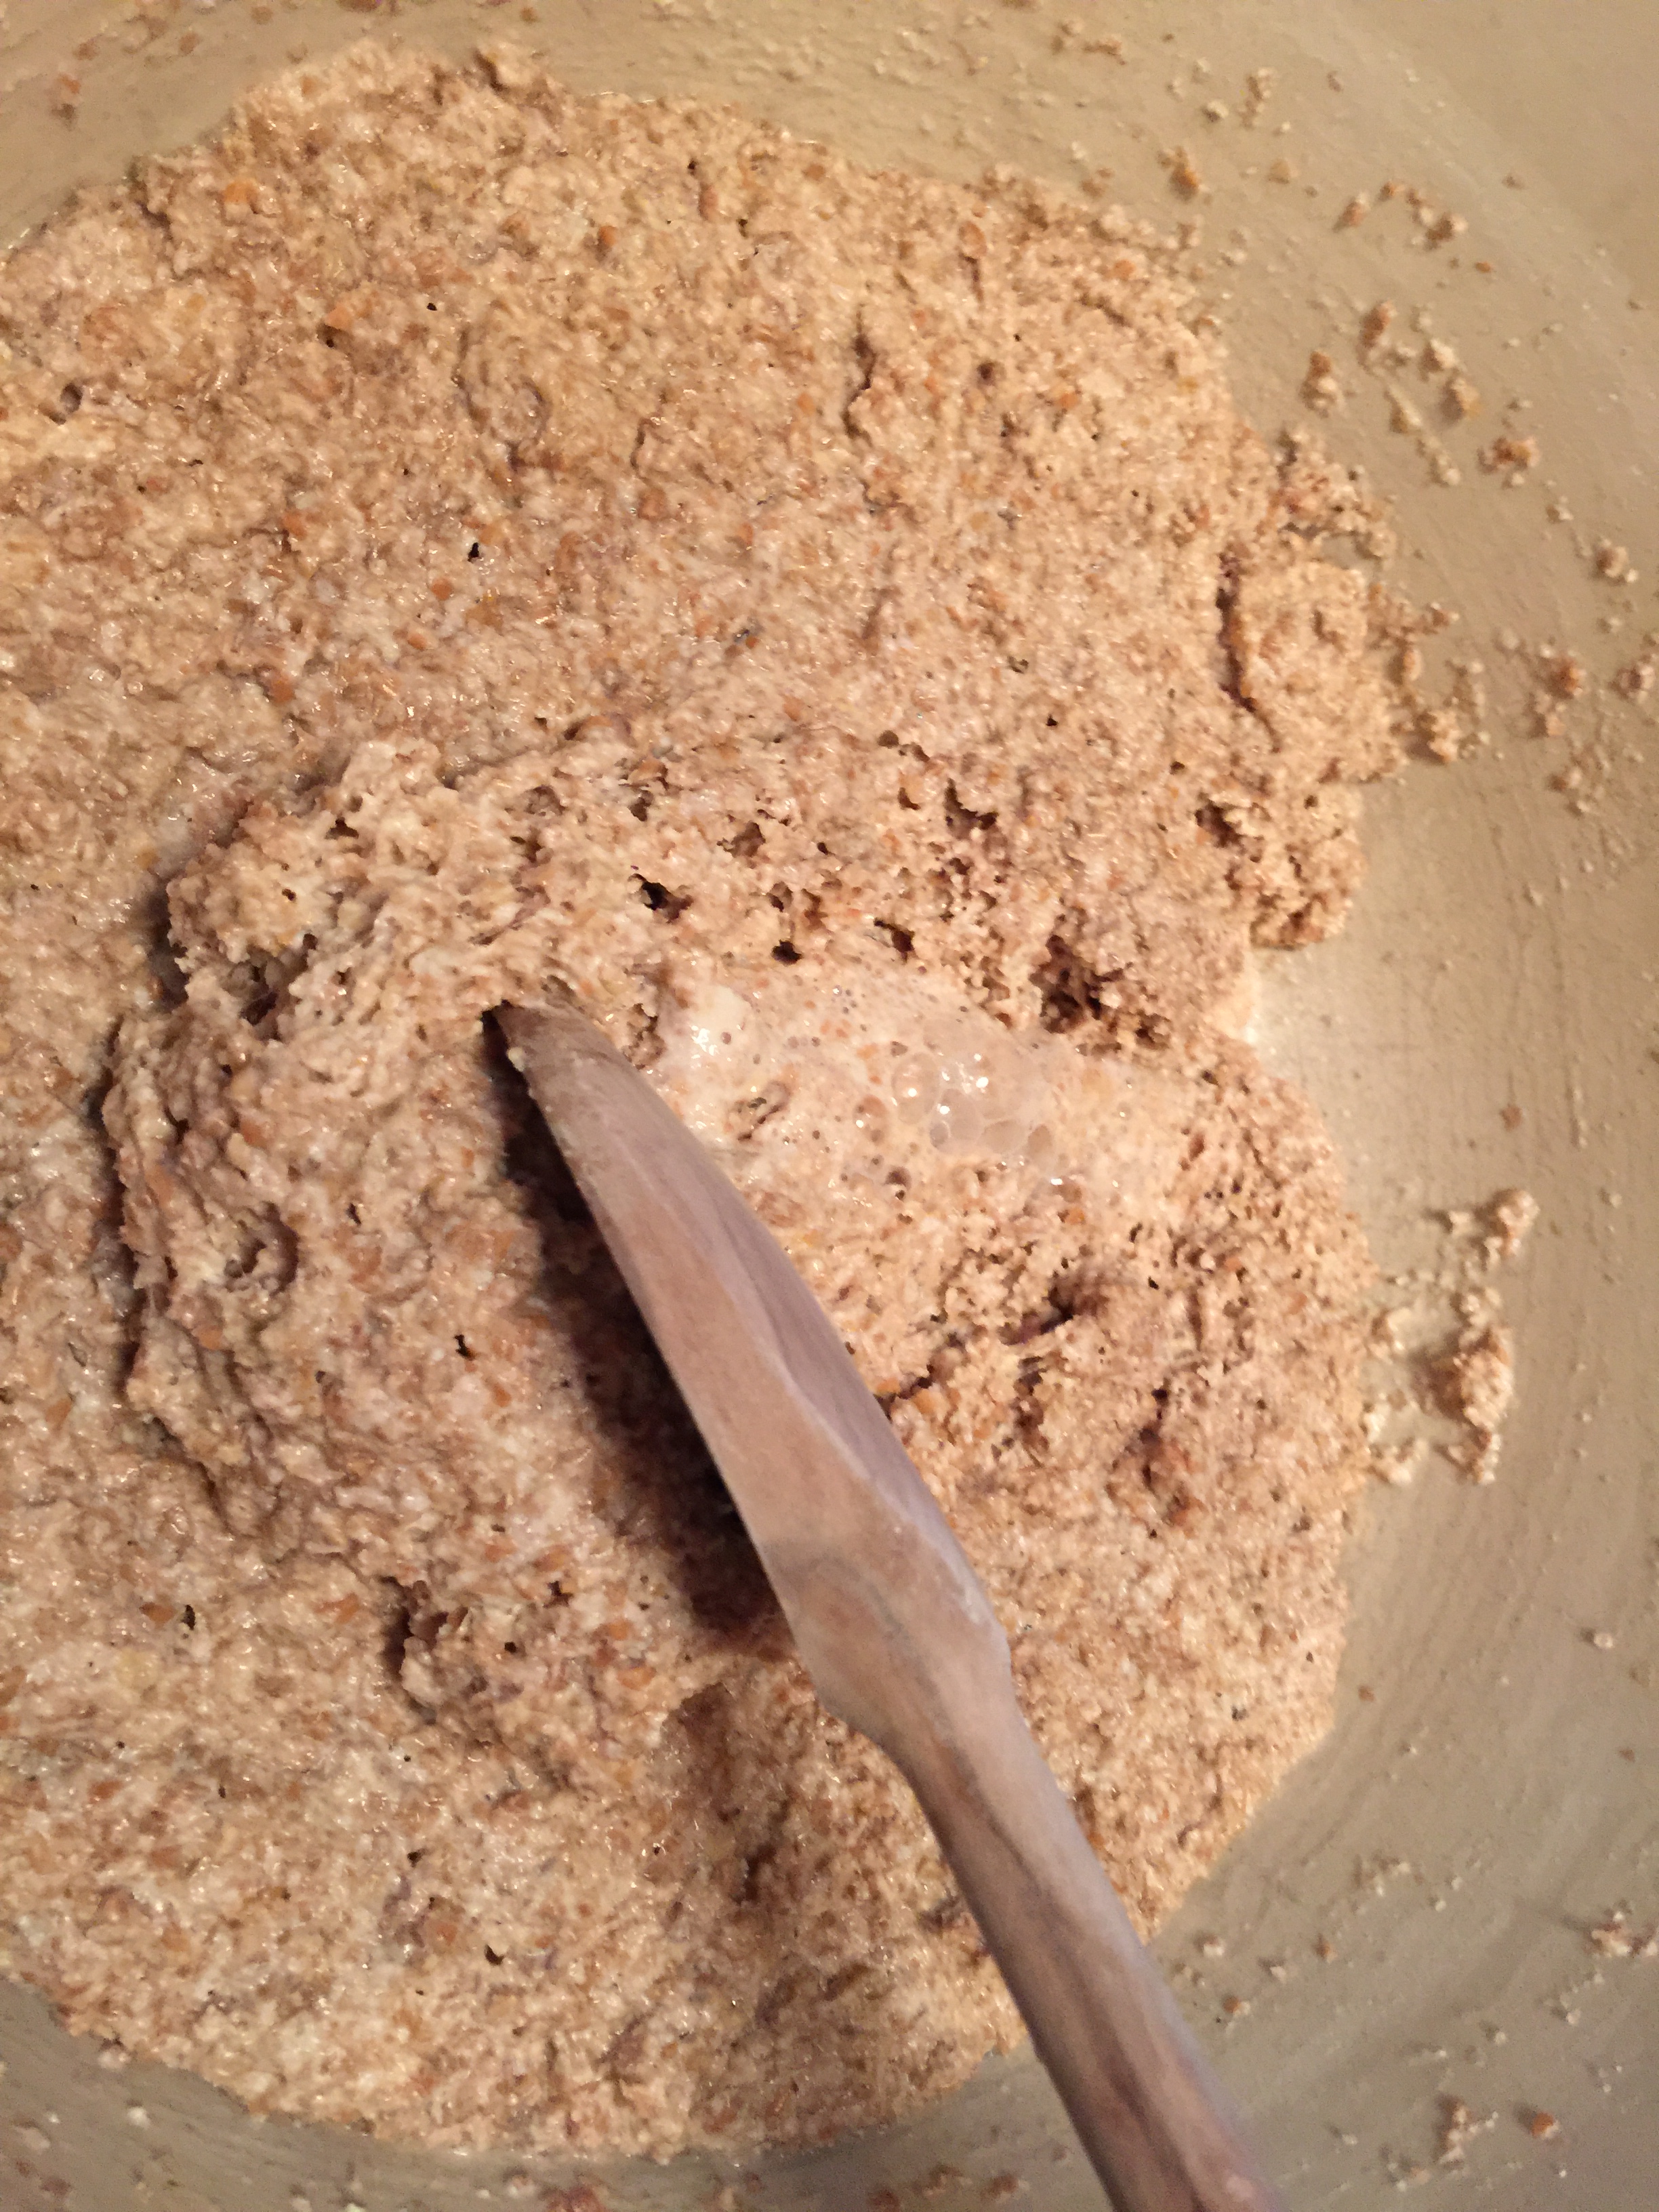
Add 4 cups of white whole wheat flour. Stir until combined, cover and let rise for 45 minutes.

3. Next, remove the cover and ADD baking powder, baking soda, salt and the remaining 1.2 cup of flour. Stir thoroughly to combine.

Oops!  I already did that in step one ~ why read when you can breeze along …

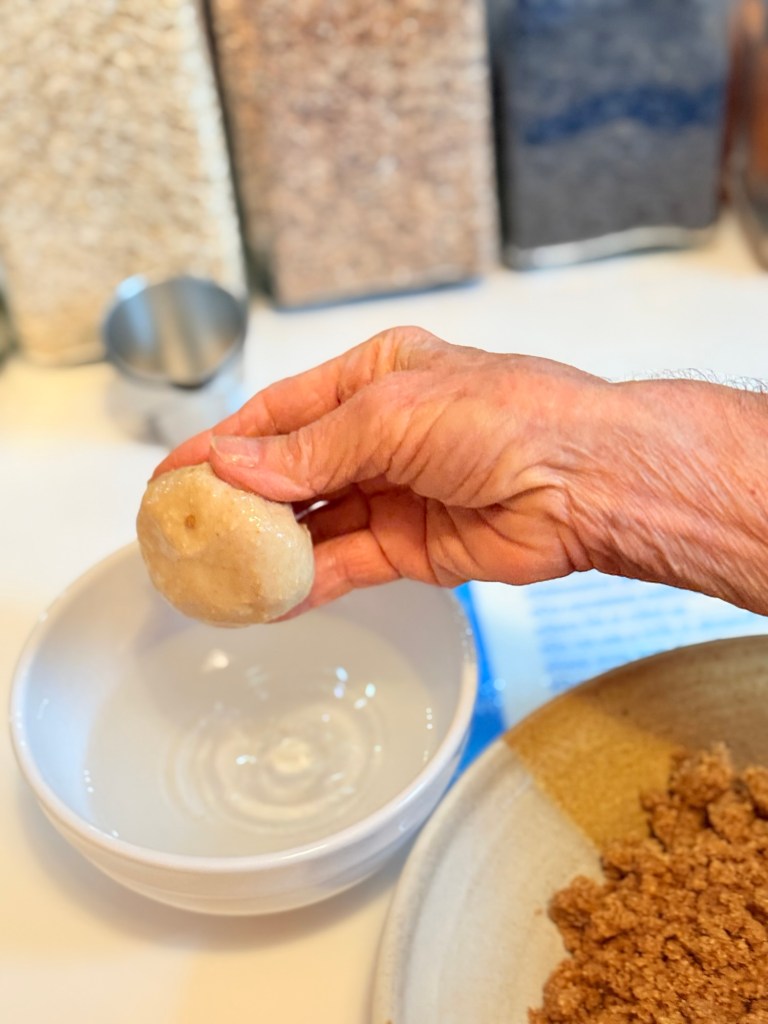
4.  Roll out the dough in a rectangle or refrigerate for at least an hour or up to 3 days. (Probably need to keep an eye out for overflowing dough, so punch down if it rises to the top). Relatively slack dough so it probably is easier to work with when chilled!
IMG_0678
I did chill my dough BUT the best thing I see here is:  Make all the recipe, DO NOT divide by 2.  Mix entire recipe; bake half one day and the other half a day or 2 later!  Joy in the morning!

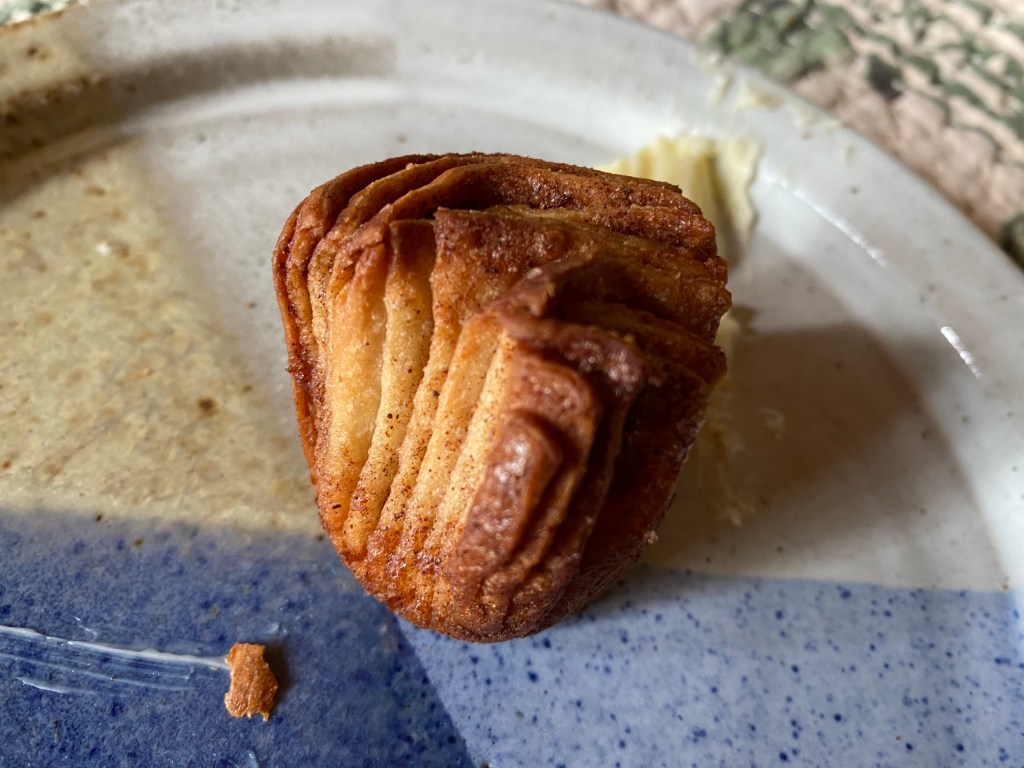
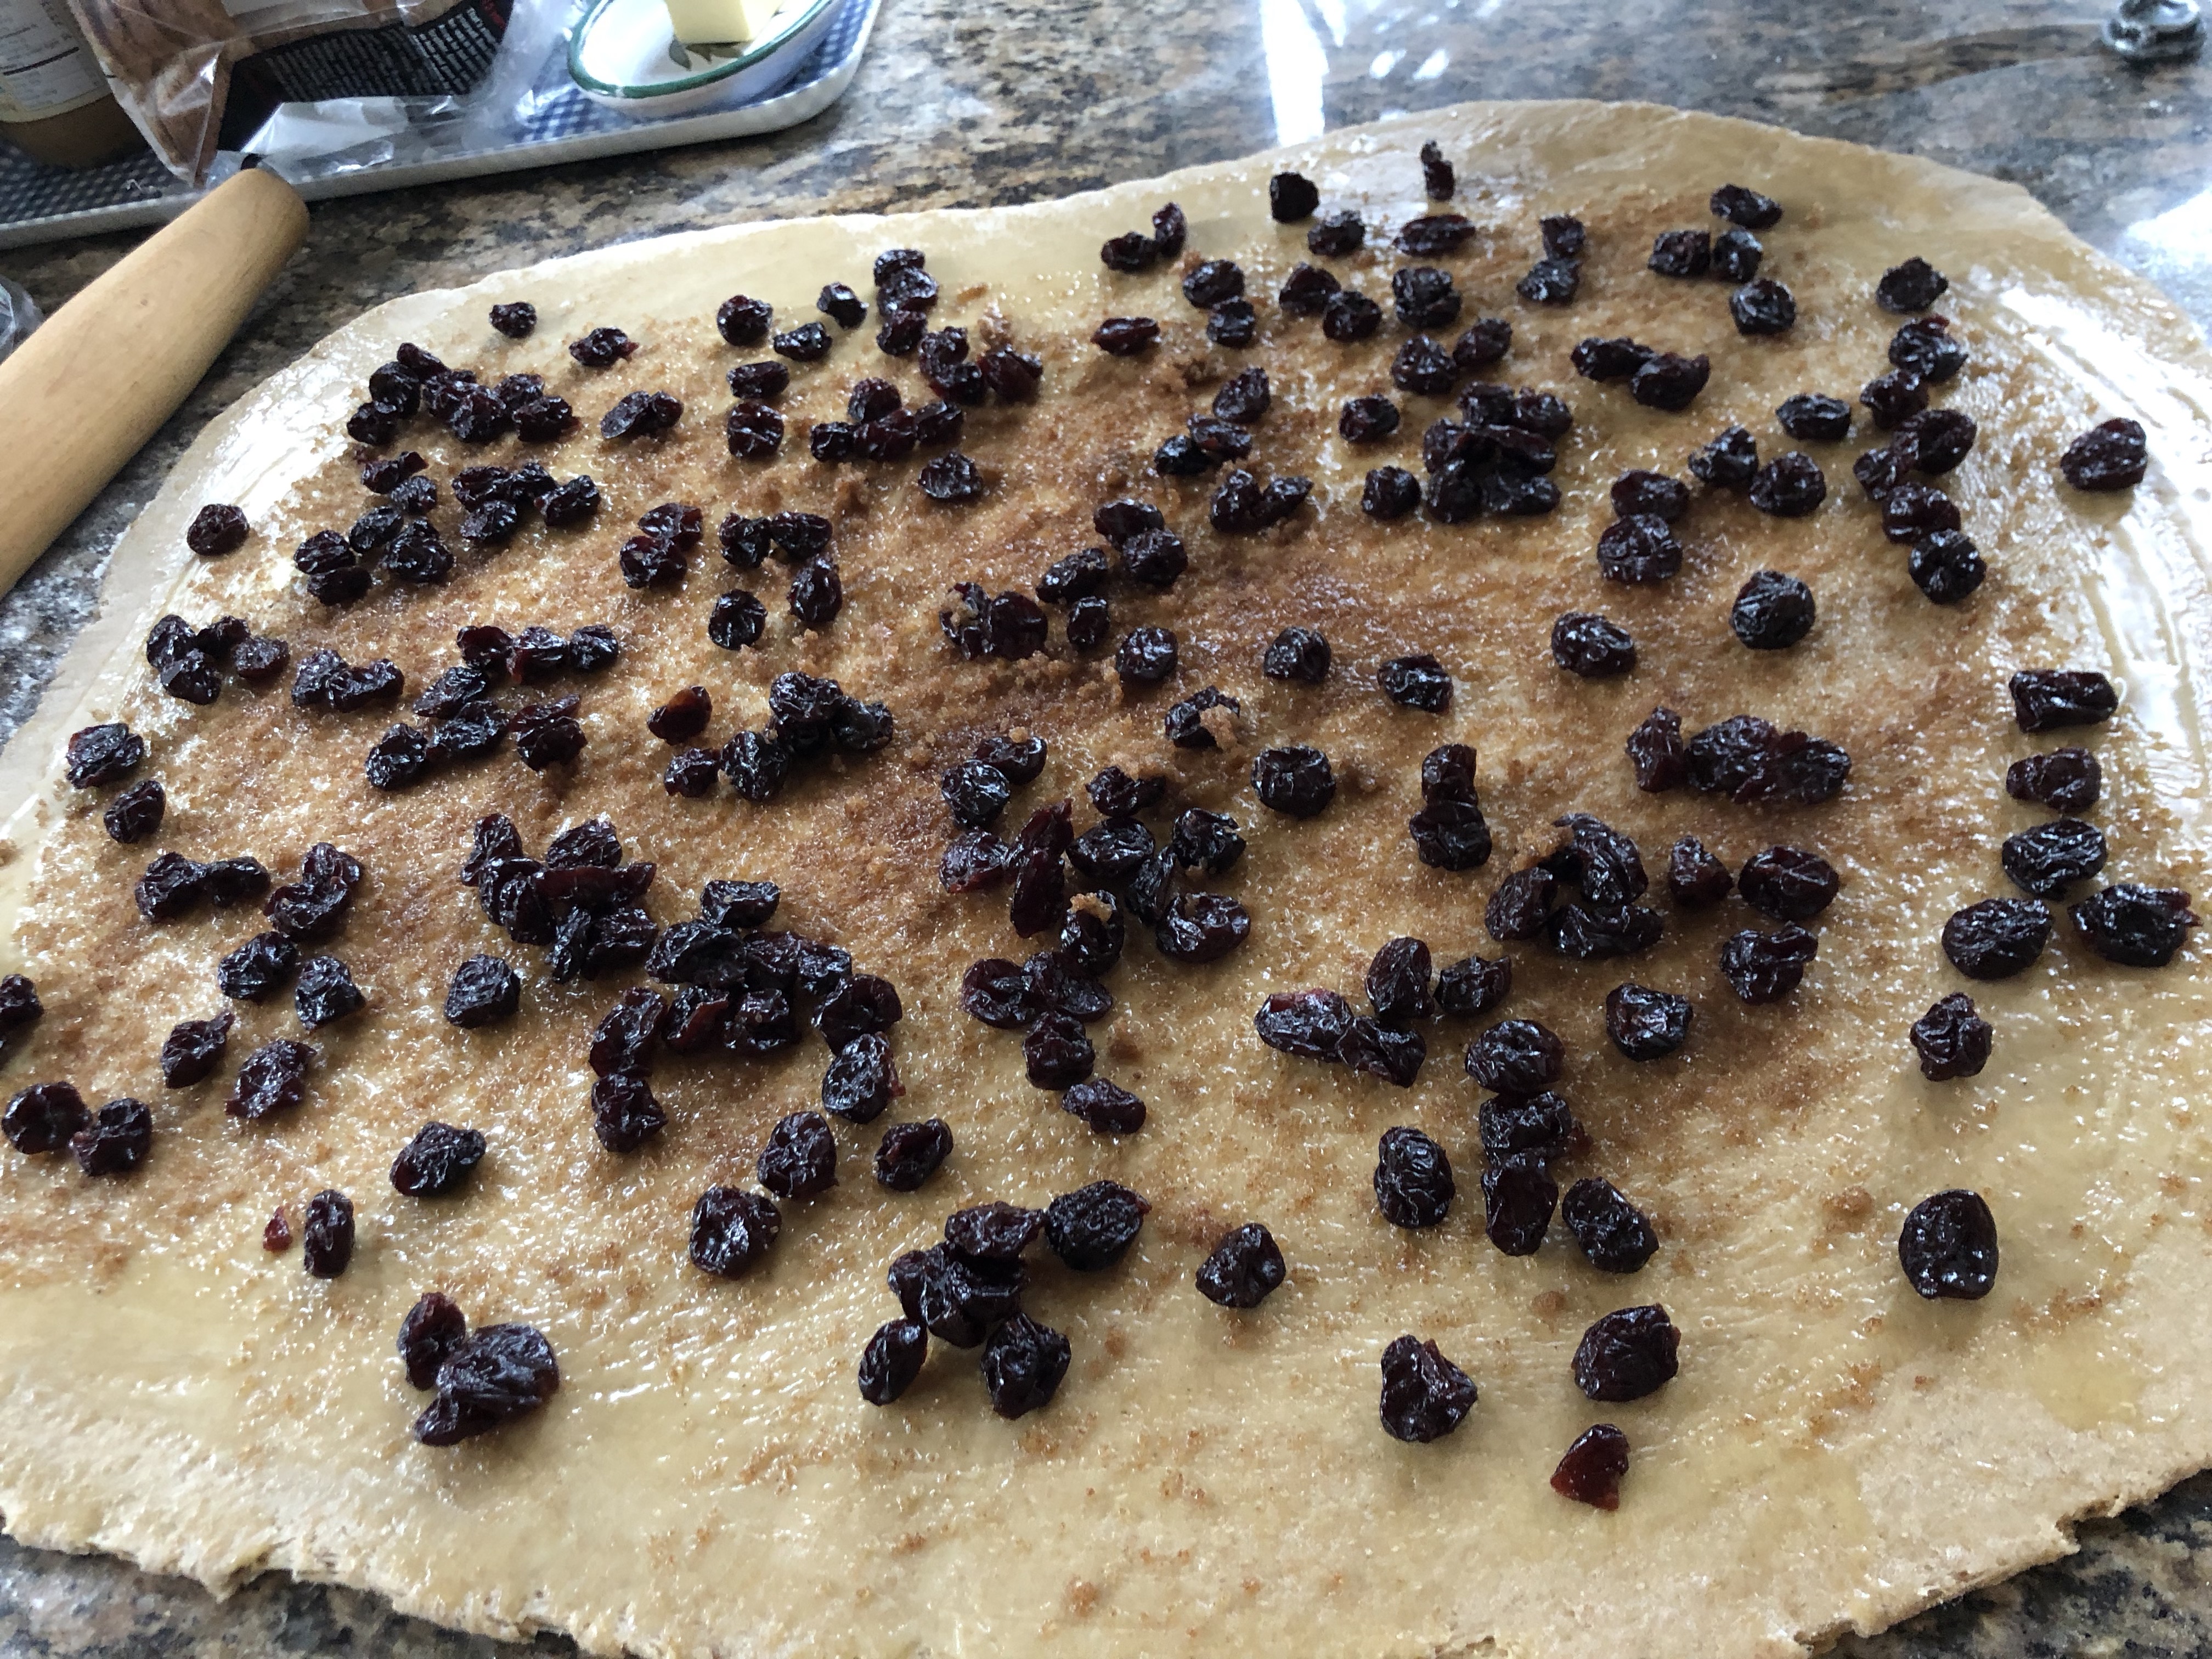
5. Proceed as you will with any other rolls you make; roll dough into a large rectangle on a floured surface. My first batch were thicker than the second day with colder dough.  I liked both.

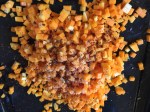
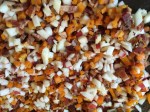
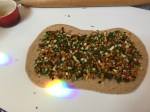
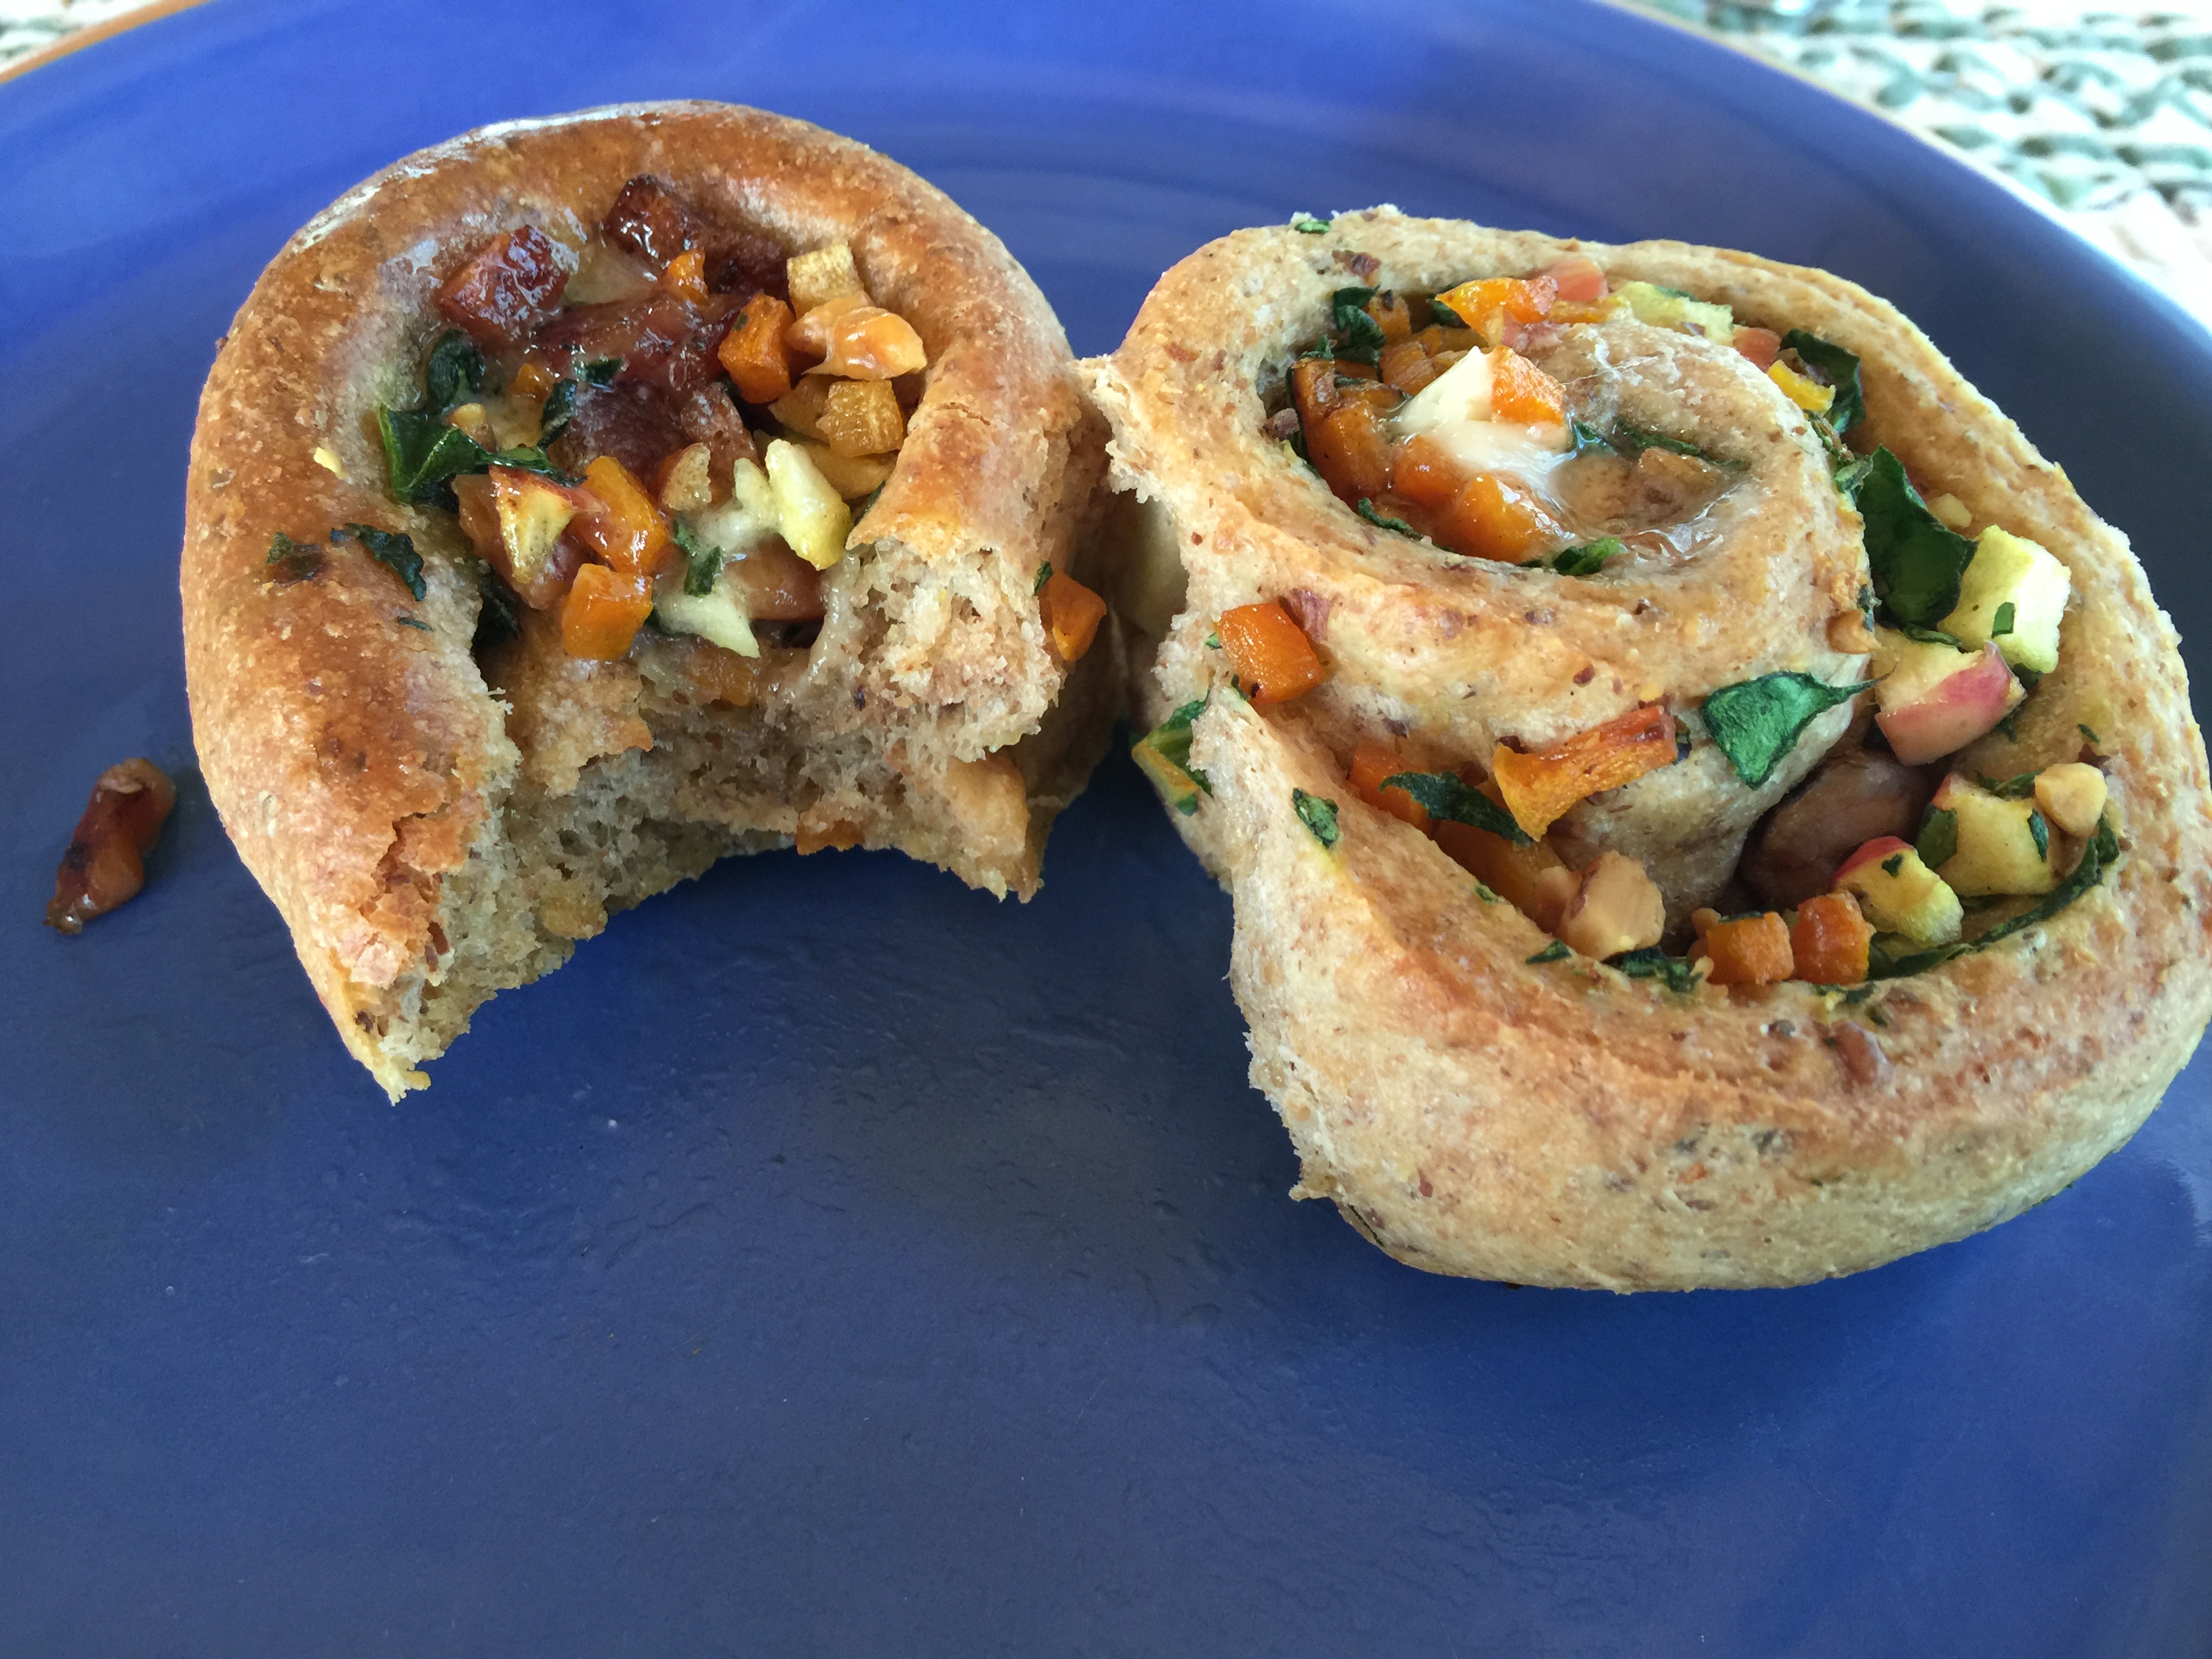
6. To make the filling, use your imagination… go sweet, go savoury, go wacky. Make it yours and make it good!

OK Karen:
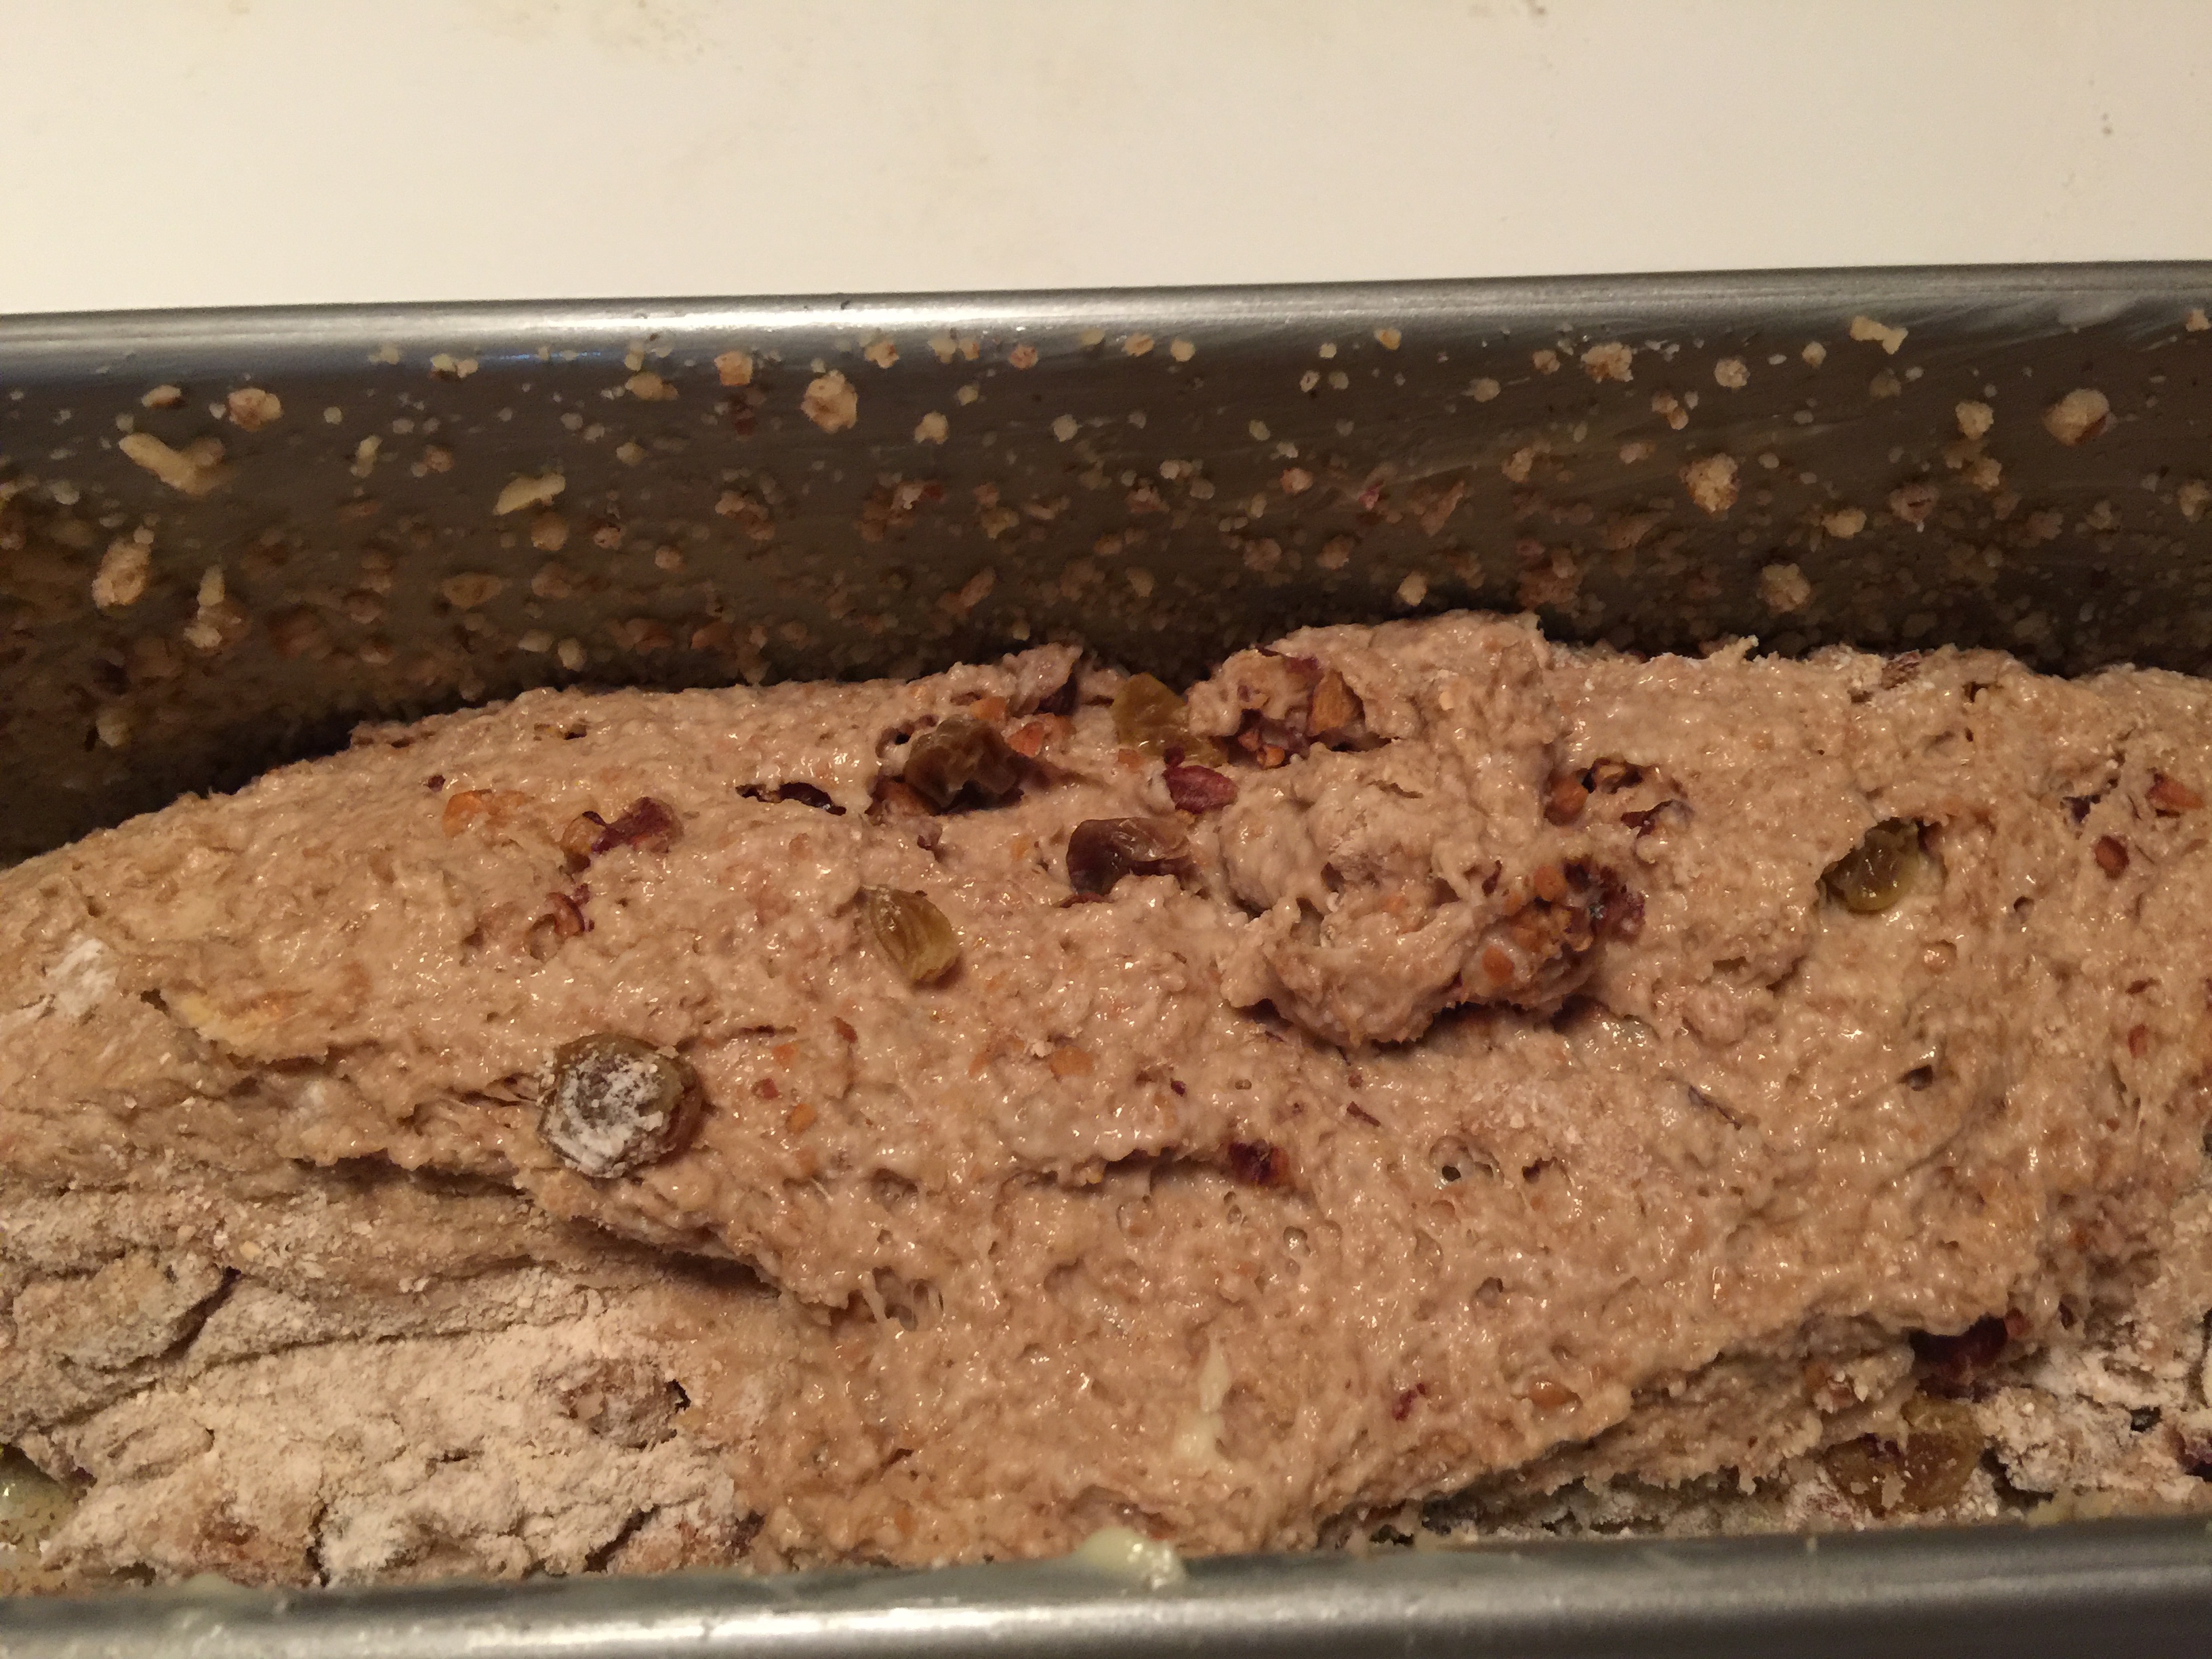
butternut squash roasted tiny cubes
bacon chopped
apple chopped
spinach fine chopped
garlic fine chopped
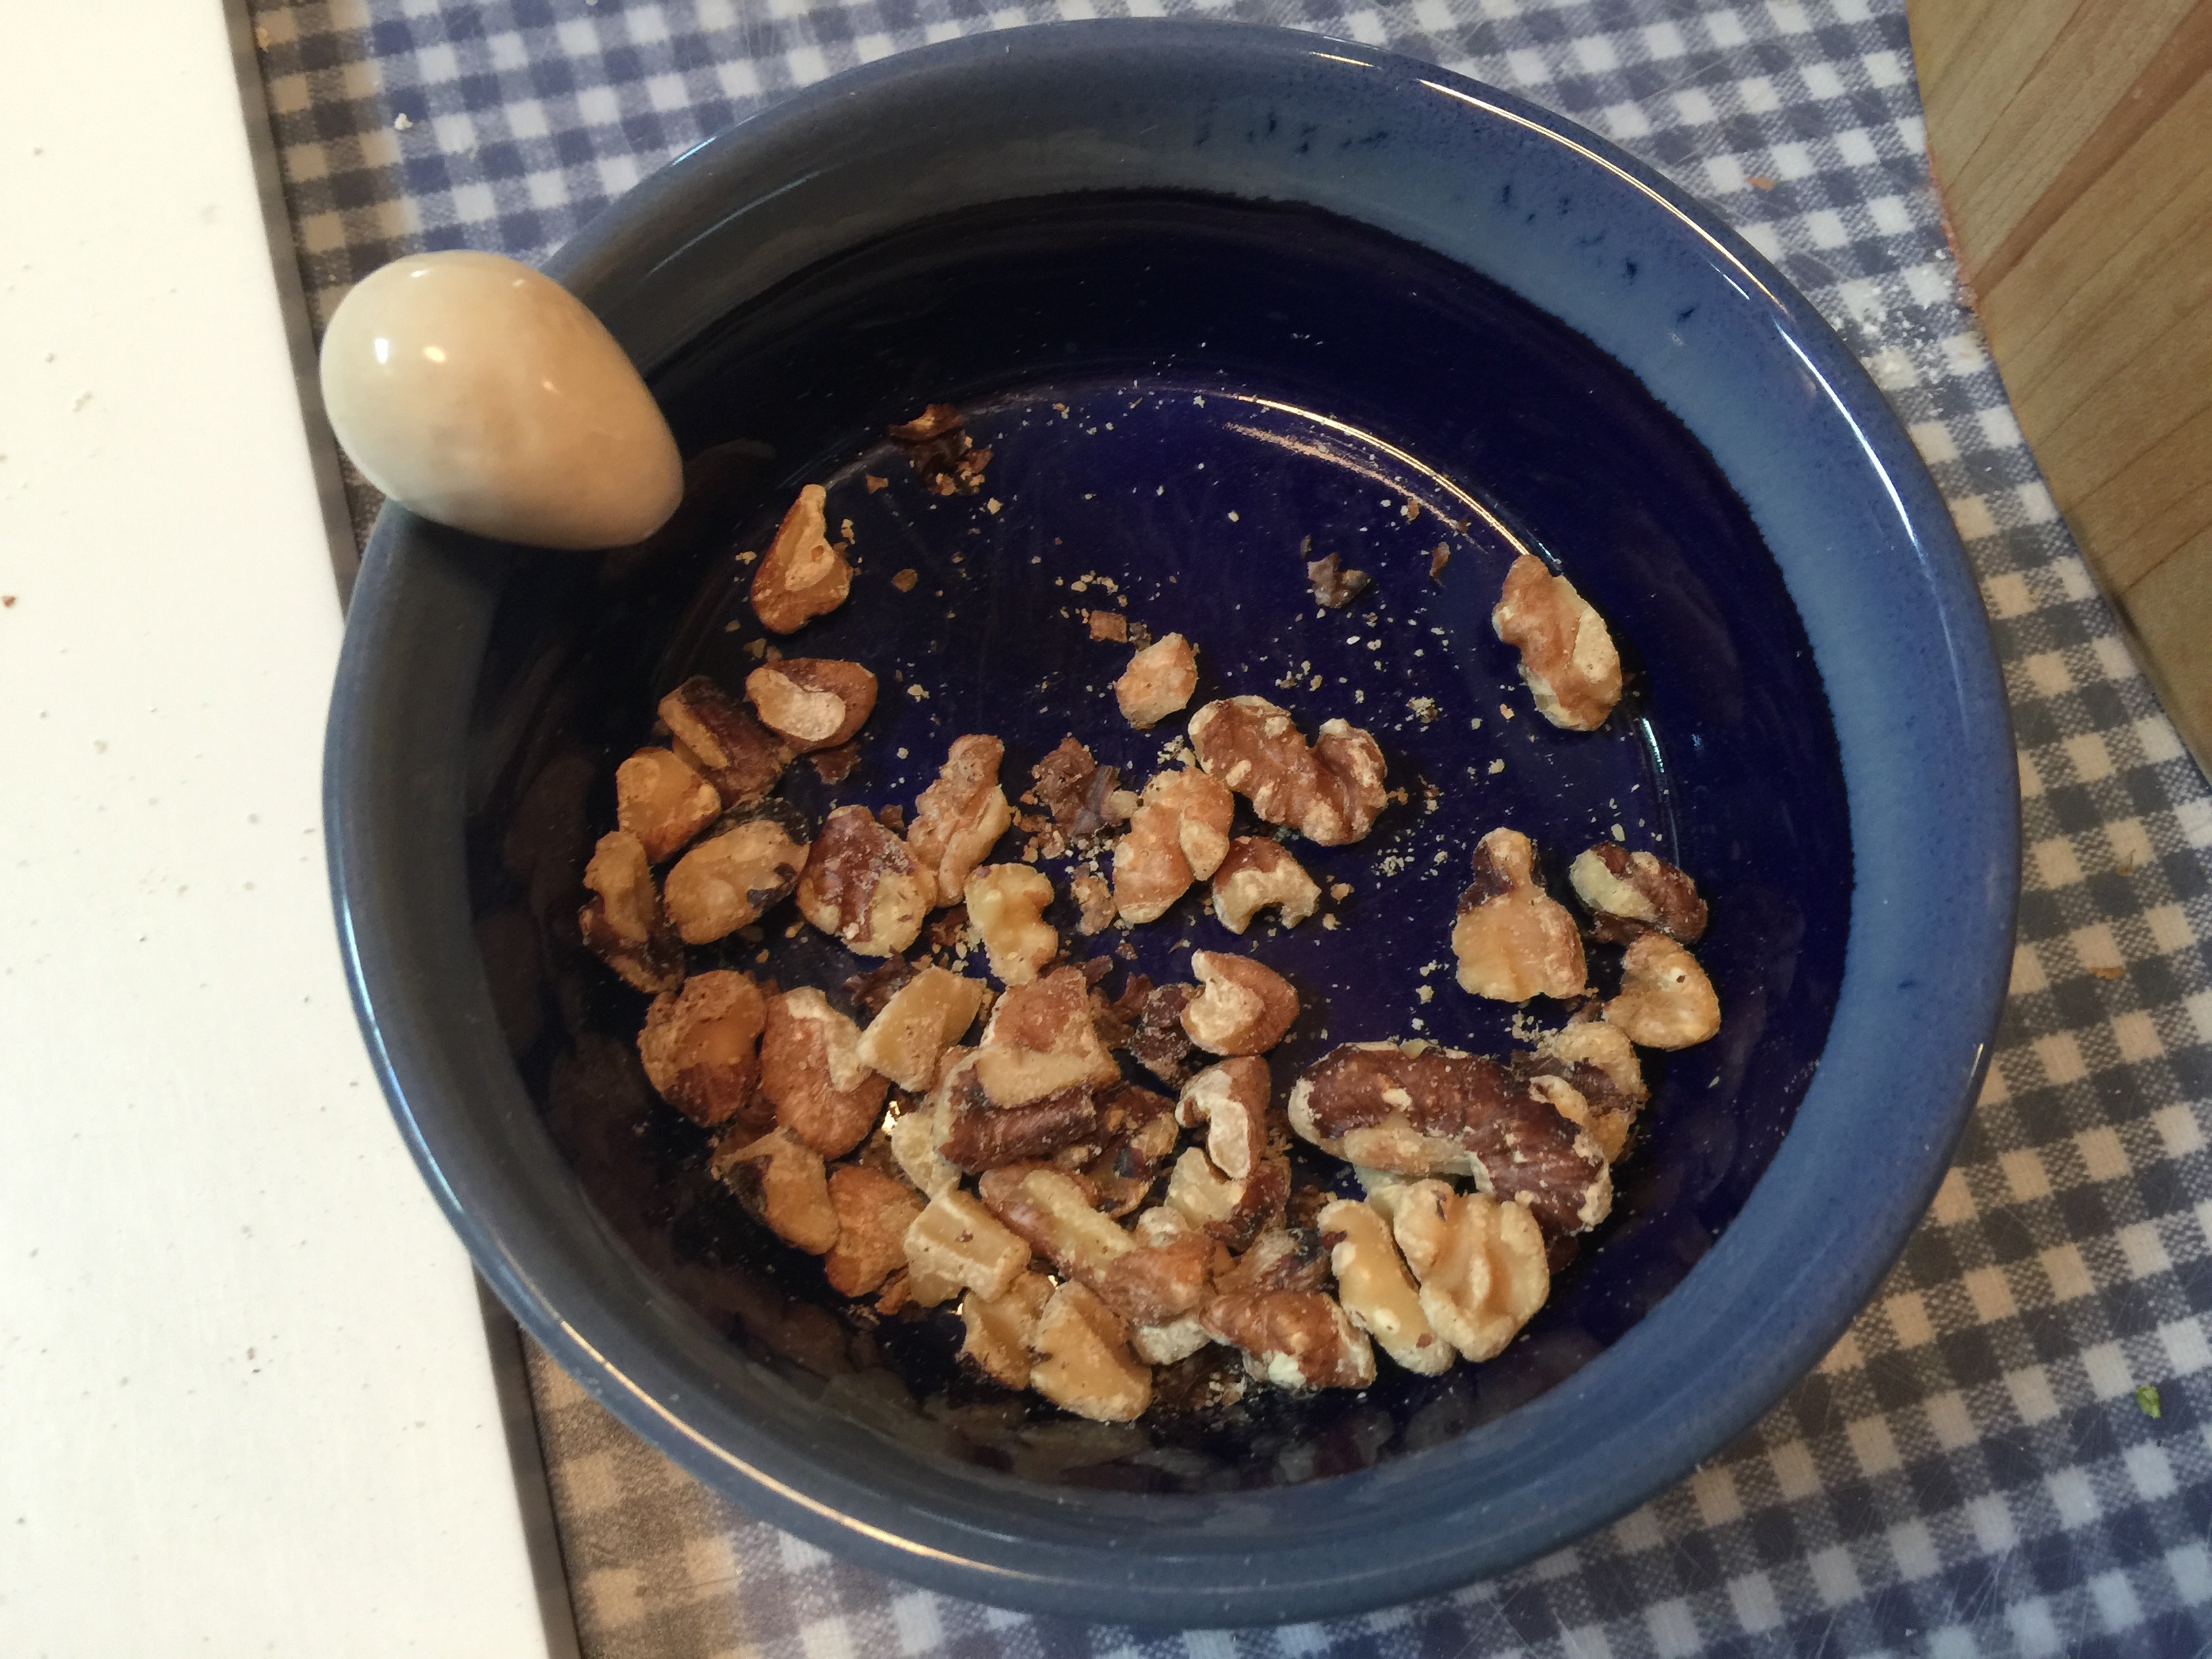
walnuts, roasted and chopped

(pecans didn’t make it; I think cranberries would be marvelous; happily even though I worried I was adding too many different things, this was a great combo!)

7.  Start rolling, I always start with the long side closest to me and roll away from my body. You could do it the other way round, I am easy like that! Just keep a tight roll.

I think I roll about the same as Karen but I need to work on a slightly tighter roll.

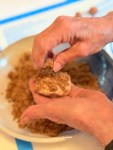
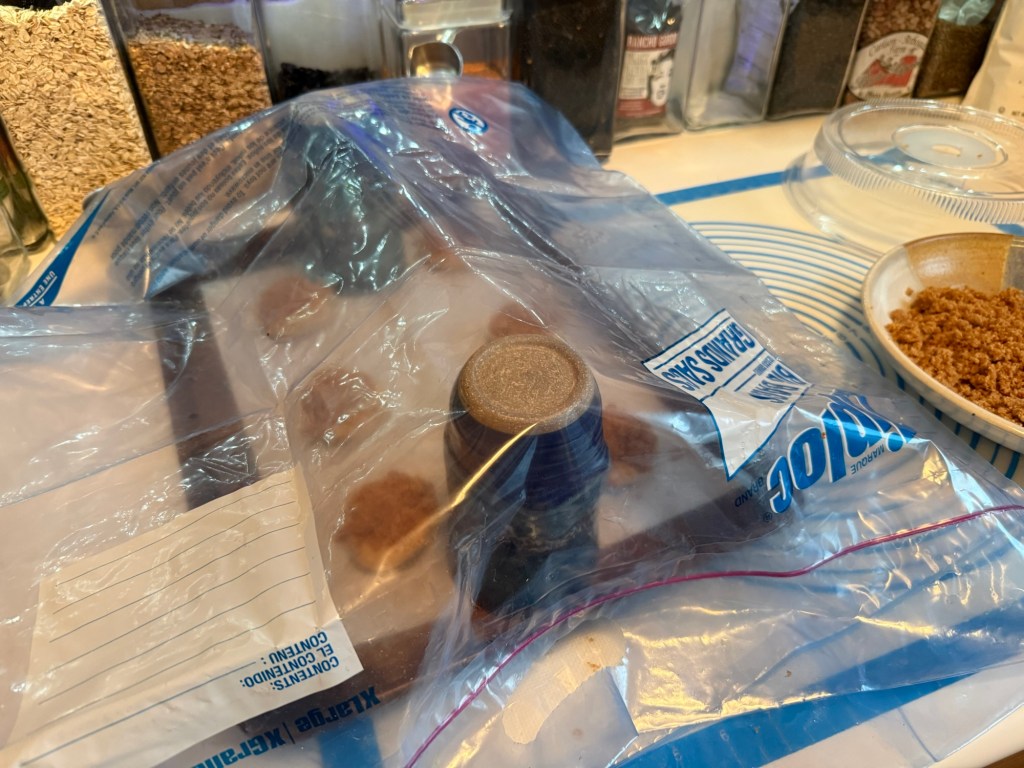
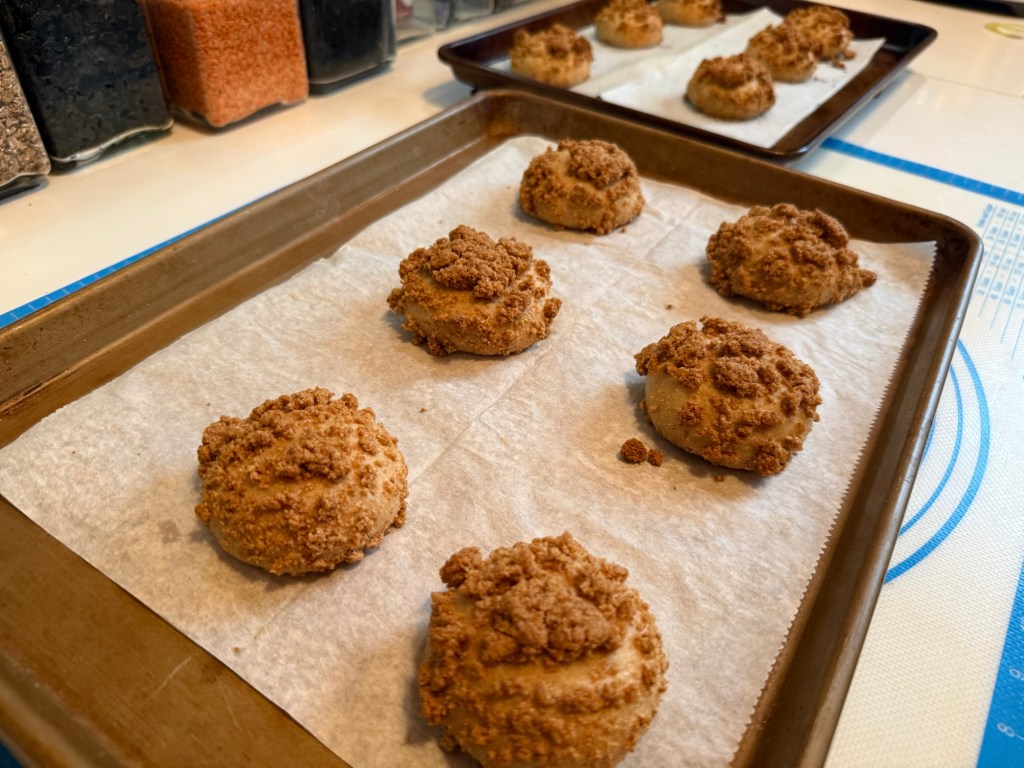
Once you have your roll, pinch the seam and roll it once over so the seam is on the bottom. Slice into 1.1/2 inch thick slices. Cover and set aside to rise for at least 20-45 minutes before baking.  15 minutes worked for me both times.

IMG_0680

8. Bake fo 15-18 minutes in a preheated oven (375F/190C)
White whole wheat flour required 24 to 26 minutes.

Rolls - Not a cinnamon roll

And so we have Breakfast Rolls.  NO cinnamon, NEW tradition!

9. Make these rolls all your own.  Cook with what you like to eat and you should be able to create a lovely high and light roll you can enjoy for breakfast, lunch and dinner.  Just remember:  NO CINNAMON.

What Karen ask was why the leavening? Why not use just yeast, or only the other two?

So yes, you need to use all three in this recipe!

You will probably want to see what Elizabeth who did extensive research on the results with the three rising agents (yeast, baking powder, baking soda) had to say.  I’ll try to link to her page as soon as she posts.

My take on these rolls is all three rising agents aren’t used in Angel Rolls for nothing.  These rise like there is no tomorrow or no top to your bowl unless you use a really big bowl.  The dough is beautiful, light and supple.

IMG_0693

I so wanted this egg to be runny … but it stood still

10. Proof positive once again: ” Bread just wants to be bread. ”  Wisdom from Babe Elizabeth.

Notes:

The original recipe starts with heating milk/oil/sugar to just below a boil and let this cool. Karen didn’t do that and neither did I. Also, the recipe tells you to sprinkle on the yeast and let it sit for a minute to bloom. I never do that… didn’t do it this time and neither did Karen.

Basically this recipe follows the rules for making rolls, as in: make the dough, bulk rise. Roll out in a rectangle, add filling of your choice, roll up from the long side and cut into slices. Proof and bake in a moderate oven.

Now the difference lies in the leavening combo and that comes to show in the rising method.

IMG_0686

I do love cinnamon rolls and these would make excellent cinnamon rolls but to NOT make them cinnamon rolls presents an excellent opportunity and I definitely think you should join us on this one.

Join us as a Bread Baking Buddy.  Karen is our host this month. Bake these “Not-a-cinnamon-roll rolls” according to the recipe on Karen’s site and post it on your blog before the 30th of this month. Please make sure you mention BBB April 2016 in the subject line and link to this BBB post in your own blog post. If you don’t have a blog do not hesitate to bake and email me at bakemyday at gmail dot com with your name, a 500px wide image of your bread and the link to your BBB post. I will then send you a BBB badge for this bread that you can then add to your post on your blog. The round up can be expected around the 2nd of May.


Auberge Walnut Bread

Nuts.  Do you love nuts?  Walnuts, toasted. Do you love walnuts toasted?

Elizabeth was our lovely hostess for the March 2016 bread ~ I guess I’m a little late it now being April 7.

So, what did I change … I didn’t have to add ground flax!  I didn’t have vital wheat gluten; I did use organic bread flour (no all purpose).  I used powered ginger but there was also fresh ginger sitting on the counter and I gave that several swipes on the microplane; any ginger flavor or aroma was in the background, I didn’t really identify it.

Butter – salted or unsalted.  Before I moved to the woods, I always had both salted and unsalted on hand and used unsalted when called for.  Now, there is a place called Country Dairy   http://www.countrydairy.com/about    just 8 miles from us.  I love this place!
IMG_0610
You may ask what does butter (salted or unsalted) have to do with ice cream.  You can ask that.  Here’s my story, why I don’t buy salted butter anymore:  Growing up I was a lover of ice cream.  What kid isn’t!  In my world as an Air Force brat, I had ice cream from all over this country.  But for me the very best ice cream, the only ice cream worth eating was only to be found in a little mid-west town where we spent all holidays, many other times and actually lived one year while my father was stationed overseas.  My favorite aunt loved ice cream and watermelon as much as I did and so she was always willing to take me into Central Dairy for a cone.  That was childhood when I was always into ice cream.  As we struggle with waist lines in what some might call my “adulthood” (I don’t call it that even into my 70’s because it just doesn’t seem likely that I could be an adult even now.) ice cream is something for rare occasions.  Even so, I did one day find myself in Country Dairy and allowed a treat … that would be ice cream.  I don’t really remember which flavor it was but the first lick … I was suddenly 5 years old again, back on those small black and white floor tiles in Central Dairy.  People, this was ICE CREAM like it is supposed to be.  This was the real deal.

When you have that kind of a moment in a place where the people are terrific, your husband says this is the best skim milk ever, they do wonderful panini breakfast sandwiches and there is terrific cheese and sausage in the counters along with that ice cream, you can count on a VERY loyal customer – that would be me.  They only have salted butter.  Sorry, I just don’t buy unsalted butter any more.
IMG_0609

I brushed the mostly baked loaf with half and half.

Recipe From Elizabeth as found in Auberge of the Flowering Hearth by Roy Andries de Groot
Yield: 2 loaves

TWO LOAVES ~ Amounts
253 grams walnut halves, divided
»    200 grams 200g (2 c) whole walnut halves
»   53 grams 53g (0.66 c) walnut halves, finely chopped
420 grams (1.75 c) boiling water
34 grams (0.5c) skim milk powder
36 grams (2.5 Tbsp) unsalted butter (I used salted butter)
12 grams kosher salt (2 tsp table salt)
0.5g (0.25 tsp) powdered ginger
84 grams (4 Tbsp) dark honey
634 grams (~5 c) flour (de Groot’s recipe calls for 3c white bread and 3 c whole wheat, but that seems like too much. I switched to the equivalent of 2c white and 3c whole wheat.)
»   250 grams 250g unbleached all-purpose flour
»  9 grams 9g vital wheat gluten
»  15 grams 15g flax seed, finely ground
»   360 grams 360g whole wheat flour
29 grams (0.25 c) wheat germ
60 grams (0.25 c) water at ~98F
6 grams (2 tsp) active dry yeast
milk or cream for brushing during baking (de Groot’s recipe calls for egg yolk and milk)
HALF RECIPE ~ Amounts
ONE LOAF
170 grams walnut halves, divided
»   100 200g (2 c) whole walnut halves (I ended up using just 100g)
»   70 53g (0.66 c) walnut halves, finely chopped
210 grams (1.75 c) boiling water
17 grams (0.5c) skim milk powder
18 grams (2.5 Tbsp) unsalted butter (I used salted butter)
6 grams kosher salt (2 tsp table salt)
1/4 teaspoon 0.5g (0.25 tsp) powdered ginger, used powdered & fresh
42 grams (4 Tbsp) dark honey
267 grams (~5 c) flour (de Groot’s recipe calls for 3c white bread and 3 c whole wheat, but that seems like too much. I switched to the equivalent of 2c white and 3c whole wheat.)
»  125 grams 250g unbleached all-purpose flour
»    9 grams 9g vital wheat gluten, omitted
»    15 grams 15g flax seed, finely ground
»   185 grams 360g whole wheat flour
15 grams (0.25 c) wheat germ
30 grams (0.25 c) water at ~98F
1 teaspoon (2 tsp) active dry yeast
milk or cream for brushing during baking (de Groot’s recipe calls for egg yolk and milk)

IMG_0611
1. Walnuts: In the morning of the day you plan to bake the bread, spread the walnut halves in a single layer on a cookie sheet and toast them in a 400F oven for 8-10 minutes. Watch them carefully so they don’t burn! They’re done just at the moment you begin to smell them. Set aside 200g (2 c) onto a plate to cool. Using a very sharp knife, finely chop the other 53g to produce about 2/3 cup.

2. Mixing the dough: Pour just-boiled water into a large mixing bowl. Whisk in milk powder. Immediately add butter, honey, salt and powdered ginger and whisk until the butter has melted and the honey is incorporated.

3. Add flours, wheat germ and finely chopped walnuts (de Groot suggests grating them(!)) on top of one side of the large bowl.

4. Warm the water for rehydrating the yeast to around 98F, a little over body temperature. Or are you allergic to a thermometer? Heat it until it’s the temperature safe to feed to a baby: a few drops on the inside of your wrist feels warm but not hot. If it’s too hot, add cold water. (Tap water is okay, but please do NOT use water from the hot-water tap! You don’t know how long things other than water have been festering in the bottom of that tank.) Pour the warmed water into a small bowl and add the yeast. Whisk until the yeast has dissolved. Check to make sure that the milk mixture is not above body temperature (do the baby-bottle test on the inside of your wrist again) and then add the yeasted water to the milk mixture. Stir everything together with a wooden spoon to created a rough dough.

5. Kneading: Knead in the bowl (or use your electric mixer’s instructions for kneading) until the dough is smooth, “elastic and no longer sticky”.

6. Proofing: Cover the bowl with a plate and allow to proof in a draft-free area (oven with only the light turned on is ideal) until the dough has doubled.

7. Prepare the pans: Cover cookie sheets with parchment paper.

8. Walnuts and Shaping: Turn dough out onto a lightly floured board and divide in two. Roll each piece into a ball. Cover with a clean tea towel and allow to rest for 20 minutes. After their rest, flatten each ball into a disc and even divide the rest of the walnut halves on top, “pressing the nuts in slightly”, then roll each piece of dough to form a log. Joining the ends to make a ring, place each log seam side down on the parchment paper. Cover with a tea towel and allow to rise in a draft-free area until the rings have almost doubled.

IMG_0612
9. Baking: Preheat oven to 375F. Just before putting the bread in the oven, spray the tops liberally with water. Put the bread into the oven and immediately turn the thermostat down to 350F. After 35 minutes, brush the tops of the loaves with milk or cream (de Groot suggests using an eggyolk whisked with milk to create this glaze) and continue baking for about 10 more minutes until the loaves are nicely browned and have reached an internal temperature between 200F and 210F (the bread sounds hollow when knuckle-rapped on the bottom). Remove the bread from the oven. Don’t even think about touching that knife!!

IMG_0615
10. Cooling and Finishing: Allow the bread to completely cool on a footed rack before cutting into it. It’s still baking inside! Of course you may want to serve warm bread: reheat it after it has cooled completely. To reheat and/or rejuvenate Unsliced bread, turn the oven to 400F for 5 minutes or so. Turn the oven OFF. Put the bread in the hot oven for ten minutes.

You probably have already seen Elizabeth’s post and know all the fun things she put up about this bread.

IMG_0618
This was a delightful loaf.  Gorn requested it until it was gone … on the 2nd day.  We can really go through a loaf!
This is what we bread heads call a “keeper loaf” meaning I’ll make this one again and again.  I will say this is a keeper of the first order.  The determining factor of when that remaking may occur probably depends on when will the BBB’s run out of great keeper breads to bake.

I hope you found this bread early enough to bake it and make the Buddy list but if not, not to worry, you should still bake this one.  It is just too good to miss.

IMG_0620

Don’t miss out.  Bake this one.